Friday, October 23, 2020

Holy Night Cards with Rachel and Candice

Hello friends! It's Rachel here with a nativity-themed box card featuring the new Holy Night Stamp Set

Sunny Studio Stamps: Holy Night Christmas Cards by Rachel Alvarado

I created a half-front box card to feature my scene. I stamped all of my images with Tuxedo Memento Black Ink, colored them with Copic Markers, and used the coordinating Holy Night Die Set to cut them out.

Copic Color Combos Used: Skin: E0000, E000, E21, E04; Greens: YG61, YG63, YG67; Blues: B21, B24, B37; Browns: E30, E31, E23, E25, E29; Hay: E50, E53, E55; Yellows: Y13, Y15, V12; Reds: R14, R46, R89; Purples: V01, V04, V17, V09; White: 0, C00, C2, C4; Dark Grays: W0, W2, W4, W5, W7; Light Grays: W0, W2, W4; Camel: E40, E41, E42, E43

Sunny Studio Stamps: Holy Night Christmas Cards by Rachel Alvarado

For my starry night sky background, I blended a small piece of smooth white card stock with Stormy Sky, Faded Jeans, Blueprint Sketch, and Black Soot Distress Inks. I then splattered this piece lightly with water using a #4 round paint brush and blotted it dry with a clean paper towel. Once my entire ink blended area was dry, I then splattered it again but this time with diluted Opaque White Paint.

Thank you all so much for stopping by! Wishing you the most safe and wonderful weekend!

----------------------------------------------------

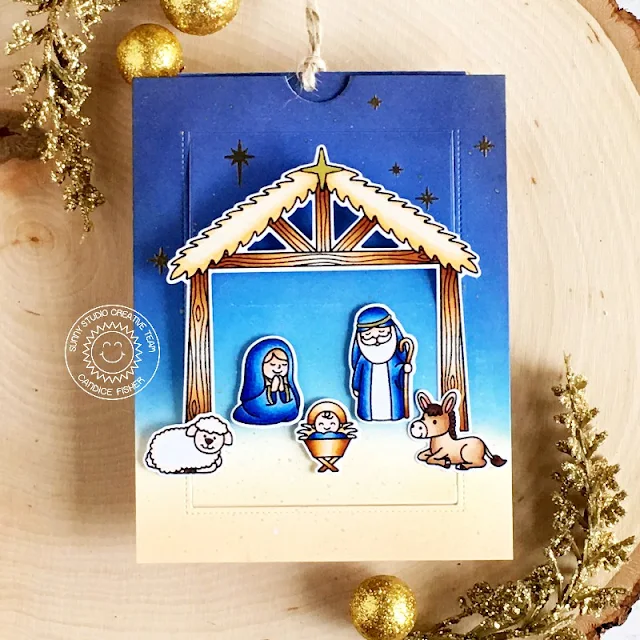
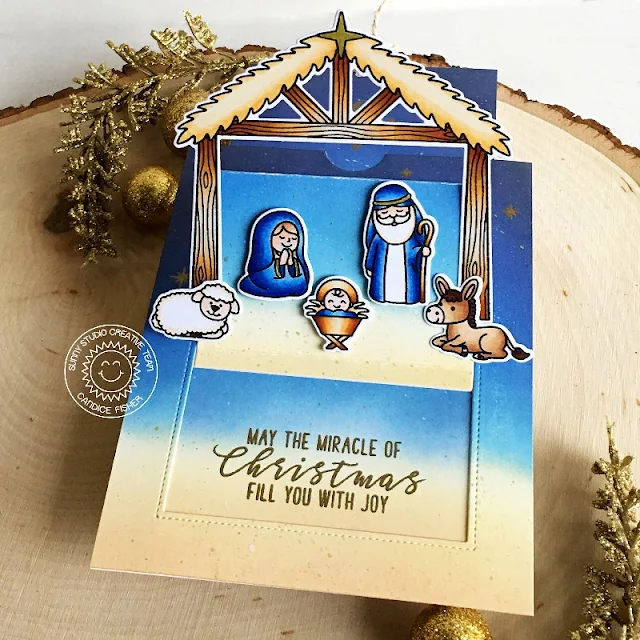
Hello! Candice with you this Friday sharing a meaningful Christmas card using the wonderful seasonal stamp set, Holy Night!

Sunny Studio Stamps: Holy Night Sliding Window Dies Inside Greetings Christmas Card by Candice Fisher

I used a few great Sunny Studio products for my interactive card:

First, I cut all my pieces following the instructions here to for making the sliding window card base and inked them with Black Soot, Chipped Sapphire, Blueprint Sketch, Salty Ocean and Tumbled Glass for the night sky and tea dye and antique linen for the sand. I then heat embossed the stars in gold on the top layer, the sentiment on the bottom layer and O Holy Night on the tag in gold and then splatter them all with gold and white shimmer spray using a damp paintbrush.

Sunny Studio Stamps: Holy Night Sliding Window Dies Inside Greetings Christmas Card by Candice Fisher

Next, I stamped all the images from the Holy Night stamp set, colored them with Copic markers and used the coordinating dies to cut them out. I adhered them to the sliding frame, making sure to only add adhesive to the parts that on the sliding frame. I finished by punching a hole for my twine and adding gold accents to my images with a pen!

Thank you so much for stopping by today!

Sunny Studio Supplies Used:

Sliding Window Dies
Sliding Window Dies
Shop at:
Sunny Studio
Holy Night Stamps
Holy Night Stamps
Shop at:
Sunny Studio
Holy Night Dies
Holy Night Dies
Shop at:
Sunny Studio
Inside Greetings-Christmas
Shop at:
Sunny Studio
Seasonal Trees Stamps
Shop at:
Sunny Studio
Seaonal Trees Dies
Seaonal Trees Dies
Shop at:
Sunny Studio
Sending Sunshine Stamps
Shop at:
Sunny Studio
Sending Sunshine Dies
Shop at:
Sunny Studio
Woodland Borders Dies
Shop at:
Sunny Studio

Thursday, October 22, 2020

Retro Ornaments Cards with Vanessa and Anja

Hello to you! Vanessa here with a slimline card using the wonderful Retro Ornaments set. This set makes it easy to create quick, beautiful Christmas cards!

Sunny Studio Stamps: Retro Ornaments Slimline Dies Season's Greetings Holiday Cards by Vanessa Menhorn

I first created a red card base using the Slimline Scalloped Frame Dies. Then I trimmed a panel of Kraft cardstock slightly smaller than the base, stamped and heat-embossed the sentiment and the strings and adhered it to the card. Now I stamped the ornaments, using Festive Berries, Spun Sugar, Picked Raspberry and Brushed Corduroy Distress Oxide Inks.

Stamps and dies used:
Retro Ornaments stamps dies
Season's Greetings stamps dies
Slimline Scalloped Frame dies

Sunny Studio Stamps: Retro Ornaments Slimline Dies Season's Greetings Holiday Cards by Vanessa Menhorn

I die-cut the pieces with the matching dies and adhered them to the card, raising some with foam tape. I stamped the tree sprigs from Season's Greetings with Lucky Clover Distress Oxide Inks, die-cut them and adhered them, too. Finally, I made little bows from white twine and added these to the ornaments and twigs.

I hope you like today's inspiration! Thanks for stopping by, see you next week!

--------------------------------------------

Hi everyone, Anja here and today I'm featuring the Retro Ornaments Stamps from another great layering stamp set. I tried to use it in a more modern way with a different color scheme. I really like non-traditional colors like pink and turquoise for Christmas.

Sunny Studio Stamps: Retro Ornaments Frilly Frame Classy Christmas Holiday Card by Anja Bytyqi

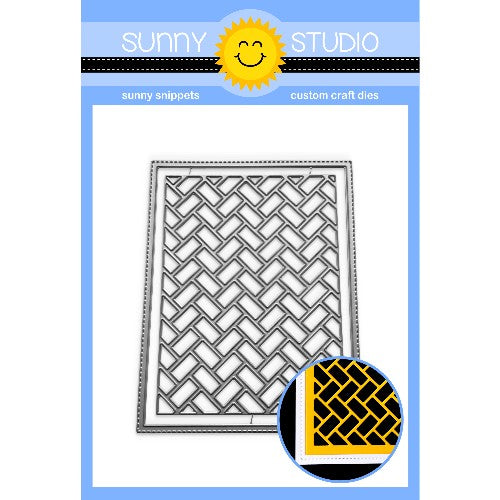
I started off with a card base that measures 4.5" x 5.75" and also cut an extra white cardstock panel to the same size. To create a frame, I used the stitched die from the Frilly Frames Herringbone Die set. I covered the front of the card with one of the Subtle Grey Tones papers.

Next, I stamped the layered ornaments with dye inks (you can find the colors listed below). For the hanger thingies at the top, I did some heat embossing with Ranger Liquid Platinum embossing powder. I used the coordinating dies to cut out the ornaments.

Altenew Dye Inks used: pink ornament: Pinkalicious, Rubellite; turquoise ornament: Dew Drop, Aqualicious, Teal Cave; patterned ornament: Cotton Candy, Ruby Red, Galactic Stream; pine tree sprigs: Sweet Leaf, Just Green, Hunter Green

Sunny Studio Stamps: Retro Ornaments Frilly Frame Classy Christmas Holiday Card by Anja Bytyqi

Of course, I needed something to attach them to, so I stamped a couple of pine tree sprigs from the Classy Christmas set in green inks mixing the shades directly on the stamp. I cut them out with the matching dies and arranged them to a cluster that stretches over the top of the card.

I attached shiny aqua strings to the ornaments and adhered them to the card background. I heat embossed the sentiment from the Surfing Santa set with Liquid Platinum as well. For some dimension, I popped up the sprigs and the white frame with foam tape. To finish off my card, I added two mirrored stars as embellishments.

Thank you so much for stopping by! Hope you're having a fabulous day!

Sunny Studio Supplies Used:

Subtle Grey Tones Paper
Shop at:
Sunny Studio
Season's Greetings Stamps
Shop at:
Sunny Studio
Season's Greetings Dies
Shop at:
Sunny Studio
Frilly Frames Herringbone
Shop at:
Sunny Studio
Slimline Scalloped Frame
Shop at:
Sunny Studio
Classy Christmas Stamps
Shop at:
Sunny Studio
Classy Christmas Dies
Shop at:
Sunny Studio
Retro Ornaments Stamps
Shop at:
Sunny Studio
Retro Ornaments Dies
Shop at:
Sunny Studio
Surfing Santa Stamps
Shop at:
Sunny Studio

Wednesday, October 21, 2020

Penguin Pals Cards and Video Tutorial with Ana and Christy

Hello friends! It’s Ana today sharing an adorable Christmas card featuring Penguin Pals stamps and coordinating dies.

Sunny Studio Stamps: Penguin Pals Winter Scenes Slimline Dies Frilly Frame Dies Winter Themed Christmas Cards by Ana Anderson

To create a night winter scene for these sweet penguins, I blended Chipped Sapphire and Wilted Violet distress inks on white cardstock, then added white splatter (snowflakes) using diluted white paint. While the background was drying, I stamped, colored and die cut the images from Penguin Pals. Trees and igloo are from Winter Scenes stamps.

Once I was done coloring, I cut the images with coordinating dies. I created the snow hills with Slimline Nature Borders dies, then trimmed the background and the hills with stitched frame die (Frilly Frames Herringbone).

Sunny Studio Stamps: Penguin Pals Winter Scenes Slimline Dies Frilly Frame Dies Winter Themed Christmas Cards by Ana Anderson

I stamped the sentiment (from Penguin Pals) on the bottom snowy hill, inked the tops lightly with Chipped Sapphire, then adhered the hills to the background. I added the images and finished the card by adding white highlights with white gel pen.

Don’t you think this card turned out so cute! I just love those adorable little penguins so much!

-------------------------------------------------

Hey friends, it's Christy here with a fun card featuring the adorable Penguin Pals. I also pulled in the igloo from Winter Scenes and colored all the images with Copics, then trimmed them out with the matching dies

Sunny Studio Stamps: Penguin Pals Winter Scenes Slimline Dies Frilly Frame Dies Winter Themed Christmas Card by Christy Reuling

To set the stage, I took the Layered Snowflake Frame and die cut it out of some Holiday Cheer 6x6 paper, that I also ran through with the outer die from Frilly Frames Quatrefoil to get that nice stitching detail along the outside edge. I stamped a sentiment on the bottom, then popped it up over another sheet of patterned paper and a few layers of snow banks that I cut out using the Slimline Nature Borders.

Sunny Studio Stamps: Penguin Pals Winter Scenes Slimline Dies Frilly Frame Dies Winter Themed Christmas Card by Christy Reuling

I adhered my images to the scene and finished off the card with a few additional snowflakes and a bit of Stickles Glitter Glue. Please check out my video tutorial below:


Sunny Studio Supplies Used:

Holiday Cheer 6x6 Paper
Shop at:
Sunny Studio
Layered Snowflake Frame
Shop at:
Sunny Studio
Frilly Frames Herringbone
Shop at:
Sunny Studio
Frilly Frames Quatrefoil
Shop at:
Sunny Studio
Slimline Nature Borders
Shop at:
Sunny Studio
Penguin Pals Stamps
Penguin Pals Stamps
Shop at:
Sunny Studio
Penguin Pals Dies
Penguin Pals Dies
Shop at:
Sunny Studio
Winter Scenes Stamps
Shop at:
Sunny Studio
Winter Scenes Dies
Winter Scenes Dies
Shop at:
Sunny Studio

Tuesday, October 20, 2020

Sledding Critters Cards with Leanne and Isha

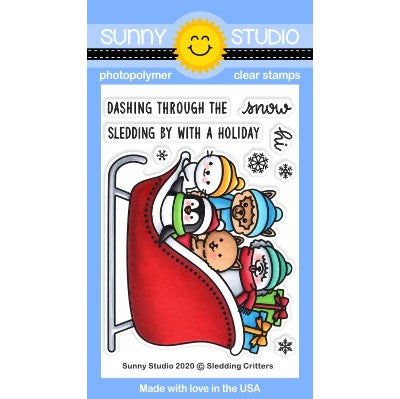
Hello everyone! Leanne here with flurries of fun! I have created a holiday shaker card featuring the adorable image from Sledding Critters. The large sled image is strong enough to stand on it's own and is perfect for a shaker card.  

Sunny Studio Stamps: Sledding Critters Fancy Frame Dies Winter Themed Christmas Shaker Card by Leanne West

I've made a square card which measures 5" x 5". I masked off the edges of the card front and added color to the background with Tumbled Glass Oxide Ink. I applied the ink heavier towards the top and very light towards the bottom. I Copic colored the image and then adhered it directly to the background so it is inside the shaker. I created my shaker in the tradition way by using a double layer of adhesive foam tape with an acetate window panel. I filled the shaker with some glittery fake snow.  

(Copics used - R32, R35, R39, G40, YG11, YG18, BG01, BG02, BG05, N2, N4, N6, C1, C3, E41, E43, Y32, Y35, Y38)

Sunny Studio Stamps: Sledding Critters Fancy Frame Dies Winter Themed Christmas Shaker Card by Leanne West

Once the shaker part was secured, I decorated the outside. I added the Fancy Frames Square Dies. I created a sentiment strip to adhere to the shaker window centered over the sled. This sentiment is from the Sledding Critters set.  As a last bit of embellishment, I added some die cut snowflakes. These snowflakes come from the Snowflake Circle Frame die set

-------------------------------------------------------

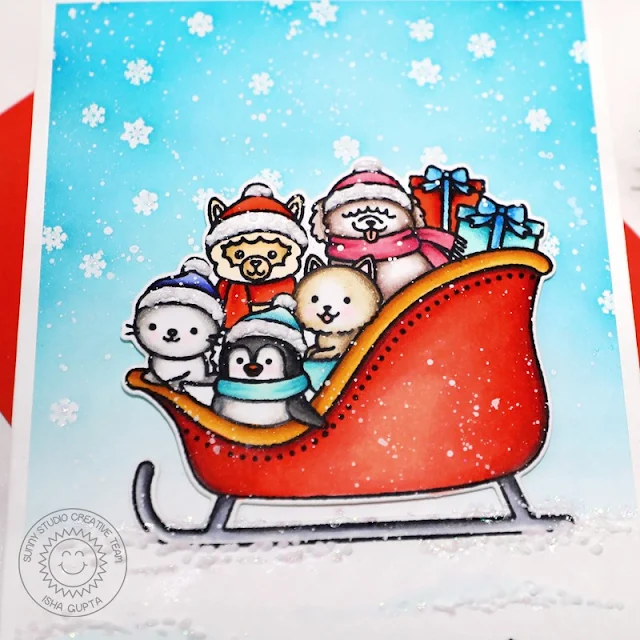
Hello everyone! Isha here with an adorable card featuring the Sledding Critters stamp set and dies for you. I did some partial die-cutting technique to create the scene.

Sunny Studio Stamps: Sledding Critters Inside Greetings Winter Themed Christmas Cards by Isha Gupta

To start the sky background, I took a white card. stamped some snowflakes from the Sledding Critters stamp set using versamark ink and heat embossed using WOW! opaque white embossing powder. I then sponged distress inks salty ocean and blueprint sketch to create the ombre sky.

I stamped the sledge using memento black ink. I then colored the image using copic markers. I then put the coordinating die on top of the image, adhere it using some washi tape. Now instead of die-cutting the full image, I left the bottom part of the sledge un-cut. To do this, I use my big shot and put the B plate slightly above the lower part of the sledge. This leaves the sledge attached to the bottom of the piece.

Sunny Studio Stamps: Sledding Critters Inside Greetings Winter Themed Christmas Cards by Isha Gupta

I then stamped the sentiment from the Inside Greetings - Holiday stamp set to the lower part of the panel.

Adhere the sky panel to a white card. Adhere the sledge panel to the background by adhering the base using glue but the critters using 3D foam. Flick white paint. Apply some white puff paint to the caps and snow part, heat set. To finish, I added some Nuvo crystal drops White Blizzard for some glitter.

Thank you for stopping by. Have a nice day!

Sunny Studio Supplies Used:

Fancy Frames-Square Dies
Shop at:
Sunny Studio
Snowflake Circle Frame
Shop at:
Sunny Studio
Inside Greetings-Holidays
Shop at:
Sunny Studio
Scaredy Cat Dies
Scaredy Cat Dies
Shop at:
Sunny Studio
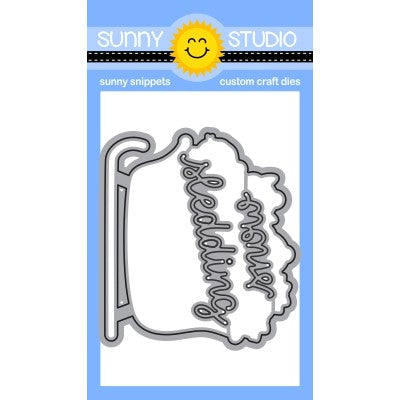
Sledding Critters Dies
Shop at:
Sunny Studio

Monday, October 19, 2020

Surfing Santa Cards with Ashley and Mayra

Hello friends! It's Ashley with a nontraditional, but totally fun Christmas card featuring Surfing Santa! This guy will definitely stand out in a sea of snowy Christmas greetings!

Sunny Studio Stamps: Surfing Santa Tropical Scenes Stitched Semi-Circle Christmas Card by Ashley Ebben

I started by die cutting a window into some light aqua cardstock using the Stitched Semi-Circle dies. I blended some Pinkfresh Studio Island Oasis inks from the bottom up for an ombre effect. I pieced together a small beach scene for inside the semi-circle. I made ocean waves with the Catch a Wave dies on aqua cardstock blended with a bit of Pinkfresh Studio Aquamarine ink. For the beach, I used the island die from the Tropical Scenes coordinating die set on some sandy cardstock and added texture with Copic markers. I blended a bit of Pinkfresh Studio Ocean Breeze ink for the sky.

I added my beach scene to a piece of polka dot patterned paper from the Dots and Stripes Pastels paper pack. I stamped the sentiment from Surfing Santa onto the light aqua window piece in Pinkfresh Studio Tidal Pond. I popped the window piece up on the patterned paper with foam tape for dimension.

Sunny Studio Stamps: Surfing Santa Tropical Scenes Stitched Semi-Circle Christmas Card by Ashley Ebben

I stamped some trees from Surfing Santa in Pinkfresh Studio Tidal Pond on white cardstock and cut them out with the matching die before tucking them into my beach scene. I stamped the Santa and surfboard from Surfing Santa and the palm tree from Tropical Scenes in Lawn Fawn Jet Black ink and colored with Copics. I added a few highlights with a white gel pen and cut everything out with the matching dies. Once my images were on the card, I finished with a few Studio Katia Poseidon crystals. 

Thank you so much for stopping by! Have a wonderful day!

----------------------------------------------------

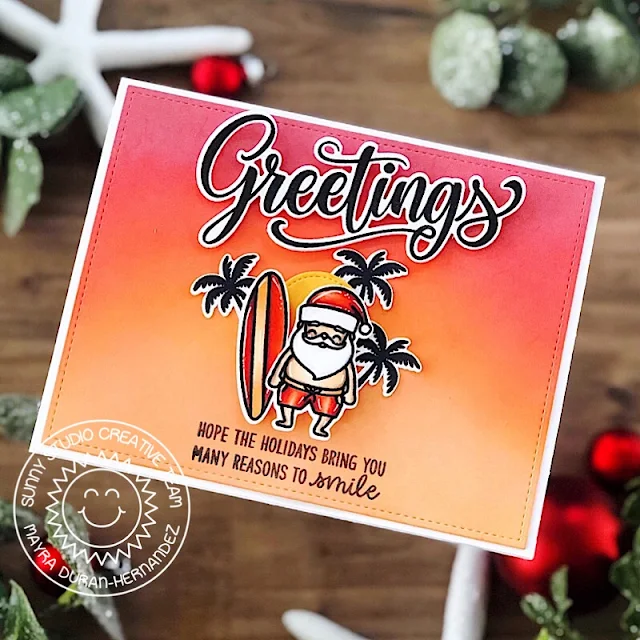
Hello and happy Monday everyone!!! Mayra here with you today. I am so happy and excited to share this super fun card with you. I used the Surfing Santa stamp set. It is such a fun set. 

Sunny Studio Stamps: Surfing Santa Frilly Frame Dies Season's Greetings Christmas Card by Mayra Duran-Hernandez

I began by die cutting a piece of Bristol Smooth cardstock using the stitched rectangle from the Frilly Frames Quatrefoil Dies set. I also used the tag and stitched circle from the Sliding Window Dies to create a coordinating tag. I then added color to each of these using Distress Oxide Inks. I used Dried Marigold, Spiced Marmalade, Ripe Persimmon, and Fired Brick. 

Sunny Studio Stamps: Surfing Santa Frilly Frame Dies Season's Greetings Christmas Card by Mayra Duran-Hernandez

Next, I colored my images using Copic markers. For the red areas, I used R12, E18, R46, R17, and R05. For the peachy orange areas, I used Y32, YR02, and YR14.  I then stamped the word greetings from the Season's Greetings stamp set in black ink and used the coordinating die to die cut it. Next, I stamped one of the sentiments from the Inside Greetings Holiday stamp set onto the card along the bottom. For the tag, I stamped the sentiment from the  Surfing Santa onto the back. 

Sunny Studio Stamps: Surfing Santa Frilly Frame Dies Season's Greetings Christmas Card by Mayra Duran-Hernandez

I hope you enjoy this card and tag set. Thank you so much for taking the time to stop by. I hope you each have a wonderful and blessed day. 

Sunny Studio Supplies Used:

Sliding Window Dies
Sliding Window Dies
Shop at:
Sunny Studio
Dots & Stripes Pastels 6x6 Paper
Shop at:
Sunny Studio
Catch A Wave Dies
Catch A Wave Dies
Shop at:
Sunny Studio
Season's Greetings Stamps
Shop at:
Sunny Studio
Season's Greetings Dies
Shop at:
Sunny Studio
Tropical Scenes Stamps
Shop at:
Sunny Studio
Tropical Scenes Dies
Shop at:
Sunny Studio
Stitched Semi-Circle Dies
Shop at:
Sunny Studio
Frilly Frames Quatrefoil
Shop at:
Sunny Studio
Surfing Santa Stamps
Shop at:
Sunny Studio
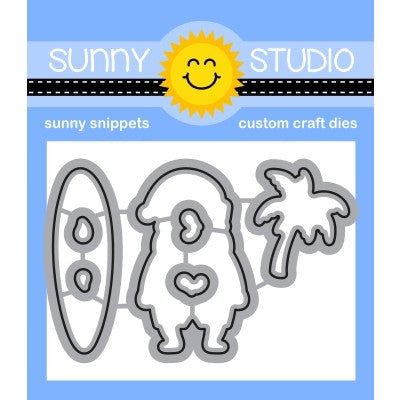
Surfing Santa Dies
Surfing Santa Dies
Shop at:
Sunny Studio