Tuesday, April 9, 2019

Sneak Peek: Hawaiian Hibiscus, Slice of Summer & New Frilly Frames

Hello and welcome to day 2 of our Sneak Peek Week!  All this week I am showcasing cards using our new collection for Summer coming out on Friday, April 12th.

Today I have not one, but TWO new layering sets for summer.  Yay!  I get so many requests for more, but many of you may not know that I am mostly a company of one with only my husband and a girlfriend helping me out part time.  Layering sets can take me anywhere from 40 to 80 hours to design so with 4 releases a year and all the hats I wear, it can be a struggle to keep up, but this time I was able to work some magic and create two new sets that I think you're going to love!  I must admit there were a couple times when I was testing them out for the first time that I fell in love myself.  ;)

Card No.1:  Up first is a card using our new Hawaiian Hibiscus Stamps and Dies together with a background that I shared earlier (you can read how I created it at this post HERE).


I stamped some beautiful hibiscus flowers in traditional colors (ink combos shared below) and I just love the way they pop against the blue background and crisp white!  To frame my sentiment I used our Fancy Frames Circle Dies and then stamped my sentiment using our Everyday Greetings Stamps.  I actually had a boo-boo where my homemade stencil using our Frilly Frames Lattice Dies raised up in the middle allowing the gel to seep below, but this particular design completely hides it and kept me from tossing it--It actually turned out to be my favorite card so I'm glad I kept going.  ;)   
Sunny Studio Stamps: Hawaiian Hibiscus Layered Flower Thank You Card (using Therm-o-web Glitz Gel with Frilly Frames Lattice Dies)

Card No.2:  For my next card I used one of two new Frilly Frames we have with this release.  Our frilly frames have quickly become a favorite of mine and I'm so excited to have two new designs to mix and match with the others.  If you aren't familiar, they are two separate dies with 3 looks in 1.  You can either use the outer frame as just a solid mat with a decorative stitched edge, you can use the inner portion as a fun backdrop or stencil or you can use them together like I did here with our new Frilly Frames Chevron Dies.  

I had a lot of fun creating some unexpected color combos for the hibiscus flowers and I adore how fresh and summery the lilac, green and crisp white look together!  I generally will mass produce a garden of flowers and leaves while I already have everything set up in my stamp positioning tool, just switching out ink colors as I go.  After that, this card came together super quick and would be a great design for mass producing.  I think it would make a great gift to make card sets, just changing out the sentiments and colors. For my sentiment, I used our Heartfelt Greeting stamps heat embossed with white embossing powder.
Sunny Studio Stamps: Hawaiian Hibiscus Lilac Layered Flowers Birthday Card (using Frilly Frames Chevron Dies)

Card No.3:  Up next is a card using the leftover pieces from the previous card (which I did end up mass producing).  I hated to see the V's go to waste so I was super excited to see how cool they look all lined up together.  To create my beachy pattern, I inked them up using every blue and aqua color in the Ranger Distress Ink line-up.  For my greeting I die-cut the letters to spell out "aloha" using our Loopy Letters Dies.  Studio Katia's Sparkling Clear Crystals were the perfect finishing touch to give the look of dew drops.  Isn't it cool how they take on the colors from below?!
Sunny Studio Stamps: Hawaiian Hibiscus Yellow & Aqua Aloha Layered Flower Card (with background using Frilly Frames Chevron Dies)

Card No.4: For my last hibiscus card of the day I used our second new Frilly Frame Die set called Frilly Frames Stripes.  I masked off my card front using some purple tape to protect my outer border from getting inky and then I inked on the inside of my taped line with Spun Sugar Distress Ink, fading it out towards the center.

For my sentiment, I cut a piece of black cardstock wide enough to perfectly cover 3 of the stripes.  I then used a clear ruler and my pencil to mark off where to trim my strip so that it would line up just right.  For my sentiment I once again turned to our Everyday Greetings stamps, heat embossing it with white opaque embossing powder.  
Sunny Studio Stamps: Hawaiian Hibiscus Pink Best Wishes Wedding Card (using Frill Frames Stripes Dies)

Card No.5:  Without further ado, allow me to introduce you to our second layering set of the season and our third layering set in our fruit series: Slice of Summer Stamps and dies.  For my card here, I have combined all the newest fruit images together with the strawberry, raspberry and cherries from our Berry Bliss Stamps and dies.

This set comes with both the words "sub" and "lime" so that you can use them together like I did here or you can use the word "lime" as a punny way to say "I'm". For example "lime so glad we're friends" (or family).  

For my backdrop, I used our new Frilly Frames Chevron Dies as a stencil together with Therm O Web's Deco Foil Metallix Gel (more details shared at this blog post HERE).  I adore hot pink and lime green together so I paired it with a sheet of green gingham paper from our Gingham Pastels 6x6 Paper pack, using a little from both sides.
Sunny Studio Stamps: Slice of Summer Watermelon, Lemon Lime, Strawberry, Raspberry & Cherry "You're Sublime" Gingham Card (using Deco Foil Metallix Gel with Frilly Frames Chevron Die)

Card No.6:  My second favorite color scheme is yellow and blue (but who am I kidding? I pretty much adore all bright and happy colors).  To create this card I used two prints from our new Summer Splash 6x6 Paper pack shared yesterday.  I kept things simple, using a lacy frame from our Fancy Frames Circle Dies and a sweet little ric-rac edge from our Ric Rac Border Dies. A Mix of droplets from Studio Katia's Drops Mix 1 and Drops Mix 2 sets completed my card and added a little something extra to my simple card.
Sunny Studio Stamps: Slice of Summer Blue & Yellow Striped Lemon Slice "You're the Zest" Card (using Summer Splash 6x6 Paper)

Card No.7: Up next is a card where the watermelon slice takes center stage.  This is the image that made my heart skip a beat the moment I stamped it.  It quite literally comes alive when you stamp in the watermelon seeds and shadows!

I started by cutting a piece of red gingham paper from our Classic Gingham Paper pack down to be approximately 5.5" wide x 3.5" high.  I then used my clear grid centering ruler by Ranger to find the center of my card and adhered my first watermelon at the center point, along the bottom edge of my piece of patterned paper.  I then added another watermelon slice to each side, trimming off the excess on each side.  From there I was able to take those pieces I cut off to flip over and add along the top as shown.  I used my scissors to fussy cut along the edge of my watermelon slices to leave the look of a scalloped edge.  A piece of striped paper from our Silly Stripes Paper pack continued my watermelon theme.

Once again I heat embossed my sentiment using some white opaque embossing powder and added the look of droplets using Studio Katia's Sparkling Clear Crystals.
Sunny Studio Stamps: Slice of Summer Watermelon Border Card (using Classic Gingham and Silly Stripes 6x6 Paper)

Card No.8: For my final card of the day I focused on the adorable citrus slice image from the set.  Love how just by changing my ink colors it can look like a lime, lemon, orange or grapefruit slice!  I mass produced my slices using a stamp positioning tool and then arranged them on a piece of sky blue paper from our Gingham Pastels Paper pack.  I completed my simple, graphic card by stamping my sentiment onto the stitched label that comes with our Sliding Window Dies.
Sunny Studio Stamps: Slice of Summer Orange, Lemon, Lime & Grapefruit "Wishing You A Slice of Happiness" Card

To help you line up our Hawaiian Hibiscus and Slice of Summer stamps like a pro I've created a special layering guide (you can click on the photo below to view it larger).  For all the Hibiscus flowers I started by stamping them with the lightest ink color, working towards the darkest, while for the fruit I started stamping them from darkest to lightest. Honestly you can start from either end depending on what you prefer. The black outline indicates where that layer touches the previously stamped layer.  :)
Sunny Studio Stamps: Hawaiian Hibiscus Layered Flower Stamp Alignment Guide
Sunny Studio Stamps: Slice of Summer Lemon, Lime and Watermelon Stamp Alignment Layering Guide

I frequently am asked which ink colors I used for my layered images.  While I think there are so many great options out there, these are the colors I used today for my stamped images (in the ordered shared from darkest to lightest)...

Dark Red Hibiscus

Versafine Tulip
Colorbox Strawberry
Colorbox Candy Red
Colorbox Cranberry


Lighter Red Hibiscus
Hero Arts Cotton Candy
Versafine Tulip
Colorbox Strawberry
Colorbox Candy Red

Lilac Hibiscus
Colorbox Pixie
Colorbox Lilac
Catherine Pooler Pixie Dust
VersaFine Purple Delight


Yellow Hibiscus
Colorbox Lemonade
Versafine Cheerful
Colorbox Banana
Colorbox Dandelion

Hot Pink Hibiscus

Colorbox Candy
Versafine Charming Pink
Colorbox Very Berry
Colorbox Raspberry Pink

Dark Green Leaves
Colorbox Grasshopper
Colorbox Green Apple
Colorbox Golf Course

Medium Green Leaves
Colorbox Kiwi
Colorbox Tree Frog
Colorbox Artichoke

Lime Green Leaves

Colorbox Limon
VersaMark Verdant
Colorbox Grasshopper

Watermelon

Lawn Fawn Bubblegum
Colorbox Strawberry
Colorbox Cranberry
Colorbox Limon
VersaMark Verdant
Colorbox Green Apple

Light Yellow Lemon

Versafine Cheerful
Colorbox Lemonade

Dark Yellow Lemon
Colorbox Banana
Versafine Cheerful

Lime Slice
VersaMark Verdant
Colorbox Limon

Orange Slice
Colorbox Tangerine
Papertrey Ink Summer Sunrise

Grapefruit Slice

Lawn Fawn Bubblegum
Stampin' Up Blushing Bride


I'm so happy you've joined me for today's sneak peek and I'd love to give a $25 gift code to one lucky winner.  Make sure to keep checking back all this week for more peeks & prizes for up to five chances to win.  The 5 contests run through Saturday at Midnight PST with winners announced here on Sunday, April 14th. :)

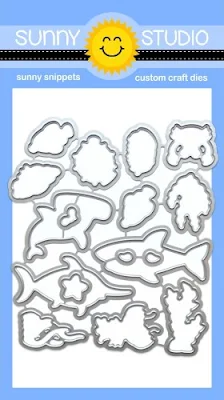
a Rafflecopter giveaway Here's a closer look at the new Hawaiian Hibiscus and Slice of Summer layering stamps & coordinating dies, as well as the two newest Frilly Frames dies used today (available for purchase on Friday, April 12th).  Please note: Items are not shown in proper proportions.


Sunny Studio Stamps: Hawaiian Hibiscus Color Layering Flower 4x6 Clear Photopolymer Stamp Set   Sunny Studio Stamps: Hawaiian Hibiscus Low Profile Metal Cutting Dies   Sunny Studio Stamps: Slice of Summer Watermelon, Lemon & Lime 4x6 Clear Photopolymer Stamp Set  

Sunny Studio Stamps: Slice of Summer Watermelon, Lemon & Lime Low Profile Metal Cutting Dies   Sunny Studio Stamps: Frilly Frames Stripes 3-in-1 Mix and Match Low Profile Metal Cutting Dies   Sunny Studio Stamps: Frilly Frames Chevron 3-in-1 Mix and Match Low Profile Metal Cutting Dies

Other Sunny Studio Supplies Used:

Heartfelt Wishes Stamps
Shop at:
Sunny Studio
Ric Rac Border Dies
Ric Rac Border Dies
Shop at:
Sunny Studio
Fancy Frames-Circle Dies
Shop at:
Sunny Studio
Berry Bliss Stamps
Berry Bliss Stamps
Shop at:
Sunny Studio
Berry Bliss Dies
Berry Bliss Dies
Shop at:
Sunny Studio
Classic Gingham 6x6 Paper
Shop at:
Sunny Studio
Striped Silly 6x6 Paper
Shop at:
Sunny Studio
Sliding Window Dies
Sliding Window Dies
Shop at:
Sunny Studio
Loopy Letters Dies
Loopy Letters Dies
Shop at:
Sunny Studio
Gingham Pastels 6x6 Paper
Shop at:
Sunny Studio
Frilly Frames Lattice Dies
Shop at:
Sunny Studio
Everyday Greetings Stamps
Shop at:
Sunny Studio
Clear Drops Mix 2
Clear Drops Mix 2
Shop at:
Sunny Studio
Sparkling Clear Crystals
Shop at:
Sunny Studio
Clear Drops Mix
Clear Drops Mix
Shop at:
Sunny Studio

Monday, April 8, 2019

Sneak Peek: Best Fishes, Catch A Wave & Summer Splash Paper

Hello and welcome to our Summer Sneak Peek Week!  All this week I will be showcasing cards using our new collection for Summer debuting on Friday, April 12th

Today I am so excited to be showcasing our new Best Fishes stamps and dies, Catch A Wave Dies and Summer Splash Paper!  They are seriously so much fun!

Card No.1:  For my first card of the day I couldn't resist pairing the new set with some previous favorites, our Magical Mermaid Stamps and Oceans of Joy Stamps.  The Best Fishes set comes with 4 new plants to help with scene building and I had so much fun with the extra options they add!  To color my images I used my favorite Copic sketch markers which I used for all of my projects today.


To create my background I turned to Colorbox's new Dyestress Inks which blend beautifully and are reactive with water.  I started by inking up my card panel with the Capri dyestress ink and then die-cut our Sun Ray Dies from masking material which I arranged on my panel to radiate out as shown.  I then inked up the bottom and outside edges with Scuba dyestress ink.  I moved around the masks a little bit as I inked up my background with a foam dauber to blur the edges.  I finished by spritzing on some water which leaves the look of bubbles.
Sunny Studio Stamps: Best Fishes & Magical Mermaids with Shark & Swordfish card by Mendi Yoshikawa

Card No.2:  For my next card I started by cutting our new Catch A Wave Dies from masking material.  I then used the negative space of the mask to ink the wave layers onto my card panel with Colorbox Caribbean and Tahiti Dyestress Ink, applying them with a heavier hand as I worked towards the bottom of my panel.  I then cut a square in the bottom for my shaker window.


For my shaker window I used a piece of acetate from Therm O Web's Deco Foil Clear Toner Sheets in Polka-dot which was transformed with Therm O Web's Iridescent Foil Transfer Sheets for some extra sparkle.  I love how it gives the look of bubbles!  To match my sparkly bubbles, I filled my shaker with Studio Katia's gorgeous Crystal Clear Mini Sequins.
Sunny Studio Stamps: Best Fishes Blowfish Sequin Bubbles Shaker Card with Wave Background (using Catch A Wave dies as a mask)

To decorate my card I used the darling blow fish image together with the plants from this set and some from Magical Mermaids.  I completed my card with a heat embossed sentiment, however this is something I would recommend doing before applying the acetate to your card.  On the other hand if you forget (like I did) you can protect and cover the acetate with a scrap of cardstock to prevent it from overheating or warping.  As a final finishing touch I added some Jade Crystals by Studio Katia which complimented my inky background perfectly!


Sunny Studio Stamps: Best Fishes "You Blow Me Away" Blowfish handmade shaker card


Card No.3:  Next I wanted to find a way to frame a much smaller scene so I turned to one of my favorite motifs for ocean themes: a porthole!  To create my porthole, I die cut two nesting circles sized 2-1/4" and 2-3/4".  I then realized the Studio Katia Snow White Crystals would be perfect for the bolts around my window!

My background was created by inking up a blend of Caribbean, Capri and Scuba Dyestress inks and then splattered generously with water. These inks react so cool with water--They almost immediately lighten and don't require dabbing to achieve this look.

As my final touch I stamped my sentiment on a curve using a circle die taped to the back of my Misti Lid to help me get the spacing and angles just right.
Sunny Studio Stamps: Best Fishes Clownfish Porthole Ocean Sea Themed Card by Mendi Yoshikawa

Card No.4:  I think all the little crustaceans in this set are so much fun so my next card focuses on them using the island and palm tree from our Island Getaway Stamps which I paired with the sandy beach from Ocean of Joy (stretched out into a straight line) and a new palm tree on the left from a set that will be showcased on Thursday.

For my background I used some patterned paper from our newest 6x6 Paper Pack called Summer Splash.  This set comes with sooo many fun prints and this card actually combines two of my favorite patterns (the wave and the clouds) using leftover scraps from other projects. 

To finish my card I stamped my sentiment onto our Dots & Stripes Pastels Paper and die-cut the end using our Fishtail Banner Dies.
Sunny Studio Stamps: Best Fishes Have A Clawsome Birthday Lobster & Crab Card

Card No.5: My last card uses one of my favorite images from the set, the hammerhead shark!  Isn't he so irresistible?!  This time I used the Catch A Wave dies to cut borders from three complimentary colors of cardstock, pairing them with a sea floor from our Oceans of Joy Stamps.  I heat embossed my sentiment with white embossing powder and stamped my bubbles in place of bulky embellishments, making this the perfect card to mail!
Sunny Studio Stamps: Best Fishes Shark & Hammerhead Shark "You're Jawsome" Card (using Catch A Wave Dies)

Card No.6: For my last Best Fishes project of the day, I turned to a new die that I will be sharing much more of later in the week.  ;)  I decorate my gift box I mixed in some fish, bubbles and splashes from our Oceans of Joy Stamps.

Sunny Studio Stamps: Best Fishes Shark Gift Box & Tag (using Wrap Around Box Die)

For my gift box panels, I decorated them using the other half of that wave paper leftover from my crab and lobster card.  I love how the paper instantly gives me a quick & interesting background that is the perfect backdrop for these cute images.  I created a sweet little tag to match using another wave print from the Summer Splash paper pack, with a stamped a sentiment from the Best Fishes set. 


Sunny Studio Stamps: Best Fishes Dolphin & Swordfish Gift Box & Tag (using Wrap Around Box Die)

That wraps up today's sneak peeks.  I'm so happy you've joined me!  I'd love to give a $25 gift code to one lucky winner using the rafflecopter below.  Make sure to keep checking back all this week for more peeks & prizes for up to five chances to win.  The contests run through Saturday at Midnight PST with winners announced here on Sunday, April 14th. :)

a Rafflecopter giveaway Here's a closer look at the new Best Fishes stamps & coordinating dies, as well as the new Catch A Wave dies & Summer Splash 6x6 Pack Pack used today (available for purchase on Friday, April 12th).


Sunny Studio Stamps: Best Fishes Hammerhead Shark, Swordfish, Blowfish, Clown Fish, Lobster & Hermit Crab 4x6 Clear Photopolymer Stamp Set     Sunny Studio Stamps: Best Fishes Metal Cutting Dies

Sunny Studio Stamps: Catch A Wave Border 3-piece Low Profile Metal Cutting Die Set     Sunny Studio Stamps: Slice of Summer 6x6 Double-Sided Patterned Paper Pack - 24 Sheets

Other Supplies Used:


Fishtail Banner Dies
Shop at:
Sunny Studio
Island Getaway Dies
Island Getaway Dies
Shop at:
Sunny Studio
Island Getaway Stamps
Shop at:
Sunny Studio
Magical Mermaid Dies
Shop at:
Sunny Studio
Magical Mermaid Stamps
Shop at:
Sunny Studio
Oceans of Joy Dies
Oceans of Joy Dies
Shop at:
Sunny Studio
Oceans of Joy Stamps
Shop at:
Sunny Studio
Memento Tuxedo Black Marker
Shop at:
Sunny Studio
Tsukineko Jumbo Dauber
Shop at:
Sunny Studio
Versafine Onyx Black Ink
Shop at:
Sunny Studio
Crystal Clear Mini Sequins
Shop at:
Sunny Studio
Snow White Crystals
Snow White Crystals
Shop at:
Sunny Studio
VersaMark Watermark Ink
Shop at:
Sunny Studio


Sunday, April 7, 2019

Therm-O-Web Feature: Giveaway Winner

Thank you to everyone who joined us each day last week for our week long partnering with the Therm-o-web team. We truly appreciate all of the sweet comments and hope that you were inspired by the projects both teams had to share. 

Without further ado, here are the winners of the $25 gift codes to our online store...
Denise Bryant

Please email me at info@sunnystudiostamps.com to claim your prize!