Friday, October 5, 2018

Sunny Studio Stamps Third Birthday Blog Hop Winners

Thank you for all your sweet comments both on our blogs and on social media last weekend.  It meant so much to have you celebrate Sunny Studio's third birthday with us!  

We have 14 winners to announce from our blog hop.  Each of you have won a $25 gift code to our online store!  :)

Patt H.

Anne Sturgeon

Lori Proulx

Eloise Blue's Winner
Larissa Heskett

Carla Hundley

Francesca Vignoli's Winner
Marilyn in Michigan


Jen Petersen

Linnea Sundstrom

I didn't have email addresses for a couple of you so if you see your name up above and haven't received an email from me yet, please email me at info@sunnystudiostamps.com to claim your prize. :)


Eskimo Kisses Winter Themed Card with Lexa

Hello everyone! Lexa here today with a card that highlighting the brand new mini Eskimo Kisses Stamp Set and the coordinating dies. This stamp set is so cute and goes well with a lot of Sunny Studio previous winter set as for today's card I pulled out the older Polar Playmates Stamp to give those little Eskimos a buddy. Let's get started right away.

Sunny Studio Stamps: Eskimo Kisses Polar Playmates Winter Themed Card by Lexa Levana

First, I stamped my images with a black Versafine ink and watercolor them using Distress Markers. I already knew that I need to use the igloo to complete my scene, they just belong together. Don't you think so? And a cute seal is the perfect buddy for them. After I finished with the coloring I cut all of the images using the coordinating dies. 

Sunny Studio Stamps: Eskimo Kisses Polar Playmates Winter Themed Card by Lexa Levana

To create a snow hill I use Woodland Borders Dies that have a pretty stitched look on both side. I blended Worn Lipstick Distress Ink on the top part that will be the sky and just a tiny bit of Tumbled Glass Distress Ink along the edges of my snow hill.

Sunny Studio Stamps: Eskimo Kisses Polar Playmates Winter Themed Card by Lexa Levana

I adhered both parts together on a card base and stamped various size snowflakes from Polar Playmates Stamp with pink dye ink. The "eskimo kisses" sentiment is stamped on a blue cardstock which I cut into a fish tail banner in the end. After that I just happily arrange my scene together with glue and foam tapes to create dimensions.

That's all for today, I hope you like today's card and have an amazing day!

Sunny Studio Supplies Used:

Polar Playmates Stamps
Shop at:
Sunny Studio
Woodland Borders Dies
Shop at:
Sunny Studio
Eskimo Kisses Stamps
Shop at:
Sunny Studio
Eskimo Kisses Dies
Eskimo Kisses Dies
Shop at:
Sunny Studio

Thursday, October 4, 2018

Warm & Cozy Christmas Shaker Card with Juliana

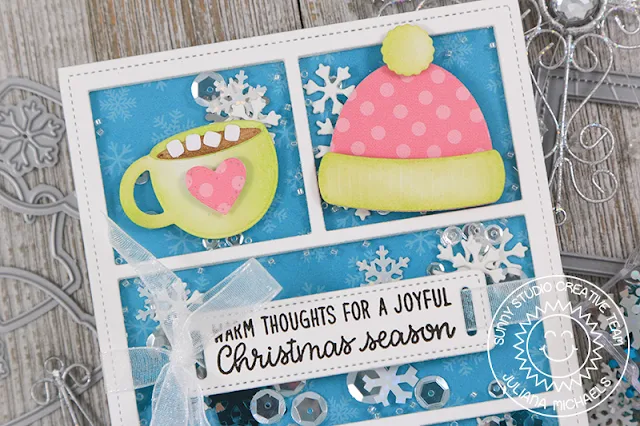
Hello friends! It's Juliana Michaels with you and today I'm excited to share a Christmas shaker card I created using the Warm & Cozy dies! If you love to play with paper, this new die set will make your paper loving self happy. You can use it with cardstock and patterned paper to create unlimited winter and Christmas themed projects.

Sunny Studio Stamps: Warm & Cozy Fancy Frames Comic Strip Everyday Dies Christmas Shaker Card by Juliana Michaels

The first thing I did was to die cut the mittens, the hat and the hearts from a piece of pink polka dot paper that is part of the Holiday Cheer 6x6 paper pad. I then cut the mugs and the trim for the mittens and hat from Bristol Paper. I added color to them using Distress Ink in Twisted Citron and a foam ink blending tool. I also cut the inside of the mug and inked it with Distress Ink in Walnut Stain. I then adhered the pieces together and used double sided foam tape to pop up the accent pieces. If you don't want to get inky, simply die cut these pieces from colored cardstock.

Sunny Studio Stamps: Warm & Cozy Fancy Frames Comic Strip Everyday Dies Christmas Shaker Card by Juliana Michaels

To create the shaker part, I took the Comic Strip Everyday dies and cut if five times from white cardstock. I glued 4 of these layers together to create the shaker box. I then cut a piece of acetate to the size of the frame and adhered it to the top of the shaker box. I then glued the 5th comic strip frame on top of the acetate.

Sunny Studio Stamps: Warm & Cozy Fancy Frames Comic Strip Everyday Dies Christmas Shaker Card by Juliana Michaels

Next, I filled the openings with a mix of snowflakes die cut using the snowflake die from the Warm & Cozy die set and the free Mini Snowflake die you get with all orders from Sunny Studio (at least while supplies last). I also added in some sequins and seed beads to add some sparkle and noise!

Sunny Studio Stamps: Warm & Cozy Fancy Frames Comic Strip Everyday Dies Christmas Shaker Card by Juliana Michaels

After I filled the sections, I glued the shaker to a piece of blue snowflake patterned paper from the Holiday Cheer 6x6 paper pad. Once the shaker was complete, I adhered the cut die cuts to the front of the card. To complete the card, I die cut a piece of white cardstock using the ribbon slider die from the Fancy Frames Rectangles die set. I stamped the sentiment from the Foxy Christmas stamp set in black ink. I then tied the sentiment piece onto the card with a piece of sheer ribbon.

I hope you enjoyed this bit of Christmas shaker fun using the brand new Warm & Cozy dies! We can't wait to see what you create and share with us using this new set!

Sunny Studio Supplies Used:

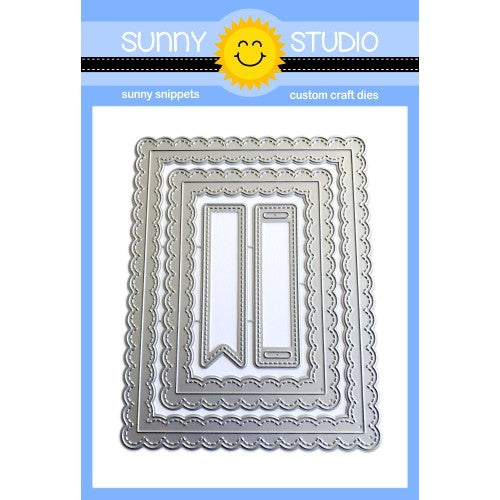
Fancy Frames- Rectangles
Shop at:
Sunny Studio
Comic Strip Everyday Dies
Shop at:
Sunny Studio
Holiday Cheer 6x6 Paper
Shop at:
Sunny Studio
Foxy Christmas Stamps
Shop at:
Sunny Studio
Warm & Cozy Dies
Warm & Cozy Dies
Shop at:
Sunny Studio

Wednesday, October 3, 2018

Christmas Trimmings Elegant Holiday Cards with Franci

Hi there, Franci here with you today with some fun cards, showcasing the new Christmas Trimmings set! This set is amazing, all these images are so classic and elegant! 


Sunny Studio Stamps: Christmas Trimmings Fancy Frames Dies Elegant Christmas Cards by Franci Vignoli

For my first card I created my card base out of white cardstock. I cut a coordinating panel and I passed it into my Big Shot with the Cable Knit Embossing folder. I stamped and die cut lots of images, settling on the pine branch and the pine cone. I die cut a tag from the new set Build-A-Tag #2, I sponged some Distress inks to create a night sky and I heat embossed the sentiment in white. My sentiment is from the Christmas Chapel set, that came out last year.


Sunny Studio Stamps: Christmas Trimmings Fancy Frames Dies Elegant Christmas Cards by Franci Vignoli

I die cut a Fancy Frame Oval out of kraft cardstock and composed my card. I glued down the tag with some foam tape to make it pop against the background, and added some gold twine and some red embellishments. 


Sunny Studio Stamps: Christmas Trimmings Fancy Frames Dies Elegant Christmas Cards by Franci Vignoli

For my second card I first created my card base and I inked it up with Distress inks to create a dark to soft blue background. I also added some white and brown watercolor spatters and let everything dry. Then I die cut two Fancy Frames Ovals out of brown cardstock.


Sunny Studio Stamps: Christmas Trimmings Fancy Frames Dies Elegant Christmas Cards by Franci Vignoli

I composed my design and glued everything down with foam tape. Finally, I stamped my sentiment on the bottom right corner with two different brown inks to create an ombrè effect.
I added some red embellishments here too.

Hope you like my cards for today and thank you so much for stopping by!

Sunny Studio Supplies Used: 


Christmas Chapel Stamps
Shop at:
Sunny Studio
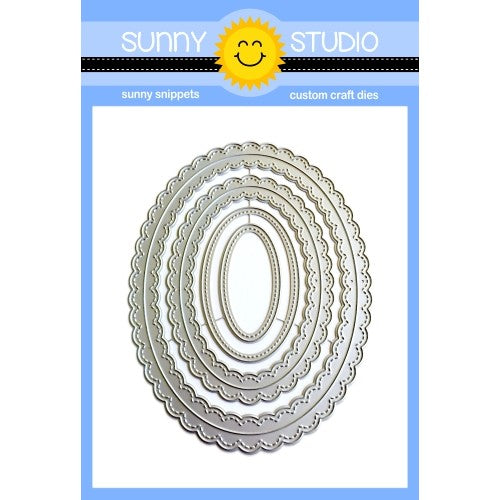
Fancy Frames- Ovals
Fancy Frames- Ovals
Shop at:
Sunny Studio
Cable Knit Embossing
Shop at:
Sunny Studio
Christmas Trimmings Stamps
Shop at:
Sunny Studio
Christmas Trimmings Dies
Shop at:
Sunny Studio
Build-A-Tag #2 Dies
Build-A-Tag #2 Dies
Shop at:
Sunny Studio

Tuesday, October 2, 2018

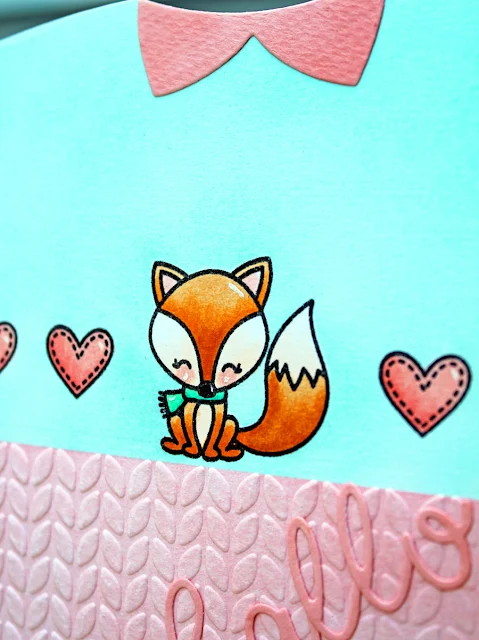
Sweater Vest Cable Knit Hello Card with Vanessa

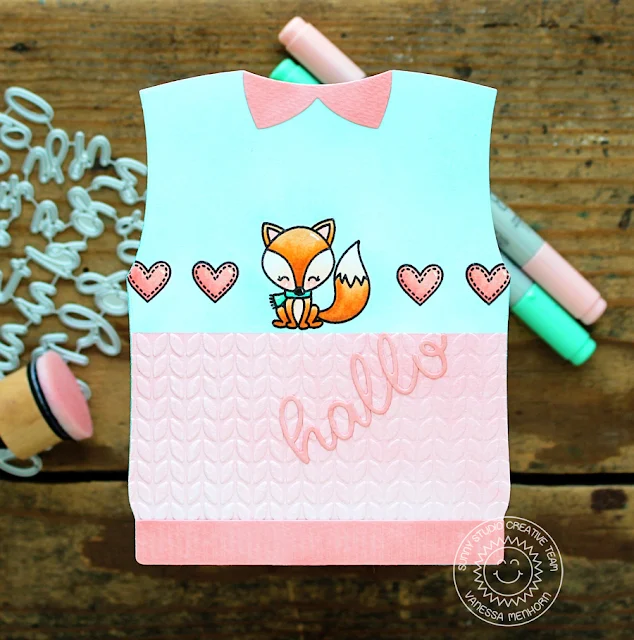
Hi everyone! Vanessa here today with a fun shaped card! I am sure you agree that the new release is fabulous!! I adore every single item of it. Here comes a cute and cozy sweater vest.

Sunny Studio Stamps: Sweater Vest Cable Knit Hello Card by Vanessa Menhorn

I started with a panel of white cardstock and stamped the fox from Foxy Christmas and the hearts from Eskimo Kisses. Then I masked the stamped images and masked the bottom part of the panel. Now I applied soft pool ink with an ink blending tool. After I had removed the masks, I masked the top part and inked the bottom area with soft pink ink. Then I die-cut the Sweater Vest from the panel and used the Cable Knit Embossing Folder to only emboss the pink part. I colored the images with Copics and added the collar and the ribbing.

Sunny Studio Stamps: Sweater Vest Cable Knit Hello Card by Vanessa Menhorn

Finally, I die-cut the letters using the Loopy Letters Dies, inked them with the same pink ink I used for the collar, and assembled the word "hallo" (the German word for hello).

I love that I can spell anything with the new letter dies now! And that sweater vest? This card would also be a cute baby card, don't you agree?

Have a wonderful day everybody and thanks for stopping by today!

Sunny Studio Supplies Used:

Cable Knit Embossing
Shop at:
Sunny Studio
Foxy Christmas Stamps
Shop at:
Sunny Studio
Eskimo Kisses Stamps
Shop at:
Sunny Studio
Loopy Letters Dies
Loopy Letters Dies
Shop at:
Sunny Studio
Sweater Vest Dies
Sweater Vest Dies
Shop at:
Sunny Studio

Monday, October 1, 2018

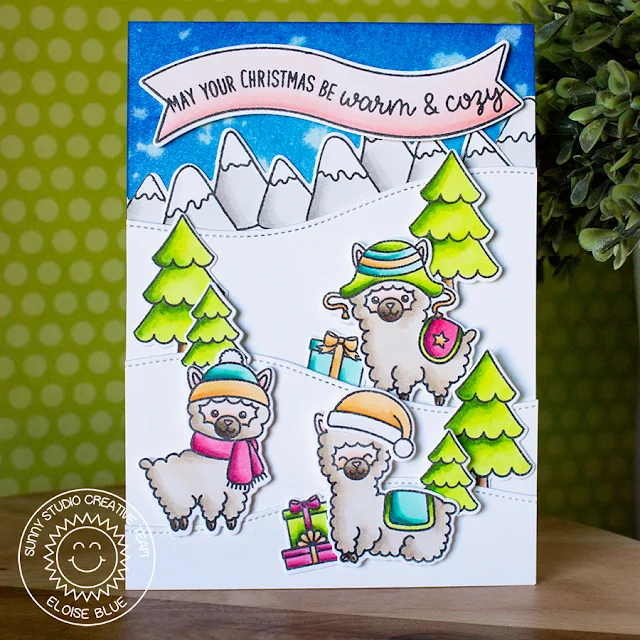
Alpaca Holiday Snowy Hilltop Christmas Card with Eloise

Hi everyone, Eloise here and today I'll be using the brand new Alpaca Holiday stamp set to create my bright Christmas card today. This set is possibly my most favourite stamp set of all time, it's super cute and I honestly can't wait to use it again.

Sunny Studio Stamps: Alpaca Holiday Snowy Hilltop Christmas Card by Eloise Blue

To start off my card for today, I stamped out all the images I wanted to use from Alpaca Holiday, I then stamped out the trees from Gleeful Reindeer and the banner from Little Angels onto some white cardstock and coloured them all in with Copic Markers. Once they were coloured, I used all of the coordinating dies to cut them out. I set them off to the side and while I had my die cutting machine out, I cut three snow layers from the Woodland Borders dies. I added foam tape to the backs of all my layers and images and worked on my background. 

Sunny Studio Stamps: Alpaca Holiday Snowy Hilltop Christmas Card by Eloise Blue

I used some Distress Inks (Blueprint Sketch, Salty Ocean, Tumbled Glass) to ink blend onto a piece of watercolour cardstock. I flicked on some water and dried it with a heat tool. I then adhered down all my images and layers onto my background in the order I wanted them in. Lastly, I stamped the sentiment from Alpaca Holiday into the banner and adhered that at the top of my card. 

That finished off my card for today, I hope you enjoyed and are loving the new release as much as I am. Thanks for stopping by! 

Sunny Studio Supplies Used - 

Gleeful Reindeer Dies
Shop at:
Sunny Studio
Gleeful Reindeer Stamps
Shop at:
Sunny Studio
Little Angels Dies
Little Angels Dies
Shop at:
Sunny Studio
Little Angels Stamps
Shop at:
Sunny Studio
Woodland Borders Dies
Shop at:
Sunny Studio
Alpaca Holiday Stamps
Shop at:
Sunny Studio
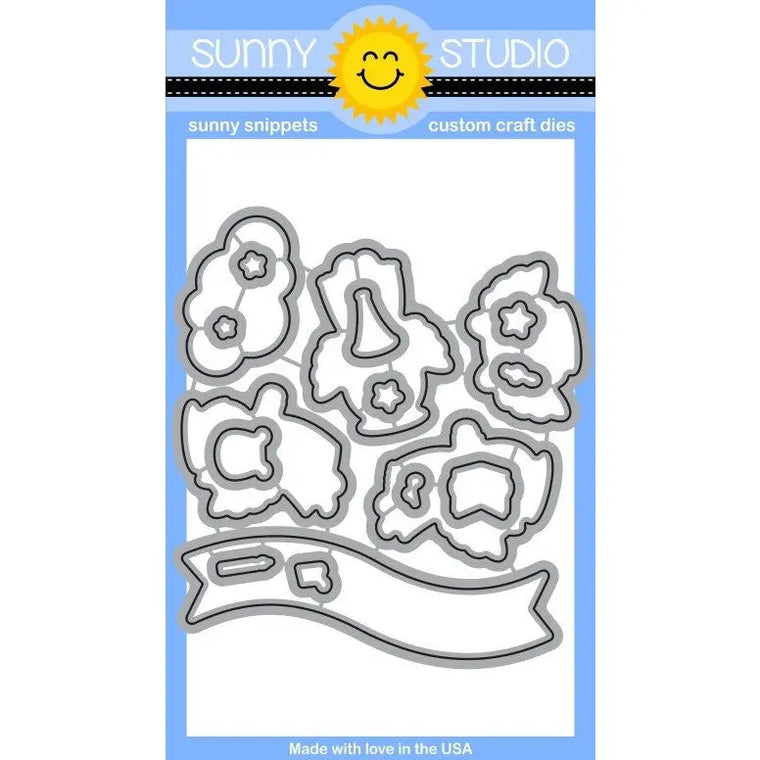
Alpaca Holiday Dies
Alpaca Holiday Dies
Shop at:
Sunny Studio

Friday, September 28, 2018

3rd Birthday Hop: Santa's Stocking, Sweater Vest & Loopy Letter Dies


Today's the big day!  Not only is it the day that our winter release is available for purchase, but it coincides with our company's third birthday so we are excited to be celebrating the occasion with many of our talented crafty friends!!!

Today I'm sharing product peeks and card ideas for three new die sets that are so much fun to play with!

Card Set No. 1: Up first we have a new A2 sized Santa's Stocking die that comes with all the parts and pieces to dress up your stocking with bows, holly & berries and layered candy canes!

For my cards here, I cut two of the stockings from white cardstock and scored them 1/2" from the top and adhered the two pieces together with some glue above the score line to form my card base.  I then decorated them with papers from our Holiday Cheer Paper.  For my sentiment I used our Greetings Word die and the word "Christmas" from our Alpaca Holiday Stamps.
Sunny Studio Stamps: Santa's Stocking Shaped Christmas Card by Mendi Yoshikawa

Card No. 2: My next project turned the stockings into a fun holiday banner to hang from my fireplace mantel. I strung mini twinkly lights with an iridescent garland and attached the banner pieces with mini clothespins.  

I cut my stockings from a mix of pink & green patterned papers from our summer and fall collections (linked below) and decorated them with all the extra elements that come with the die set.  To dress up my stockings I used a hot glue gun to adhere an iridescent chenille trim that I'm pretty smitten with and then personalized them with our names using our new Loopy Letters alphabet dies.


Sunny Studio Stamps: Santa's Stocking Christmas Holiday Banner by Mendi Yoshikawa

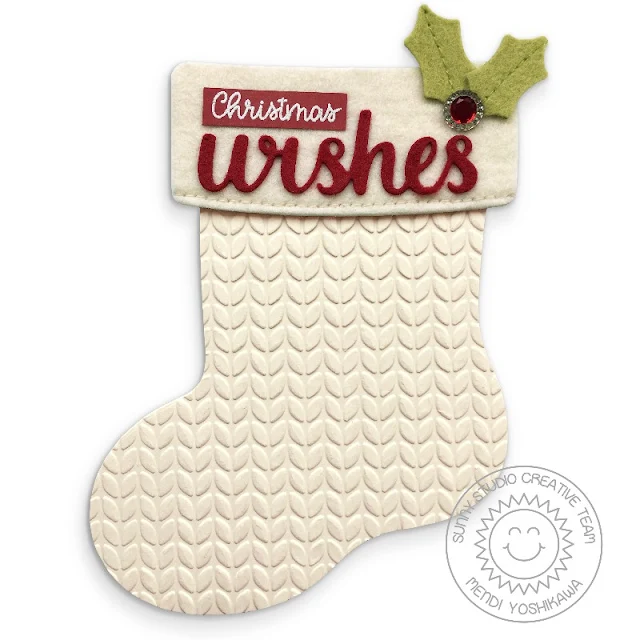
Card No. 3: For this stocking shaped card I turned out our new Cable Knit Embossing folder and cut the cuff and holly from some wool felt in my stash.  I used a red jewel from Queen & Co. and our Wishes Word die for my sentiment. To keep the felt from tearing at the delicate points, I mounted my felt onto cardstock before running it through my die-cutting machine and then used my Sizzix Chrome Precision Base Plate to apply extra pressure.
Sunny Studio Stamps: Ivory Cable Knit Christmas Stocking Shaped Card (using Santa's Stocking Dies & Cable Knit Embossing Folder)

Card No. 4: For my last card, cut two pieces and I hand-stitched around the perimeter of my stocking to create a pocket to hold a gift card.  I then adhered some Darice short pile fur to a piece of cardstock and hand cut the stocking cuff before stitching around it to help pervent fraying.  I embellished my stocking with some holly and berries from our new Christmas Trimming stamps & dies and finished off my card with a sentiment from our Alpaca Holiday stamps that had been stamped on a banner from our Sunny Borders stamps.
Sunny Studio Stamps: Santa's Stocking Gift Card Holder with Fur Trim by Mendi Yoshikawa

Card No. 5:  For our next new product we have our Sweater Vest dies which are also sized to create A2 size shaped cards.  The dies come with the argyle diamond, a stitching guide for hand-stitching, a collar, layered bow tie, the waistband and a V-neck or crew neck option.

For this card I cut my sweater from our Amazing Argyle Paper pack and then cut my V-neck and ribbed waistband using the woodgrain print on the reverse side.  Before mounting my front card panel onto my card base, I used a paper pierce together with the little "X" die from the set and punched the holes for my hand stitching.  I liked the control this gave me to line up my border without crushing the argyle diamonds I had already adhered to my card.
Sunny Studio Stamps: Argyle Sweater Vest with Bow Tie Shaped Christmas Card by Mendi Yoshikawa

Card No. 6:  For my next card I thought it would be cool to create a full blown argyle pattern so I cut the diamond from the three colors of paper found in our Striped Silly and Dots & Stripes Jewel Tones Paper pack.  

To line them up perfectly I drew horizontal and vertical lines that intersected at the center of my card and used those lines to line up the 4 points of my blue diamond.  From there, I was able to build out to keep them lined up. When I was done I used my metal edge ruler with a paper piercer and punched little holes 1/8" apart through the center of each diamond and hand stitched everything with three strands of embroidery floss. It was a bit time consuming, but I did it while catching up on some fall tv and found it relaxing.  There are so many fun color combos you could create!  I think this looks like a fun fall sweater, but would also be really cool for a Father's Day card.  ;)
Sunny Studio Stamps: Fall Argyle Sweater Vest Shaped Card by Mendi Yoshikawa


Card No. 7: I couldn't resist using the dies to create an "ugly Christmas sweater".  I think there are sooo many fun directions you could go with this them, but for my card I turned to the penguins from our Bundled Up stamps which I paired with a sentiment from our Gleeful Reindeer stamps.

To cut the top of my sweater to match the crew neck die-cut, I drew a faint pencil line on my card to indicate the placement and then used a 1-3/4" circle punch to punch out a "hole" in the top of my card base.  
Sunny Studio Stamps: Ugly Christmas Sweater Vest Card (using Bundled Up Penguin Stamps & New Shaped Dies)

Card No. 8:  I couldn't leave without using our new Cable Knit Embossing Folder together with our sweater vest dies!  To add a bit of color to what would be a fairly monochrome card, I added a button up shirt along with some teeny tiny buttons from my stash and added some holly from our Christmas Icons stamps.  A sentiment from our Alpaca Holiday Stamps heat embossed on a pennant from our Fancy Frame Rectangle dies completed the look.
Sunny Studio Stamps: Warm & Cozy Ivory Cable Knit Sweater Vest Card by Mendi Yoshikawa

Here's a closer look at the new standalone dies featured today...
Sunny Studio Stamps: Santa's Stocking Christmas Low Profile Metal Cutting Die Set   Sunny Studio Stamps: Sweater Vest A2 Card Low Profile Metal Cutting Die Set   Sunny Studio Stamps: Loopy Letters Script Alphabet & Number Low Profile Metal Cutting Die Set
    
I've also created a video sharing the full release in detail.  I was determined to do it in under 20 minutes and I'm thrilled to report I achieved my goal. Woo-hoo! (You can view it at our YouTube Channel in HD here). 


I'm ecstatic to have a very talented group of ladies helping me celebrate today.  They are showing lots more sneak peeks with amazing projects that are sure to inspire you!  Your next stop in the hop is Sandy's blog.  :) 

In case you get lost, here's a full list of everyone hopping today...

Sunny Studio
Sandy Allnock
Lexa Levana
Francine Vuillème
Juliana Michaels
Teri Anderson


Don't forget to leave a comment at every stop because each designer is giving away a $25 gift code to our online store for 14 chances to win and a total of $350 in prizes

a Rafflecopter giveaway
You have until Monday evening at 11:59 pm PDT to leave your comments.  Winners will be announced on our blog on Friday, October 5.  :)

Do you love what you see and can't wait to order your favorites?  Use the promo code CELEBRATE at checkout to save 15% off your entire order at our online store through Monday, October 1st at 11:59 PST (retail orders only).

For this release's free mini die with each purchase we are re-releasing our Snowflake die that we ran out way too quickly last year.  We have made sure to have more extras on hand this time.  ;)


Other Sunny Studio Supplies Used:
Bundled Up Dies
Bundled Up Dies
Shop at:
Sunny Studio
Bundled Up Stamps
Bundled Up Stamps
Shop at:
Sunny Studio
Gleeful Reindeer Stamps
Shop at:
Sunny Studio
Wishes Word Die
Wishes Word Die
Shop at:
Sunny Studio


Gingham Jewel Tones 6x6 Paper
Shop at:
Sunny Studio
Amazing Argyle 6x6 Paper
Shop at:
Sunny Studio
Dots & Stripes Jewel Tones 6x6 Paper
Shop at:
Sunny Studio
Greetings Word Die
Greetings Word Die
Shop at:
Sunny Studio
Striped Silly 6x6 Paper
Shop at:
Sunny Studio
Holiday Cheer 6x6 Paper
Shop at:
Sunny Studio
Cable Knit Embossing
Shop at:
Sunny Studio
Alpaca Holiday Stamps
Shop at:
Sunny Studio