Monday, December 5, 2016

Merry Sentiments Rainbow Lights Card with Eloise

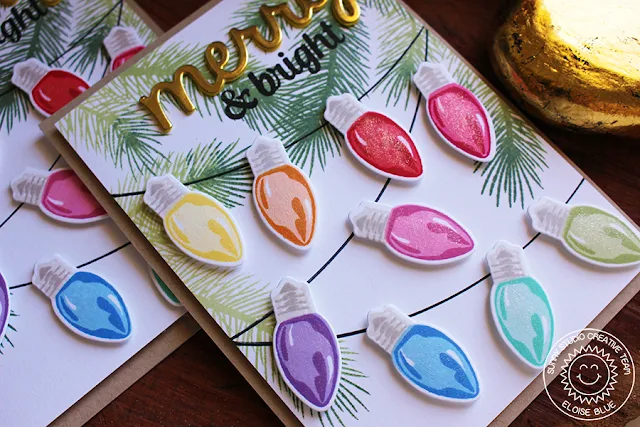
Hey everyone! Eloise here and today I'm making a rainbow string of lights card using the Merry Sentiments stamp set. My original idea for this card was to just have the three strings across a card, similar to how the card turned out this time and to just have a popped up sentiment over top, but when I did that.. I wasn't sure I liked it. It was too clean and simple and needed more colour and if you know me, I never have clean and simple cards. So I came up with this card.

Sunny Studio Stamps: Merry Sentiments and Holiday Style Rainbow Lights Card by Eloise Blue.

To begin my card I cut down a piece of white cardstock and stamped down some branches from the Holiday Style stamp set in various green inks. Just around the top of the card. I then took a plate and traced around the edge of it to create the lines for the lights to sit on. I then used various colours of rainbow coloured inks and stamped down the bulbs. I stamped down two of each in case I made a mistake, but these bulbs are so easy to line up! Once everything was stamped, I could die cut them out.

Now, since this die is solid, there was a little bit of an issue. So I used a trick I learnt from Michelle Short quite a while back. All you do first is die cut the die out of some plain cardstock. Then you use the negative piece and place it over your stamped image in the spot where it's equal on all sides. Then adhere it down with washi tape. Then place the die over top and it should just fall into place, then adhere that down and you're ready to run it through your big shot. When you run it through and take it out, your image should be perfectly centred! I love this trick, so handy.

Sunny Studio Stamps: Merry Sentiments and Holiday Style Rainbow Lights Card by Eloise Blue.

Anyway, once all my pieces were die cut I adhered down all my bulbs with foam tape, in my rainbow order. I always like to start with yellow first, I don't know why. But anyway, once they were all adhered I then stamped out the '& bright' portion of the sentiment at the top of the card in black ink. I then used the Merry die and die cut that out of gold cardstock and adhered it down above the '& bright' portion of the sentiment. To finish up my card I adhered down the panel with fun foam on a kraft card base and added some wink of stella all over the lights.

Hope you enjoyed my card today. Definitely wasn't what I was planning at all, But I love all the green  stamping at the top. I always love green on my cards! Thanks for stopping by today and check back the rest of the week for more inspiration.

- Eloise

Sunny Studio Supplies Used:
       

Saturday, December 3, 2016

Christmas Cards with Guest Designer Anika Lerche

Hey stampers, Anni here. I am back again as a guest designer and so happy that Mendi is such a kind person to let me come back for a few cards.

With Christmas just around the corner I have some Christmas cards to share with you!
I played with the super cuts sets called Christmas Icons and Mug Hugs. For the sentiments I used the set Merry Sentiments and the Merry Word Die.

I totally love the Merry Word Die - just like every word die Mendi creates! So I made it the star of the show on my first very clean and very simple card. I just watercolored some pointsettias from the set Christmas Icons. For the sentiment I die cut a few Merry and stacked them up. I free hand cut some leaves and assembled the card!


Sunny Studio Stamps: Christmas Icons Poinsettia Holiday Card by Anni Lerche.


Sunny Studio Stamps: Christmas Icons Poinsettia Holiday Card by Anni Lerche.


When I realized the Christmas Icons fit perfectly on the Hug Mugs I couldn't resist! I stamped, colored with Copics and fuzzy cut the images. I created a background with ink blending and splashes of water. Another simple card!


Sunny Studio Stamps: Christmas Icons & Mug Hugs Holiday Card by Anni Lerche.


Sunny Studio Stamps: Christmas Icons & Mug Hugs Holiday Card by Anni Lerche.

For my last card I stamped all the snowflakes from Mug Hugs and  heat embossed them on watercolor paper. I love these outline snowflakes so much! For the soloring I used some ZIG Clean Color Real Brush! Just add a die cut Merry from glitter cardstock and another festive card is done!


Sunny Studio Stamps: Mug Hugs Snowflake Christmas Card by Anni Lerche.

Hope you like the cards!
Thanks for stopping by and have a sunny week!
Anni


Sunny Studio Supplies Used:
          

Friday, December 2, 2016

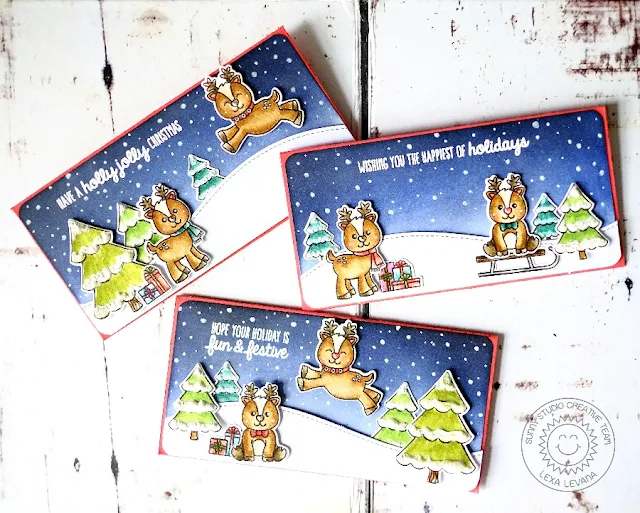
Gleeful Reindeer Money Pockets by Lexa

Hello crafty friends! Lexa here with another idea using Gleeful Reindeer stamp and it's coordinating dies. One of my friend asked me to make her some money pockets in Christmas theme, I was thinking why not..so today I will show you the result.


Sunny Studio Stamps: Gleeful Reindeer Money Pocket Christmas cards by Lexa Levana.

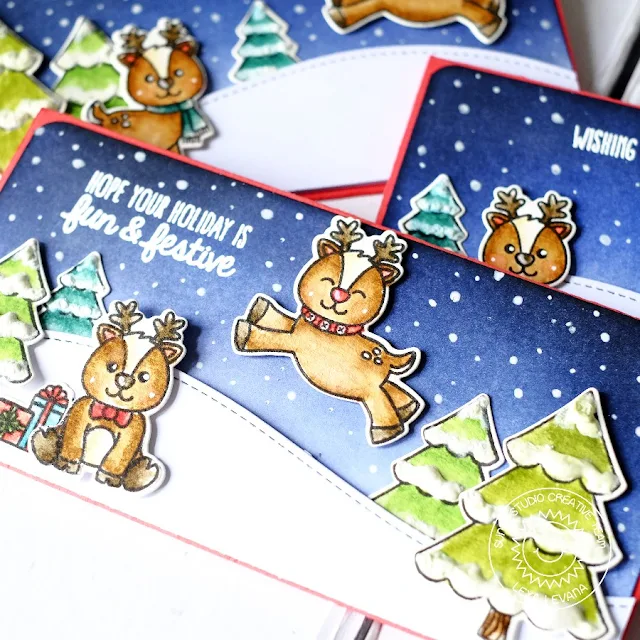
Each pocket is sized 3" x 6" so it will fit the money perfectly (in this case I measured the money first to decide the envelope size) I used red cardstock and stamped a reindeer head and some snowflakes from Christmas Icons using tone on tone technique so it's not over the top. I stamped all my images with versafine black ink and watercolored them with Distress Markers. I was thinking I would like to create a little scene for the back panel of my envelope. I started with a piece of white smooth cardstock and blended some Chipped Sapphire and Black Soot Distress Inks for the night sky. 

Sunny Studio Stamps: Gleeful Reindeer Money Pocket Christmas cards by Lexa Levana.

Next I put all the pieces together.  The magic snow marker is always perfect for a snow effect on the trees. It gives you extra dimension, so puffy and cute. I also created falling snow with a white gel pen. It's super easy, quick and adorable. Here's a closer look at today's project.

Sunny Studio Stamps: Gleeful Reindeer Money Pocket Christmas cards by Lexa Levana.

I hope you all like it.  Thank you so much for stopping by today. Have a wonderful day! 

Sunny Studio Supplies Used:


Thursday, December 1, 2016

Blissful Baking Sweet Birthday Wishes Card by Vanessa

Hello everyone!  Vanessa here with a short break from Christmas cards! I used Blissful Baking to create a sweet Birthday card.

Sunny Studio Stamps: Blissful Baking Sweet Birthday Wishes card by Vanessa Menhorn.

I first stamped the images onto a piece of cardstock, colored them with Copics and die-cut them with the matching dies. Then I adhered the bowl, egg, spoon, butter and glove onto the front of my card. I covered the card with vellum and adhered the pie, the topping and the pipe with foam tape. Now I inked a piece of cardstock with pink ink, die-cut the sweet word from it, backed it with another piece die-cut from fun foam and adhered it. I stamped the sentiment onto a strip of aqua cardstock, trimmed it and adhered it underneath the large word. Finally, I added clear sequins.

Sunny Studio Stamps: Blissful Baking Sweet Birthday Wishes card by Vanessa Menhorn.

The smiling face on the pipe is from the Summer Picnic set. I love adding some personality to the cute images :)

Thank you for stopping by today!

Vanessa

Wednesday, November 30, 2016

Gift Tags with Lindsey Using Christmas Icons & Tag Topper Dies

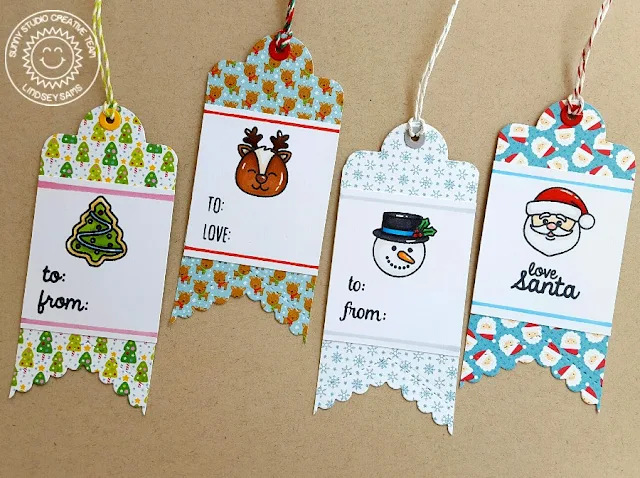
Hi, Lindsey here today sharing a tag set I made using the fun Christmas Icons stamp set, crescent tag topper, and fishtail banner II dies. This set is perfect for tag making, and I was able to whip these little cuties up pretty quickly. Let's see how!


To begin, I selected some coordinating patterned paper to create my tag base from. I used the tag topper die and the fishtail banner to create the tag shape. Then I cut some white card stock strips to go across the middle of each tag. That is where I did my stamping. I selected the images and "to/from" that I wanted to use on each tag and stamped them out. I colored all the images using Copic markers. I also used Copic markers to draw a line at the top and bottom of each white piece of card stock. This added some interest and helped pull the colors together. I attached the stamped panel to each tag using some regular adhesive and added a color coordinated reinforcer to the hole in each tag. To finish these tags off, I added some matching twine.


That's it for me today. I appreciate you checking out my project and hope you will try some tags yourself. You can't go wrong with this set because it just makes the tag making process so easy with everything you need in one set. Have a great day!

Sunny Studio Supplies Used:
      

Tuesday, November 29, 2016

Merry Sentiments and Festive Friends with Emily

Sunny Studio Stamps: Merry Sentiments & Sending My Love Cat & Dog Christmas Card by Emily Leiphart.

Hi, everyone! Today, I'm sharing a card using the Merry Sentiments mini stamp set. I created a two-line sentiment to frame this festive couple from Sending My Love. After heat embossing and watercolouring with distress inks, I fussy cut the animal heads, bodies and their gifts. The heads and gifts are popped up with foam tape.


Sunny Studio Stamps: Merry Sentiments & Sending My Love Cat & Dog Christmas Card by Emily Leiphart.

The sentiments were first heat embossed on watercolour cardstock. Then I gave a two-colour wash with a large, flat brush, and added bright yellow and black splatter.  I die cut several snowflakes from Santa's Helpers Dies and strategically adhered them to cover up some smudges at the top of the card.


Sunny Studio Stamps: Merry Sentiments & Sending My Love Cat & Dog Christmas Card by Emily Leiphart.

Thanks so much for stopping by!

Sunny Studio Supplies Used:


Convoy of Hope Fundraiser Update

I just wanted to pop in and let you know the results of our fundraising efforts.  With your generous support of our company over the past 5 days I was able to donate $1725 to Convoy of Hope's Feed The World Fund!  It's such a good feeling knowing that together we are helping to feed so people.


For anyone looking for a last minute tax deduction this year, they are a great organization to support. Now through December 31st someone out there has generously offered to match dollar for dollar up to $1 million which is pretty amazing.  

Thanks again for helping make our fundraiser a huge success.