The holidays are about family, kindness, and joy. However, during this time many of the elderly who live in nursing homes feel lonely. Wouldn’t it be great if we brought a smile to their face and brightened their holiday season simply by sharing our love of cardmaking? Please join crafters around the world for the 7th annual Caring Hearts Card Drive. Last year we collected over 22,000 cards and distributed them to over 100 nursing homes throughout the world. And we hope to collect even more this year!
Please join us. Details for the card drive can be found at: Vera Yates Blog & Jennifer McGuire's Blog. Sunny Studios is proud to be a sponsor… offering a prize to a lucky contributor!
Friday, November 11, 2016
Thursday, November 10, 2016
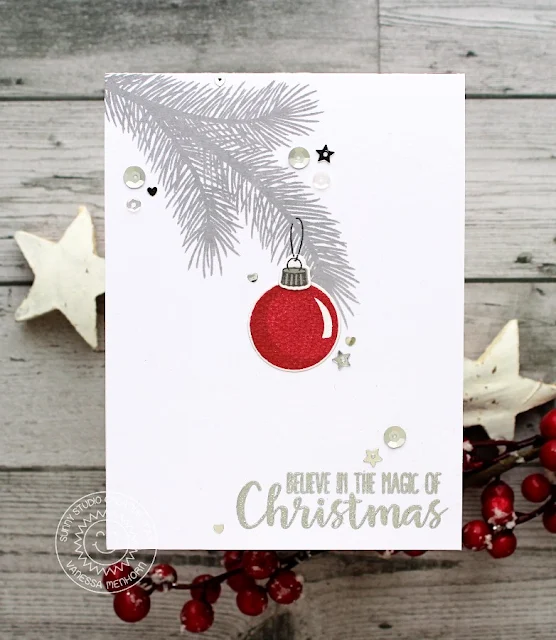
Holiday Style Clean & Simple Classy Christmas Card with Vanessa
Hello everybody! Vanessa here with a non-traditional colored Christmas card using Holiday Style. I experimented with grey, white, red and silver here.
First, I stamped the tree branch onto my white card base. Then I stamped the sentiment and heat-embossed it with silver embossing powder. I stamped the ornament onto a piece of white cardstock and die-cut it with the matching die. After I had adhered it to the card, I stamped the hanging loop and finished the card off with various sequins.
What do you think? Too little color? I wasn't sure if I liked it first, but I like it better now :) Something different for Christmas.
Thanks for stopping by today!
Vanessa
Sunny Studio Supplies Used:
What do you think? Too little color? I wasn't sure if I liked it first, but I like it better now :) Something different for Christmas.
Thanks for stopping by today!
Vanessa
Sunny Studio Supplies Used:
Wednesday, November 9, 2016
Blissful Baking & Little Angels Birthday Card with Lindsey
Hi, Lindsey here today sharing a birthday card combining Blissful Baking and Little Angels. I love mixing and matching all the Sunny Studio Stamps. They just work so well together. Let's get started on how I created this card.
To begin, I cut an A2 size piece of white cardstock. Then, I used a cloud border die to cut another piece of paper and used that as a stencil for my cloud background. I simply placed the cloud piece of paper on the card base and blended distress ink over the top of it onto the white card base. Next, I stamped the images from both Blissful Baking and Little Angels onto white cardstock and colored the images with Copic markers. I used the coordinating dies to cut out each image.
Before placing the images on the card, I stamped my sentiment from Blissful Baking onto the cloud card base. Once the sentiment was stamped, I attached my colored images. I used both regular adhesive and foam tape. Then I used the sprinkle stamp from Blissful Baking to stamp directly onto the cloud background to make it look like the little angel was "sprinkling" the cookies on the plate. Finally, I added some sparkle with my Wink of Stella pen and some pink and clear sequins. In order to make the cloud panel really pop, I mounted it to a pink scalloped rectangle. That's it!
I like how both of these sets can be used for more than just holiday cards. They combined so perfectly for a sweet little birthday card. I hope you will give these sets a try, and I can't wait to see what you guys create! Thanks for reading and have a great day!
Sunny Studio Supplies Used:
Tuesday, November 8, 2016
Little Angel Sends Joy to the World
Today, I'm featuring the Little Angels stamp set and coordinating dies. To start, I created a wreath of poinsettias from the Christmas Icons stamp set. I stamped and fussy cut four of each of the two sizes of poinsettias so I could lay those masks on to the watercolour panel and decide on the position of each flower before stamping.
After watercoloring the poinsettias with distress inks, I set the panel aside and stamped the angel and candle for watercolouring. After the pieces were dry, I used a craft knife to cut slits above and below the angel's hands so I could slide a candle behind it. To finish, I heat embossed the sentiment and adhered the angel with foam tape.
Thanks so much for stopping by!
Sunny Studio Supplies Used:
Monday, November 7, 2016
Fall Challenge Winner Announcement
Hello there! I nearly forgot to post a winner for our Fall blog challenge. Thank you to everyone who played along. I LOVED all the entries and it makes me super sad to narrow it down to just one winner.
The winner of this month's challenge is Stephanie Davis! Here are two of the amazing cards she submitted for the challenge...
Thank you again for joining our challenge. I hope you will join in our November challenge starting next week. :)
The winner of this month's challenge is Stephanie Davis! Here are two of the amazing cards she submitted for the challenge...
Thank you again for joining our challenge. I hope you will join in our November challenge starting next week. :)
Sunny Studio Supplies Used:
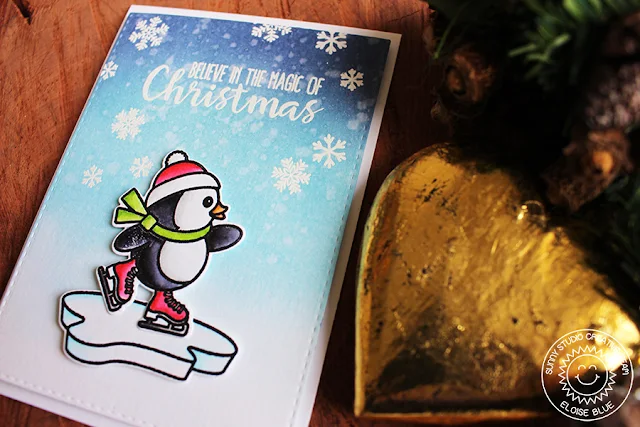
Snow Kissed Skating Penguin Scene by Eloise
Hello everyone! Eloise here and I'm here to share a card using the Snow Kissed stamp set that was previously released. This is a super fun set with three different penguins doing snow related activities. So cute and unique!
To begin my card I stamped, coloured and die cut out my penguin skating and the ice. I used my Zig Clean Color Real Brush Markers for the colouring today, since they're super quick and easy to use. Once they were done I needed a background. I wanted a resist background, so I grabbed a piece of watercolour cardstock and the snowflake stamps from the Snow Kissed stamp set. I also used the large sentiment from the Holiday Style stamp set and stamped that down too. I used Versamark ink along with white embossing powder. Once they were heat set I pulled a few blue Distress Inks and ink blended the background in an ombre style to white, since I wanted that to sort of be like snow.
Once my panel was blended I popped up my penguin and ice on some foam tape and adhered them down. I then used a piece of fun foam and popped my panel up and adhered it down to my card base. To finish it up I used some Wink of Stella on the penguin to give it some sparkle.
Thanks for stopping by today! I hope you enjoyed. Make sure you come back the rest of the week to be inspired more!
- Eloise
Sunny Studio Products Used:
Saturday, November 5, 2016
Guest Designer Spotlight: Christmas Cards with Juliana Michaels
Hi everyone! It's Juliana Michaels and I'm so happy to be a guest with you here again on the Sunny Studio Stamps blog. Today I'm sharing four cards I created using stamps and dies from the recent Sunny Studio Winter Release.
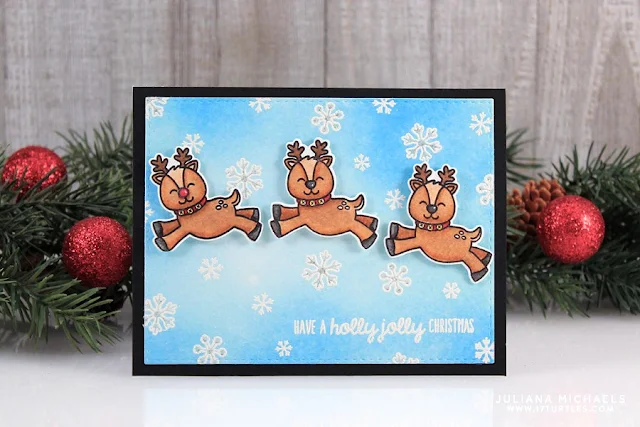
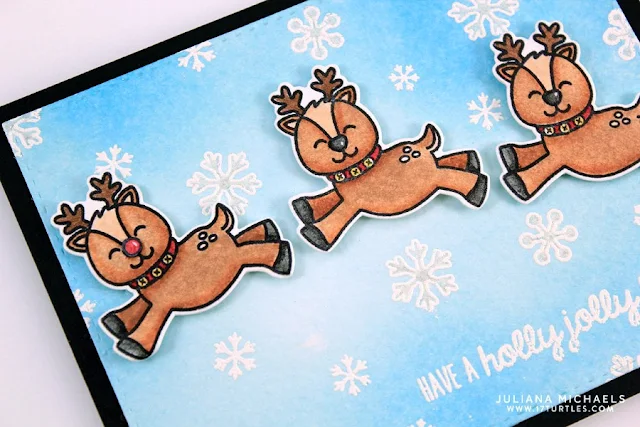
For my first card, I stamped the flying reindeer from the Gleeful Reindeer stamp set onto watercolor paper and die cut them using the coordinating dies. I then colored them with Zig Clean Color Real Brush Markers.
To create the snowy sky background, I stamped the snowflakes and the sentiment onto watercolor paper using Versamark Embossing Ink, sprinkled them with white embossing powder and heat set them with my heat gun. I then used Distress Ink and a foam blending tool to add color. To make the snowflakes a bit sparkly and shiny, I colored them in using a Clear Gelly Roll Stardust Pen.
I used the Gleeful Reindeer stamp set again and those adorable reindeer on my second card. For this card, I randomly stamped the reindeer and presents to create a fun background.
I then colored them with Zig Clean Color Real Brush Markers. The sentiment was then stamped onto red cardstock using Versamark Embossing Ink, sprinkled them with white embossing powder and heat set with my heat gun.
When I first saw this Winter release, I was so excited to see the Mug Hugs stamp set. As a coffee lover, I knew this set was going to be so much fun to create with.
For this card, I stamped the images onto watercolor paper using Versamark Embossing Ink, sprinkled them with white embossing powder and heat set them with my heat gun. I then die cut the shapes using the coordinating die and colored the images in with my Zig Clean Color Real Brush Markers. I then had fun creating a little scene with the mugs, candy cane and cookie.
On my final card, I again used the Mug Hugs set. As you might have noticed, I love to stamp onto watercolor paper using Versamark Embossing Ink and heat emboss the image. This makes coloring with markers so easy, because it helps keep the ink inside the lines.
To create the background on this card, I randomly stamped the stitched heart and the little coffee bean onto a piece of kraft paper. I then layered the die cut pieces and patterned paper and adhered them to the card front. I finished this one off with a bit of jute tied into a bow.
Thanks so much for stopping by today. I really enjoyed this opportunity to share with you here on the Sunny Studio blog. Thanks again Mendi for having me!
Sunny Studio Supplies Used:
Subscribe to:
Posts (Atom)


