Thursday, January 28, 2021

Country Scenes Cards with Vanessa and Anja

Hello to you! Vanessa here with a card using Country Scenes. I love Mendi's various backdrop stamps, they make it easy to create lovely scenes! 

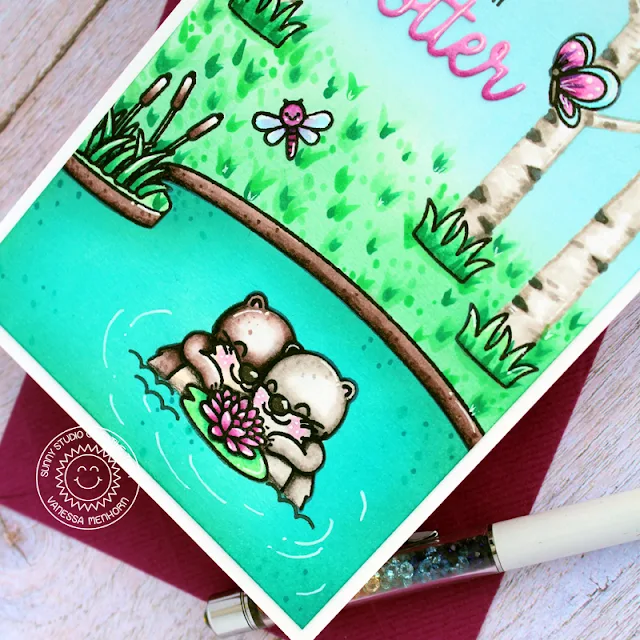
Sunny Studio Stamps: Country Scenes My Otter Half Rustic Winter Everyday Card by Vanessa Menhorn

For today's card I started with a white cardstock panel and stamped the pond border, the grass, the butterfly, the dragonfly and the lotus flower. After I had masked these images, I stamped the otters, covering the bottom half of the stamp to make them float in the water. Then I masked the otters, die-cut the birch trees from masking paper and adhered these to the front, too. I inked the pond with Peacock Feathers and Pine Needles Distress Oxide Inks and the sky and grass with Cracked Pistachio and Tumbled Glass Distress Oxide Inks. After I had removed the masks, I colored everything with Copics. 

Sunny Studio Stamps: Country Scenes My Otter Half Rustic Winter Everyday Card by Vanessa Menhorn

Sets used for this card:
Country Scenes stamps (pond border, lotus flower)
My Otter Half stamps + dies (otters, sentiment, word)
Feeling Froggy stamps (dragonfly)
Garden Fairy stamps (butterfly)
Easter Wishes stamps (grass)
Rustic Winter dies (birch trees)

Finally, I stamped the sentiment, die-cut the "otter" from pink cardstock, adhered everything to the card base and added details with a white gel pen.

Thank you so much for visiting today! Have a lovely day!

---------------------------------------------------

Hello everyone, Anja here and today I'm featuring the versatile Country Scene Stamps. I picked the mountains with the fir tree border and combined them with the fun Plane Awesome set.

Sunny Studio Stamps: Country Scenes Plane Awesome Everyday Card by Anja Bytyqi

The background colors were inspired by a gorgeous winter sunset. On a piece of Bristol cardstock, I blended together the Distress Oxide Inks Chipped Sapphire, Faded Jeans, Stormy Sky, Tattered Rose, Dried Marigold and Crackling Campfire.

Sunny Studio Stamps: Country Scenes Plane Awesome Everyday Card by Anja Bytyqi

I stamped the images in Memento Tuxedo Black Ink and colored them with Copic Markers. The clouds were stamped in Faded Jeans to match the sky background. I used the coordinating dies to cut everything out. The sentiment inside the banner and the larger cut-off cloud are included the Balloon Rides set.

Thank you so much for stopping by! Have an awesome day!

Sunny Studio Supplies Used:

Easter Wishes Dies
Easter Wishes Dies
Shop at:
Sunny Studio
Easter Wishes Stamps
Shop at:
Sunny Studio
Rustic Winter Dies
Rustic Winter Dies
Shop at:
Sunny Studio
Plane Awesome Stamps
Shop at:
Sunny Studio
Plane Awesome Dies
Plane Awesome Dies
Shop at:
Sunny Studio
Balloon Rides Stamps
Shop at:
Sunny Studio
Balloon Rides Dies
Balloon Rides Dies
Shop at:
Sunny Studio
Country Scenes Stamps
Shop at:
Sunny Studio
Country Scenes Dies
Country Scenes Dies
Shop at:
Sunny Studio
Feeling Froggy Stamps
Shop at:
Sunny Studio
Garden Fairy Stamps
Garden Fairy Stamps
Shop at:
Sunny Studio
My Otter Half Stamps
Shop at:
Sunny Studio
My Otter Half Dies
My Otter Half Dies
Shop at:
Sunny Studio

Wednesday, January 27, 2021

Layered Basket Cards and Video Tutorial with Franci and Julia

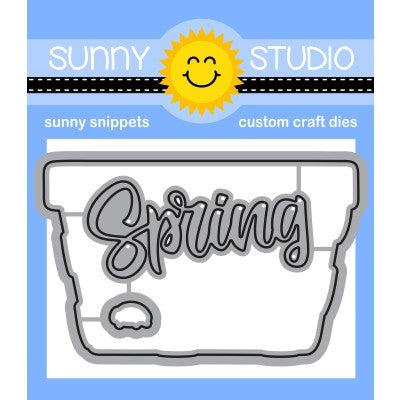
Hello there! Franci here with you today, showcasing the new Layered Basket set.

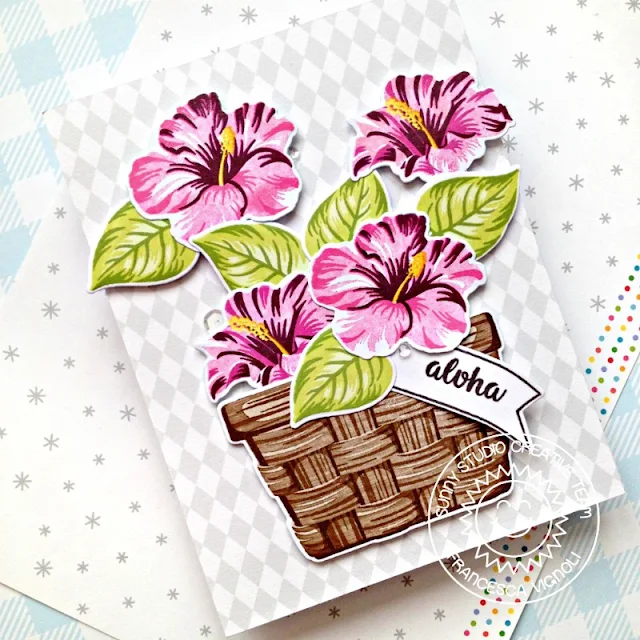
Sunny Studio Stamps: Layered Basket Hawaiian Hibiscus Banner Basics Floral Card by Franci Vignol

First of all I created my card base out of white cardstock and covered the front with this soft grey patterned paper from the Subtle Grey Tones 6x6 paper set.

Then I stamped my basket plus all these lovely flowers and some leaves from the Hawaiian Hibiscus set with various inks from the Memento ink drops family. I also stamped a banner from the Banner Basics set and my sentiment on it.

Sunny Studio Stamps: Layered Basket Hawaiian Hibiscus Banner Basics Floral Card by Franci Vignol

I arranged my elements onto the front of my card and glued everything down with foam adhesive. Finally I added some sequins here and there to finish my design.

As you know layering sets are way out of my comfy zone but I had so much fun creating this card and it was super easy as well. I hope you like it as much as I do and thank you for stopping by today.

-------------------------------------------------

Hello crafty friends! I hope you are doing well! It’s Julia here with a Spring themed card using the gorgeous Layered Basket and Captivating Camellias stamp sets! 

Sunny Studio Stamps: Layered Basket Captivating Camellias Fluffy Clouds Floral Spring Themed Cards by Julia Englich


This was my very first time ever playing with layering stamp sets and I had so much fun! I don’t own a lot of inks (yet ;-)) that can be used for layering, so instead of going out and buying more, I thought I would try using what I have – so Distress Inks to the rescue! Now these are not amazing for stamping, but they sure did the trick for this beautiful basket! All those layers of dimensions made sure that any stamping imperfections weren’t even visible after I was done. So happy that worked out!

Sunny Studio Stamps: Layered Basket Captivating Camellias Fluffy Clouds Floral Spring Themed Cards by Julia Englich

For the sentiment I used the beautiful script word die that comes with the coordinating dies for the Layered Basket as well as the “hello” from the Captivating Camellias stamp set! To the background I also added some white Fluffy Clouds and a grassy hill die cut with the Slimline Nature Borders.

If you would like to see how this card was made, you can watch the video below - or on my YouTube channel, Craft Room Adventures.


Inks used: background: Tumbled Glass and Salty Ocean Distress Oxide Ink; basket: Antique Linen, Tea Dye, Vintage Photo, Walnut Stain Distress Inks; flowers: Altenew Floral 6 Crisp Dye Ink Mini Cube Set. 

Thank you so much for stopping by! Wishing you a wonderful day!

Sunny Studio Supplies Used:

Fluffy Clouds Dies
Fluffy Clouds Dies
Shop at:
Sunny Studio
Hawaiian Hibiscus Stamps
Shop at:
Sunny Studio
Hawaiian Hibiscus  Dies
Hawaiian Hibiscus Dies
Shop at:
Sunny Studio
Subtle Grey Tones Paper
Shop at:
Sunny Studio
Banner Basics Stamps
Shop at:
Sunny Studio
Banner Basics Dies
Banner Basics Dies
Shop at:
Sunny Studio
Slimline Nature Borders
Shop at:
Sunny Studio
Captivating Camellias Stamps
Shop at:
Sunny Studio
Captivating Camellias Dies
Shop at:
Sunny Studio
Layered Basket Stamps
Shop at:
Sunny Studio
Layered Basket Dies
Layered Basket Dies
Shop at:
Sunny Studio

Tuesday, January 26, 2021

Scalloped Circle Mat Die Focused Cards with Isha and Kavya

Hello everyone! Isha here with you and today I am sharing a CAS one layer card featuring the Scalloped Circle Mat 1 dies and Scalloped Circle Mat 3 dies. I used these dies to create the flowers and am really loving them :)

Sunny Studio Stamps: Scalloped Circle Mat Dies Slimline Dies Everyday Card by Isha Gupta

To start, I die-cut the smallest and 2nd. of the smallest dies from the Scalloped Circle Mat 1 dies three times using watercolor paper. Die-cut the smallest die from the Scalloped Circle Mat 3 dies using watercolor paper. Add distress inks as watercolor to make three flowers in pink, orange and yellow colors. Let these dry and create the flowers by adhering each layer using 3D foam. 

Watercolor another piece of watercolor cardstock using green distress inks. Stamp the leaves from Pink Peonies stamps. Die-cut using the coordinating diesDie-cut the biggest of the scallop circle using the Scalloped Circle Mat 3 dies. Now using the Stitched Circle large die, die-cut this scalloped circle die-cut to create a frame. 

Sunny Studio Stamps: Scalloped Circle Mat Dies Slimline Dies Everyday Card by Isha Gupta

Adhere the frame to the cardbase using 3D foam. Adhere the flowers and the leaves. Flick some gold ink and let dry. Die-cut the word HELLO from the Slimline Scalloped Frame die. Add clear ink and sprinkle WOW! Gold metallic embossing powder. Emboss. Assemble the card as per the photo. To finish, adhere some of the Rainbow Pearls.

Thank you for dropping by and have a nice day!

--------------------------------------------

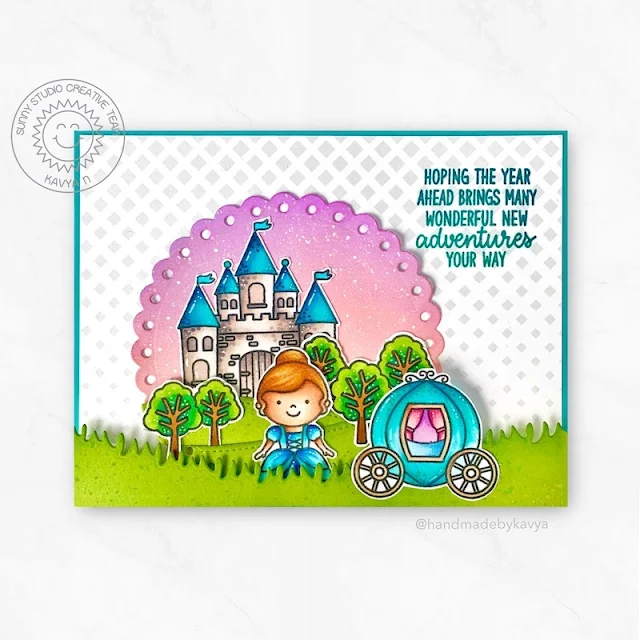
Hi everyone, Kavya here. Today’s card was inspired by a sentiment from the new Inside Greetings Birthday stamp set. I knew I had to make a fairy tale themed card using my favorite stamp set - Enchanted! Here is how I made this card.

Sunny Studio Stamps: Scalloped Circle Mat Dies Enchanted Country Scenes Everyday Card by Kavya

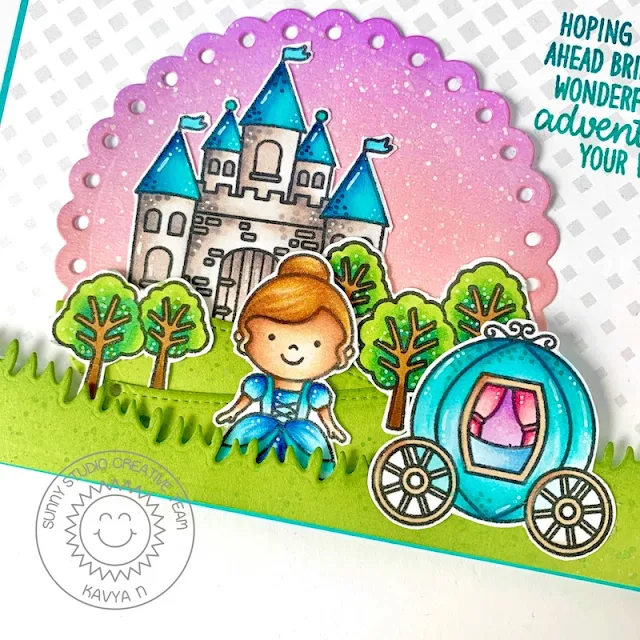
I first started off by using a pattern paper from Subtle Grey Tones set and matting it on blue cardstock. I used Scalloped Circle Mat 2 to create a focal point. I ink blended the die cut circle using shades of purple and pink dye ink. I then die cut the grass and land using Slimline Nature Borders dies and green cardstock. 

Sunny Studio Stamps: Scalloped Circle Mat Dies Enchanted Country Scenes Everyday Card by Kavya

Later, I stamped images from Enchanted and Country Scene stamp sets and colored using alcohol ink markers and colored pencils. Finally, I stamped the sentiment that caught my eye from Inside Greetings Birthday stamp set using blue dye ink. 

I hope you liked this card! Thanks for stopping by!

Sunny Studio Supplies Used:

Subtle Grey Tones Paper
Shop at:
Sunny Studio
Enchanted Stamps
Enchanted Stamps
Shop at:
Sunny Studio
Enchanted Dies
Enchanted Dies
Shop at:
Sunny Studio
Slimline Nature Borders
Shop at:
Sunny Studio
Slimline Scalloped Frame
Shop at:
Sunny Studio
Country Scenes Stamps
Shop at:
Sunny Studio
Country Scenes Dies
Country Scenes Dies
Shop at:
Sunny Studio
Inside Greetings Birthday
Shop at:
Sunny Studio
Scalloped Circle Mat 1 Dies
Shop at:
Sunny Studio
Scalloped Circle Mat 2 Dies
Shop at:
Sunny Studio
Scalloped Circle Mat 3 Dies
Shop at:
Sunny Studio
Stitched Circle Large Dies
Shop at:
Sunny Studio

Monday, January 25, 2021

Meow & Furever Cards with Ashley and Mayra

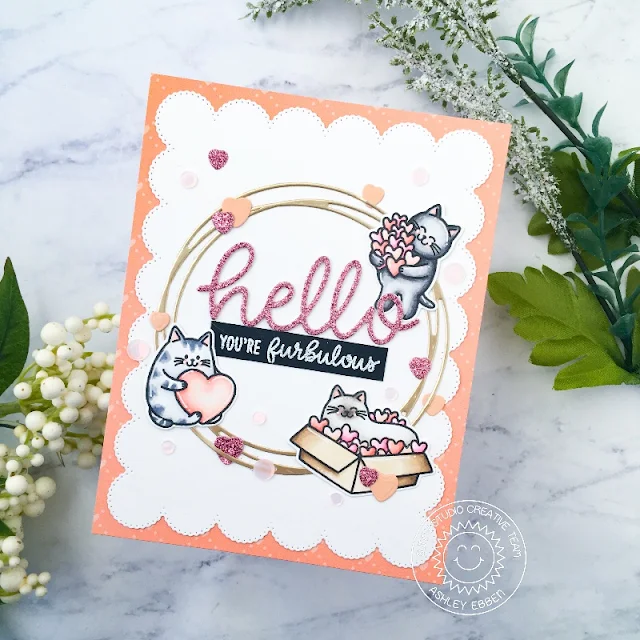
Hi friends! It's Ashley with a card featuring the Meow & Furever set! This set is purrfect for Valentine's Day cards, but I don't send a lot of those so I wanted to make a card that would be good for any time as well. I kept lots of hearts along with a pink and peach color scheme for Valentine's but used a more neutral sentiment for every day. Now I think this card would be good all year!

Sunny Studio Stamps: Meow & Furever Snowflake Circle Dies Frilly Frame Dies Cat Themed Card by Ashley Ebben

I started by cutting a piece of white cardstock with the frame from Frilly Frames Eyelet Lace dies for a pretty scalloped edge. I added this to a piece of peach quilted heart paper from the Flirty Flowers paper pack for a pretty background. I cut the circle frame from the Snowflake Circle Frame dies from metallic gold paper and added it to the center of the card.

I stamped the cats from Meow & Furever in Lawn Fawn Jet Black ink onto white cardstock and colored with Copics. I just had to use the cat in a box! My cat is definitely one of those "if I fits, I sits" cats and it reminded me of him. I cut the cats out with the matching dies and adhered them to my card around the circle frame.

Sunny Studio Stamps: Meow & Furever Snowflake Circle Dies Frilly Frame Dies Cat Themed Card by Ashley Ebben

I cut the Hello Word die twice from white cardstock and once from glittery pink cardstock and layered them together for a dimensional word. I added this to my card, then I stamped a sentiment from Meow & Furever in Versamark ink onto black cardstock and embossed with white. I added this strip below the large "hello" to finish the sentiment. I used some of the heart shaped dies from Meow & Furever as stand alone dies on the glittery pink cardstock and some peach cardstock to make matching embellishments. I scattered them around the circle, tucking a few underneath the frame. I finished with a scattering of soft pink confetti extra shine.

Thank you so much for stopping by! Have a wonderful day.

----------------------------------------------------

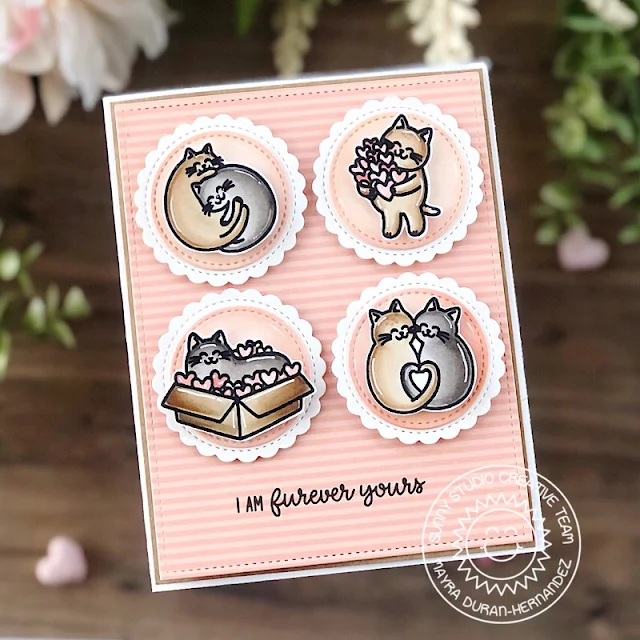
Happy Monday everyone. Mayra here with you today. I am always so happy to be here on the blog. I used the very cute new Meow & Furever stamp set. These little cats are adorable. 

Sunny Studio Stamps: Meow & Furever Stitched Circle Dies Cat Themed Card by Mayra Duran-Hernandez

I began by coloring my images using Copic markers. I used E41, E31, E55, and a bit of E35 for the tan-colored kitty. For the dark gray, I used W1, W3, W5, and W7. Next, I die cut a stitched rectangle using the Frilly Frames Quatrefoil die and from the Dots & Stripes Pastels paper set. 

Sunny Studio Stamps: Meow & Furever Stitched Circle Dies Cat Themed Card by Mayra Duran-Hernandez

Next, I used the Stitched Circles Large and the Scalloped Circle Mat 1 dies sets to create the small scalloped circles for each of the colored cat images. I added a bit of color to the stitched circles using Gina K. Ink Cube-Innocent Pink, and Peach Fuzz from the Indian Summer set Cubes by PinkFresh Studio Ink. 

I hope you enjoy this card I created to share with you. Thank you very much for taking the time to stop by. I hope you each have a wonderful and blessed day.

Sunny Studio Supplies Used: 

Hello Word Die
Hello Word Die
Shop at:
Sunny Studio
Flirty Flowers 6x6 Paper
Shop at:
Sunny Studio
Dots & Stripes Pastels 6x6 Paper
Shop at:
Sunny Studio
Snowflake Circle Frame
Shop at:
Sunny Studio
Frilly Frames-Eyelet Lace
Shop at:
Sunny Studio
Frilly Frames Quatrefoil
Shop at:
Sunny Studio
Meow & Furever Stamps
Shop at:
Sunny Studio
Meow & Furever Dies
Meow & Furever Dies
Shop at:
Sunny Studio
Scalloped Circle Mat 1 Dies
Shop at:
Sunny Studio
Stitched Circle Large Dies
Shop at:
Sunny Studio