Showing posts with label Sunshine Word Die. Show all posts

Monday, September 2, 2019

Sunflower Fields Cards with Eloise and Leanne

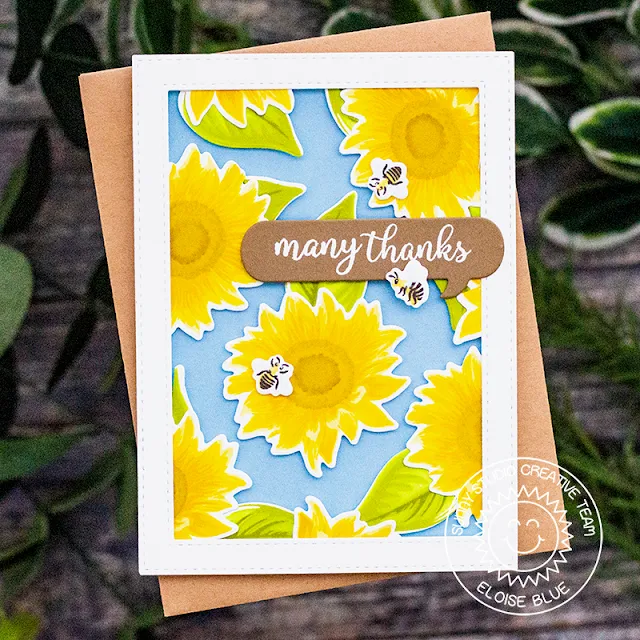
Hi everyone, Eloise here and today I’ll be using the Sunflower Fields Stamp Set to create a thank you card.

Sunny Studio Stamps: Sunflower Fields Comic Strip Speech Bubbles Dies Thank You Card with Eloise Blue

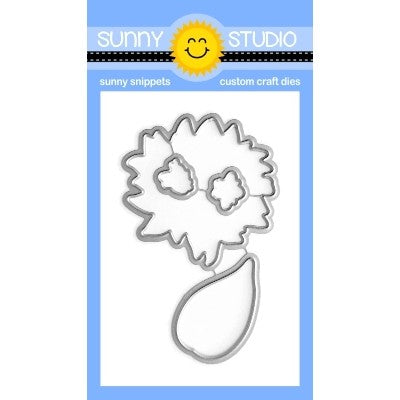
I started off with stamping out the images from the Sunflower Fields Stamp Set. I used various dye inks for each image. I stamped 7 flowers, 7 leaves and 3 bees. Once they were stamped, I cut them out. While I was die-cutting I also die cut out a white frame and also a Kraft coloured speech bubble from the Comic Strip Speech Bubble Dies.

Sunny Studio Stamps: Sunflower Fields Comic Strip Speech Bubbles Dies Thank You Card with Eloise Blue

I added foam tape onto the backs of all my images and adhered them onto a piece of blue cardstock. I then adhered the white frame around the piece as well.

Sunny Studio Stamps: Sunflower Fields Comic Strip Speech Bubbles Dies Thank You Card with Eloise Blue

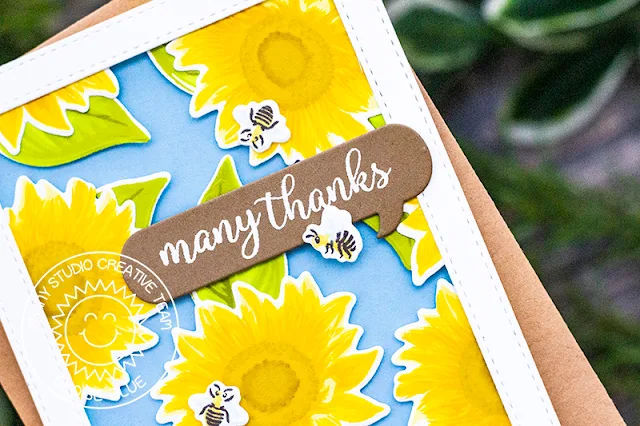
For my sentiment, I white heat embossed the ‘Many Thanks’ from Sunflower Fields onto the speech bubble I die cut earlier. I added more foam tape on to the back and adhered it down onto my panel. I then adhered the bees around it.

Thanks for stopping by today and I’ll see you next time.

------------------------------------------------------

Hi Friends! Leanne here and I have a slimline card to share today that is sure to brighten anyone's day, thanks to some beautiful images from the Sunflower Fields stamp set.

Sunny Studio Stamps: Sunflower Fields Sunny Sentiments Sunshine Word Die Everyday Card by Leanne West

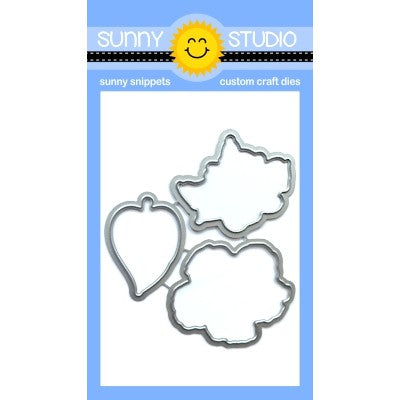
My slimline Kraft card base measures 8.5" long by 3.5" wide. I created an ink blended background panel using Peacock Feathers Distress Ink. I splattered the panel generously with thinned white and brown paint to give it a little more interest. I stamped out 3 sunflowers and several leaves from Sunflower FieldsI die cut with the coordinating Sunflower Fields dies and then arranged the images across the length of the background.  

Sunny Studio Stamps: Sunflower Fields Sunny Sentiments Sunshine Word Die Everyday Card by Leanne West

Next I created a custom greeting to layer over the sunflowers. The stamped part, which is white heat embossed on dark brown card stock, is from the Sunny Sentiments set. I then added the die cut Sunshine Word to complete the greeting. Lastly I added a few stamped bees, also from Sunflower Fields, and some white Nuvo Crystal drops. 

Sunny Studio Supplies Used:

Sunny Sentiments Stamps
Shop at:
Sunny Studio
Sunshine Word Die
Sunshine Word Die
Shop at:
Sunny Studio
Sunflower Fields Stamps
Shop at:
Sunny Studio
Sunflower Fields Dies
Shop at:
Sunny Studio
Comic Strip Speech Bubble Dies
Shop at:
Sunny Studio

Wednesday, June 12, 2019

Hawaiian Hibiscus Cards with Mona and Franci

Hi crafty friends! It's Mona here, today I am showing you a bright floral card featuring the Hawaiian Hibiscus stamp set. I love this stamp set so much and I wanted to create a vintage card with it.

Sunny Studio Stamps: Hawaiian Hibiscus Sunshine Word Die Frilly Frames Dies Hello Cards by Mona Toth and Franci Vignoli

This time I started the card making with stamp layering. For the stamping I used Hybrid Inks from Scrapbook.com and green colored mini ink cubes from Altenew. For the leaves I used the Bamboo,  Parrot and Shadow Creek colors. For the Flowers I used many colors and I mixed and matched them from the lightest to darkest. (For the flowers I used the following colors: Yellow 1, 3; Violet 2, 3, 4; Rise 2,3,4; Pink 2; Blue 1,4.) When the layering was done I Die-cut the images with the coordinating dies.

Sunny Studio Stamps: Hawaiian Hibiscus Sunshine Word Die Frilly Frames Dies Hello Cards by Mona Toth and Franci Vignoli

The next step was the background. I made a die-cut with the Frilly Frames Stripes Dies from a light teal cardstock and adhered to the card base. When it was done, I die-cut the Sunshine sentiment with the Sunshine Word Die and I adhered it to the card base.

Sunny Studio Stamps: Hawaiian Hibiscus Sunshine Word Die Frilly Frames Dies Hello Cards by Mona Toth and Franci Vignoli

In the end I stamped the "Aloha" sentiment to my card and embellished the card with tiny Hearts confetti and it was done. Thank you very much for reading through my post, I hope that you have enjoyed it and I have inspired you! If you like my creations let's be friends on Instagram. :)

----------------------------------------------------

Hi there! Franci here with you today, showcasing the Hawaiian Hibiscus set.

Sunny Studio Stamps: Hawaiian Hibiscus Sunshine Word Die Frilly Frames Dies Hello Cards by Mona Toth and Franci Vignoli

This set is amazing!! I have a love/hate relationship with layering sets cause they can be tricky to align and solid images are not super easy for me to stamp, but this set is no trouble and all the joy!! These flowers are the easiest images to align ever and every layer is amazing, the final effect is so beautiful! So if you are a little bit scared, I say ... get this set and you'll love it!

Sunny Studio Stamps: Hawaiian Hibiscus Sunshine Word Die Frilly Frames Dies Hello Cards by Mona Toth and Franci Vignoli

Back to my project. First of all I created my white card base as usual, then I created my background by Sponging Distress inks on to a stripes stencil. You can easily masked the front of the card with some thin strips of masking paper and ink on top to achieve the same pattern :)

I let it dry and then added some little spatters of dark blue and rose gold watercolors with a fine tip brush. I stamped my Hibiscus flowers and the leaves using a combo of Lawn Fawn inks and Memento Drops inks. I die cut all the images with their coordinated dies and glued them down with foam adhesive.

Sunny Studio Stamps: Hawaiian Hibiscus Sunshine Word Die Frilly Frames Dies Hello Cards by Mona Toth and Franci Vignoli

Finally I added some sparkle clear sequins and stamped my sentiment. I'm so happy with this clean and simple card, it makes me dream about beautiful beaches and the lovely time of summer vacations!

Hope you like it too and thank you so much for stopping by today!

Sunny Studio Supplies Used:

Sunshine Word Die
Sunshine Word Die
Shop at:
Sunny Studio
Frilly Frames Stripes Die
Shop at:
Sunny Studio
Hawaiian Hibiscus Stamps
Shop at:
Sunny Studio
Hawaiian Hibiscus  Dies
Hawaiian Hibiscus Dies
Shop at:
Sunny Studio

Thursday, April 18, 2019

Coastal Cuties Cards with Anja and Vanessa

Hi everyone, Anja here and I'm delighted to share my first card using some of the new Summer Release products. Today I'm showcasing the Coastal Cuties Stamps. The two girls included in this set are having so much fun in the sun!

Sunny Studio Stamps: Coastal Cuties Fancy Frames Sending Sunshine Sunshine Word Die Summer Themed Cards by Anja Bytyqi and Vanessa Menhorn

I created a square card and die cut the yellow sunburst paper from the Spring Sunburst 6x6 paper pack for my cheering background. For the water, I pulled out some Alcohol Inks in aqua and blue tones and die cut the Yupo paper with a circle die. Next, I die cut one of the Fancy Frame Circle Dies from white cardstock and adhered it on top of my Alcohol Ink circle.

Sunny Studio Stamps: Coastal Cuties Fancy Frames Sending Sunshine Sunshine Word Die Summer Themed Cards by Anja Bytyqi and Vanessa Menhorn

I stamped the girls as well as the palm tree (from the new Sending Sunshine set), island image (Island Getaway Stamps) and crab (Oceans of Joy Stamps) in Memento Tuxedo Black Ink and colored them with Copic Markers. I covered the girl's floating ring with Glossy Accents for some extra shine.

For the sentiment, I combined the gold heat embossed word "Sending" and the Sunshine Word Die which I die cut from golden glitter cardstock. To finish off my summer card, I adhered three aqua jewels to the water.

Thank you so much for stopping by! Hope to see you again next Thursday!

------------------------------------------------------

Hello everybody! Vanessa here with a summer card using the new Coastal Cuties set. For today's project I wanted to create the look of a swimming pool, so I took out my watercolors.

Sunny Studio Stamps: Coastal Cuties Fancy Frames Sending Sunshine Sunshine Word Die Summer Themed Cards by Anja Bytyqi and Vanessa Menhorn

To achieve this, I first masked off a rectangle on a panel of watercolor paper. Then I drew the lines with a masking fluid pen. After the blue watercolors were dried, I removed the masking fluid and the tape and adhered the panel to the card base.

Sunny Studio Stamps: Coastal Cuties Fancy Frames Sending Sunshine Sunshine Word Die Summer Themed Cards by Anja Bytyqi and Vanessa Menhorn

Now I stamped the girl onto white cardstock, colored her with Copics, die-cut the image with the matching die and adhered it to the card. Finally, I stamped the sentiment and the water splashes and colored these with Copics.

This new release is amazing again, don't you agree? Love every single bit of it! Hope to see you next week for more inspiration using the new products!

Sunny Studio Supplies Used:

Island Getaway Dies
Island Getaway Dies
Shop at:
Sunny Studio
Island Getaway Stamps
Shop at:
Sunny Studio
Oceans of Joy Dies
Oceans of Joy Dies
Shop at:
Sunny Studio
Oceans of Joy Stamps
Shop at:
Sunny Studio
Sunshine Word Die
Sunshine Word Die
Shop at:
Sunny Studio
Fancy Frames-Circle Dies
Shop at:
Sunny Studio
Spring Sunburst 6x6 Paper
Shop at:
Sunny Studio
Coastal Cuties Stamps
Shop at:
Sunny Studio
Coastal Cuties Dies
Coastal Cuties Dies
Shop at:
Sunny Studio
Sending Sunshine Stamps
Shop at:
Sunny Studio
Sending Sunshine Dies
Shop at:
Sunny Studio

Thursday, July 13, 2017

Sun Ray Dies and Sunny Sentiments Sunshine Card Duo with Lynn Put

I'm so excited to welcome Lynn Put to the blog today as our special guest. She has some gorgeous cards that you are going to just love! 

Hi there! I'm honored to be a guest designer and happy to be sharing some cards that I created using some fun Sunny Studio Stamps and dies! 

I created two cards using the adorable Sunny Studio's stamp set Sunny Sentiments along with the coordinating Sunshine Word Die and Sun Ray Die sets.

Sunny Studio Stamps: Sun Ray Dies and Sunny Sentiments Sunshine Card Duo by Lynn Put

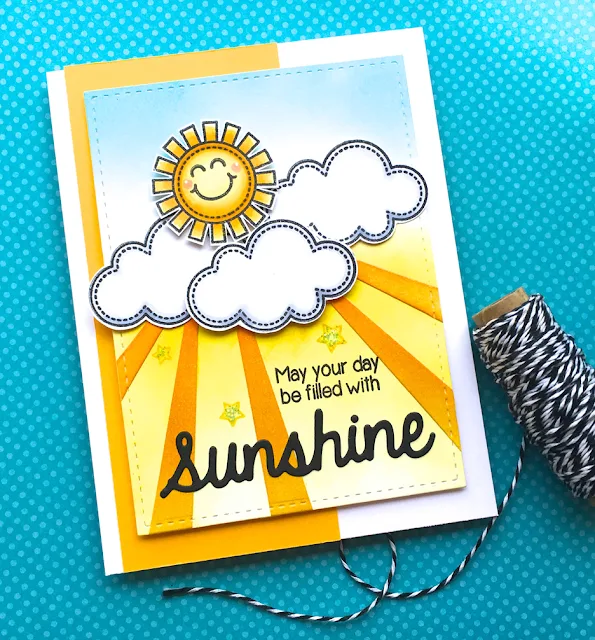
For my first card, I stamped one of the cute sunshine images from the set along with three of the cloud images onto white cardstock and colored them using Copic markers and then cut them out. Next I did some ink blending onto a panel of white cardstock using tumbled glass, mustard seed and spiced marmalade distress inks. 

Sunny Studio Stamps: Sun Ray Dies and Sunny Sentiments Sunshine Card Duo by Lynn Put

After that, I blended the same yellow distress inks onto a piece of yellow cardstock and used the Sun Ray Die to die cut them out. I adhere my die cut sun rays onto my ink blended panel, making sure to leave room for my stamped sentiment. I added my clouds and sunshine images next, popping up the sun and one of the clouds using foam tape and then stamped my sentiment along with three yellow stars. 

Sunny Studio Stamps: Sun Ray Dies and Sunny Sentiments Sunshine Card Duo by Lynn Put

I used the Sunshine Word Die and die cut that from black cardstock and adhered that below my stamped sentiment. I added a vertical strip of yellow cardstock to a white card base and added my decorated cardstock panel using foam tape. As a final touch, I used some icicle Stickles to the three stamped stars and some Wink of Stella glitter pen to my sun rays.

Sunny Studio Stamps: Sun Ray Dies and Sunny Sentiments Sunshine Card Duo by Lynn Put

For my second card, I used a piece of watercolor paper and watercolored some yellow and orange for the area I knew I wanted my sunshine and some grays and dots of aqua for where I wanted my clouds and rain drops. I stamped the same sunshine and cloud images on to white cardstock again, coloring them with Copic markers and cutting them out. Then on a scrap piece of paper, I die cut one of the sun rays using the Sun Ray Dies and used it as a stencil, using mustard seed and marmalade distress inks, over the area I knew I was going to place my stamped sunshine image.  

Sunny Studio Stamps: Sun Ray Dies and Sunny Sentiments Sunshine Card Duo by Lynn Put

Next I used the same yellow distress inks onto a piece of yellow cardstock and die cut my Sunshine Word and adhered it to my panel, then stamped my sentiment and rain drops and adhered my clouds and sunshine, popping up the sun and one cloud with foam tape. I used a white card base with a strip of yellow cardstock along the bottom and adhered my panel using foam tape. For some added detail, I used some Glossy Accents on the rain drops and did dots of yellow Stickles on the sun rays.

Sunny Studio Supplies Used:

Sun Ray Dies
Sun Ray Dies
Shop at:
Sunny Studio
Sunny Sentiments Stamps
Shop at:
Sunny Studio
Sunshine Word Die
Sunshine Word Die
Shop at:
Sunny Studio

Friday, May 27, 2016

Island Getaway Sushine Card with Lexa

Hello everyone!  Lexa here with a bright summer-y card showcasing the Island Getaway stamp set and coordinating dies. You already know that coordinating dies surely make your life easier, right? :)

Sunny Studio Stamps: Palm Tree, Hibiscus Flower and Flip Flops card by Lexa Levana (using Tropical Paradise, Island Getaway and Sunshine Word die)

I chose to use all bright colors for this one.  It reminds me of one hot sunny day... it's just me and my flip flops walking under the trees' shade. Did you just smile imagining that? Or is it just me? Hehe. First I cut my pink panel to 2.25" x 5.5" and created a tone-on-tone background by stamping some hibiscus images with Hero Arts Pale Tomato. The bigger hibiscus are from Tropical Paradise stamps, while the smaller one (and the leaves) are from Island Getaway. They matched perfectly!

The circle diecut is blended with some Squeezed Lemonade and Wild Honey Distress Inks on the edges. I die-cut the Sunshine Word Die four times and layered them together to get some dimension. All the images are stamped with Versafine Onyx Black and watercolored with Distress Markers. I also cut a strip of burlap to add an extra fun texture for this card. Last but not least I added my favorite clear sequins from Pretty Pink Posh.

Sunny Studio Stamps: Palm Tree, Hibiscus Flower and Flip Flops card by Lexa Levana (using Tropical Paradise, Island Getaway and Sunshine Word die)

I hope you like today's card. Have a great weekend to you all!