Showing posts with label Forest Trees Stencils. Show all posts

Saturday, December 3, 2022

Sunny Saturday Shares: Winter Holiday Customer Cards


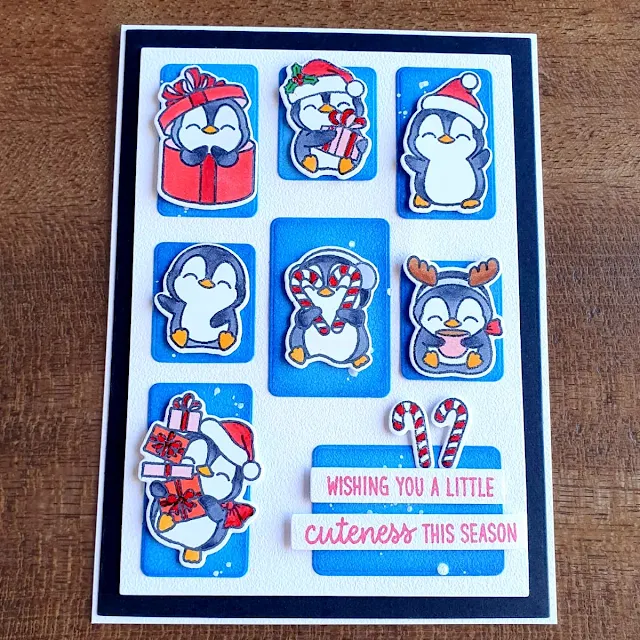
Hey everyone, how are you all doing this weekend? I'm so excited to be popping in today with a Sunny Saturday Share. There have been so many amazing cards popping up on Instagram that have made my jaw drop so I couldn't wait to share them with all of you! 


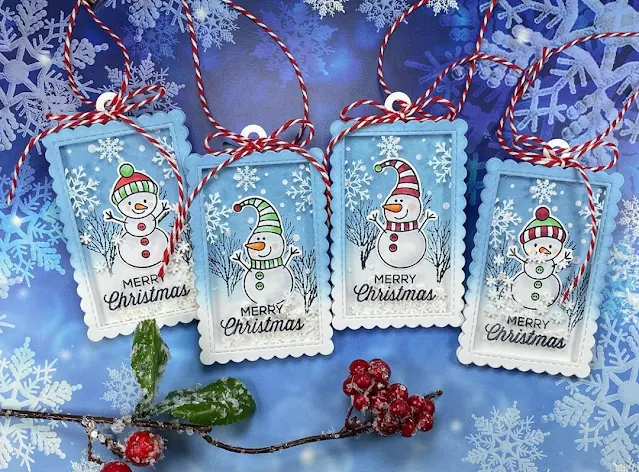
Sunny Studio Stamps: Snowman Kisses Holiday Card by Katis Deko Eck

Thank you for sharing all these fabulous ideas with us! I hope you will continue to share your gorgeous projects with us--It always makes my day to see them. You can tag us on instagram with the hashtag #sunnystudiostamps or share your projects with us in our flickr group or on our facebook page. ☺


Sunny Studio Supplies Used:

Holiday Express Stamps
Shop at:
Sunny Studio
Holiday Express Dies
Shop at:
Sunny Studio
Feeling Frosty Stamps
Shop at:
Sunny Studio
Feeling Frosty Dies
Feeling Frosty Dies
Shop at:
Sunny Studio
Scenic Route Stamps
Scenic Route Stamps
Shop at:
Sunny Studio
Scenic Route Dies
Scenic Route Dies
Shop at:
Sunny Studio
Hogs & Kisses Stamps
Shop at:
Sunny Studio
Hogs & Kisses Dies
Hogs & Kisses Dies
Shop at:
Sunny Studio
Forest Trees Stencils
Shop at:
Sunny Studio
Ocean View Stamps
Ocean View Stamps
Shop at:
Sunny Studio
Ocean View Dies
Ocean View Dies
Shop at:
Sunny Studio
Cozy Christmas Stamps
Shop at:
Sunny Studio
Cozy Christmas Dies
Cozy Christmas Dies
Shop at:
Sunny Studio
Penguin Party Stamps
Shop at:
Sunny Studio
Penguin Party Dies
Penguin Party Dies
Shop at:
Sunny Studio
Snowman Kisses Stamps
Shop at:
Sunny Studio
Snowman Kisses Dies
Snowman Kisses Dies
Shop at:
Sunny Studio
Snow One Like You Stamps
Shop at:
Sunny Studio
Snow One Like You Dies
Shop at:
Sunny Studio

Friday, November 11, 2022

Snowman Kisses Cards with Vanessa and Tina

Hello to you! Vanessa here with a fun winter card using the adorable Snowman Kisses set.

Sunny Studio Stamps: Snowman Kisses Winter Themed Holiday Card by Vanessa Menhorn (featuring Scenic Route, Comic Strip Speech Bubble Dies)

I die-cut the Comic Strip Speech Bubble Dies from white cardstock and inked the inside parts with Dried Marigold and Salvaged Patina Distress Oxide inks. Now I stamped all my images, colored everything with Copics and die-cut the pieces with the matching dies. Then I adhered the Scenic Route images to the little squares and rectangles, trimmed them and adhered these to the card base. 

Sunny Studio Stamps: Snowman Kisses Winter Themed Holiday Card by Vanessa Menhorn (featuring Scenic Route, Comic Strip Speech Bubble Dies)

I adhered the snowmen with foam tape and added the cute banner from Balloon Rides. Finally, I added snow with a white gel pen.

Have a happy weekend, everybody! 

--------------------------------------------

Hello crafty friends, Tina here with an ornament shaped Christmas card featuring the new Snowman Kisses stamp and die set!  How adorable is this set, and perfect for your holiday projects!

Sunny Studio Stamps: Snowman Kisses Winter Themed Holiday Card by Tina (featuring Forest Tree Stencils)

To create this ornament card, I used shaped dies from my stash. But it works just as great with two nesting circle dies. The biggest die creates our panel and our card base, while the two dies together cut a circular frame. I also had an ornament topper die, but you can add a small rectangle piece as well.

The sky portion of the circular panel was inked with Distress Oxide Saltwater Taffy and I splattered it with white paint droplets to give the illusion of snowflakes. Once this was dry, I stamped the sentiment from the Snowman Kisses stamp set directly onto the panel.

Next, I used Salvaged Patina on the layers of the Forest Trees stencil and fussy cut these tree borders from some Neenah card stock. As extra dimension, I also created two snowbanks from the same Neenah paper.

For a ‘frosted’ look on the snowbanks, I added an opaque white layer with a snow pen and sprinkled some fine white glitter on top. While this was drying, I stamped and die cut my three darling snowmen. Going for a nontraditional color scheme, I colored these cuties with my copics and added a ‘knit’ detail to the hat of the middle snowman. And put in lots of snowdrops with my white gel pen!

Sunny Studio Stamps: Snowman Kisses Winter Themed Holiday Card by Tina (featuring Forest Tree Stencils)

All the elements were ready, and I could start assembling the shaped card by gluing the trees and snowbanks to the circular panel. Next, I added the panel to the card base and lastly, adhered the circular frame, three snowmen and topper (that was cut from glitter card stock).

To embellish the card, I added a few of the Pure White Jewels scattered around the sentiment. These jewels are my favorite on snowy projects!! I thought it would be fun to include a few small jingle bells from my stash to the ornament topper, using some white thread.

Another sweet Christmas card finished and ready to send in December! Thank you for joining me and happy crafting!

Sunny Studio Supplies Used:

Comic Strip Speech Bubble Dies
Shop at:
Sunny Studio
Scenic Route Stamps
Scenic Route Stamps
Shop at:
Sunny Studio
Scenic Route Dies
Scenic Route Dies
Shop at:
Sunny Studio
Balloon Rides Stamps
Shop at:
Sunny Studio
Balloon Rides Dies
Balloon Rides Dies
Shop at:
Sunny Studio
Forest Trees Stencils
Shop at:
Sunny Studio
Snowman Kisses Stamps
Shop at:
Sunny Studio
Snowman Kisses Dies
Snowman Kisses Dies
Shop at:
Sunny Studio

Wednesday, November 9, 2022

Reindeer Games Cards with Alma and Marie

Hello, my dears. This is Alma and today I want to show you a greeting card with an integrated advent calendar.

Sunny Studio Stamps: Reindeer Games Holiday Card by Alma Störk (featuring Warm & Cozy Dies, Cityscape Border Dies, Santa Claus Lane)

First of all, I cut out a rectangular card. Then I cut 25 squares from the Joyful Holiday Paper, 2 by 2 inches. Afterwards I punched out the glove from the Warm & Cozy Dies 25 times and the numbers 1-25 from the Chloe Number Dies. Now I wiped a white card with the Distress Oxides colours Stormy Sky, Blueprint Sketch, Chipped Saphire and Black Soot and wiped clouds with white ink. I used the clouds from the Slimline Nature Border Dies set as a stencil.

Sunny Studio Stamps: Reindeer Games Holiday Card by Alma Störk (featuring Warm & Cozy Dies, Cityscape Border Dies, Santa Claus Lane)

Now I stamped and coloured the reindeer from the Reindeer Games Stamps set and the Santa from the Santa Claus Lane Stamps set and punched them out with the corresponding Santa Claus Lane Dies and Reindeer Game Dies. Now I punched the Cityscape Border Dies in black and glued it to the cloud background. To attach the advent calendar, I punched all the individual elements with the Bind it and tied them to the card. Finally I glued all the images on it and the Christmas countdown was done!

What a great interactive card!

----------------------------------------------

Hello Crafty Friends, Marie here. I am very happy to be back on the blog to share a new Holiday inspiration card with you featuring the recently released Reindeer Games stampsReindeers are some of my favorite images to color and create with during the holidays so I was very excited to make a card with this adorable stamp set! 

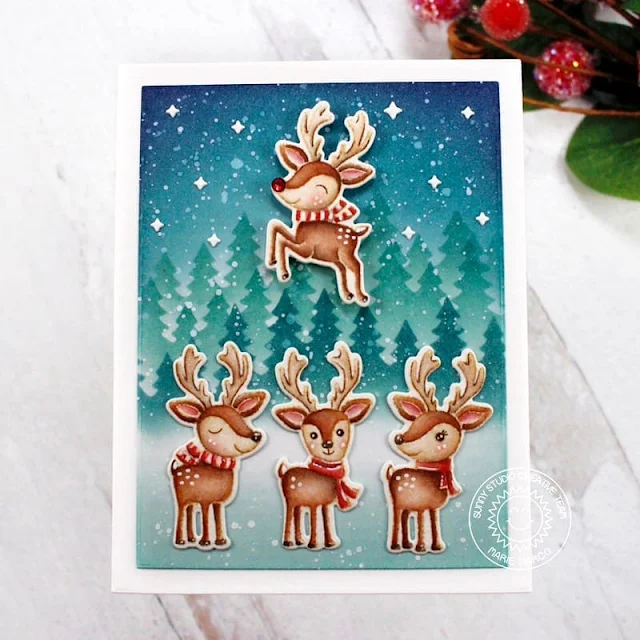
Sunny Studio Stamps: Reindeer Games Holiday Card by Marie Marco (featuring Forest Tree Stencils)

The first thing I do before anything when cardmaking is to prepare my base and my background panels. I cut out my A2 sized base panel from 110 lb Sturdy Neenah solar white cardstock paper so that I never have a problem with my cards warping. Using a slightly smaller die from a nesting A2 die set, I cut out my background panel using bristol smooth white cardstock for easy ink blending.

I then prepared my background panel using the Forest Trees stencils. This layering stencil set creates such a beautiful background of lush pine trees that look like they fade out with the distance depending on how light or dark you go with your inking. I also love that these stencils are numbered so you know the order in which to use them when inking. For my tree stencils, I used Distress Inks. For layer number 1, I used a very light hand with the color Evergreen Bough, for the 2nd layer of trees, I used the same ink color and applied it with a bit more pressure to get a darker shade. For my 3rd layer, I used a combination of Evergreen Bough, Rustic Wilderness, and Uncharted Mariner Distress Inks for the darkest shade of all the layers. 

Sunny Studio Stamps: Reindeer Games Holiday Card by Marie Marco (featuring Forest Tree Stencils)

After my trees were finished, I inked around my entire card background with Evergreen Bough and then for the top of my card, I inked a darker shade of Uncharted Mariner and Chipped Sapphire to create a night sky. I then used some water splatters and watered down acrylic paint to create a snowy backdrop. 

I stamped the reindeer images using antique Linen on watercolor paper, and used water color pencils to color my images. I did some white detailing using a white gel pen. I then cut my images using the Reindeer Games corresponding dies. I positioned my reindeers and adhered them all down using double sided tape adhesive. Flying Rudolph was adhered using double sided foam strips for dimension. I also gave Rudolph a bright shiny blinged out nose using the Red Zircon Jewels. I find adding the one single red gem embellishment so charming, perfect for Santa's favorite reindeer. 

Sunny Studio Stamps: Reindeer Games Holiday Card by Marie Marco (featuring Forest Tree Stencils)

I didn't want to leave the inside of my card blank so I added a reindeer wishing everyone a Happy Holidays with the sentiments from the stamp set placed in a word bubble stamped in Candied Apple Distress Ink. 

I am so so happy with how my card turned out! Thank you so much for stopping by the blog and I hope it gives you some ideas for all your upcoming Christmas Cardmaking and crafting! Until next week, Have an Awesome Day or Night! and as always, Happy Crafting!!! 

Sunny Studio Supplies Used:

Chloe Number Dies
Chloe Number Dies
Shop at:
Sunny Studio
Warm & Cozy Dies
Warm & Cozy Dies
Shop at:
Sunny Studio
Cityscape Border Dies
Shop at:
Sunny Studio
Santa Claus Lane Stamps
Shop at:
Sunny Studio
Santa Claus Lane Dies
Shop at:
Sunny Studio
Slimline Nature Borders
Shop at:
Sunny Studio
Forest Trees Stencils
Shop at:
Sunny Studio
Reindeer Games Stamps
Shop at:
Sunny Studio
Reindeer Games Dies
Reindeer Games Dies
Shop at:
Sunny Studio
Joyful Holiday Paper
Shop at:
Sunny Studio