Wednesday, August 19, 2020

Sneak Peek: Penguin Pals, North Pole, Winter Scenes & Window Quad Dies

Hello and welcome to day 4 of our Fall & Winter Peek Week!  All this week I am showcasing cards using our newest collection which will be available for purchase on Friday, August 21st. 

Today's sneak peeks include three cute new 4x6 stamps sets perfect for both Winter and the Christmas season, along with matching dies and two versatile standalone die sets. There's a lot to share again today so let's dive right in!

Card No. 1:  My first set of cards showcase our new Penguin Pals Stamps, as well as our newest scene building border set called Winter Scenes. These can be layered together with and compliment last year's Scenic Route Stamps beautifully. For my card here I used the fir tree border which can be colored green as I did or in a sparkly white to look like they are covered in snow. This set comes with a removable stamp that is just a curved line that I used here to create my water's edge. You could also use it to color your scene to look like a frozen pond for ice skating or omit it entirely and layer it together with some snow slopes. Both the Penguin Pals set and the Winter Scenes set come with an ice block, each flipped a different direction so I was able to use the two together for my little penguin duo here.  

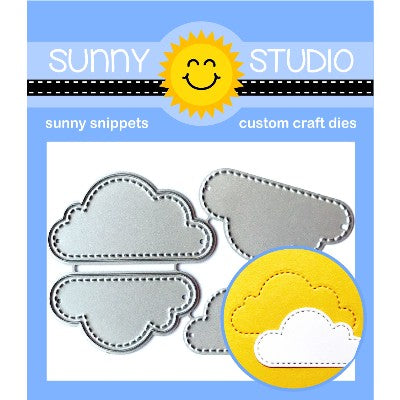
I used the coordinating Winter Scenes dies to cut out the area above my line of trees and also cut the same curved line from some masking material so I could mask off my trees and ink up my water with Salty Ocean distress ink and then used the small wave stamps from our Spring Scenes Stamps to make it even more evident that they were floating in an icy pool of water. For my sky I inked up my card base with some Tumbled Glass distress ink and then added a couple stitched clouds using our Fluffy Cloud dies. Finally, I stamped my punny greeting with clear VersaMark ink and then heat embossed it with some white embossing powder.

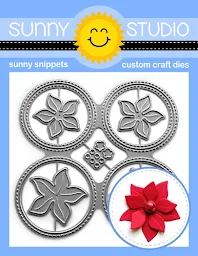
Card No. 2:  For my next card I turned to our new Window Quad Circle dies which are a follow-up and alternative option to our Window Trio Circle dies and Window Trio Square dies.These not only create this great grid design with four stitched circles, but in their negative space they include two stitched circles, two plain circles and 4 mini poinsettia flowers you can layer together (I have an example of that later in this post). I just love how quick cards come together when using these dies and they're such a great way to frame little critters! 

For this card I cut a number of scalloped borders from our Sleek Stripes Paper using our new Slimline Basic Border dies, layering them together for a fun ruffled look. The Penguin Pals set comes with a number of mini snowflakes in the set so I heat embossed several of them onto my background, scattering them almost like I would with sequin embellishments. A simple twine bow tied below the sentiment helped visually balance things out a bit with the two "heavier" penguins on the left side of the card and also helped give my card a more finished look with my transition between my card background and the ruffles.

Card No. 3: This card uses our second new standalone called... You guessed it, Window Quad Square dies. The negative spaces for this die set comes with all the pieces you need to make adorable mini tags which I share an example of later in this post. This time I decided to use the dies for a square card measuring 4.25" x 4.25".  

I started by inking up a piece of white cardstock with Salty Ocean, Blueprint Sketch and Chipped Sapphire distress inks before flicking on some water, dabbing with a paper towel and then flicking on some watered down white paint. In my case I made a number of backgrounds and then walked away from them for several days so they had plenty of time to dry, but if you want to speed things up I would recommend zapping the finished panel with a heat gun to make sure it's good and dry and then using an anti-static tool generously over the surface so make sure there's no moisture left on the paper surface to attract embossing powder where you don't want it when stamping your sentiment.

I colored my little Penguin Pals with Copic Markers and colored all their accessories in red for a fun red, white and blue color scheme. For my heart balloons, I used a .1 Copic Multiliner pen with a small clear ruler to draw in my own balloon strings around the sentiment. This card was really simple and easy to make, but in the end it turned out to be one of my favorites.  I think it's the beauty of these dies and how well they frame our little critters with a quick crank through the die-cutting machine.
Sunny Studio It's penguining to look a lot like Christmas Punny Handmade Holiday Card (using Penguin Pals Stamps & Window Quad Square Dies)

Card No. 4: Up next is a card featuring the solid version of that same heart balloon from our Penguin Pals Stamps. For those that don't love coloring, these images can be layered together to save time or used separately. I love the way a solid balloon image looks when overlapped with other colors using die inks giving the same look as a real transparent balloon!

Before stamping any balloons though I started by cutting out a cloud border from masking material using our new Slimline Nature Border Dies and inking up my sky with Tumbled Glass distress ink. These dies are 9 inches long which give you a ton of options when using them on a 4.25" wide card.  It almost looks like I used a larger border set with three separate cloud border dies, right? I tell ya, even I was surprised by how much I fell in love with these long slimline dies!

For my sentiment I used one of the stitched circles that pop out from our Window Quad Circle dies and layered it over a circle cut using our Staggered Circle Dies. I cut a thin strip from the rainbow chevron print found in our Surprise Party Paper pack to tie in with all the colors in my balloons, but somehow my card was just feeling a little blah and off balanced. That's when I realized layering in some cute clouds from our Spring Showers Stamps would be the perfect way to fill some of those visual gaps.

Card No. 5: For my last Penguin Pals card today, I paired them with the new little igloo and snow covered tree from our new Winter Scenes Stamps and the larger igloo from our retiring Polar Playmates Stamps.  

The Winter Scene Stamps also comes with a number of little individual circles perfect for creating your own custom snowy background. To create mine, I arrange all my circles onto a 1-inch square block in such a way that I could keep stamping the same pattern over and over again without having to mess with moving them around each time. When I was done a saw a couple spots where it looked empty so I just stamped those with one of the tiniest circles to fill in the gaps. In hindsight as I'm typing this I realize I probably should have taken a wet paint brush to lighten up the centers of each "snowflake" to lift up some of my distress ink behind them to turn them more white, but let's pretend I did that before spending 30 minutes editing my photo.  ;)

For my snowy hills, I used the stitched slopes from our Slimline Nature Border dies and then tucked all my images between them. The Penguin Pals set comes with several fun things for the penguins to hold like a letter to Santa, two candy canes, a bell to ring, balloons, two fish and of course the penguin that already comes holding a cute string of holiday lights.

Sunny Studio Stamps Penguins with Igloos & Snow Slope Stitched Hills Handmade Holiday Christmas Card (using Winter Scenes & Penguin Pals Stamps)

Card No. 6: Staying with the icy climate, we have another fun set to introduce called North Pole! This set comes with four cute elves, another Santa to compliment last year's Santa Claus Lane set and Mrs.Claus! For my card here I paired the new stamps with the sleigh and Santa's bag from Santa Claus Lane and the log cabin & fir tree backdrop from our new Winter Scenes Stamps. For my background I inked it up with a light layer of Salty Ocean distress ink and then heat embossed our Snow Flurries Stamps over the top, stamping them twice side by side.
Sunny Studio Blog: You're A Friend Like No One Elf Elves with Santa's Sleigh Punny Handmade Holiday Christmas Card (using North Pole, Winter Scenes and Snow Flurries Stamp Sets)

Card No. 7:  For this card I used the two other elves from the North Pole Stamps with their outstretched arms creating a scene of them all jumping up in unison. For my snowy backdrop I inked up my sky with tumbled glass distress ink and then repeatedly stamped and heat embossed our Frosty Flurries stamps until my background was covered.

For my snowy hill, I tried my best to align one of the sloped dies from the new Slimline Nature Border dies onto my paper so that perfectly centered in the middle of my A2 sized card and then added a basic straight stitch to the bottom edge of my panel using our Slimline Basic Border dies. I left a little room along the bottom for a strip of red gingham paper from the Holiday Cheer Paper pack to peek out. I then stamped my punny sentiment in red ink and added a trio of red hearts which I cut out using our Basic Mini Shape Dies 2 set.  This is another card that was fairly simple in design and assemble, but I think it just might be my favorite with these stamps.

Sunny Studio Blog: Have Your Elf A Merry Little Christmas Punny Elves Handmade Holiday Card (using North Pole Stamps, Slimline Nature Border Dies & Holiday Cheer 6x6 Paper Pack)

Card No. 8: For my next card I thought I would create my own "patterned paper" heat embossing the little elves from the North Pole set in my background on a piece of the red grid print from our new Classic Sunburst paper (shared more fully tomorrow). There were some gaps between the elves created by their outstretched arms so I filled them in with some die-cut shapes cut from white cardstock using our Basic Mini Shape Dies 2 set for the mini hearts and one of the smaller snowflakes from our Snowflake Circle Frame Dies.

For my focal point images, I colored the elves with Copic markers and framed them with a stitched scallop circle using our Fancy Frames Circle dies. I used a sentiment from the set, stamping it onto one of the banners from Banner Basics which I inked up with mowed lawn distress ink and fussy cut out.
Sunny Studio Blog: Spreading Christmas Cheer Red & Green Holiday Card (using North Pole & Banner Basics Stamps, Fancy Frames Circle Dies & Classic Sunburst Paper)

Card No. 9: Up next is a card showcasing Santa and Mrs.Claus from the North Pole Stamps. The set comes with a plate of cookies and a nice list for Santa to hold. I kept my card very simple, just inking up behind the couple with some Worn Lipstick distress ink and stamping the sentiment from the set below them. For my holly border and background paper I used prints from our Holiday Cheer Paper pack, adding stitching to the edges and a small scalloped border with the Slimline Basic Border dies. As a final touch, I added glossy accents to each of the holly berries on the borders.
Sunny Studio Blog: "You're On My Nice List" Santa with Mrs. Claus Red & Green Holly Holiday Christmas Card (using North Pole Stamps, Slimline Basic Borders & Holiday Cheer Paper)

Card No. 10: My last North Pole Card is another simple design using or new Window Quad Square dies. I backed the openings featuring Mrs. Claus, Santa and the elves with a patterned paper from our Very Merry Paper pack. My greeting combines the word "Christmas" from our Alpaca Holiday Stamps and the die-cut "greetings" word from our new Slimline Scalloped Frame dies.Sunny Studio Blog: Christmas Greetings Elves with Santa Claus & Mrs. Claus Stitched Grid Style Card (using North Pole Stamps, Window Quad Square Dies & greetings word from Slimline Scalloped Frame Dies)

Card No. 11: My final card of the day spotlights the fun mini poinsettia dies and stitched circles that come with our Window Quad Circle dies. Each of the 4 poinsettias in this die set have scored petals and can be "fluffed" up for extra dimension. For my flowers I cut a large and small version from red cardstock, inking up the centers with a little finger dauber and some Barn Door Distress ink and layering them together. I also cut a large green one from green cardstock for my leaves which I offset and adhered below my main flower, topping them with Wine Berry Pearls by Studio Katia in the center of each. For my sentiment I die-cut the word "Christmas" using our Christmas Garland Frame Dies and the word "merry" was heat embossed above it using our Merry Mice Stamps.
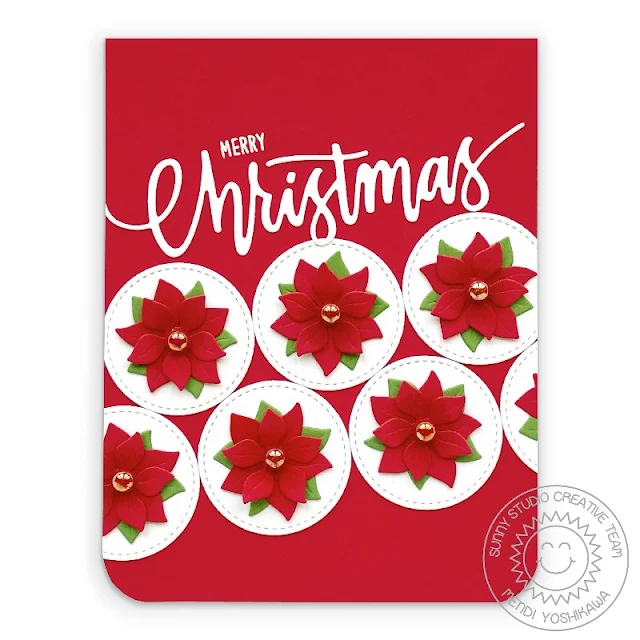
Sunny Studio Merry Christmas CAS Poinsettia Handmade Holiday Card with Stitched Circles (using Window Quad Circle Dies, Christmas Garland Frame Dies & Merry Mice Stamps)

The Window Quad Square Dies also come with a little bonus to make use of all the openings which includes all the pieces you need to create mini tags which are a smaller version of our Build-A-Tag #2 dies. Here are just a few ways you can mix and match them using our Holiday Cheer Paper, Striped Silly Paper and Classic Gingham Paper.  For the word "to" I used our new Inside Greetings Holiday Stamps with some Versamark ink and white opaque embossing powder.
Sunny Studio Blog: Mini Red & Green Stitched and Scalloped Holiday Gift Tags (using Window Quad Square Dies, Holiday Cheer Paper, Striped Silly Paper & Classic Gingham Paper)
That wraps up today's sneak peeks.  I'm so happy to have you hang out with me today. I read all your comments and they mean so much!  I'd love to give a $25 gift code to one lucky winner using the rafflecopter below.  Make sure to keep checking back all this week for more peeks & prizes. The contests run through Wednesday, August 26th at Midnight PST with winners announced here on Sunday, August 30th. :)

a Rafflecopter giveaway

Sunny Studio Stamps Penguin Pals Winter 4x6 Clear Photo-polymer Stamp Set  Sunny Studio Stamps North Pole Metal Cutting Dies Set  

Sunny Studio Stamps North Pole Elves 4x6 Clear Photo-polymer Stamp Set  Sunny Studio Stamps Penguin Pals Metal Cutting Dies Set  

Sunny Studio Winter Scenes 4x6 Clear Photo-polymer Border Stamps  Sunny Studio Stamps Winter Scenes Metal Cutting Dies Set

Other Sunny Studio Supplies Used:

Memento Tuxedo Black Ink Pad
Shop at:
Sunny Studio
Tsukineko Jumbo Dauber
Shop at:
Sunny Studio
Versafine Onyx Black Ink
Shop at:
Sunny Studio
Frosty Flurries Stamps
Shop at:
Sunny Studio

Polar Playmates Dies
Shop at:
Sunny Studio
Snow Flurries Stamps
Shop at:
Sunny Studio
Fancy Frames-Circle Dies
Shop at:
Sunny Studio
Classic Gingham 6x6 Paper
Shop at:
Sunny Studio
Striped Silly 6x6 Paper
Shop at:
Sunny Studio
Woodland Borders Dies
Shop at:
Sunny Studio
Holiday Cheer 6x6 Paper
Shop at:
Sunny Studio
Alpaca Holiday Stamps
Shop at:
Sunny Studio
Staggered Circles Die
Shop at:
Sunny Studio
Mini Basic Shape Dies II
Shop at:
Sunny Studio
Fluffy Clouds Dies
Fluffy Clouds Dies
Shop at:
Sunny Studio
Surprise Party 6x6 Paper
Shop at:
Sunny Studio
Santa Claus Lane Stamps
Shop at:
Sunny Studio
Santa Claus Lane Dies
Shop at:
Sunny Studio
Christmas Garland Frame
Shop at:
Sunny Studio
Banner Basics Stamps
Shop at:
Sunny Studio
Banner Basics Dies
Banner Basics Dies
Shop at:
Sunny Studio
Spring Scenes Stamps
Shop at:
Sunny Studio
Spring Showers Stamps
Shop at:
Sunny Studio
Spring Showers Dies
Spring Showers Dies
Shop at:
Sunny Studio
Slimline Basic Borders
Shop at:
Sunny Studio
Slimline Nature Borders
Shop at:
Sunny Studio
Slimline Scalloped Frame
Shop at:
Sunny Studio
Classic Sunburst Paper
Shop at:
Sunny Studio
Polar Playmates Stamps
Shop at:
Sunny Studio
Sleek Stripes Paper
Sleek Stripes Paper
Shop at:
Sunny Studio
VersaMark Watermark Ink
Shop at:
Sunny Studio

Tuesday, August 18, 2020

Sneak Peek: Classy Christmas, Retro Ornaments & Quatrefoil Die

Hello and welcome to day 3 of our Fall & Winter Peek Week!  All this week I am showcasing cards using our newest collection which will be available to purchase on Friday, August 21st. 

Today's sneak peeks include two new 4x6 holiday stamp sets, their matching dies and a brand new frilly frames die. Plus by popular quest we have a coordinating die to go with one our previously released sentiment sets. Let's get started!

Card No. 1:  My first set of cards today showcases our new Classy Christmas Stamps and dies, as well as our newest Frilly Frame Quatrefoil Dies. Typically our Frilly Frame dies measure 4" x 5.25", but this one is sized a bit larger and will cut a full stitched A2 Sized panel that is 4.25" x 5.5" and will mat together nicely with the outer die from our Frilly Frames Retro Petals dies. This new stamp set comes with three poinsettia flowers, two coordinating leaves, three holly leaves, two berry groupings, two pine cones, two tree branch sprigs and a noel greeting. 

For my images I stamped them out using colored dye inks onto Bristol paper using a stamp positioning tool and then stamped them a second time with clear VersaMark Ink, heat embossing them with clear embossing powder. By heat embossing them, I could take advantage of my full array of dye ink colors and they could get wet without bleeding. I then colored my images using Karin Brushmarker Pro markers and a wet paintbrush for blending them out and moving the color throughout my flower, leaves and pine cones. I'm not the best at staying in the lines when it comes to working with water so I elected to fussy cut my images after they had dried and paired them with the tree branch garland pieces that I stamped with Grassy Knoll and Key Lime green inks from PinkFresh Studio Over the Hills Ink cube set. I then inked up the front of my card base with the Coral Reef ink included with the PinkFresh Studio Heartbeat Ink cube set before layering it with my die-cut quatrefoil panel.
Sunny Studio Coral Poinsettia Handmade Holiday Christmas Card (using Classy Christmas Stamps  & Frilly Frames Quatrefoil Dies)

Card No. 2:  For my next Classy Christmas card I uses all the same elements, but this time I colored my images with Copic Markers. For my front panel I started by die-cutting the stitched edge using our Frilly Frames Retro Petal Dies and used center portion of the Frilly Frames Quatrefoil Dies to create an embossed look, running them through my machine with a rubbery embossing mat in place of my bottom cutting plate. It's such a fun way to get extra life from your background dies and it lends a very classy look to your holiday cards. After I had my pieces all arranged and adhered, I added glossy accents to my berries to make them shine and added a simple greeting the center of my card using our Holiday Style Stamps and dies.
Sunny Studio Poinsettia Embossed Handmade Holiday Christmas Card (using Classy Christmas, Holiday Style Stamps  & Frilly Frames Quatrefoil & Retro Petal Dies)


Card No. 3:  For this card using the Classy Christmas Stamps, I stamped and colored my images the same way I did for my first card, however this time I switched up my color scheme, stamping and coloring them in a pinkish berry color instead. I was able to stamp out the images for my two cards at the same time while all my stamps were positioned and ready to go in my MISTI which greatly helped speed up my cardmaking process. For this clean & simple design, I cut a stitched scalloped panel from white cardstock using our Frilly Frames Hexagon Dies and stamped it in the center with "Season's Greetings" from our Festive Greetings Stamps. As my last step, I mounted my completed panel onto a piece of our green diagonal grid patterned paper from our new Classic Sunburst Paper pack (being shown more later this week) and added some transparent Lipstick Red Crystals by Studio Katia to the center of each of my poinsettias in a variety of sizes.
Sunny Studio Poinsettia Handmade Holiday Christmas Card (using Classy Christmas, Festive Greetings Stamps, Frilly Frames Hexagon Dies & Classic Sunburst Paper)

Card No. 4: For my last poinsettia card today with the Classy Christmas Stamps I heat embossed my flower and leaves using VersaMark Ink with some white embossing powder onto Bristol paper and and colored them using Zig Clean Color Real Brush Markers, going darker for my back petals and working lighter for the top petals to create a little dimension. I topped them with some pearls in varying sizes from our Rainbow Pearls pack.

For my background, I used the Frilly Frames Quatrefoil dies to cut out the background from pink, red, green and white cardstock. I set aside the outside frame portions to use on future cards, but used all the inside pieces to create a repeat pattern for my background with a fun harlequin feel. Technically I had enough pieces leftover to create 4 identical cards so this would be a fun one to create several of and fill in while you catch up on your favorite TV show.  It actually came together really quick since I had covered my entire background with adhesive and all I had to do was pop the pieces into place.

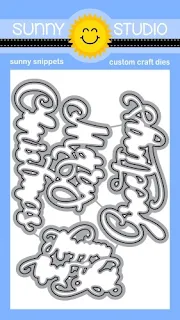
For my "Merry Christmas" sentiment I used our Season's Greetings Stamps from last year, stamping them in red ink and pairing them with our new coordinating Season's Greetings Word Dies. I realized too late last year that sometimes you just really need to have a way layer these great over-sized sentiments on top of an embossed or die-cut background like this one and these are a welcome addition to our line-up.
Sunny Studio Poinsettia Handmade Holiday Christmas Card (using Classy Christmas, Season's Greetings Stamps & Frilly Frames Quatrefoil Dies)

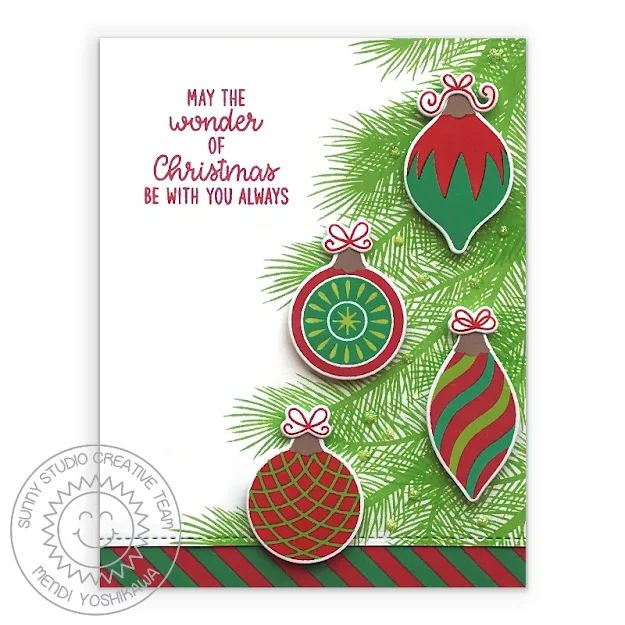
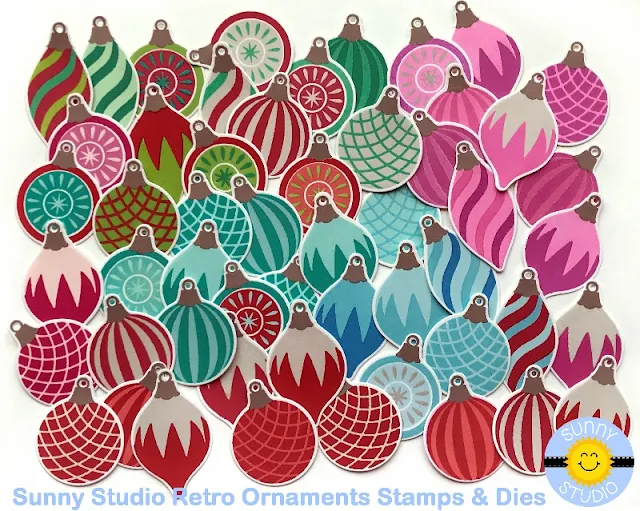
Card No. 5:  My next set of cards showcase our new Retro Ornament Stamps and dies. With this set you can create 5 unique vintage ornaments in dozens of fun color combinations.  I started this card off by using a set of ornaments I had stamped in a traditional color scheme with PinkFresh Studio Inks (linked below). To create my tree, I pulled out the branch from my trusty old favorite Holiday Style Stamps and repeatedly stamped it off the edge of the card to create the look of a Christmas tree. I then arranged my ornaments, topping them with the three of the different 1950's inspired retro bows from the set. 

To dress up my card, I added a stitched edge to my panel using our Slimline Basic Border dies and then added a custom made green and red striped strip of paper to tie in with my ornaments using our Background Basics Stamps. I just discovered when making this card that when stamping the striped border stamps using my original MISTI, I could slide my paper over and stamp it again in a different color! Talk about a light bulb moment. I'm not quite sure it never occurred to me, but now I feel like creating a bunch of borders assembly line style one afternoon to just have on hand. I don't think the physical stamp is quite long enough to make this cool two-colored stripe work for a horizontal card, but it works amazing for vertical cards like this one, since it's easy to trim off the excess portions on either side where each of the colors cut off. 

For my greeting I used a sentiment from our new Inside Greetings Holiday Stamps which I will be sharing more fully on Thursday.  As a final step, I added small dots of Stardust Stickles by Rangers and set it aside to dry. They aren't super noticeable here, but it just gives it a little extra sparkle in person.
Sunny Studio Red & Green Vintage Glass Ornaments Handmade Holiday Christmas Card (using Retro Ornament, Holiday Style, Background Basic, Inside Greetings Holiday Stamps & Slimline Basic Border Dies)

Card No. 6:  And now for my personal favorite card of the day... I always love crisp white and royal blue together. It reminds me of the blue & white china handed down to me by my Mother who received it from her grandmother. I also remember as a child how my grandma liked to take her real trees outside to be flocked. As an adult that sounds just way too messy to deal with, but yet it was completely beautiful!  OK, enough trips down memory lane. ;)

For my card I started with a piece of
 bright navy blue cardstock, stamping the edge with the two different tree branches from our new Classy Christmas Stamps with clear VersaMark Ink. When I had them all stamped out, I heat embossed them all at once using white embossing powder. I then ran my A2 sized panel through my die-cutting machine to give it the stitched outer edge using the outside die from our Frilly Frame Quatrefoil Die set. For my sentiment I used our new Inside Greetings Christmas Stamps (which will also be shared Thursday) and added a thin scalloped edge along the bottom with our new Slimline Basic Border dies.

For the ornaments themselves I used the inks from PinkFresh Studio's Morning Sky Ink cube set. The dies that go with this set also cut out a little hole for you to string them with twine or embroidery floss which is fun.  As a last touch I added some sparkle to two of my ornaments using some more Stardust Stickles. It sort of remind me of snowy icicles coming down around the glass bulb.
Sunny Studio Navy Blue & White Vintage Glass Ornaments Handmade Holiday Christmas Card (using Retro Ornament, Classy Christmas & Inside Greetings Christmas Stamps, Frilly Frames Quatrefoil Dies & Slimline Basic Border Dies)

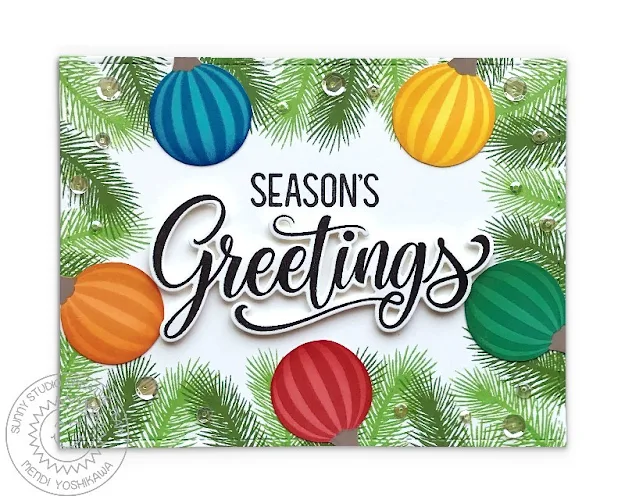
Card No. 7: For this card I used just the one striped ornament from the Retro Ornaments set, stamping them in a rainbow of colors. As I was stamping I realized the orange one looks a lot like a pumpkin and how cute it would be to stamp the tops green and create a fall card with them, perhaps adding some jack-o-latern faces! Unfortunately that will have to be a project for another day.

I used those same versatile branches from the new Classy Christmas Stamps to stamp a wreath-like garland around the perimeter of my card. For those curious, these branches mix and match beautifully with our Christmas Trimmings and Holiday Style sets. It's always nice to have additional size options and these are ultra flexible for filling in small spaces with a single sprig.  

I chose to fussy cut my ornaments for this particular card. My ink had bled past the edge on a couple of the ornaments that I wanted to disguise and I also thought it would be fun to do some extra inking around the edges to give them a three-dimensional appearance that would have been harder with the white edge there. On the other hand if you have a circle punch, die or electronic die-cutting machine that can cut a 1-1/8" wide circle, you can create a mask to put over the outside edge and sponge on some ink along the edges before die-cutting them out. You can also try double stamp them and sponging on some ink along the edges of the physical stamp while your images are still in your MISTI.  :)

For my sentiment I stamped my greeting using our new Season's Greetings Stamps and the new coordinating Season's Greetings Word Dies. I just love the way the large words look with the extra shadow and popped up with foam tape. As a final touch I sprinkled around some basic clear sequins to give the look of twinkly lights.
Sunny Studio Vintage Glass Ornaments Handmade Holiday Christmas Card (using Retro Ornament, Season's Greetings & Classy Christmas Stamps)

Card No. 8: For this card I started out intending to have it be a horizontal card, but I had already done a card like that for the navy blue one earlier and for some reason I just liked the unexpected look of running the branches down the right side and how it balanced out the weight of the ornaments on the left. I stamped my ornaments using Coral Reef & Passion Fruit ink from the PinkFresh Studio Heartbeat Ink set and the Ballet Slipper from Concord & 9th Ink Cube Bundle. The two company's have a lot of great colors with almost no overlap, but I think they each help fill some gaps in their color line-up so it's fun to use them together. My tree branches were stamped in alternating shades of green from the PinkFresh Studio Over the Hills Ink cube set and my beaded chains and ornament toppers were stamped with Colorbox Suede Archival Ink

I heat embossed a sentiment from our new Inside Greetings Holiday stamps onto a piece of lime green paper from our Classic Gingham Paper set which I cut out using the stitched label from our Sliding Window dies. Then I added a sliver of matching lime green striped print paper from our new Sleek Stripes Paper pack down the right side of my card to tie it all together.
Sunny Studio Coral Pink Vintage Glass Ornaments Handmade Holiday Christmas Card (using Retro Ornaments, Classy Christmas & Inside Greetings Holiday Stamps, Sliding Window Dies & Sleek Stripes Paper)

Card No. 9: For my last card of the day, I cut a striped panel from our Subtle Grey Tones Paper pack using the stitched mat from our new Slimline Scalloped Frame Dies. I then used the scalloped portion of the frame to cut my border on either side. Once again, I have loved using these slimline dies on my A2 sized cards. I stamped two of the tree branches from the Classy Christmas Stamps onto my background directly and then stamped several more into white cardstock which I die-cut with the matching dies and then adhered them near the edge, trimming off the excess with my scissors. But not before first stringing my ornaments with twine and hiding the ends behind the tree branches. Lastly I stamped a sentiment in the same pink ink (linked below) to match my Retro Ornaments, using a sentiment from our Inside Greetings Christmas Stamps. I mass produced this card as a display card for the brick and mortar stores who carry our products and while it was a tiny bit time consuming, it wasn't too bad when making it assembly line style.
Sunny Studio Vintage Glass Ornaments Handmade Holiday Christmas Card with non-traditional colors (using Retro Ornaments, Classy Christmas & Inside Greetings Christmas Stamps & Slimline Basic Borer Dies)

A couple of the retro ornaments in this set can be a bit tricky to line-up just right on the first try so a stamp positioning tool is a must. To get my layering stamps lined up perfectly, I start by stamping a half dozen or so of the first layer for each style onto scraps of printer paper cut down into small squares. Then when I was ready to position my second layer I had plenty of scraps on hand to test the position and get it just right before messing up my good ones stamped on cardstock. Once I get my layers set up, I love to mass produce my images assembly line style all at once so I have plenty of choices ready to grab and go when I'm ready to sit down and create cards. 

I think it's probably pretty straightforward with this set, but just in case there's any confusion, I've created an alignment guide to share how the ornaments go together. The black outlines show where that layers line up with the previous layer. Three of the glass balls are the same shape so they get to share the same die which has the added bonus of making the coordinating dies more affordable. Always love when I can do that.  :)

Here's some additional color combinations I created that I didn't have a chance to include on a card yet using all the new inks in our store by PinkFresh Studio (linked below). For all my ornament toppers I used Colorbox Suede Archival Ink so it would be easy to mix and match them for different projects.

Sunny Studio Vintage Glass Ornament Examples using Retro Ornament Stamps

That wraps up today's sneak peeks. I'm so happy to have you hang out with me today. I read all your comments and they mean so much!  I'd love to give a $25 gift code to one lucky winner using the rafflecopter below. Make sure to keep checking back all this week for more peeks & prizes. The contests run through Wednesday, August 26th at Midnight PST with winners announced here on Sunday, August 30th. :)

a Rafflecopter giveaway
Here's a closer look at the new Classy Christmas Stamps & coordinating diesRetro Ornament Stamps & coordinating dies, as well as the new Frilly Frame Quatrefoil Dies and new Season's Greetings Word Dies featured today (available for purchase on Friday).

Sunny Studio Stamps Classy Christmas 4x6 Clear Photo-polymer Stamp Set Sunny Studio Stamps Classy Christmas Metal Cutting Dies Set Sunny Studio Stamps Season's Greetings Word Metal Cutting Dies Set

Sunny Studio Stamps Retro Ornaments 4x6 Clear Photopolymer Stamp Set Sunny Studio Stamps Retro Ornaments Metal Cutting Dies Set Sunny Studio Frilly Frames Quatrefoil Background Metal Cutting Dies

Other Supplies Used:

Holiday Style Dies
Holiday Style Dies
Shop at:
Sunny Studio
Holiday Style Stamps
Shop at:
Sunny Studio
Festive Greetings Stamps
Shop at:
Sunny Studio
Background Basics Stamps
Shop at:
Sunny Studio

Sliding Window Dies
Sliding Window Dies
Shop at:
Sunny Studio
Frilly Frames Hexagon Dies
Shop at:
Sunny Studio
Frilly Frames Retro Petals Dies
Shop at:
Sunny Studio
Season's Greetings Stamps
Shop at:
Sunny Studio
Slimline Basic Borders
Shop at:
Sunny Studio
Slimline Scalloped Frame
Shop at:
Sunny Studio
Inside Greetings-Christmas
Shop at:
Sunny Studio
Inside Greetings-Holidays
Shop at:
Sunny Studio
Classic Sunburst Paper
Shop at:
Sunny Studio
Sleek Stripes Paper
Sleek Stripes Paper
Shop at:
Sunny Studio
Iridescent Pearls
Iridescent Pearls
Shop at:
Sunny Studio
Majestic Fusion Sequins
Shop at:
Sunny Studio
Classic Gingham 6x6 Paper
Shop at:
Sunny Studio
PinkFresh Fairy Dust Ink
Shop at:
Sunny Studio
PinkFresh Heartbeat Ink
Shop at:
Sunny Studio
PinkFresh Indian Summer Ink
Shop at:
Sunny Studio

PinkFresh Over The Hills Ink
Shop at:
Sunny Studio
PinkFresh Garden Stroll Ink
Shop at:
Sunny Studio
PinkFresh Island Oasis Ink
Shop at:
Sunny Studio
PinkFresh Morning Sky Ink
Shop at:
Sunny Studio
PinkFresh Soul of Provence
Shop at:
Sunny Studio
PinkFresh Urban Raincoat Ink
Shop at:
Sunny Studio