Monday, December 23, 2019

Scenic Route Cards with Eloise and Leanne

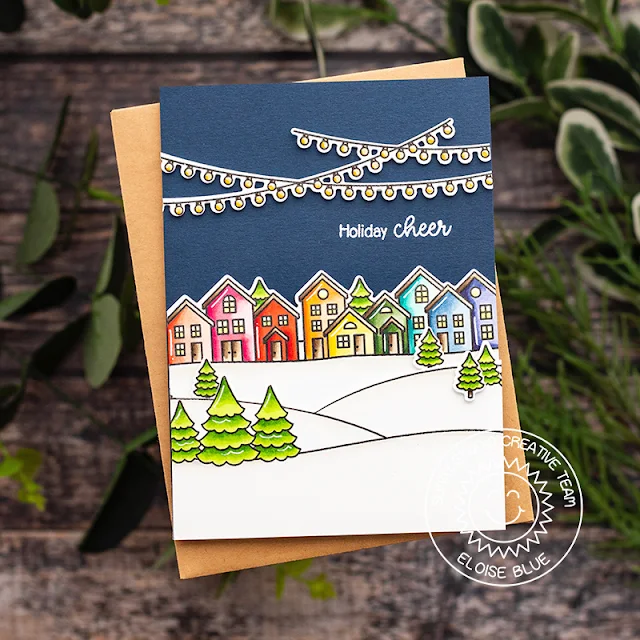
Hi friends, Eloise here and today I’m using the Scenic Route Stamp Set to create my last Christmas Card for the year.

Sunny Studio Stamps: Scenic Route Winter Themed Holiday Cards by Eloise Blue

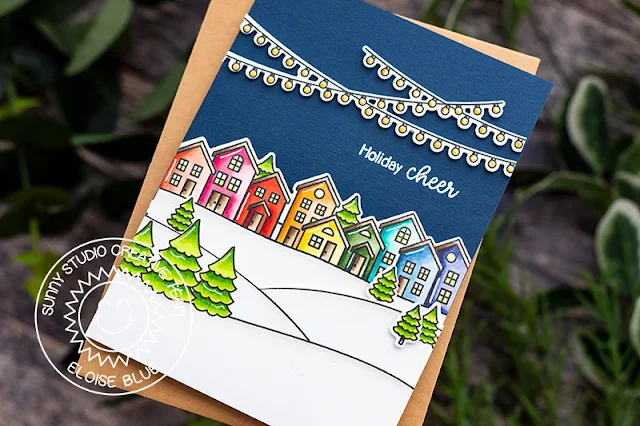
I started off with stamping out the images from Scenic Route onto some white cardstock and colouring them in with Copic Markers. Once they were all coloured, I cut them out.

(Copic Markers Used: R30, R21, R22, R24 / RV10, RV13, RV25, RV19 / R14, R17, R27, R29 / YR00, YR02, YR12, YR18 / Y11, Y13, Y15, Y19 / YG61, YG63, YG67, G28 / BG10, BG11, BG13, BG49 / B91, B93, B95, B97 / BV01, BV02, BV04, BV08 / YG01, YG03, YG23, YG17 / E42, E43, E44, E47 / W00, W0, W1 / 0)

Sunny Studio Stamps: Scenic Route Winter Themed Holiday Cards by Eloise Blue

I then added foam tape onto the backs of all the pieces and adhered them onto a navy card base. Lastly, I white heat embossed the ‘Holiday Cheer’ sentiment onto the background and added white gel pen details onto the images.

Thanks so much for stopping by today and I’ll see you next week.

-------------------------------------------------

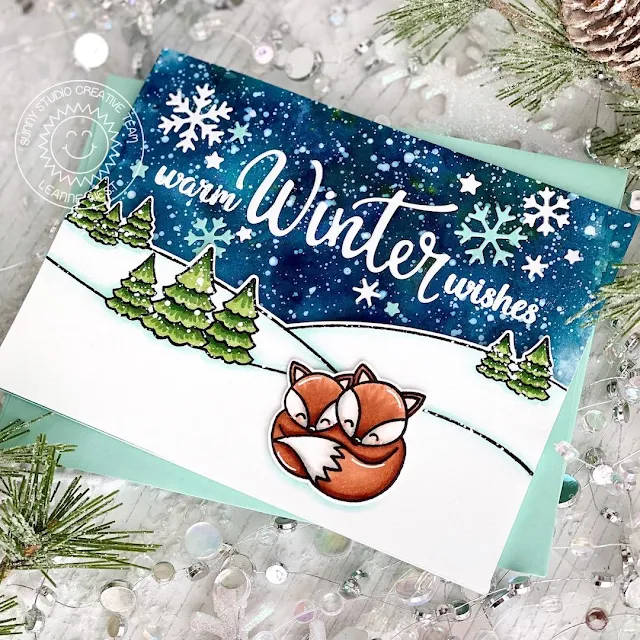
Happy Holidays everyone, Leanne here! Even though I'm officially done with Christmas projects, I still wanted to make some winter themed cards to have on hand. I've created a simple but sweet little scene on today's card. It couldn't have been easier with the help of the Scenic Route stamp set.  

Sunny Studio Stamps: Scenic Route Circle Snowflake Frame Dies Layered Snowflake Frame Dies Foxy Christmas Winter Themed Holiday Card by Leanne West

I love that with just one stamp, I can have the perfect landscape for my scene. I Copic colored the trees and added some light shading to the snowy hills. I wanted to include some cute critters to my wintery scene. I choose the adorable little foxes from Foxy Christmas

For the top half of this scene, I wanted to create a beautiful night sky. I used a combination of two Nuvo Shimmer Powders (Atlantis Burst & Meteorite Shower) to achieve this. I started with a panel of Bristol Smooth card stock and sprayed it with a little water. I then sprinkled the powders overtop. I used a paint brush to move the color around while adding more water where needed to cover the entire panel. After the panel was completely dry, I splattered it with thinned white paint.  

Sunny Studio Stamps: Scenic Route Circle Snowflake Frame Dies Layered Snowflake Frame Dies Foxy Christmas Winter Themed Holiday Card by Leanne West

I layered the snowy landscape over the sky panel with foam tape and then adhered the completed scene to an A2 size card base. I combined stamps and a die cut for the greeting. The stamped warm wishes is from Heartfelt Wishes. The winter die cut word is from the Layered Snowflake Frame set. To finish off the card I added a few die cut snowflakes scattered around the greeting.  

Sunny Studio Supplies Used:

Heartfelt Wishes Stamps
Shop at:
Sunny Studio
Foxy Christmas Stamps
Shop at:
Sunny Studio
Foxy Christmas Dies
Foxy Christmas Dies
Shop at:
Sunny Studio
Scenic Route Stamps
Scenic Route Stamps
Shop at:
Sunny Studio
Scenic Route Dies
Scenic Route Dies
Shop at:
Sunny Studio
Layered Snowflake Frame
Shop at:
Sunny Studio
Snowflake Circle Frame
Shop at:
Sunny Studio

Saturday, December 21, 2019

Sunny Saturday Share: Christmas Themed Customer Cards


Hey everyone, how are you all doing this weekend? I'm so excited to be popping in today with a Sunny Saturday Share. There have been so many gorgeous Christmas themed cards popping up on Instagram that have caught my eye, and I couldn't wait to share them with all of you! 

Hogs & Kisses card by Toni Maddox

Sunny Studio Stamps: Hogs & Kisses Customer Christmas Card by Toni Maddox

Hogs & Kisses card and tutorial by Sandy Allnock

Sunny Studio Stamps: Hogs & Kisses Customer Christmas Themed Card by Sandy Allnock

Alpaca Holidays card by Anika Lerche

Sunny Studio Stamps: Alpaca Holidays Customer Christmas Themed Card by Anika Lerche

Jolly Gingerbread and Fabulous Flamingos card by Roslyn Jin


Sunny Studio Stamps: Jolly Gingerbread Fabulous Flamingos Customer Christmas Themed Card by Roslyn Jin

Jolly Gingerbread card by Waleska Galindo


Sunny Studio Stamps: Jolly Gingerbread Customer Christmas Themed Card by Waleska Galindo

Foxy Christmas card by Nicole


Sunny Studio Stamps: Foxy Christmas Customer Christmas Themed Card by Nicole

Happy Owlidays gift tags by Misty Elam


Sunny Studio Stamps: Happy Owlidays Customer Christmas Themed Gift Tags by Misty Elam

Merry Mice card by Toni Maddox


Sunny Studio Stamps: Merry Mice Customer Christmas Themed Card by Toni Maddox

Merry Mice and Merry Word die card by Lori U’ren


Sunny Studio Stamps: Merry Mice Merry Word Die Customer Christmas Themed Card by Lori U'ren

Merry Mice card by Lynn Hayes


Sunny Studio Stamps: Merry Mice Customer Christmas Themed Card by Lynn Hayes

Merry Mice gift bag and tag by Angela Moeckel


Sunny Studio Stamps: Merry Mice Customer Christmas Themed Gift Bag Tag by Angela Moeckel

Bundled Up card by Caren Bartholomew


Sunny Studio Stamps: Bundled Up Customer Christmas Themed Card by Caren Bartholomew

Sweater Vest Card by Ana Anderson


Sunny Studio Stamps: Sweater Vest Dies Customer Christmas Themed Card by Ana Anderson

Scenic Route card by Mary Reiner


Sunny Studio Stamps: Scenic Route Customer Christmas Themed Card by Mary Reiner

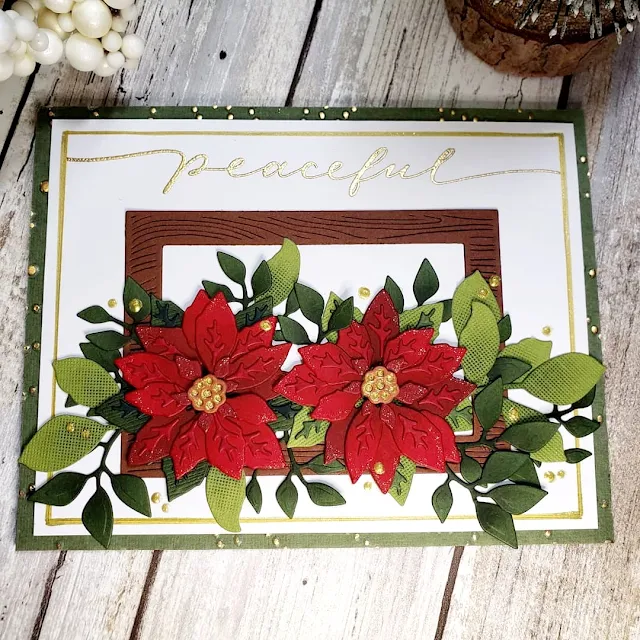
Layered Poinsettias card by Kreative Kinship


Sunny Studio Stamps: Layered Poinsettias Customer Christmas Themed Card by Kreative Kinship

Petite Poinsettias tag by Maria Helena de Lama


Sunny Studio Stamps: Petite Poinsettias Customer Christmas Themed Tag by Maria Helena de Lama

Thank you for sharing all these fabulous ideas with us! I hope you will continue to share your gorgeous projects with us--It always makes my day to see them. You can tag us on instagram with the hashtag #sunnystudiostamps or share your projects with us in our flickr group or on our facebook page. ☺


Sunny Studio Supplies Used:


Bundled Up Dies
Bundled Up Dies
Shop at:
Sunny Studio
Bundled Up Stamps
Bundled Up Stamps
Shop at:
Sunny Studio
Merry Word Die
Merry Word Die
Shop at:
Sunny Studio
Jolly Gingerbread Stamps
Shop at:
Sunny Studio
Jolly Gingerbread Dies
Shop at:
Sunny Studio
Fancy Frames- Ovals
Fancy Frames- Ovals
Shop at:
Sunny Studio
Alpaca Holiday Stamps
Shop at:
Sunny Studio
Alpaca Holiday Dies
Alpaca Holiday Dies
Shop at:
Sunny Studio
Foxy Christmas Stamps
Shop at:
Sunny Studio
Foxy Christmas Dies
Foxy Christmas Dies
Shop at:
Sunny Studio
Happy Owlidays Stamps
Shop at:
Sunny Studio
Happy Owlidays Dies
Happy Owlidays Dies
Shop at:
Sunny Studio
Sweater Vest Dies
Sweater Vest Dies
Shop at:
Sunny Studio
Fabulous Flamingos Stamps
Shop at:
Sunny Studio
Fabulous Flamingos Dies
Shop at:
Sunny Studio
Merry Mice Stamps
Merry Mice Stamps
Shop at:
Sunny Studio
Merry Mice Dies
Merry Mice Dies
Shop at:
Sunny Studio
Scenic Route Stamps
Scenic Route Stamps
Shop at:
Sunny Studio
Scenic Route Dies
Scenic Route Dies
Shop at:
Sunny Studio
Hogs & Kisses Stamps
Shop at:
Sunny Studio
Hogs & Kisses Dies
Hogs & Kisses Dies
Shop at:
Sunny Studio
Layered Poinsettia Dies
Shop at:
Sunny Studio

Friday, December 20, 2019

Scalloped Tags Holiday Projects with Rachel and Candice

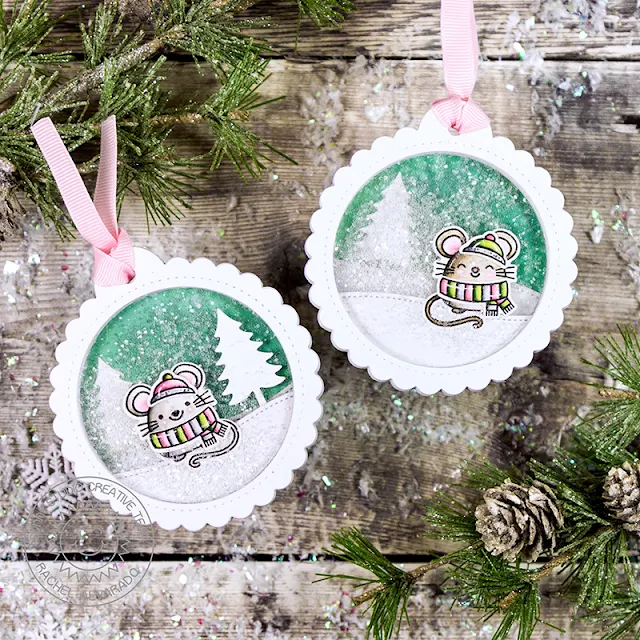
Hello everyone! It's Rachel here and I have some Christmas shaker tags to share with you today! I love the size of the Scalloped Tag Circle Dies that were recently released. They're perfect for creating a fun little scene and having room to write if need be. I combined the Scalloped Tag Circle Dies with the cute Merry Mice Stamp Set to make a few double-layer shaker tags that were inspired by some ornaments that Jennifer McGuire made a few years back. You can check out that video HERE.

Sunny Studio Stamps: Scalloped Tag Dies Merry Mice Woodland Border Dies Fabulous Christmas Gift Tags by Rachel Alvarado

To created my tags, I first cut two base layers and stamped my sentiment onto the back of each of them. I then used the large Scalloped Circle Tag Die with a basic Circle Die to create a frame of the tag. I quickly die cut about 11 of these frames for each tag and glued 5 of them together for my first layer and 5 for my second layer, leaving one frame left for the final piece to show in the front. I like to create my shaker tags this way because this allows for a very neat and uniform frame that lines up perfectly with each layer below. For the inside of the tag, I used some Evergreen Bough Distress Oxide Ink for my background and splattered it with diluted Opaque White Paint to resemble snow. I also die cut some snow drifts and trees from white card stock using the Woodland Borders Die Set.

Sunny Studio Stamps: Scalloped Tag Dies Merry Mice Woodland Border Dies Fabulous Christmas Gift Tags by Rachel Alvarado

Because I used two layers of acetate with stacked frames in between, I was able to add more glittery embellishments than usual because it wouldn't completely cover my images. I love how it looks like a snowy blizzard behind each mouse.

I love how the sentiment stands out on its own on the back of the tag. There is still plenty of room to write a short message. These would also make the perfect ornaments to decorate a Christmas tree if so desired. Thanks so much for stopping by! Happy card making!

--------------------------------------------------------

Hi my Crafty friends, Candice back with you this Friday! If you have noticed a tropical theme from me the past couple of weeks, you can blame it on my family that lives in Florida while I am stuck in the snow! I can only dream (and create) about the warmth! I am showcasing these amazing new Scalloped Tag dies, which come with two sizes, and the larger size is perfect to turn into a shaker!

Sunny Studio Stamps: Scalloped Tag Dies Fabulous Flamingos Scenic Route Christmas Gift Tags by Rachel Alvarado and Candice Fisher

To create the tropical tags, I used these Sunny Studio products:
I began my tags by first die cutting the scalloped tags from striped pattern paper and using a square die, cut out the center. I then die cut two more scalloped tags from white cardstock, inked the bottom with twisted citron and the tops with spun sugar and stamped the sentiments from Santa Claus Lane & Fabulous Flamingos stamp sets.

To put the shaker tags together, I added acetate behind the pattern tags and filled with sequins. Next, I stamped the flamingos, leaves, fruit, presents, ornaments and candy canes, colored with Copic markers and cut out using the coordinating dies listed above.

Sunny Studio Stamps: Scalloped Tag Dies Fabulous Flamingos Scenic Route Christmas Gift Tags by Rachel Alvarado and Candice Fisher

To finish the tags, I die cut and layered the christmas lights, colored with Copic markers and added some green Stickles for sparkle! I also added a few accents to the images with a white pen.

I hope you can have fun making some amazing Christmas tags to really show off that gift you so thoughtfully got for someone special! Thank you for visiting and have a Very Merry Holiday!

Sunny Studio Supplies Used:

Woodland Borders Dies
Shop at:
Sunny Studio
Holiday Cheer 6x6 Paper
Shop at:
Sunny Studio
Fabulous Flamingos Stamps
Shop at:
Sunny Studio
Fabulous Flamingos Dies
Shop at:
Sunny Studio
Santa Claus Lane Stamps
Shop at:
Sunny Studio
Santa Claus Lane Dies
Shop at:
Sunny Studio
Merry Mice Stamps
Merry Mice Stamps
Shop at:
Sunny Studio
Merry Mice Dies
Merry Mice Dies
Shop at:
Sunny Studio
Scenic Route Stamps
Scenic Route Stamps
Shop at:
Sunny Studio
Scenic Route Dies
Scenic Route Dies
Shop at:
Sunny Studio
Scalloped Tags-Circle
Shop at:
Sunny Studio
Scalloped Tags-Square
Shop at:
Sunny Studio