Thursday, October 24, 2019

Embossing Folder Focused Cards with Vanessa and Anja

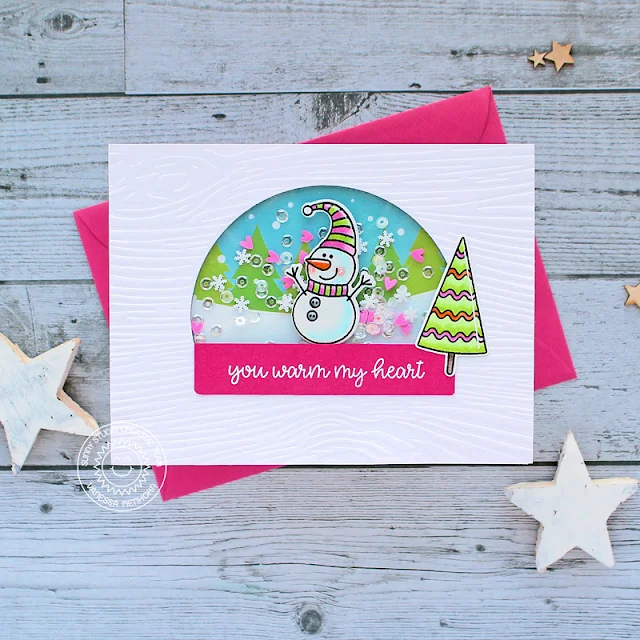
Hello to you! Vanessa here today with a fun shaker card using the Woodgrain Embossing folder. While looking at the new dies, I thought the flap die from the Sweet Treat Bag Dies would make a perfect window for a snow globe shaker card!

Sunny Studio Stamps: Feeling Frosty Sweet Treats Gift Bag Dies Christmas Themed Shaker Card by Vanessa Menhorn

I first embossed a panel of white cardstock with the embossing folder and die-cut the window. I covered the front of my card with patterned paper from the Very Merry 6x6 paper pad, then I stamped the snowman from Feeling Frosty, colored it with Copics, die-cut it with the matching die and adhered it to the card with foam tape. I adhered clear cardstock to the back of the window, backed it with fun foam, filled the window with clay heartssnowflakes and clear sequins and adhered the front to the card.

Sunny Studio Stamps: Feeling Frosty Sweet Treats Gift Bag Dies Christmas Themed Shaker Card by Vanessa Menhorn

Now I stamped and heat-embossed the sentiment onto a strip of pink cardstock, trimmed it and adhered it to create the base of the snowglobe. Finally, I stamped the tree, colored it with Copics, die-cut it with the matching die and adhered it.

I hope you like my idea to stretch your dies! Thanks for stopping by today!

------------------------------------------------

Hello everyone, Anja here sharing a pastel Christmas card which features the Buffalo Plaid Embossing Folder and one of the cute Merry Mice Stamps. As a little bonus, I added a circle shaker element.

Sunny Studio Stamps: Merry Mice Fancy Frame Dies Christmas Themed Shaker Card by Anja Bytyqi

First, I ran the embossing folder with a piece of white cardstock through my die-cutting machine. To enhance the texture of the embossed plaid pattern, I diagonally applied Distress Oxide Inks (Milled Lavender, Spun Sugar and Tumbled Glass) with a soft blending brush. I also added some random ink and white paint splatters.

Next, I stamped the mouse and its hat in Memento Tuxedo Black Ink and did some coloring with Copic Markers. I added little dots to the stocking with a white gelly roll pen and used the coordinating dies to cut out the images.

Sunny Studio Stamps: Merry Mice Fancy Frame Dies Christmas Themed Shaker Card by Anja Bytyqi

For my shaker element, I die cut three stitched scalloped circle frames from white cardstock using the Fancy Frame Circle Dies. I stacked two of them together to create a more sturdy top frame. I adhered an acetate circle to its back and die cut a narrow circle frame from white fun foam which I adhered with double-sided tape. This will create the right height for the embellishments to move around freely in the shaker. I then taped the last stitched scalloped circle frame to the other side of the fun foam circle (this step is not necessary but this bottom layer made it easier for me to adhere the shaker to the card later).

Now for the fun part of creating a shaker, I picked all kinds of tiny embellishments: Pink & White Clay Heart Confetti as well as sequins and seed beads from my stash. I also adhered some White Pearls and Blue & White Clay Snowflake Confetti to the embossed plaid background, so they won't fell to the bottom of the shaker when the card stands upright.

Finally, I stamped the sentiment in VersaMark Ink onto a banner and heat embossed it with silver embossing powder.

Thank you so much for stopping by! Have a wonderful day!

Sunny Studio Supplies Used:

Fancy Frames-Circle Dies
Shop at:
Sunny Studio
Very Merry 6x6 Paper
Shop at:
Sunny Studio
Buffalo Plaid Embossing
Shop at:
Sunny Studio
Woodgrain Embossing
Woodgrain Embossing
Shop at:
Sunny Studio
Feeling Frosty Stamps
Shop at:
Sunny Studio
Feeling Frosty Dies
Feeling Frosty Dies
Shop at:
Sunny Studio
Merry Mice Stamps
Merry Mice Stamps
Shop at:
Sunny Studio
Merry Mice Dies
Merry Mice Dies
Shop at:
Sunny Studio
Sweet Treats Gift Bag
Shop at:
Sunny Studio

Wednesday, October 23, 2019

Scenic Route Cards with Franci and Ana

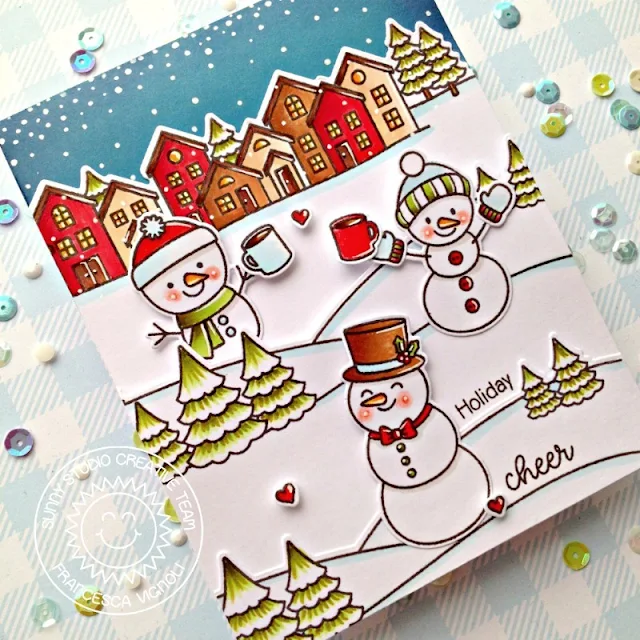
Hello there! Franci here with you today with a frosty card showcasing the new Scenic Route set!

Sunny Studio Stamps: Scenic Route Feeling Frosty Winter Themed Holiday Card by Franci Vignoli

This set is so cool because it is filled up with elements that help you create lots of different scenes and layouts/backgrounds for your projects. I started my card by creating my card base out of white cardstock, then I die cut some matching white rectangle panels and I stamped them with the houses border and the snowy hill one at different heights. I colored them with Copics and die cut them with the coordinated dies (I love that the dies just cut the top of each of these images!!).

Sunny Studio Stamps: Scenic Route Feeling Frosty Winter Themed Holiday Card by Franci Vignoli

I also stamped, colored and die cut lots of little snowmen from the Feeling Frosty set and started building my winter scene. For the little sky portion at the top, I colored the front top of my card with Salty Ocean and Chipped Sapphire distress inks, let it dry completely and added lots of dots with a white gel pen to create a snowy effect.

I glued everything down with a combo of liquid glue and foam adhesive, then I added more details with the white gel pen and stamped my sentiment following the snowy hills. Aww it turned out super cute!! 

Hope you like it as much as I do and thank you so much for stopping by today!

--------------------------------------------------

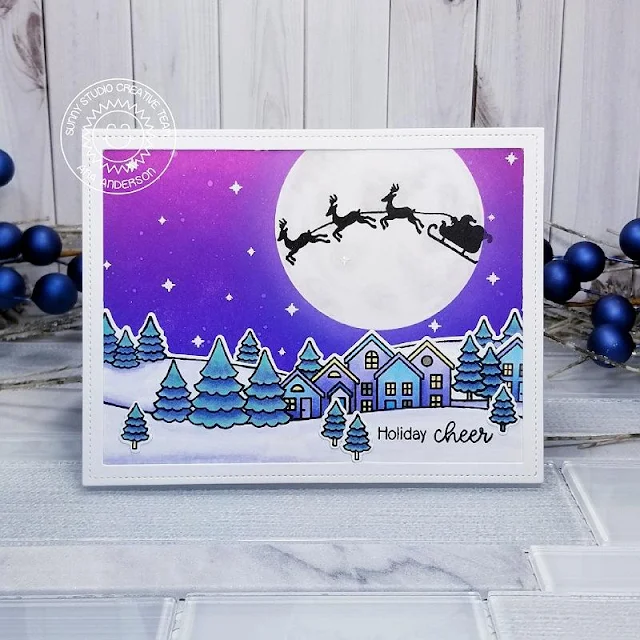
Hi friends! Ana here today with a winter night scene card featuring amazing Scenic Route stamp set and coordinating dies from the new holiday release!

Sunny Studio Stamps: Scenic Route Here Comes Santa Winter Themed Holiday Card by Ana Anderson

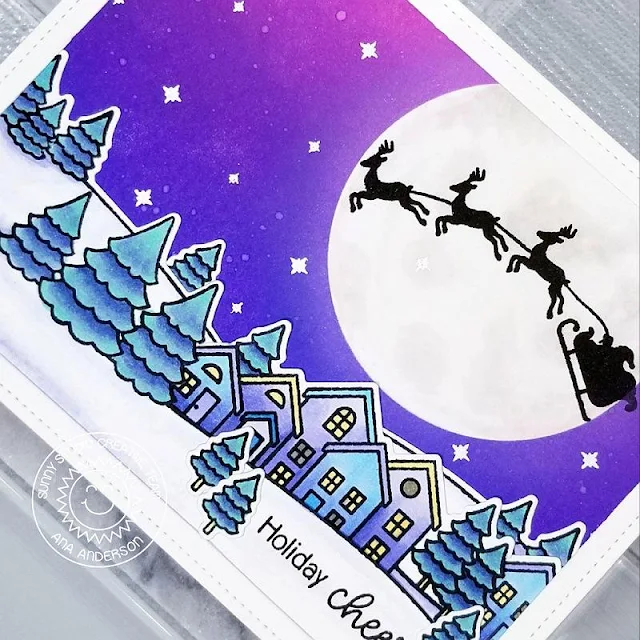
Scenic Route is such an amazing versatile stamp set – so many awesome scenes and backgrounds can be created with this set and for today’s project have used the row of houses and snowy hills images as well as the sentiments and standalone tree for my scene.
I created the background by ink blending Chipped Sapphire, Blueprint Sketch, Wilted Violet and Seedless Preserves distress inks on my panel, leaving the circle white to create the moon. I used masking paper that I die cut with circle die then shaded the moon with W1 Copic marker.

I colored the houses and snowy hills with Copic markers, die cut them with coordinating dies then using scissors cut on the line of the hill to insert the row of houses, adhering them together. I stamped Santa and sleigh, from Here Comes Santa stamps, on the moon and stamped the sentiment, from Scenic Route set on the snowy hill using VersaFine Onyx black ink.

Sunny Studio Stamps: Scenic Route Here Comes Santa Winter Themed Holiday Card by Ana Anderson

Stars, from Here Comes Santa set, were white heat embossed to the background. To finish off the card I added white frame which I created by altering Comic Strip Speech Bubbles Die (I cut the inside window partitions to create the frame).

I really love the versatility of the Scenic Route set and I hope you liked today’s project and got inspired! Thank you for stopping by today and I’ll see you next week!

Sunny Studio Supplies Used:

Here Comes Santa Stamps
Shop at:
Sunny Studio
Comic Strip Speech Bubble Dies
Shop at:
Sunny Studio
Feeling Frosty Stamps
Shop at:
Sunny Studio
Feeling Frosty Dies
Feeling Frosty Dies
Shop at:
Sunny Studio
Scenic Route Stamps
Scenic Route Stamps
Shop at:
Sunny Studio
Scenic Route Dies
Scenic Route Dies
Shop at:
Sunny Studio