Thursday, March 7, 2019

Botanical Backdrop Cards with Vanessa and Anja

Hi there! Vanessa here today with a soft pastel card using the Botanical Backdrop Die. I am so ready for spring and have been enjoying a few warmer days! So I was in the perfect mood for creating this.

Sunny Studio Stamps: Botanical Backdrop Hello Word Die Hello Card by Vanessa Menhorn

I started with a card base made from watercolor paper and inked it with various watercolors. Then I added ink droplets and let it dry. Now I die-cut the leafy frame and colored the leaves. After I had adhered the frame to the card, I die-cut the flowers from purple cardstock, bend the petals upwards, added a white pearl to the center and adhered the flowers to the card.

Sunny Studio Stamps: Botanical Backdrop Hello Word Die Hello Card by Vanessa Menhorn

I die-cut the Hello Word Die from watercolor paper, inked it, layered it with a word die-cut from purple cardstock and adhered it to the card. Finally, I added clear droplets.

Have you been enjoying spring days in your part of the world? I hope you'll get plenty soon! Thanks for visiting today :)

-------------------------------------------------

Hi everyone, Anja here and today I'm back with a birthday card that uses the beautiful Botanical Backdrop Die.

Sunny Studio Stamps: Botanical Backdrop Everyday Greetings Birthday Card by Anja Bytyqi

I started with a white A2 card base and die cut this leafy frame from two shades of purple cardstock. I snipped the lighter frame apart to fill in the empty spaces behind the darker frame.

Next, I created a reversed mask of the die by cutting it from masking paper. I adhered it to a panel of Strathmore Bristol Smooth cardstock and sponged on the Distress Oxide Inks Milled Lavender and a little bit of Wilted Violet. I also added tiny ink splatters with a paint brush.

Sunny Studio Stamps: Botanical Backdrop Everyday Greetings Birthday Card by Anja Bytyqi

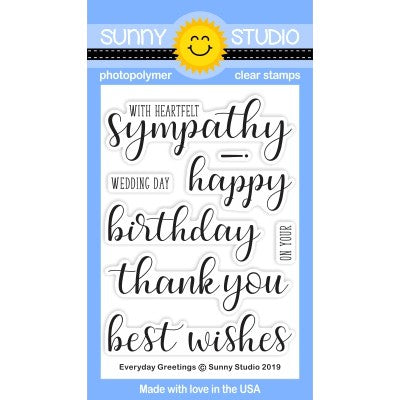
When everything was completely dry, I combined some sentiments from the Everyday Greetings set and stamped them in VersaMark Ink before heat embossing them with Ranger Liquid Platinum embossing powder. I adhered the layered frame to the panel and embellished the card with Sparkling Clear sequins. You can't really see it on the photo, but I also added some Nuvo Pale Periwinkle Jewel Drops.

Thank you so much for stopping by! See you next week!

Sunny Studio Supplies Used:

Hello Word Die
Hello Word Die
Shop at:
Sunny Studio
Botanical Backdrop Die
Shop at:
Sunny Studio
Everyday Greetings Stamps
Shop at:
Sunny Studio

Wednesday, March 6, 2019

Chubby Bunny Cards with Franci and Mona

Hello there and happy Wednesday! Franci here with you today, with a little Spring themed treat box :)

Sunny Studio Stamps: Chubby Bunny Sliding Window Dies Fancy Frames Hello Spring Card by Franci Vignoli

I looove these little cuties from the Chubby Bunny set, they are super adorable and perfect for Easter/Spring time, I can't help smiling every time I look at them! I decide to create a fun project today cause I needed a little treat box/ party favor idea and I'm so happy about how it turned out!

First of all I die cut the Sliding Window die twice out of lilac cardstock and I cut the "scored" sides with my trimmer. I also die cut the little window included in the set out of only one of the 2 pieces and from the side that does not have little tab attached.

Sunny Studio Stamps: Chubby Bunny Sliding Window Dies Fancy Frames Hello Spring Card by Franci Vignoli

I glued my little box together and added a little strip of green patterned paper from the Flirty Flowers paper to create the grass for my bunnies to stand on. I stamped, colored and die cut all the images, added some details with a white gel pen and glued them down to the grass. I think you could also add a little piece of acetate behind the window so your critters have more stability.

Finally I die cut a little banner using the Fancy Frames Rectangle dies out of white cardstock and I stamped a "Hello Spring" sentiment, I glued it down too and added a little clear bag with lots of candies :) It's cute, isn't it?! 

Can't wait to create more and also try to modify this to make also a little shadow box! Hope you like it too and thanks for stopping by today, have a lovely day! 

------------------------------------------------------

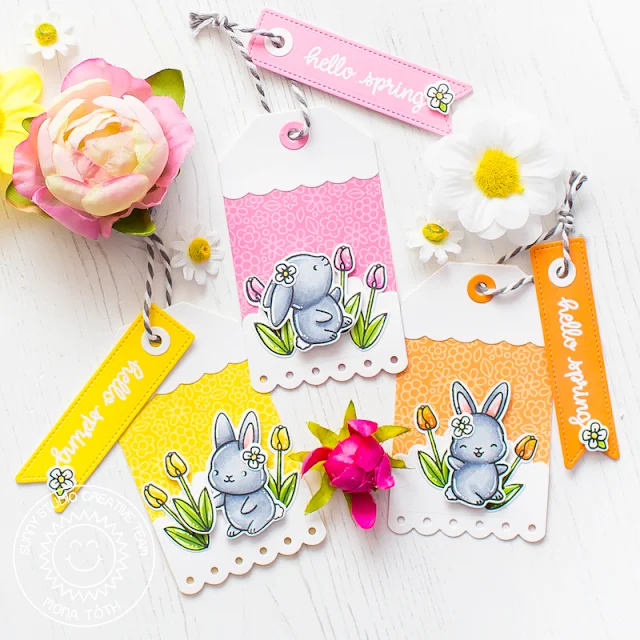
Hi crafty friends! It's Mona here, today I am showing you a pretty, but easy tag tutorial, featuring the Chubby Bunny Stamp Set.

Sunny Studio Stamps: Chubby Bunny Fancy Frames Spring Greetings Build-A-Tag Hello Spring Card by Mona Toth

I started the cardmaking with Stamping and Coloring. I stamped the cute bunny images from the Chubby Bunny Stamp Set and I also stamped tulip images from the Spring Greetings Stamp Set


Sunny Studio Stamps: Chubby Bunny Sliding Window Dies Fancy Frames Spring Greetings Build-A-Tag Hello Spring Card by Mona Toth

I colored the images with Copic markers.

Sunny Studio Stamps: Chubby Bunny Sliding Window Dies Fancy Frames Spring Greetings Build-A-Tag Hello Spring Card by Mona Toth

(Used colors: 0, C0, C1, C3, C5, R20, R22 E0000; Y11, Y15, Y19; YR14, YR07; RV06, RV11, RV34, YG 01, YG03, YG17;)

Sunny Studio Stamps: Chubby Bunny Sliding Window Dies Fancy Frames Spring Greetings Build-A-Tag Hello Spring Card by Mona Toth

When I was done I started the Die-cutting process. I used the Build a Tag #2 Dies, the Fishtail Banner II Dies and the cute banner from the Fancy Frames Rectangle Dies and I made die-cuts. 


Sunny Studio Stamps: Chubby Bunny Sliding Window Dies Fancy Frames Spring Greetings Build-A-Tag Hello Spring Card by Mona Toth

You will need the following pieces for one tag, so if you want to make more like me you can chose more colors.

Sunny Studio Stamps: Chubby Bunny Sliding Window Dies Fancy Frames Spring Greetings Build-A-Tag Hello Spring Card by Mona Toth

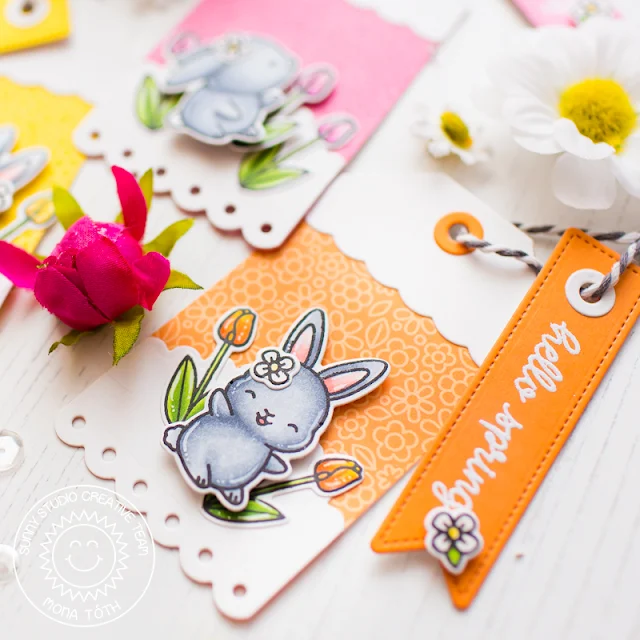
There is one more step before you adhere everything together. I wanted to add more dimension to the tags so I run them through my Die-cut machine with the Fishtail Banner II Dies.

Sunny Studio Stamps: Chubby Bunny Sliding Window Dies Fancy Frames Spring Greetings Build-A-Tag Hello Spring Card by Mona Toth

In the end I added my heat embossed sentiment to the banner and put my tag together. Thank you very much for reading through my post, I hope that you have enjoyed it and I have inspired you! If you like my creations let's be friends on Instagram. :)

Sunny Studio Supplies Used:

Fishtail Banner II Dies
Shop at:
Sunny Studio
Fancy Frames- Rectangles
Shop at:
Sunny Studio
Sliding Window Dies
Sliding Window Dies
Shop at:
Sunny Studio
Build-A-Tag #2 Dies
Build-A-Tag #2 Dies
Shop at:
Sunny Studio
Flirty Flowers 6x6 Paper
Shop at:
Sunny Studio
Chubby Bunny Stamps
Chubby Bunny Stamps
Shop at:
Sunny Studio
Chubby Bunny Dies
Chubby Bunny Dies
Shop at:
Sunny Studio
Spring Greetings Stamps
Shop at:
Sunny Studio
Spring Greetings Dies
Shop at:
Sunny Studio

Tuesday, March 5, 2019

Puppy Parents Cards with Juliana and Angelica

Hello friends! It's Juliana Michaels here and today I'm sharing a birthday card featuring the Puppy Parents Stamp Set.

Sunny Studio Stamps: Puppy Parents Sliding Window Dies Party Pups Puppy Themed Cards by Juliana Michaels

To get started, I took a piece of watercolor paper and randomly stamped images from the Puppy Parents Stamp Set to create my own background paper.

Sunny Studio Stamps: Puppy Parents Sliding Window Dies Party Pups Puppy Themed Cards by Juliana Michaels

I stamped them using Ranger Ink Grey Embossing Ink. This ink is colored so you can see where you are stamping! I then sprinkled the images with black embossing powder and heat set them with a heat gun.

Sunny Studio Stamps: Puppy Parents Sliding Window Dies Party Pups Puppy Themed Cards by Juliana Michaels

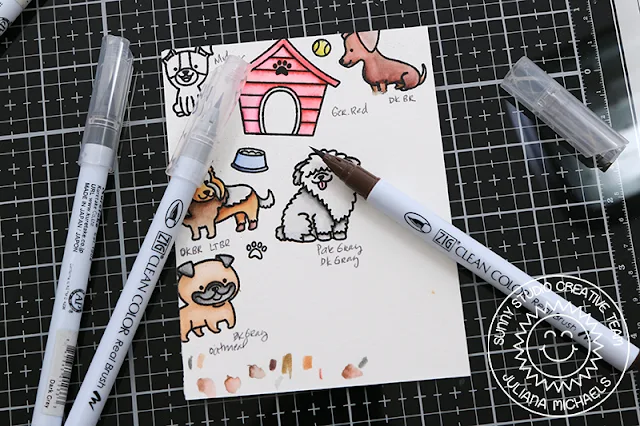
Next, I colored the images using Zig Clean Color Real Brush Markers. I did some test coloring on my first attempt at the creating the background. You'd be surprised how many times I start something before I actually have the finished card to share with you!

Sunny Studio Stamps: Puppy Parents Sliding Window Dies Party Pups Puppy Themed Cards by Juliana Michaels

Once the background was finished, I worked on the sentiment piece. I die cut a label from green cardstock using the stitched bracket label from the Sliding Window Die Set

Sunny Studio Stamps: Puppy Parents Sliding Window Dies Party Pups Puppy Themed Cards by Juliana Michaels

I then stamped the phrase using a combination of stamps from the Puppy Parents Stamp Set and the Party Pups Stamp Set.

Sunny Studio Stamps: Puppy Parents Sliding Window Dies Party Pups Puppy Themed Cards by Juliana Michaels

To finish off the card I tied on a black and white stitched ribbon. I then adhered everything to a piece of green patterned paper from the Classic Gingham 6x6 Paper Pad.

-----------------------------------------------------

Happy Tuesday friends! Angelica here, and today I'm sharing a card showcasing the adorable stamp set Puppy Parents.

Sunny Studio Stamps: Puppy Parents Comic Strip Everyday Dies Puppy Themed Card by Angelica Conrad

My first step was stamping and coloring the images. I used the following Copic colors for the puppies and house: Puppies: E40, E42, E43, E44 for fur; E70, E71, E74, E77 for ears and face; House: R59, R29, R24, R22 for siding; N6, N8 for trim; N3, N1, N0 for door

Sunny Studio Stamps: Puppy Parents Comic Strip Everyday Dies Puppy Themed Card by Angelica Conrad

After coloring, I used the coordinating dies to cut them out. Next, I die-cut an outdoor scene using dies from the Comic Strip Everyday Dies. I die-cut the grass and sun out of papers from the Gingham Pastels Paper Pack. The rest of the die cuts I used random pieces of card stock scraps. I cut the clouds out of two different greens to make a bush behind the doghouse.

To assemble the card, I started by ink-blending Mermaid Lagoon and Tumbled glass Distress Oxide inks onto a white card stock panel. I glued three layers of grass to the bottom, using both sides of the Gingham Pastels paper for different textures. I glued the tree and bushes on, then added the rest of the images with thin adhesive squares. 

Sunny Studio Stamps: Puppy Parents Comic Strip Everyday Dies Puppy Themed Card by Angelica Conrad

I picked out words from the stamp set to make the sentiment, and stamped them onto black card stock with embossing ink. I heat embossed with white embossing powder before trimming each word down to their own block. After adding the words to the card front, I attached the panel to red card stock, then backed it with craft foam. My last step was adding it to an A2 size card base.

That's all that I have for today. Thanks for stopping by!

Sunny Studio Supplies Used:

Party Pups Stamps
Party Pups Stamps
Shop at:
Sunny Studio
Party Pups Dies
Party Pups Dies
Shop at:
Sunny Studio
Classic Gingham 6x6 Paper
Shop at:
Sunny Studio
Comic Strip Everyday Dies
Shop at:
Sunny Studio
Sliding Window Dies
Sliding Window Dies
Shop at:
Sunny Studio
Gingham Pastels 6x6 Paper
Shop at:
Sunny Studio
Puppy Parents Stamps
Shop at:
Sunny Studio
Puppy Parents Dies
Puppy Parents Dies
Shop at:
Sunny Studio

Monday, March 4, 2019

Staggered Circles Cards with Eloise and Leanne

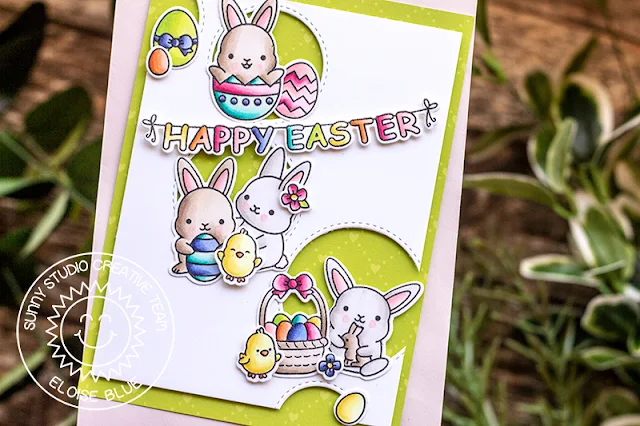
Hello friends, Eloise here and today we are sharing cards using the Staggered Circles Die. I paired the die with the Chubby Bunny Stamp Set since it’s so super cute and I haven’t had a chance to use it yet.

Sunny Studio Stamps: Staggered Circles Dies Chubby Bunny Happy Easter Card by Eloise Blue

I started off with stamping out my images onto some white cardstock, colouring them in with Copic Markers and cutting them out using the coordinating dies. While I had my die cutting machine out, I also cut the Staggered Circles Dies from a panel of white as well.

(Copic Markers Used: R00, R30, R21, R22 / RV10, RV13, RV25, RV19 / B63, BV02, BV04, BV08 / BG10, BG11, BG13, BG49 / YR00, YR02, YR12, YR18 / W00, W0, W1, W3 / YG01, YG03, YG05, YG07 / E41, E42, E43, E44 / R20 / 0)

Sunny Studio Stamps: Staggered Circles Dies Chubby Bunny Happy Easter Card by Eloise Blue

I then cut down a piece of patterned paper from the Flirty Flowers Paper Pad to the size of my card base. I added foam tape to the back of the die cut panel and adhered that into place as well.

Sunny Studio Stamps: Staggered Circles Dies Chubby Bunny Happy Easter Card by Eloise Blue

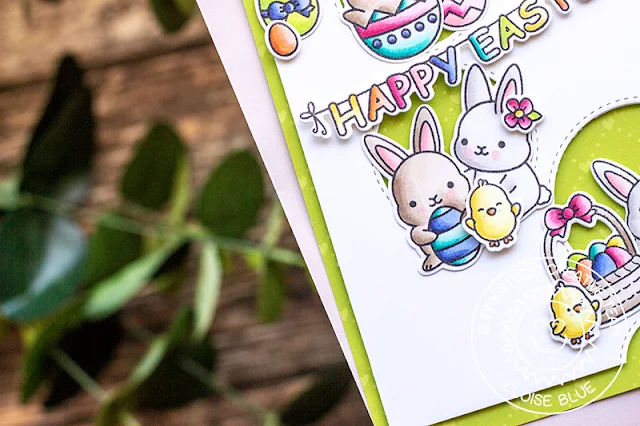
I added foam tape onto the backs of all my images and sentiment banner and adhered them in little clusters inside the die cut circles. I also added a couple on the left and on the bottom, even though those circles weren’t full. I adhered the entire panel onto a card base and that completed my card.

Thanks so much for stopping by today and I’ll see you next week!

---------------------------------------------------------

Hello everyone! Leanne here and I have a fun and colorful card to share today. This card was very easy to make with the help of the Staggered Circle DieI used the adorable bug images from the Backyard Bugs stamp set to fill the circles and create a playful scene down the length of the card.

Sunny Studio Stamps: Staggered Circles Dies Backyard Bugs Hello Card by Leanne West

I started with a white card stock panel that measures 4 inches wide by 6 inches tall. I used the Staggered Circle die to cut the circles  going vertically down the right side of the panel. I created a card base that measures 4.5 inches wide by 6 inches tall. I added strip of diagonal striped pattern paper (from the Spring Sunburst Paper pad) to the left side of the card front. I blended some Tumbled Glass Distress Oxide ink onto the area of the card front where the circle openings would be and then adhered the die cut panel over top.  

Sunny Studio Stamps: Staggered Circles Dies Backyard Bugs Hello Card by Leanne West

I stamped and Copic colored the bugs and flowers from Backyard Bugs. The tree branch image is from A Bird’s Life. I used the coordinating dies to cut out the images. I then adhered all the images with glue dots. To finish off this card, I stamped a sentiment from Backyard Bugs. I used a Misti and manipulated the stamp so it would follow the curve of one of the circles.  

Sunny Studio Supplies Used:

A Bird's Life Stamps
Shop at:
Sunny Studio
A Bird's Life Dies
A Bird's Life Dies
Shop at:
Sunny Studio
Backyard Bugs Dies
Backyard Bugs Dies
Shop at:
Sunny Studio
Backyard Bugs Stamps
Shop at:
Sunny Studio
Spring Sunburst 6x6 Paper
Shop at:
Sunny Studio
Flirty Flowers 6x6 Paper
Shop at:
Sunny Studio
Chubby Bunny Stamps
Chubby Bunny Stamps
Shop at:
Sunny Studio
Chubby Bunny Dies
Chubby Bunny Dies
Shop at:
Sunny Studio
Staggered Circles Die
Shop at:
Sunny Studio