Wednesday, December 5, 2018

Stitched Felt Santa's Stocking with Eloise

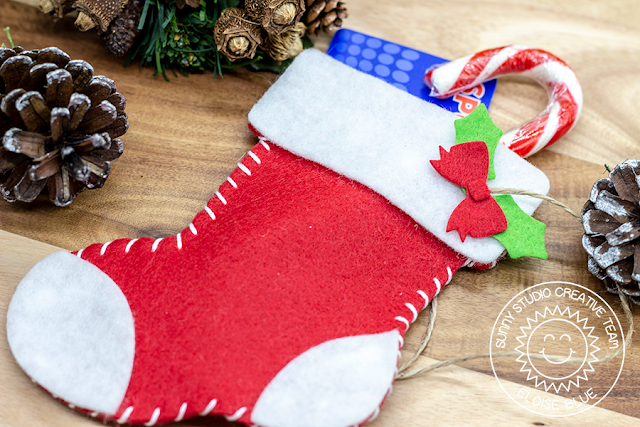
Hello friends, Eloise here and today I have a stitched felt stocking to share with you all using the Santa's Stocking die set

Sunny Studio Stamps: Stitched Felt Santa's Stocking by Eloise Blue

To start off my stocking today I die cut two stockings and the bow from red felt, the top, heel and toe piece from white felt and the holly leaves from green felt. I then used some white thread and stitched through the sides of the stocking, leaving the top piece open.

A tip here is to pierce the holes with a paper piercer first, so it's easier to stitch though two layers of felt.

Sunny Studio Stamps: Stitched Felt Santa's Stocking by Eloise Blue

Now that my stocking is stitched, I went ahead and adhered my white pieces into place with glue. I then pierced through another hole at the top of the stocking for the twine. I threaded it through and tied it in a knot. 

Sunny Studio Stamps: Stitched Felt Santa's Stocking by Eloise Blue

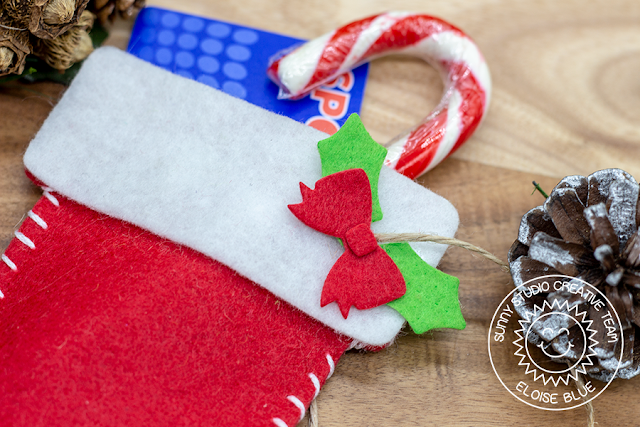
Lastly, I added the holly leaves and bow on the top for added interest. Now the stocking is complete and perfect for adding in any small gifts. 

Thanks so much for stopping by today. I hope you enjoyed this as much as I did making it and I can't wait to make more! See you next time. 

Sunny Studio Supplies Used: 

Santa's Stocking Dies
Shop at:
Sunny Studio

Tuesday, December 4, 2018

Christmas Trimmings Layered Wreath Christmas Card with Juliana

Happy Holidays friends! It's Juliana Michaels and today I'm here to share a Christmas wreath card created using the beautiful new layering stamp set called Christmas Trimmings.

Sunny Studio Stamps: Christmas Trimmings Dapper Diamonds Embossing Folder Layered Wreath Christmas Card with Juliana Michaels

To begin, stamp the various holly and berry images from the Christmas Trimmings stamp set onto white cardstock using your favorite green and red inks. For my card I used Scrapbook.com's new Hybrid Inks in Cardinal Red, Havana Red, Carnival Pink, Olive, Succulent and Guacamole. I then die cut them using the coordinating dies.

Sunny Studio Stamps: Christmas Trimmings Dapper Diamonds Embossing Folder Layered Wreath Christmas Card with Juliana Michaels

The background was creating by embossing a piece of kraft cardstock using the Dapper Diamonds embossing folder. I then adhered the holly and berry images in the shape of a circle on the front of the embossed paper. Feel free to use 3D foam tape to give some of the pieces a bit of dimension. You can then finish off the wreath by adding a red ribbon bow.

Sunny Studio Stamps: Christmas Trimmings Dapper Diamonds Embossing Folder Layered Wreath Christmas Card with Juliana Michaels

For the sentiment, I stamped Merry Christmas from the Christmas Trimmings stamp set onto a piece of white cardstock with Versamark Embossing Ink. I then sprinkled it with gold embossing powder and heat set it. Use double sided foam tape to adhere the deer and to add some depth and dimension to the scene.


I hope you enjoyed learning how this Christmas Wreath card came together using the new Christmas Trimmings stamp set. Thanks so much for joining me today!

Sunny Studio Supplies Used:

Dapper Diamonds Embossing
Shop at:
Sunny Studio
Christmas Trimmings Stamps
Shop at:
Sunny Studio
Christmas Trimmings Dies
Shop at:
Sunny Studio