Tuesday, January 24, 2017
Froggy Friends Toadally Awesome Birthday by Emily
Eek, these frogs from Froggy Friends are the cutest ever! If you can only buy one stamp set, this is the one. The three frogs can be transformed into girls with the little eyelash stamps and there are so many images to play with. This stamp set is really packed with fun. I love it so much!
I created a little scene where one of the frogs is a bit more excited than the other two. LOL They're celebrating a friend's birthday with a punny sentiment. I borrowed the first line of the sentence from the That Sucks mini stamp set, proving that it's easy to mix-and-match these sets from Sunny Studio Stamps.
Thanks so much for stopping by!
Sunny Studio Supplies Used:
Monday, January 23, 2017
Daffodil Dreams Friends Card with Eloise
Hello everyone, Eloise here and I'm going to be using the new Daffodil Dreams stamp set along with the Friends die from the Friends and Family word die set to make a sweet friendship card today.
Once my images had been stamped and die cut I could assemble my card. I ran a piece of white cardstock through my Big Shot with an embossing folder and then cut it down to about 3 3/4". I then used various adhesives to adhere down my flowers - to give dimension. Once all my flowers and leaves had been adhered I foam mounted this panel onto a green cardbase. For the sentiment I die cut the 'Friends' word from the Friends and Family word die set out of some black cardstock and white fun foam and adhered the two together and then onto my card. For the rest of the sentiment I used the Friends and Family stamp set and stamped down the additional sentiment onto a white strip and adhered that below my other sentiment with foam tape.
That finished off my card for today, I hope you liked it and got inspired. For more inspiration using the new stamp sets, stop by the rest of the week!
- Eloise
Sunny Studio Supplies Used:
To begin my card today I stamped out all my flowers. For my stamping today I used Distress Inks. I love how imperfect they look and they look watercoloured. To do this technique, I inked up the base layer of the flower first with a light yellow, spritzed it with water from about 6" away and stamped it down. I repeated this for all three layers, drying in between and using a darker yellow each time. Once all my daffodil's had been stamped I did the leaves and stems in the same way and then used the coordinating dies to cut them all out.
Once my images had been stamped and die cut I could assemble my card. I ran a piece of white cardstock through my Big Shot with an embossing folder and then cut it down to about 3 3/4". I then used various adhesives to adhere down my flowers - to give dimension. Once all my flowers and leaves had been adhered I foam mounted this panel onto a green cardbase. For the sentiment I die cut the 'Friends' word from the Friends and Family word die set out of some black cardstock and white fun foam and adhered the two together and then onto my card. For the rest of the sentiment I used the Friends and Family stamp set and stamped down the additional sentiment onto a white strip and adhered that below my other sentiment with foam tape.
That finished off my card for today, I hope you liked it and got inspired. For more inspiration using the new stamp sets, stop by the rest of the week!
- Eloise
Sunny Studio Supplies Used:
Saturday, January 21, 2017
Guest Designer: Daffodil Dreams & Timeless Tulips with Kay Miller
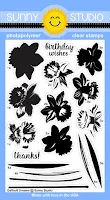
Hello! It's Kay here and I'm thrilled to be guest designing this month with Sunny Studios! They have some amazing new stamps and dies for their Spring Release. I have a card and tag that I created with the new sets, Timeless Tulips, Daffodil Dreams and Vintage Jar.
This first card is using Daffodil Dreams and the matching dies, along with Vintage Jar and matching dies. The daffodils were stamped with ink from Papertrey Ink in Lemon Tart, Summer Sunrise and Orange Zest. These flowers are stamped in three different steps using the MISTI. I love the detail and dimension! The glass jar was stamped with Aqua Mist and I blended a little ink in the middle of it too. I cut the Thanks die out three times and layered that before adhering it to the jar. Everything was added to a watercolor base that I blended some Aqua Mist ink on and added some white dots with acrylic paint. I added a few tiny white dots to the flowers as well.
***
My next project is a pretty birthday tag created with the Timeless Tulips stamp set and matching dies. I first blended some distress in onto the bottom portion of the tag and speckled it with water. The flowers were stamped with Berry Sorbet, Pale Peony, and Pure Poppy inks from Papertrey Ink. The leaves and stems with Spring Moss and Simply Chartreuse. I cut them out with the matching dies and adhered them to the tag with MonoAdhesive. I then trimmed the ends off along the bottom, and stamped the sentiment with black ink.
Be sure to check out all of the new releases over at Sunny Studios Stamps! They have some super cute products!
Thanks so much for stopping by!
Hugs,
Kay :)
Sunny Studio Supplies Used:
Friday, January 20, 2017
Hoppy Valentines Day Card by Lexa
Hello everyone! Lexa here today with an inspiration using the brand new Froggy Friends stamp and coordinating dies which I used to make a Valentine's day card.
I started with a piece of 4.25" x 5.5" white cardstock and blended some Tumbled Glass (for the water) and Squeezed Lemonade, Mustard Seed (for the sky) Distress Inks. I stamped all my images with Versafine black ink and watercolored them with both Distress Markers and Kuretake Clean Color Real Brush markers. This card is actually a flat shaker card. I used a piece of vellum to create the pond. Before that I placed the lily pad and stamped the ripple with blue dye ink. I added some flat heart sequins behind the vellum, it looks much prettier in real life. These froggies have matching bow and bow ties. Aren't they adorable?
That's all for today, I hope you like my card as much as I do. Have a wonderful day!
Sunny Studio Supplies Used:
Thursday, January 19, 2017
A Turtley Awesome Birthday Card with Vanessa
Hello everyone! Vanessa here with a card using some of the newly released stamps. Aren't they amazing? I love every single one of the new sets and it was difficult to decide which one to use first :)
Sunny Studio Supplies Used:
I ended up using Turtley Awesome for this card.
I first trimmed a panel of white cardstock slightly smaller than my yellow card base. Now I stamped everything from top to bottom, always masking the previously stamped image. That cute bird is from the Easter Wishes set. And that balloon? It is the small egg from Blissful Baking! Voilá, a perfect little balloon for the bird. And the string is from the same set. After I had colored the images with Copics, I stamped the sentiment and adhered the panel to the card. Finally, I added tiny star sequins.
I hope you like today's idea! Thank you so much for stopping by!
Wednesday, January 18, 2017
Froggy Friends Hoppy Birthday Card with Lindsey
Hi, Lindsey here today sharing a birthday card using the adorable Froggy Friends. I just love the sweet little frogs and there are a lot of different cards you can create with this set. It's also perfect for boy cards.....bonus! Let's get started on how I created this card.
To begin, I cut an A2 sized card base from some plaid patterned paper. I then cut a coordinating smaller stitched rectangle, and finally an even smaller rectangle from some blue card stock. Next, I stamped my sentiment on a light blue piece of card stock that would become the "water" in the scene. I stamped the images from the set that I wanted to use and colored them with Copic markers. I cut them out using the Froggy Friends dies.
I built my scene on the small blue rectangle allowing some of the images to hang off onto the larger green rectangle. I also added some die cut clouds to balance off the top of the scene. I decided to add another layer of color with a yellow rectangle behind the green one and then, adhered the yellow rectangle to the plaid card base using from tape.
That's it for me today. I just love this set and can't wait to use it again. I hope you'll give it a try. You get a lot of bang for your buck with this one. Thanks for reading and have a great day!
Sunny Studio Supplies Used:
Tuesday, January 17, 2017
My Life Would Suck Without You Card Set by Emily
Today's card set features the mini stamp set That Sucks and its coordinating die set. This mini set can be used in various ways, to express love/friendship or condolences on an event that 'sucks'. I made a card set showing it with one version of the sentiments with the scripted word die. I had so much fun paper piecing the cute vacuum cleaner and coordinating the scripted word dies with the other papers in each card.
The vacuums were stamped and trimmed from their respective patterns. Then I embellished them with white silk bows. The little hearts were die cut from the white panel using a tiny heart die and reveals the patterned paper in the layer beneath. The adorable little heart die is included in the That Sucks Die Set. The front two panels are popped up with fun foam for a bit of dimension.
Thanks so much for stopping by!
Sunny Studio Supplies Used:
Subscribe to:
Posts (Atom)