Hello everyone, Eloise here and today I'm here to show you a card using the Gleeful Reindeer set. These reindeers are so super adorable and I loved making this moonlight scene with them all on this card today.
To begin my card today I stamped, coloured and die cut all my images out from the Gleeful Reindeer set. I then got to work on my background. I first die cut a circle out of some masking paper and put that down onto my watercolour cardstock to protect it, since it's going to be a moon later on. I used various colours of Distress Inks to create my night sky background. I then used the negative piece of the masking paper and protected the night sky, while I worked on the moon, I used Distress Inks for this too. Once my background was done I used some white mist, water and shimmer watercolour to splatter the background, to make it look more starry.

Once the background was all done and dry I could work on assembling my scene together. I die cut two snow hills - but you could just use your scissors to cut a border like this and then adhered those onto my scene. I then took all my previously coloured and cut images and arranged them on my scene too, using various adhesives. To finish up my card I white heat embossed my sentiment on some red cardstock and cut it to a banner strip, added my entire scene onto a black card base and then added a little wink of stella to my images too, this wink of stella I used was so juicy that it sort of spurted out everywhere on my images, but hopefully it looks okay!
I hope you enjoyed my card today and check back the rest of the week for more inspiration!
- Eloise
Sunny Studio Supplies Used:
I'm so excited to welcome Kimberly Rendino to the blog today as our special guest. She has some gorgeous cards that are going to knock your socks off! Take it away Kimberly...
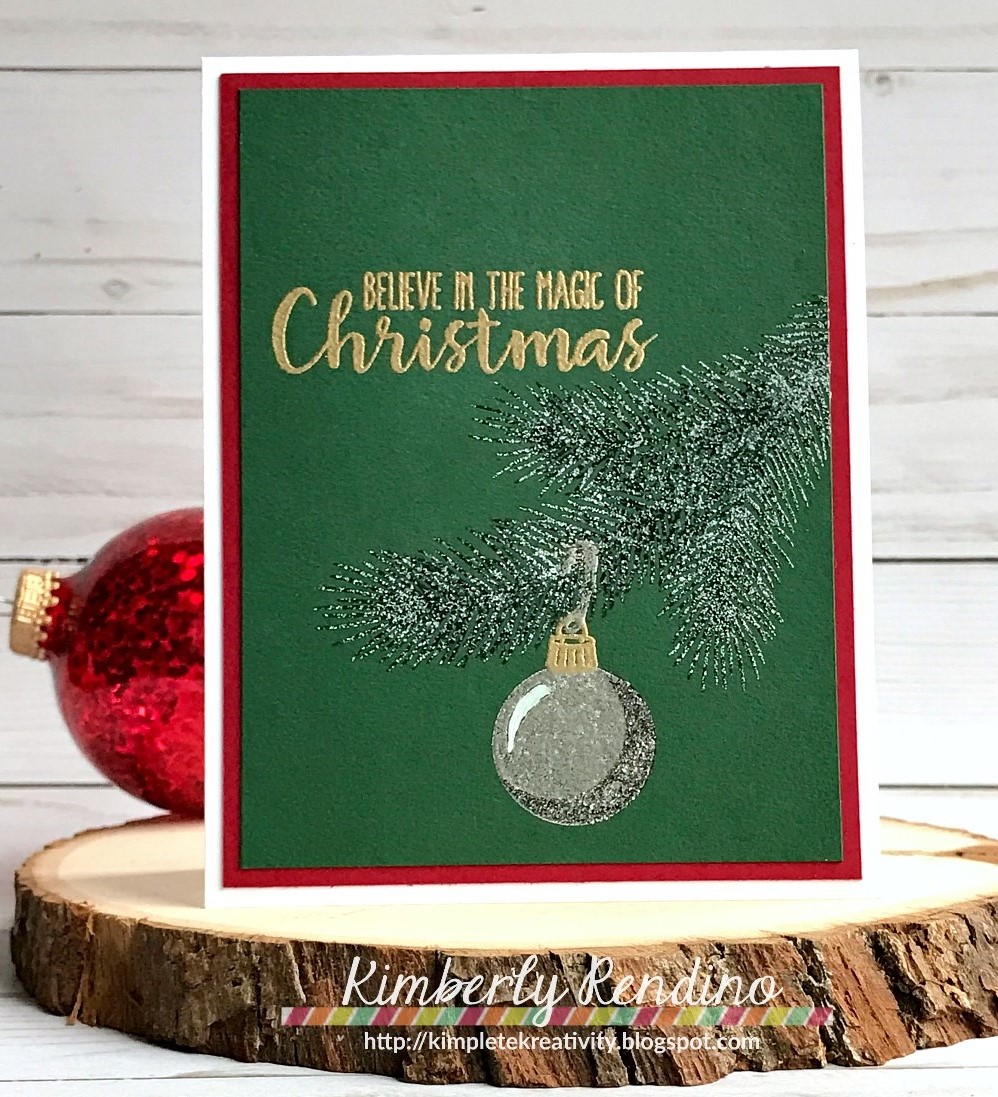
Hi there! I’ve created three cards to share with you today using Holiday Style, Merry Sentiments and the coordinating dies!
My first card is completely heat embossed! To create the fun snowy effect on the pine bough, I mixed together a bit of clear and white embossing powder. The shadow of the silver ornament was heat embossed with sparkle embossing powder.
For my second card I used the pine bough from Holiday Style to create a wreath. The little berries were stamped with the Autumn Splendor stamp set, and coated with Glossy Accents. I added the white accent on top of the Glossy Accents with a paint pen!
The third card showcases the fun light bulbs in the Merry Sentiments set. I began by embossing the light bulb die into a piece of white cardstock repeatedly. This is a great way to get more mileage from your dies! I stamped and die cut a rainbow of light bulbs and coated them with Glossy Accents. Once dry, I added them to a “cord” made of embroidery floss. A coat of Wink of Stella glitter marker makes the ‘Merry’ sentiment sparkle.
Thanks so much, Mendi for having me as a guest today on the Sunny Studio blog! I’ve enjoyed every minute of it!
Sunny Studio Supplies Used: