Monday, October 10, 2016

Night Time Gleeful Reindeer Scene with Eloise

Hello everyone! Eloise here and I'm back with my card for this week. I was inspired by a card I did a few months ago for a previous Sunny Studio release, but I switched it up a little and came up with this super cute reindeer card! This is the new Gleeful Reindeer stamp set that has just been released along with the Merry word die as well. I love these word dies, they're so versatile and fun! 

Sunny Studio Stamps: Gleeful Reindeer Grid Style Christmas Card by Eloise Blue.

To begin my card today I first started off with die cutting 6 squares to use on my card. You don't have to use dies if you don't want too, since they're square - you can just use your trimmer! I just used dies because they were convient for me. I then pulled the stamps I wanted to use from the Gleeful Reindeer stamp set and stamped each of the images I wanted down in the squares. I did have to use some masks since I wanted things to appear in front and behind and I wanted these pieces to be completely flat. Once all the stamping was done I used my Copic Markers and coloured in all the images.

Once all the colouring was done I wanted to colour in the backgrounds of each of the squares, so I stamped my images once again on masking paper and covered them up. I then used a couple of Distress Inks and ink blended over the images and created the night sky look. While the masks were still colouring the images, I also used my favourite water splotch technique and splatted a litter water over each square also.


Sunny Studio Stamps: Gleeful Reindeer Grid Style Christmas Card by Eloise Blue.

Now that all the colouring was done I could start bringing my card together. I first pulled some red and white striped patterned paper from my stash and adhered that down to my white 4" x 5 1/2" cardbase. I then pulled another piece of white cardstock and used an embossing folder to give that plain white piece some texture and interest and I stuck that on top of my patterned paper piece with some fun foam. I then used some foam adhesive to adhere down my squares onto that white piece. I made sure they were basically all even on there too - I used a t-square ruler to help with that.

Now my card was basically done I needed a sentiment. I was dying to use the Merry die so I die cut that out of some fun foam and gold mirror cardstock and adhered the two together and then on my card. For the word christmas, I masked off one of the sentiments in the set and white heat embossed it on some black cardstock. Then I adhered it down flat to my card. For a last finishing touch I used some Wink of Stella and added a little clear shimmer onto some of the images. You have to have a little sparkle on Christmas cards, right?

Thanks for stopping by today, I hope you enjoyed and got inspired. Make sure you stop by the blog for the rest of week to see the other ladies projects for the week, they're going to be amazing!

- Eloise

Sunny Studio Supplies Used:

Sunday, October 9, 2016

Sunny Studio Winter Release Giveaway Winners!


Thank you everyone who joined our Winter Release festivities this week!  It was such a joy having you help me celebrate.  Without further ado, the winners of our five $20 gift codes are... 

Monday, Oct 3
Heidi Hurley

Tuesday, Oct 4
Karen Linkogle

Wednesday, Oct 5
Gilda (McStamper)

Thursday, Oct 6
Jo Williams

Friday, Oct 7
Sue Martin

Ladies, I have emailed you.  For everyone else, there's still two days left to take advantage of our free shipping offer. Please note that with Columbus Day on Monday, any orders placed in the next two days will go out on Tuesday.  :)


Don't forget you can also combine the free shipping offer with our SAVE5 promo code on orders over $49.  

Hope you have a wonderful and relaxing Sunday. :)


Saturday, October 8, 2016

Sunny Saturday Share: Customer Fall & Winter Cards


Hello Peeps!  I just wanted to thank you for your overwhelming support this past week.  Your sweet comments truly made my week extra special.   I think our paper crafts industry is filled with some of the sweetest souls around.

I thought I would take this Saturday to share a handful of gorgeous customer cards that caught my eye over the past couple of weeks.


City Streets Scene Card by Vanessa


Sunny Studio Stamps: City Streets Scene Card by Vanessa

Bundled Up Penguin Shaker Card by Andreea Raghina


Sunny Studio Stamps: Bundled Up Penguin Shaker Card by Andreea Raghina

Autumn Splendor Fall Leaves Card by Cassie Tezak


Sunny Studio Stamps: Autumn Splendor Fall Leaves Card by Cassie Tezak

City Streets Fall Scene Card by Julene VanKleeck


Sunny Studio Stamps: City Streets Scene Card by Julene VanKleeck

Snow Kissed Skiing Penguin Card by Nicky


Gleeful Reindeer Card by my friend Lorna.  :)


Thank you so much for sharing your beautiful cards with us.  Please keep 'em coming.  Tag me with the hashtag #sunnystudiostamps on Instagram, our facebook page or in our flickr group for your chance to be featured here in our next Sunny Saturday Share feature.  :)

Also, mark your calendars.  Two weeks from today I will kick off a fall themed challenge.  ;)  


Sunny Studio Supplies Used:


Friday, October 7, 2016

Simon Says Stamp Guest Post with Sneak Peeks

I'm sharing some bonus cards over on the Simon Says Stamp blog today.  I hope you will hop over there to see the full reveal and read more about how I created each card.  :)  

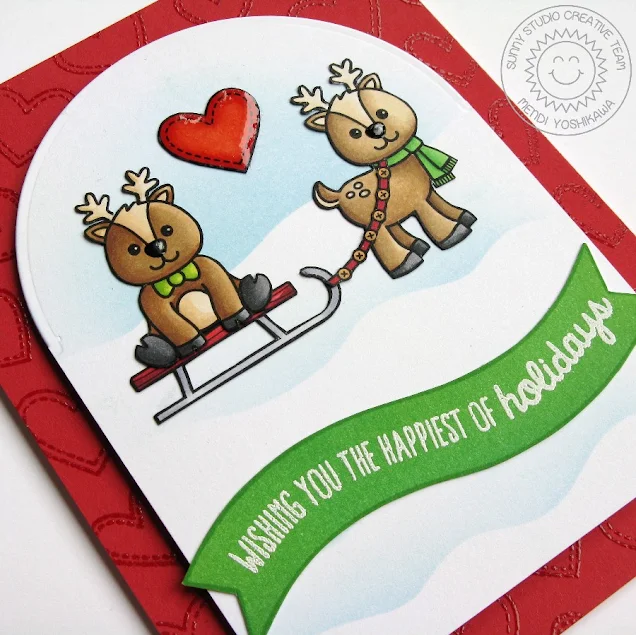
Gleeful Reindeer Card

Sunny Studio Stamps: Gleeful Reindeer Holiday Christmas Card by Mendi Yoshikawa

Sunny Studio Supplies Used:
              

Holiday Style Card
Sunny Studio Stamps Holiday Style Pink Hanging Ornaments Christmas Card by Mendi Yoshikawa

Sunny Studio Supplies Used:
         

Little Angels Card

Sunny Studio Stamps: Little Angels & Angelic Sentiments Holiday Card by Mendi Yoshikawa

Sunny Studio Supplies Used:
        

Mug Hugs Card

Sunny Studio Stamps: Mug Hugs Cup of Cheer Christmas Holiday Card by Mendi Yoshikawa

Sunny Studio Supplies Used:
        

Also, don't forget there's still time to enter our five giveaways for the week using the rafflecopter at the bottom of each day's post from this week.  Contest ends Saturday night at midnight PST. ;)  

Inspiration Week: Introducing Christmas Icons & Tag Topper Dies

Welcome!  Today's the big day!  Before you run off to go shopping, make sure to check out the final unveiling of products and scroll down to the bottom of this post for our last giveaway of the week and a special offer for free shipping.  ;)

Today I'm super excited to share a new set of dies that were created with the same flexibility and value as our fishtail banner dies.  I also have one last holiday stamp set to share that was created as a compliment to the gift tag dies with 11 small iconic Christmas images and the words "to" & "from" in 4 unique fonts.  As you will see from my examples though it's pretty fun all on it's own too.  

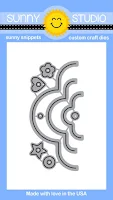
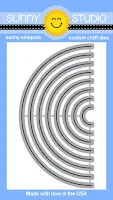
Introducing Sunny Semi Circles Dies (Retail: $15.00)

These dies were designed to be ultra flexible for creating tags, labels, bookmarks, card panels and shaped cards from 1/2" wide to 4" wide.  


Sunny Studio stamps:  Introducing Sunny Semi Circles Dies

I honestly wanted to have sooo much more time to play with these dies, but I only was able to finish some holiday gift tags with them today (although you might check the SSS Blog this afternoon for another bonus project with them).  I used the dies to create both the inner tag as well as a shadow.  I then decorated them with images & greetings from Gleeful Reindeer, Blissful Baking and Christmas Icons.
Sunny Studio Stamps: Sunny Semi Circles Gift Tags by Mendi Yoshikawa (with Gleeful Reindeer, Blissful Baking & Christmas Icons stamps)

To use them, I found using these steps gave me the best results:

  1. Draw a faint pencil line on your cardstock with a T-square ruler approximately 1/2" to 2" from the top depending on the circle size.
  2. Using some washi tape, secure them in place along the line that was drawn and run them through the die-cutting machine (As an alternative, I found you could also skip the first step by using a clear ruler with a grid and pushing the die flat with the edge of the ruler before adhering with washi tape).
  3. Use a paper trimmer to trim them down each side.  Because they are sized at exact 1/2 increments they are super easy to trim using the guides on your trimmer.  
  4. Erase pencil lines and shorten to desired length.  Round corners if desired.

Introducing Crescent Tag Topper Dies (Retail: $9.00)


Just like the Sunny Semi Circles, these were designed to create a variety of tags, bookmarks, labels and card panels in three sizes. I created several gift tags using the middle tag size together with Blissful Baking & Christmas Icons to embellish them.  These would be perfect for adhering to baked goods for neighbors and friends at the holidays.  As a finishing touch I added cute borders to my tags using our Sunny Borders Stamps & coordinating dies.


Sunny Studio Stamps: Crescent Tag Toppers Holiday Gift Tags by Mendi Yoshikawa (with Blissful Baking & Christmas Icons stamps)


Introducing Traditional Tag Topper Dies (Retail: $10.00)


I created a third style of gift tags with the new Traditional Tag Topper dies.  You can die-cut the hole with the slot die for ribbon that comes with this die set or mix them with the Crescent Tag Topper dies for more options. This was the last project I tackled for the release and I had a lot of fun using up some extra odds and ends from different stamp sets shared throughout the week--it always feels really good to have nothing go to waste. 

To add some interest to my 2-1/4" wide tags I cut a second portion from patterned paper to add to the top of each one using Doodlebug's Here Comes Santa Claus 6x6 paper pad.  I then die-cut the bottoms using different Fishtail Banner dies.  I actually was able to use them for the flat bottomed tags as well since they were narrow enough.  

As a side note, I wanted to point out the Minnie Mouse inspired embellishment using our Holiday Style set.  I stamped an extra set of ornaments with Hero Arts Charcoal ink and Black ink for the shadow.  I then punched our her ears using a 5/8" circle punch before paper-piecing them together.  I had so much fun on the is one & it was super easy--I can totally see myself mass producing these for all my gifts this Christmas.


Sunny Studio Stamps: Crescent Tag Toppers Holiday Gift Tags by Mendi Yoshikawa (with Blissful Baking, Little Angels, Holiday Style, Mug Hugs & Christmas Icons stamps)

Up next is a grid style card focusing on all the fun images from the Christmas Icons stamp set.  For my sentiment I turned to one from our Bundled Up set that was just the right size to fit in my center square.
Sunny Studio Stamps: Christmas Icons Grid Style Card by Mendi Yoshikawa

I think many of the images from the Christmas Icons set make great companion pieces for the little penguin from our Bundled Up set from last year.  To decorate my package I added stripes to one with a pen and ruler and stamped circles on the other one using a circle snowflake from our Snow Kissed set.  The little holly added to his hat was taken from the new Blissful Baking set.  I finished off my card with my other favorite banner from our Sunny Borders set.
Sunny Studio Stamps: Penguin Secret Santa Card by Mendi Yoshikawa (using Christmas Icons & Bundled Up)

For this Christmas Icons card I inked up my background using a tiny bit of Picked Raspberry with Festive Berries and Fired Brick distress inks. I then flicked on water and when it was dry, used the two poinsettia images to stamp a tone-on-tone print onto the background.  I then stamped and colored 6 separate images with Copic Markers which I fussy cut out.  It looks like there are actually 10 flowers, but I was crafty and placed many of them off the edge where I could trim them off and add them to a second spot so nothing went to waste (and saved me some time).

For my merry word die, I pressed a piece of kraft cardstock into my VersaMark ink pad and sprinkled the whole piece with glittery gold embossing powder before heating it up and die-cutting my word from it.  A sentiment heated embossed in coordinating gold powder from our Merry Sentiments set completed my card.
Sunny Studio Stamps: Christmas Icons Poinsettia Card by Mendi Yoshikawa

This last card was created using a glue pad with those same poinsettia images (and the trio of dots from our Sweet Shoppe set) together with hot pink foil and a Mini Minc machine.   This is one of those times where a stamp positioner to get extra good glue coverage with multiple impressions of the stamp is really helpful.  

You can also achieve a similar fun look by stamping with VersaMark & applying metallic or colored opaque embossing powder on black cardstock.  I then just added some jewels to the center of each flower for some extra bling and foiled a sentiment on some plain white cardstock using Merry Sentiments.
Sunny Studio Stamps: Christmas Icons Poinsettia Card by Mendi Yoshikawa

I honestly had so many more ideas for this set that I ran out of time for, but hopefully I shared enough to get your creative wheels turning--I think there are endless ways these cute images can be used and I can't wait to see what you make!

Here's a full look at the new Christmas Icon stamps, Tag Topper Dies & Sunny Semi Circle Dies all being released today (dies are a bit larger than they appear here)...


Sunny Studio Stamps: Introducing Christmas Icons Stamp Set  Sunny Studio Stamps: Introducing Crescent Tag Toppers Die Set  Sunny Studio Stamps: Introducing Traditional Tag Toppers Die Set  Sunny Studio Stamps: Introducing Sunny Semi Circles Die Set

I hope you've enjoyed all the sets and inspiration this week.  I'm loving the new dies for their reasonable price point, flexibility and space saving features!

Would you like to win a $20 gift code to our online store?  Use the rafflecopter below to enter to win.  We will be giving away a new gift code each day for a total of five chances to win!  If you're just joining us, there's still time to enter the contests from earlier in the week too. ;)

a Rafflecopter giveaway
Each contest closes on October 8th at Midnight PST.  Winners will be announced on Sunday, October 9th.  :)

SALES & FREEBIES:

Before you rush off, I wanted to let you know that I'm running a special for FREE SHIPPING on all orders over $25 for our US retail customers & all orders over $50 for our Canadian friends through Monday, 10/10/16 at Midnight PST (offer will be applied automatically).  

In addition, orders over $49 from any location will qualify for $5 off using the code SAVE5.

Don't forget all orders will automatically come with a free 7/8" holly die (while supplies last).


Other Sunny Studio Supplies Used Today: