Showing posts with label Sunflower Fields. Show all posts

Wednesday, August 12, 2026

Sunflower Fields Card with Tina H

Hi there crafty friends, Tina here and since we are enjoying plenty of sunny days what better card to make than this one with the beautiful Sunflower Fields stamp and die set

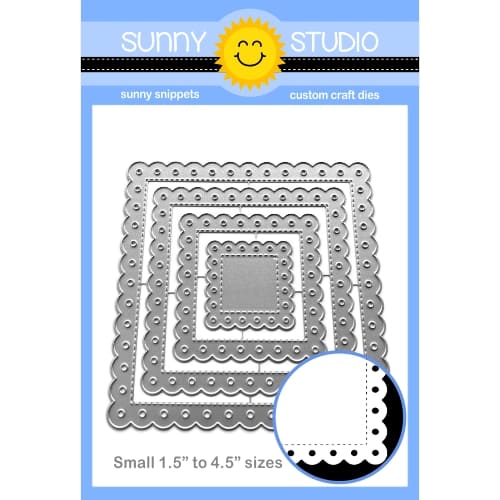
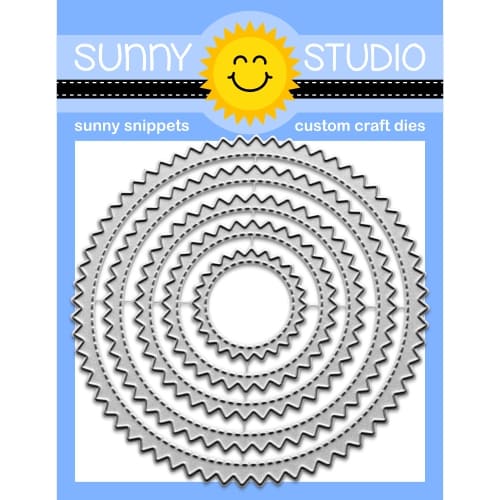
Sunny Studio Stamps: Sunflower Fields Congratulations Card by Tina Henkens (featuring Scalloped Square Dies, Stitched Circle Dies, Zig Zag Circles Dies)

I started this project by creating the flowers and leaves using my packaging sheet as a guide since this is a layering set. After selecting my ink colors, stamping multiple images is easy when you have all the white die cuts ready. 

A square design is a good match for any cluster of blooms, so after making a white square card base, I added another white layer with the largest of the Scalloped Square 2 Small dies. Then I switched to a white panel made with the Zig Zag Circle diesMy focal panel is a plain Stitched Circle Small from a bright pink paper (Dots & Stripes Jewel Tones). 

Sunny Studio Stamps: Sunflower Fields Congratulations Card by Tina Henkens (featuring Scalloped Square Dies, Stitched Circle Dies, Zig Zag Circles Dies)

Now I was ready to place the flowers and leaves as a cluster in the left bottom corner of the card with thin foam tape. Since this card has a lot of layers, I wanted a clean and simple sentiment (Country Carnival) stamped with Versafine Onyx Black ink on a white strip. Finally, I added a few Champagne Clear Jewels for a bit of sparkle!

How would you arrange these pretty flowers on your card? I am curious to see your creations! Thank you for joining me and happy crafting!

Sunny Studio Supplies Used:

Dots & Stripes Jewel Tones 6x6 Paper
Shop at:
Sunny Studio
Sunflower Fields Stamps
Shop at:
Sunny Studio
Sunflower Fields Dies
Shop at:
Sunny Studio
Stitched Circle Small Dies
Shop at:
Sunny Studio
Country Carnival Stamps
Shop at:
Sunny Studio
Scalloped Square 2 Small Die
Shop at:
Sunny Studio
Zig Zag Circle Dies
Zig Zag Circle Dies
Shop at:
Sunny Studio

Tuesday, August 4, 2026

Sunflower Fields Card with Marieke

Hello all, Marieke here. I'm back again with my weekly post for Sunny Studio Stamps. Today I hope to inspire you with a card that I made using the Sunflower Fields Stamp & Die.

Sunny Studio Stamps: Sunflower Fields Friendship Card by Marieke Slaats (featuring Big Bold Greetings, Inside Greetings Friends)

For this project I thought it would be fun to create a shaped card, so I used the Spellbinders Make a Wish Arch Labels Etched Dies S5-619. Die cut the large die twice and scored one at 3/4 inch. Adhered them together to create my base. Traced the inner shape of the large die out of Kraft cardstock and cut the slightly smaller one using pattern paper.

Sunny Studio Stamps: Sunflower Fields Friendship Card by Marieke Slaats (featuring Big Bold Greetings, Inside Greetings Friends)

I stamped the sunflowers and leaves out of the Sunflower Fields stamp using Scattered Straw, Mustard Seed, Wild Honey, Rusty Hinge, Brushed Corduroy, Vintage Photo and Walnut Stain Distress Oxides for the sunflowers. For the leaves I stamped Shabby Shutters twice, Peeled Paint and Forest Moss. Die cut the elements using the Sunflower Fields Die. Shaped the flowers and bit before adhering them.

Sunny Studio Stamps: Sunflower Fields Friendship Card by Marieke Slaats (featuring Big Bold Greetings, Inside Greetings Friends)

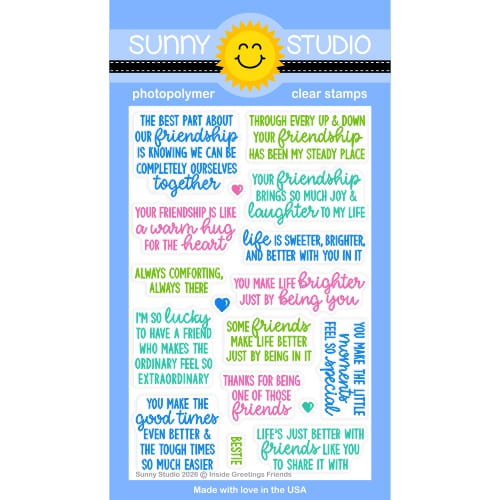
Stamped the thanks sentiment out of the Big Bold Greetings Stamp and Cut them using the matching Big Bold Greetings Dies. Stamped the other sentiment out of Inside Greetings Friends directly on to the card. Finished the card by adding some black paint splatters.

Have a wonderful day!

Sunny Studio Supplies Used:

Sunflower Fields Stamps
Shop at:
Sunny Studio
Sunflower Fields Dies
Shop at:
Sunny Studio
Big Bold Greetings Stamps
Shop at:
Sunny Studio
Big Bold Greetings Dies
Shop at:
Sunny Studio
Inside Greetings Friends Stamps
Shop at:
Sunny Studio

Monday, July 27, 2026

Sunflower Fields Card with Tina M

Hi there! Tina M here! Today I have an elegant card for you using the Sunflower Fields setI usually go for bright pinks, orange, greens and turquoise on my cards, but today I chose a soft, muted pink to  mulled red color scheme!

Sunny Studio Stamps: Sunflower Fields Friendship Card by Tina Magnusson (featuring Inside Greetings Friends, Icing Rectangle Frame Dies)

For my card I used an A2 size card base. I started off by trimming a piece of grey polka dot patterned paper from the Subtle Grey Tones paper pack to 4,25 x 5,5 inches and adhered it to my card base using double sided tape.

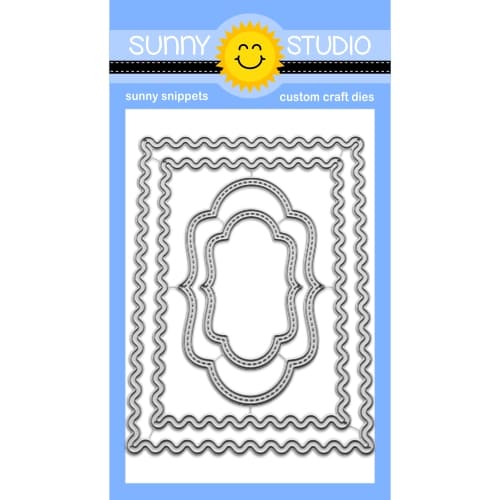
Next, I trimmed a piece of white card stock to 4,25 x 5,5 inches and ink blended the outer edges with pink ink and then die cut out the largest of the Icing Rectangle Frame Dies to create a frame and adhered it to the card base using liquid glue.

I stamped one of the sentiments from the Inside Greetings Friends Stamps set in the upper right corner. There are so many good sentiments to choose from with this stamp set!

Sunny Studio Stamps: Sunflower Fields Friendship Card by Tina Magnusson (featuring Inside Greetings Friends, Icing Rectangle Frame Dies)

I then stamped the sunflowers and leaves from the Sunflower Fields set, layer by layer, using light to dark inks. Next, I die cut the stamped images using the coordinating sunflower and leaves dies. As the stem stamp does not have a coordinating die I fussy cut them, super easy and quick! Next, I stamped one of the little bees and die cut it out using the coordinating die!

I assembled the sunflowers with the stems and leaves using liquid glue. Lastly, I added foam dots to the back of them and the little bee for dimension and arranged them to my taste and adhered them to the card.

Thanks for stopping by! Wishing you a happy and colorful day!

Sunny Studio Supplies Used:

Sunflower Fields Stamps
Shop at:
Sunny Studio
Sunflower Fields Dies
Shop at:
Sunny Studio
Subtle Grey Tones Paper
Shop at:
Sunny Studio
Inside Greetings Friends Stamps
Shop at:
Sunny Studio
Icing Rectangle Frame Dies
Shop at:
Sunny Studio

Sunday, July 19, 2026

Sunflower Fields Card with Hanh

Hello Crafty Friends! It's Hanh here with you today and I have a clean and simple Thank You card to share showcasing the Sunflower Fields set. I love how well this previously released set pairs so well with the recently released Sweet As Can Bee set. So, let’s get started.

Sunny Studio Stamps: Sunflower Fields and Sweet As Can Bee Thank You Card by Hanh Nguyen

I stamped the sunflowers from the Sunflower Fields Stamp set onto a piece of Neenah Solar White 110 lb cardstock with Squeezed Lemonade, Mustard Seed, Fossilized Amber, Wild Honey, Tea Dye, Vintage Photo and Ground Espresso Distress Oxide inks. I used the coordinating Sunflower Fields Dies to die cut them out. 

Next, I stamped the bees from the Sweet As Can Bee Stamps set onto a piece of Neenah Solar White 110 lb cardstock with Memento Tuxedo Black ink. I used the coordinating Sweet As Can Bee Dies to die cut them out. I colored with Copic markers and highlighted with a white gel pen.

COPIC COLORS:
Bees: Y11/13/15/19, T1/3/5/7, R20, BG000/10

Sunny Studio Stamps: Sunflower Fields and Sweet As Can Bee Thank You Card by Hanh Nguyen

For the background, I used Salvaged Patina Distress Oxide Ink to ink blend to add a bit of color onto a piece of Neenah Solar White 110 lb cardstock behind the sunflowers.

I stamped the “Just buzzin’ by to say” sentiment from the Sweet As Can Bee Stamps set and the “Thanks” from the Sunflower Fields Stamp set with Memento Tuxedo Black ink directly onto the inked panel. I also added some stitched trails with the same black ink. 

Sunny Studio Stamps: Sunflower Fields and Sweet As Can Bee Thank You Card by Hanh Nguyen

The sunflowers and bees were adhered to the panel with foam tape for a bit of dimension and interest. Finally, the panel was adhered to a white A2 card base (4.25” x 5.5”).

I appreciate you taking the time to stop by and visit today. I hope you liked my card. For more info and ideas, be sure to visit the Sunny Studio Stamps Shop. Please also visit my INSTAGRAM feed for more inspirations.

Have a wonderful and crafty day!

Sunny Studio Supplies Used: 

Sunflower Fields Stamps
Shop at:
Sunny Studio
Sunflower Fields Dies
Shop at:
Sunny Studio
Sweet As Can Bee Stamps
Shop at:
Sunny Studio
Sweet As Can Bee Dies
Shop at:
Sunny Studio

Friday, July 10, 2026

Sunflower Fields Card with Janneke

Hello crafty friends, Janneke here. Today I’m sharing a card featuring the Sunflower Fields stamp set.

Sunny Studio Stamps: Sunflower Fields and Garden Fairy Card by Janneke Peters (featuring Dotted Diamond Die, Icing Rectangle Frame Die)

I started by die cutting a beige frame and a light brown background panel for inside the frame using the Icing Rectangle Frame dies. To give the background some extra texture, I added a beautiful effect with the Dotted Diamond Portrait plate. I blended brown ink along the bottom of the panel to create more depth. To finish the background, I added some gold and white paint splatters, which gave it a subtle sparkle and a little bit of magic.

Sunny Studio Stamps: Sunflower Fields and Garden Fairy Card by Janneke Peters (featuring Dotted Diamond Die, Icing Rectangle Frame Die)

Next, I created the sunflowers and leaves using the Sunflower Field stamp set. This stamp set is a layering stamp set, so the sunflowers are created by adding different stamped layers. With every layer, more details and depth appear, giving the flowers a beautiful and realistic look. 

Sunny Studio Stamps: Sunflower Fields and Garden Fairy Card by Janneke Peters (featuring Dotted Diamond Die, Icing Rectangle Frame Die)

I stamped the fairies from the Garden Fairy stamp set. I colored them in warm bee-inspired colors with my Ohuhu markers. I also added tiny watering cans from the Foxy Friends stamp set into their hands, which made them look like they were taking care of the flowers. To complete the scene, I added an adorable little bee from the Sweet as Can Bee stamp set.

After arranging and gluing all the elements onto the light brown background, I attached the whole panel onto a yellow layer and finally placed it on a white cardstock base.

Card done, ready to send joy! Thanks for joining me, and see you next week.

Sunny Studio Supplies Used:

Sunflower Fields Stamps
Shop at:
Sunny Studio
Sunflower Fields Dies
Shop at:
Sunny Studio
Garden Fairy Stamps
Garden Fairy Stamps
Shop at:
Sunny Studio
Garden Fairy Dies
Garden Fairy Dies
Shop at:
Sunny Studio
Dotted Diamond Portrait
Shop at:
Sunny Studio
Foxy Friends Stamps
Foxy Friends Stamps
Shop at:
Sunny Studio
Foxy Friends Dies
Foxy Friends Dies
Shop at:
Sunny Studio
Icing Rectangle Frame Dies
Shop at:
Sunny Studio
Sweet As Can Bee Stamps
Shop at:
Sunny Studio
Sweet As Can Bee Dies
Shop at:
Sunny Studio

Monday, September 22, 2025

Crisp Autumn & Pretty Pumpkins Cards with Mendi

Hello and welcome! This is Mendi here today, popping in to share some fall cards featuring the Crisp Autumn Stamps.

Sunny Studio Fall Cards using Sunflower Fields, Crisp Autumn & Pretty Pumpkins Stamps, Dies & Dapper Diamond Embossing Folder

For my first card showcasing the Crisp Autumn Stamps, I paired the layered fall leaves and the "Happy Autumn" sentiment from the set with the large sunflower and green leaves from the Sunflower Fields Stamps. I then layered them with a couple of loopy circle die-cuts cut from brown cardstock using the Snowflake Circle Frame Dies to form my grapevine twine wreath.

Sunny Studio Fall Wreath Card using Sunflower Fields & Crisp Autumn Stamps, Craft Dies, & Dapper Diamond Embossing Folder

Here's a closer look at how I inked only the recessed portions of my embossed background. I used a spongy foam ink brayer with VersaFine Clair Cheerful Ink to apply ink to only the raised diamond side portion of my embossing folder. I then laid a clean white A2-sized cardstock panel on the dry side of my embossing folder, positioned just where I wanted it, and carefully closed the lid onto my sheet of paper before rolling the sandwich through my die-cutting machine. It's important to note that this technique only works with pigment inks, which are sticky enough to adhere to the slick plastic surface of the embossing folder. Sadly, dye inks will only bead up on the surface. 

Sunny Studio Stamps Dapper Diamond Embossing Folder Embossed & Inked Background Tutorial using Pigment Ink & Brayer

As a finishing touch, I applied our Champagne Clear Jewels with Multi Medium Matte liquid adhesive to the center of my sunflower to add sparkle and make it the true focal point of my card. It was difficult for me to capture in the photo, but the clear rhinestones really catch the light in person and helped add that tiny bit of bling I was looking for. I also love that their clear nature allows the stamped image from below to peek through, making these the perfect match with whatever you use them with.

Detailed Look at Sunny Studio Fall Wreath Card using Sunflower Fields & Crisp Autumn Stamps & Dapper Diamond Embossing Folder

For my second card of the day, I started by creating an oversized picket fence using the pencil die from our Color My World Dies, cut from woodgrain textured cardstock. This cardstock is naturally a kraft brown color, but I decided it would be fun to create a whitewashed look to brighten up my fence and emphasize the incredible texture of the paper. I achieved this just by dipping my finger into Hero Arts Unicorn Pigment Ink and rubbing it along the surface of each die-cut fence piece before hitting them with a heat gun to speed up the drying process. 

I then used a Tim Holtz clear ruler to line them up on my card front and help keep them evenly spaced. I started by adhering the two slats on the outside edges. I then added the one in the very center of my card. From there, I found the center between the two posts on each side, leaving me with only two posts to fill in between each of those, which I eyeballed. I then added a grass border using the grassy border die from the Picket Fence Dies, adding flicks of "grass" with my Copic Marker pen. I created an arrangement of pumpkins in front of my fence using the images from the Pretty Pumpkins Stamps and Crisp Autumn Stamps. Finally, I stamped my thank you sentiment from the Words of Gratitude Stamps onto a stitched label from the Sliding Window Dies.

Sunny Studio Pumpkins with Wood Fence Handmade Fall Card using Crisp Autumn & Pretty Pumpkins Clear Stamps & Metal Craft Dies

I am frequently asked which ink colors I used for my layered images. While I think there are so many great options out there, these are the colors I used today from light to dark:


Sunflower Leaves 


That wraps up my projects for today. Thanks so much for hanging out with me. I hope I've inspired you to spread a little happiness by sending out a card to someone you love. 💛

Don't forget to check out our Pretty Pumpkins Stamps, Pretty Pumpkins Dies, Sunflower Fields Dies, and Dapper Diamond Embossing Folder in our online shop, which are currently on sale!  Also, while you are there, check out the loads of other card ideas on each of the product pages, as there are so many other beautiful ways to use these stamps!

Supplies Used:

Crisp Autumn Stamps
Crisp Autumn Stamps
Shop at:
Sunny Studio
Crisp Autumn Dies
Crisp Autumn Dies
Shop at:
Sunny Studio
Sunflower Fields Stamps
Shop at:
Sunny Studio
Sunflower Fields Dies
Shop at:
Sunny Studio
Pretty Pumpkins Stamps
Shop at:
Sunny Studio
Pretty Pumpkins Dies
Shop at:
Sunny Studio
Words of Gratitude Stamps
Shop at:
Sunny Studio
Dapper Diamonds Embossing
Shop at:
Sunny Studio
Picket Fence Border Dies
Shop at:
Sunny Studio
Sliding Window Dies
Sliding Window Dies
Shop at:
Sunny Studio
Snowflake Circle Frame
Shop at:
Sunny Studio
Color My World Dies
Color My World Dies
Shop at:
Sunny Studio
Hero Arts Unicorn Pigment Ink
Shop at:
Sunny Studio
Versafine Onyx Black Ink
Shop at:
Sunny Studio
Versafine Clair Ink- Cheerful
Shop at:
Sunny Studio
Versafine Clair Ink- Acorn
Shop at:
Sunny Studio
PinkFresh Studio Blending Brushes
Shop at:
Sunny Studio
Multi Medium Matte
Multi Medium Matte
Shop at:
Sunny Studio
Champagne Clear Jewels
Shop at:
Sunny Studio