Showing posts with label Icing Border Dies. Show all posts

Monday, December 30, 2024

Window Trio Heart Die Focused Garden Critters Card with Leanne

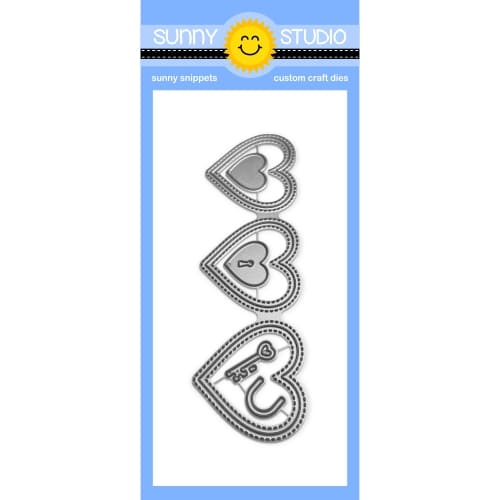
Hello everyone! Leanne here to share a clean and simple Valentine's card featuring the Window Trio Heart Landscape die

Sunny Studio Stamps: Window Trio Heart Die Focused Valentine's Day Card by Leanne West (featuring Garden Critters, Icing Border Dies, Brilliant Banner Dies)

I used the landscape version of this die and the inlay technique to create a heart filled panel that measures 4"x 5.25".  I adhered the panel to a light pink A2 size mat. I then filled each window with different shades of pink hearts die cut using the same Window Trio Heart Landscape die

Other Sunny Studio supplies used to create this card are listed below:

Icing Border dies - For the decorative wavy lines added above and below the hearts. 

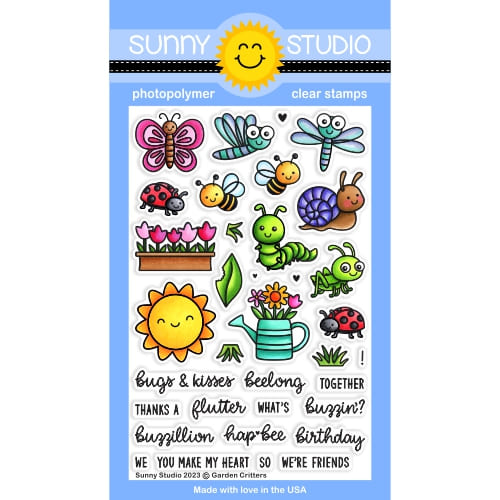
Garden Critter stamp set and coordinating dies - For the butterflies and sentiment. 

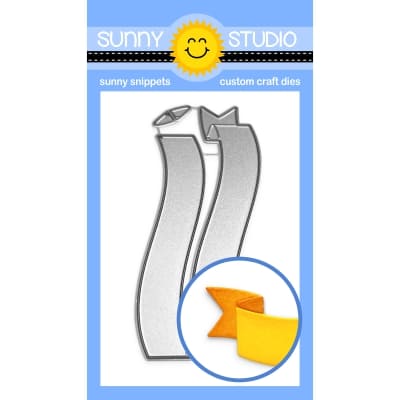
Brilliant Banner 3 die -  For the die cut banner where I stamped the sentiment.

Sunny Studio Stamps: Window Trio Heart Die Focused Valentine's Day Card by Leanne West (featuring Garden Critters, Icing Border Dies, Brilliant Banner Dies)

I used some warm grey Copic markers to add light shading to the banner. I colored the butterflies with R00, R20, R22, RV55, W1, & W3. 

For this simple design, the banner and butterflies can be placed anywhere on the card. I decided wanted a centrally balanced focal point and adhered them with foam squares right in the middle. To finish the design, I added a few sparkling clear sequins. 

Sunny Studio Supplies Used:

Icing Border DIes
Icing Border DIes
Shop at:
Sunny Studio
Garden Critters Stamps
Shop at:
Sunny Studio
Garden Critters Dies
Shop at:
Sunny Studio
Brilliant Banner 3 Dies
Shop at:
Sunny Studio
Window Trio Heart Landscape
Shop at:
Sunny Studio

Saturday, September 9, 2023

Guest Designer Spotlight: Cards with Tina Smith

Cool down this summer with some wintery holiday hugs! Hello Crafty Friends, my name is Tina Smith and I am super excited to be joining Sunny Studio this month as a Guest Designer on their Blog celebrating their amazing Fall/Holiday Release. 

Sunny Studio Stamps: Holiday Hugs and Woolen Mittens Holiday Cards and Tags by Tina Smith

Today I get the pleasure of creating with the Woolen Mitten Die set and the Holiday Hugs Stamps. I created a tag with a treat, a heartwarming A2 card, and a snowflake-filled mitten-shaped card.   

Sunny Studio Stamps: Holiday Hugs Holiday Card by Tina Smith (featuring Icing Border Dies, Stitched Arch Dies)

For my first project, I created an A2 card with the adorable Holiday Hugs Stamp set along with the Coordinating Holiday Hugs Die Set. I love that you can die-cut the arms of the bear and tuck lots of cute images in them. I colored my bear & present with Copic markers and used the Sunny Studio Stitched Arch Die set to place him on. I ink-blended the arch and my card base with inks and added a fun border frame using the Sunny Studios Icing Borders Die Set.   

Sunny Studio Stamps: Woolen Mittens Holiday Tag by Tina Smith

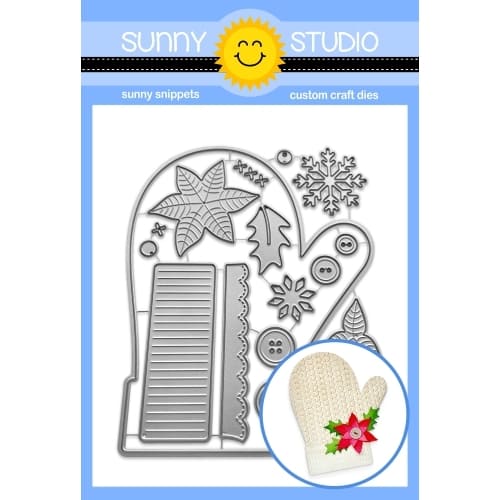
For my second project, I created a shaped card with the Woolen Mittens Die Set. I embossed a mitten panel for the front with the Quilted Hearts Embossing Folder and ink blended the edges & cuff filling in the mitten with stitched details and snowflakes. I created a tag with the Stitched Arch Die set and stamped my greeting from the Holiday Hugs Stamp set. I embellished the top right of the mitten with die-cut holly and buttons adding color by inking the edges, I threaded the buttons and created a bow with twine and ribbon. 

Sunny Studio Stamps: Holiday Hugs Holiday Card by Tina Smith (featuring Icing Border Dies, Stitched Arch Dies)

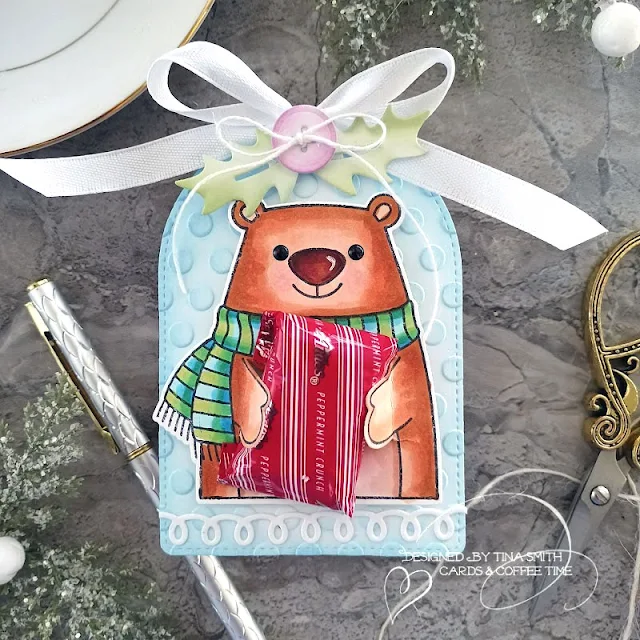
For my final project, I created a fun tag with a treat. I used the Holiday Hugs Stamp, coloring the cute bear with Copic markers. I created a tag with the Stitched Arch Die set, embossing it with the Lots of Dots Embossing Folder and inking the edges. I placed a swirl border at the bottom of the tag using the Icing Borders Die set. I adorned my tag with a button and holly from the Woolen Mitten Die Set and some white ribbon. A small candy will fit perfectly in the arm of the bear, I suggest a miniature chocolate to make your tags extra sweet this Holiday Season!  


Thanks so much for stopping by! If you would like to see the step-by-step tutorial on how I created the projects above you watch the video above or you can check it out on my YouTube Channel, Just Click HERE. Have a Lovely Day!

Sunny Studio Supplies Used:

Icing Border DIes
Icing Border DIes
Shop at:
Sunny Studio
Quilted Hearts Embossing
Shop at:
Sunny Studio
Stitched Arch Dies
Stitched Arch Dies
Shop at:
Sunny Studio
Woolen Mitten Dies
Woolen Mitten Dies
Shop at:
Sunny Studio
Holiday Hugs Stamps
Holiday Hugs Stamps
Shop at:
Sunny Studio
Holiday Hugs Dies
Holiday Hugs Dies
Shop at:
Sunny Studio

Saturday, June 10, 2023

Guest Designer Spotlight: Scrumptious Cupcake Card with Leanne West

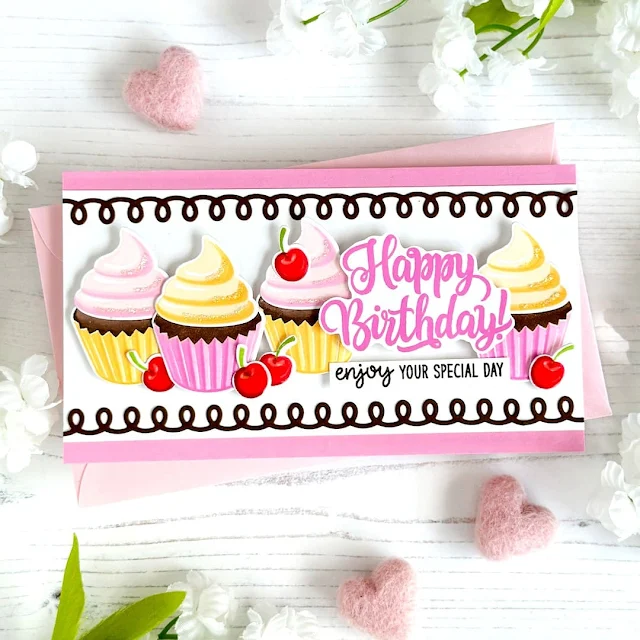
Hello everyone, Leanne West here with you! Can you believe it's almost summer? There are lots of summer birthdays in my family so I always like to restock my stash of birthday cards in June. I came up with a birthday card design using the fun images from Scrupmtious Cupcakes which I can duplicate easily. It's a mini slimline card which measures 6.25" long by 3.5" wide.  

Sunny Studio Stamps: Scrumptious Cupcakes Birthday Card by Leanne West (featuring Icing Border Dies, Inside Greetings)

For this sample, I have chosen pink as the primary color with yellow, chocolate brown, and red as the accent colors. I plan on making many more but change the pink out for other colors like aqua blue, lavender, or mint green. I figure I can use the recipients favorite color. Each card will have a row of four cupcakes, some cherries, and the Happy Birthday greeting across the length of the card. I've used one of the Icing Border dies to frame in this row. Even though the die only cuts a 5.5" long border piece, I was able to glue two together seamlessly to cover the full length of my mini slimline card.

Sunny Studio Stamps: Scrumptious Cupcakes Birthday Card by Leanne West (featuring Icing Border Dies, Inside Greetings)

To kick this card design up a notch, I've highlighted the swirls of cupcake icing with some Stickles Glitter Glue. Stickles is always such easy way to give anything a touch of sparkle. I've added Glossy Accents over the cherries to make them really shiny and fresh looking. And lastly I decided to add an additional sentiment below the big Happy Birthday greeting. You would't have to do this but I felt it balanced the design out nicely. This sentiment comes from the Inside Greetings Birthday stamp set.  

Ink colors used for stamping: Altenew Crisp Dye Ink - Baby Pink, Fuchsia, Buttercream, Warm Sunshine, Fresh Leaf, Pink Pearl, Coral Bliss, Heart Beat; brown ink color is Catherine Pooler Icing On the Cake

Sunny Studio Supplies Used:

Icing Border DIes
Icing Border DIes
Shop at:
Sunny Studio
Inside Greetings Birthday
Shop at:
Sunny Studio
Scrumptious Cupcakes Stamps
Shop at:
Sunny Studio
Scrumptious Cupcakes Dies
Shop at:
Sunny Studio

Sunday, April 30, 2023

Special Day Card with Cathy

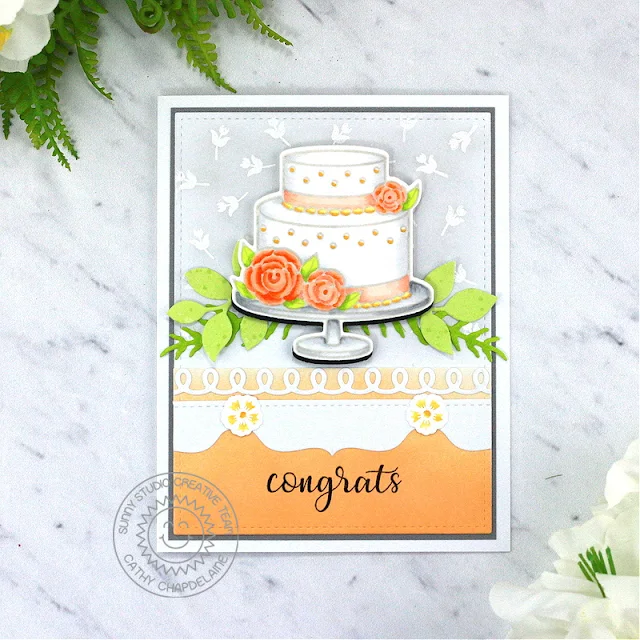
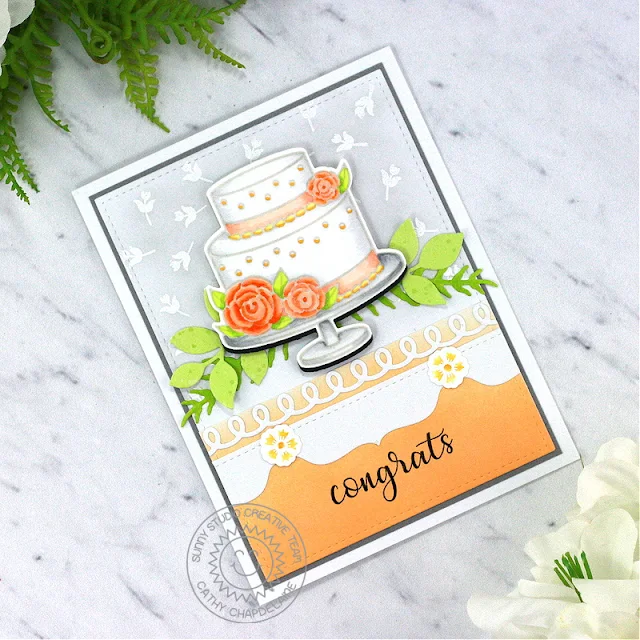
Hey friends! Cathy here today sharing a card featuring this gorgeous cake from the Special Day Stamps! I love a peachy orange/lime green color scheme as the weather gets warmer and I think this would make for a perfect summer wedding congrats card.

Sunny Studio Stamps: Special Day Wedding Card by Cathy Chapdelaine (featuring Icing Border Dies, Spring Greenery, Stitched Rectangle Dies)

I started this card by die-cutting a piece of white cardstock using the largest Stitched Rectangles Die. On the top half of the piece, I stamped a small rose from the Everything’s Rosy Stamps multiple times in Versamark ink and heat embossed them with white embossing powder. I then lightly inked over the roses with Lost Shadow Distress ink.

Next, I die-cut a second piece of white cardstock with the same Stitched Rectangle Die, cut it straight across at 2” and inked it in a gradient from light to dark using Dried Marigold Distress ink. I heat embossed the “congrats” sentiment from the Everything’s Rosy Stamps with black embossing powder 1/2" from the bottom of the cardstock.

Sunny Studio Stamps: Special Day Wedding Card by Cathy Chapdelaine (featuring Icing Border Dies, Spring Greenery, Stitched Rectangle Dies)

For a little extra fanciness, I die-cut an Icing Border Die from white cardstock, adhered it at the top of the Dried Marigold piece and trimmed the excess from the right and left edges. I also die-cut 3 tabs from the Notebook Tabs Dies from white cardstock, adhered one centered on the Dried Marigold piece below the Icing Border and adhered the other 2 tabs to each side, trimming the excess from the edges. To cover where the tabs meet, I stamped a flower from the Fabulous Flamingos Stamps twice on white cardstock using Versamark ink and heat embossed them with white embossing powder. I then used a water brush and painted the inside of the flowers using yellow and orange inks. I die-cut the flowers using the coordinating dies and adhered them where the tabs meet. I adhered the Dried Marigold piece to the bottom of the Stitched Rectangle die-cut, matted the piece on silver cardstock and adhered it to an A2 card base.

Sunny Studio Stamps: Special Day Wedding Card by Cathy Chapdelaine (featuring Icing Border Dies, Spring Greenery, Stitched Rectangle Dies)

Next, I inked 2 pieces of white cardstock (one with Twisted Citron Distress ink and one with Mowed Lawn Distress ink) and die-cut leaves using the Spring Greenery Dies. I adhered these above the Dried Marigold piece. To keep a light and airy feel to the card, I stamped the cake from the Special Day Stamps in light gray ink on Neenah Classic Crest 80lb solar white cardstock, colored it with Copics and die-cut it using the coordinating dies. To make the cake stand out a bit more and balance the black sentiment, I die-cut a piece of black cardstock with the coordinating cake die, cut the top portion of the cake off leaving just the cake stand portion and adhered the colored cake slightly overlapping the black die-cut. I then adhered the cake over the leaves with foam tape.

Sunny Studio Stamps: Special Day Wedding Card by Cathy Chapdelaine (featuring Icing Border Dies, Spring Greenery, Stitched Rectangle Dies)

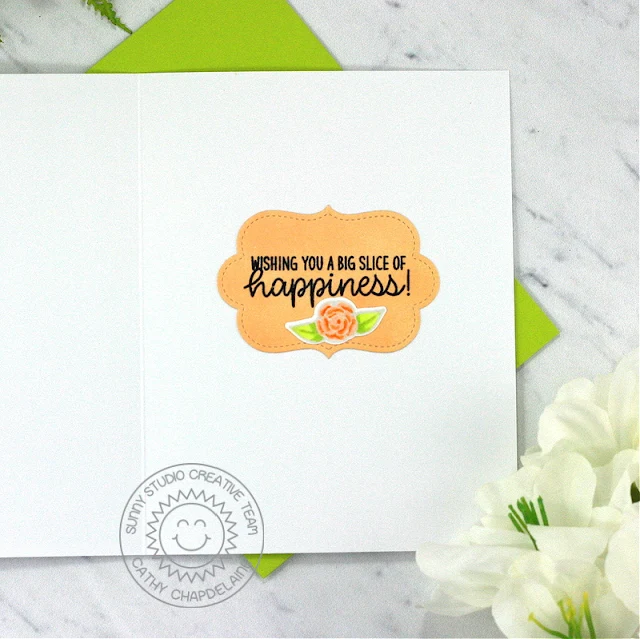
On the inside of the card, I heat embossed the sentiment from the Special Day Stamps with black embossing powder on white cardstock and die-cut it using a label die from the Sliding Window Dies. I then inked the die-cut with Dried Marigold Distress ink. I stamped a rose from the Special Day Stamps in light gray ink, colored it with Copics and die-cut it using the coordinating dies.

I hope you enjoyed and thanks for stopping by! For more inspiration, please visit my blog www.inkredibleadventures.com and you can also find me on Instagram as @cathy.chapdelaine.

Sunny Studio Supplies Used:

Stitched Rectangle Dies
Shop at:
Sunny Studio
Icing Border DIes
Icing Border DIes
Shop at:
Sunny Studio
Sliding Window Dies
Sliding Window Dies
Shop at:
Sunny Studio
Everything's Rosy Stamps
Shop at:
Sunny Studio
Fabulous Flamingos Stamps
Shop at:
Sunny Studio
Spring Greenery Dies
Shop at:
Sunny Studio
Notebook Tabs Dies
Notebook Tabs Dies
Shop at:
Sunny Studio
Special Day Stamps
Special Day Stamps
Shop at:
Sunny Studio
Special Day Dies
Special Day Dies
Shop at:
Sunny Studio

Monday, November 14, 2022

Joyful Holiday Paper Focused Cards with Cathy and Bobbi

Hey friends! Cathy here today with a card featuring some of my favorite papers from the Joyful Holiday Paper. I just love the beautiful bold poinsettia prints in this paper pack and the colors are so fun and fresh for the Holidays!

Sunny Studio Stamps: Joyful Holiday Paper Focused Christmas Card by Cathy Chapdelaine (featuring Icing Border Dies, Frilly Frame Dies, Rustic Winter Dies, Reindeer Games, Classy Christmas)

To start, I cut the pink poinsettia paper 3” x 5 1/2", centered a Stitched Semi-Circle Die along the bottom 5 1/2" edge and die-cut the paper. I adhered this piece to the top of an A2 card base. I die-cut the gray snowflake paper using the same die. Before I adhered it to the card front, I die-cut a tree from the Rustic Winter Dies from white and dark gray cardstock and adhered the tree to the left side trimming the excess along the top edge of the semi-circle.

Next, I cut the pink polka dot paper 1” x 5 1/2" and adhered it to the bottom of the card front. To create the double scalloped edges, I cut a piece of white glitter cardstock and dark brown cardstock 1 “ x 5 1/2" and die-cut the bottom edge of each piece using the Icing Border Dies. I overlapped the pieces and adhered them across the bottom of the semi-circle. For extra interest, I cut a piece of gray cardstock 5/8” x 5 1/2" and die-cut along the center of the strip using an Frilly Frame Eyelet Lace Die. I adhered this across the top edge of the glitter cardstock. I love that little bit of extra detail.

Sunny Studio Stamps: Joyful Holiday Paper Focused Christmas Card by Cathy Chapdelaine (featuring Icing Border Dies, Frilly Frame Dies, Rustic Winter Dies, Reindeer Games, Classy Christmas)

I stamped the cute reindeer from the Reindeer Games Stamps on Neenah Classic Crest 80lb solar white cardstock, colored it with Copics and die-cut it using the coordinating dies. The large poinsettia from the Classy Christmas Stamps goes beautifully with the poinsettia paper and I decided to fussy cut the image and pop it up with foam tape to really make it stand out.

To finish, I die-cut the gray/white plaid paper using the tag die from the Stitched Semi-Circle Dies, heat embossed the sentiment and added a Pure White Jewel over the hole in the tag.

I hope you enjoyed and thanks for stopping by today! For more inspiration, please visit my blog www.inkredibleadventures.com and you can also find me on Instagram as @cathy.chapdelaine.

---------------------------------------------------

Hello crafty friends. It’s Bobbi here and I’m sharing a few peppermints and shiny candies on this cute gingerbread house covered in fun holiday papersI’m using the Gingerbread House dies with the new Joyful Holiday pattern paper pack and the cute penguins from the Penguin Party stamp set and dies. Inside, I also used one of the sentiments from the Holiday Greetings stamps and dies.

Sunny Studio Stamps: Joyful Holiday Paper Focused Christmas Card by Bobbi Lemanski (featuring Gingerbread House Dies, Penguin Party, Holiday Greetings)

To make this gingerbread house, I cut the elements from the vibrant and coordinating paper from the Joyful Holiday Paper pack and Neenah 80lb. Classic Crest Solar White cardstock for the white elements. I also used a blue-violet color cardstock for the window insets and green and pink for the peppermints, too.  To make the white card base, I scored an 8-1/2″ X 5-1/2″ piece of white cardstock and placed the largest house die on top of the folded cardstock, ensuring the top cutting line (i.e., the rooftop line) was above the folded edge. This keeps the fold line intact and creates a scored card base.

Sunny Studio Stamps: Joyful Holiday Paper Focused Christmas Card by Bobbi Lemanski (featuring Gingerbread House Dies, Penguin Party, Holiday Greetings)

In addition to adding the many cute accent elements from the gingerbread die set, I also applied Pearl Pen (similar to Nuvo Drops) to add red, glossy candies around the roof line and on the bottom. Next, I stamped and colored a cute penguin using the Penguin Party stamp set and dies. I colored the penguin using Copic Sketch markers in 100, C7, C5, C3, C1, YR68, YR09, RV09, RV55 and YG03. I added a garland of red candies between the penguin’s hands, too. I used a white gel pen to add extra “fluff” to the penguin’s Santa hat.

Sunny Studio Stamps: Joyful Holiday Paper Focused Christmas Card by Bobbi Lemanski (featuring Gingerbread House Dies, Penguin Party, Holiday Greetings)

Inside the card, I added an outline of the pink confetti paper (cut out using the two different sizes of house outlines in the die set)two more penguins and a script phrase using the Holiday Greetings stamps and dies. I used blue ink for the script. Using my Copic markers, I added tiny confetti dots of color around the sentiment and penguins to match the pink pattern paper. I kept them tiny so that they would not bleed through the white paper. I used the following Copic Sketch markers to color the penguins: 100, C7, C5, C3, C1, YR68, YR09, RV09, RV55, RV02, R29, and YG03.


Thanks for stopping by today. If you want to see more ideas and inspiration from me, subscribe to my blog, BobbiHartDesign.com. I’ll send you updates on new posts! You can also find me on Instagram as @BobbiHartDesign and on Facebook as BobbiHartDesign.


Sunny Studio Supplies Used:

Gingerbread House Dies
Shop at:
Sunny Studio
Icing Border DIes
Icing Border DIes
Shop at:
Sunny Studio
Rustic Winter Dies
Rustic Winter Dies
Shop at:
Sunny Studio
Frilly Frames-Eyelet Lace
Shop at:
Sunny Studio
Stitched Semi-Circle Dies
Shop at:
Sunny Studio
Classy Christmas Stamps
Shop at:
Sunny Studio
Holiday Greetings Stamps
Shop at:
Sunny Studio
Holiday Greetings Dies
Shop at:
Sunny Studio
Penguin Party Stamps
Shop at:
Sunny Studio
Penguin Party Dies
Penguin Party Dies
Shop at:
Sunny Studio
Reindeer Games Stamps
Shop at:
Sunny Studio
Reindeer Games Dies
Reindeer Games Dies
Shop at:
Sunny Studio
Joyful Holiday Paper
Shop at:
Sunny Studio