Showing posts with label Slimline Dies. Show all posts

Sunday, June 22, 2025

Beach Bus Card with Hanh

Hello Crafty Friends! This is Hanh on the Sunny Studio Stamps blog today with a fun card to mark the official start of summer! If people build sandcastles at the beach, then what do mice build at the beach? They build "sandmice", of course! My card features the adorable images from the Beach BusSealiously SweetHarvest Mice and Merry Mice sets. 

Sunny Studio Stamps: Beach Bus Summer Themed Card by Hanh Nguyen (featuring Sealiously Sweet, Harvest Mice, Merry Mice, Slimline Nature Border Dies, Tropical Trees Backdrop Dies)

I stamped the images from the Beach Bus Stamps, Sealiously Sweet Stamps, Harvest Mice Stamps and Merry Mice Stamps sets onto a piece of Neenah Solar White 110 lb cardstock with Memento Tuxedo Black ink and used the coordinating Beach Bus DiesSealiously Sweet DiesHarvest Mice Dies, and Merry Mice Dies to die cut them out. I also used the Tropical Trees Backdrop Dies to die cut a piece of Neenah cardstock for the scene. I colored them with Copic markers and highlighted them with a white gel pen.

COPIC COLORS:
Tree: YG01/03/25/17, E31/33/35
Bus: G000 BG34/15, C1/3, T5/7, Y11, R05
Mice: C00/0/1/3/5, R00/02
Ball: RV00/02/04, G000 BG34/15, C00/1
Surfboard: RV00/02/04/06, C00/1
Sand/Sandmouse: E30/31/33

Sunny Studio Stamps: Beach Bus Summer Themed Card by Hanh Nguyen (featuring Sealiously Sweet, Harvest Mice, Merry Mice, Slimline Nature Border Dies, Tropical Trees Backdrop Dies)

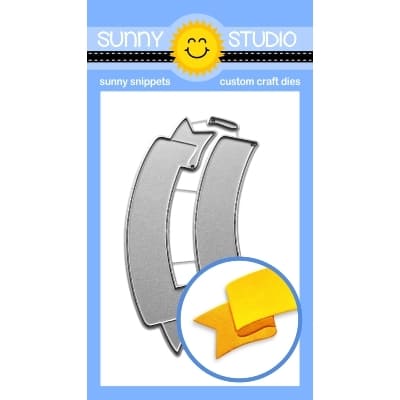
For the background, I used the Slimline Nature Borders Dies to die cut a piece of clear acetate to make my own cloud stencil. I separated the pieces that I die cut with the Tropical Trees Backdrop Dies. I masked off the bottom half of the large panel. I ink blended a cloudy background with my homemade stencil and some Tumbled Glass Distress Oxide ink. Then, I masked off the cloudy top half of the panel as well as the bottom portion of the panel so as to only expose about a 1/2" strip in the middle of the panel. I inked this strip of the panel with Salty Ocean Distress Oxide ink. Once the panel was dry, I colored in the sand with Copic markers. I adhered the frame of the backdrop panel to a piece of white cardstock (4.25" x 5.5"). I placed the remaining two pieces into the frame like a puzzle.

Sunny Studio Stamps: Beach Bus Summer Themed Card by Hanh Nguyen (featuring Sealiously Sweet, Harvest Mice, Merry Mice, Slimline Nature Border Dies, Tropical Trees Backdrop Dies)

For the sentiment, I stamped the "Summer" sentiment from the Beach Bus stamps set with Versamark Watermark ink onto a piece of black cardstock and heat embossed with Detail White Embossing Powder. I used the coordinating Beach Bus Dies to die cut it out. Then I stamped the sub-sentiments "sending" and "vibes" directly onto the panel with Memento Tuxedo Black ink. 

Sunny Studio Stamps: Beach Bus Summer Themed Card by Hanh Nguyen (featuring Sealiously Sweet, Harvest Mice, Merry Mice, Slimline Nature Border Dies, Tropical Trees Backdrop Dies)

I adhered the tree, bus and surfboard to the front of the inked panel with liquid adhesive. The sentiment, mice, sandmouse and ball were adhered onto the panel with foam tape for a bit of dimension and interest. Finally, I adhered the panel to a white A2 card base (4.25" x 5.5").

I appreciate you taking the time to stop by and visit today. I hope you liked my card and it inspires you to make and send out some happy snail mail. For more info and ideas, be sure to visit the Sunny Studio Stamps Shop. Please also visit my INSTAGRAM feed for more inspirations.

Have a wonderful and crafty day!

Sunny Studio Supplies Used:

Merry Mice Stamps
Merry Mice Stamps
Shop at:
Sunny Studio
Merry Mice Dies
Merry Mice Dies
Shop at:
Sunny Studio
Sealiously Sweet Stamps
Shop at:
Sunny Studio
Sealiously Sweet Dies
Shop at:
Sunny Studio
Slimline Nature Borders
Shop at:
Sunny Studio
Harvest Mice Stamps
Harvest Mice Stamps
Shop at:
Sunny Studio
Harvest Mice Dies
Harvest Mice Dies
Shop at:
Sunny Studio
Tropical Trees Backdrop
Shop at:
Sunny Studio
Beach Bus Stamps
Beach Bus Stamps
Shop at:
Sunny Studio
Beach Bus Dies
Beach Bus Dies
Shop at:
Sunny Studio

Thursday, June 19, 2025

Two Scoops Card with Marine

Hello crafty friends, Marine here, back with a super duper extra colorful birthday card showcasing Two Scoops. I've had this stamp set in my stash for a very long time, and I knew that when I'd use it, it would be on a rainbow themed card. So here we are!

Sunny Studio Stamps: Two Scoops Birthday Card by Marine Simon (featuring Slimline Scalloped Frame Dies, Ribbon & Lace Border Dies, Notebook Photo Corner Dies)

I started off with all the stamping, and the Two Scoops layering stamps are super easy to line up, so even if it looks like the stamping took a million years, it actually did not, it actually was pretty quick. Here is a detailed list of the Lawn Fawn premium dye inks I used to stamp everything, from light to dark:

• pink - ballet slippers + peachy keen + guava

• orange - peach fuzz + carrot + fake tan

• yellow - butter + lemonade + sunflower

• green - celery stick + freshly cut grass + jalapeno

• aqua - kiddie pool + merman + peacock

• purple - fresh lavender + grape jelly + sugarplum

• cones - pizza crust + doe

Sunny Studio Stamps: Two Scoops Birthday Card by Marine Simon (featuring Slimline Scalloped Frame Dies, Ribbon & Lace Border Dies, Notebook Photo Corner Dies)

Once the stamping was done, I cut the images using the matching dies, mixed some copic opaque white ink with water, and used a slim brush to add white splatters to each image. I also picked matching distress inks, mixed each of them with water, added more splatters to the ice-creams, and then I did the same with matching distress spritz for sparkling details.

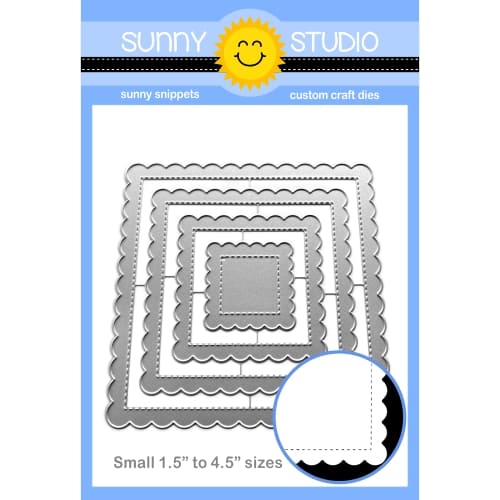
Next I cut a slimline panel out of Strathmore bristol smooth cardstock using a die from the Slimline Scalloped Frame die set, and used distress inks to create watercolored splashes, giving the illusion of melting ice-cream. I mixed each ink with water, and from left to right, I applied the colors with a fluffy brush: worn lipstick, spiced marmalade, mustard seed, mowed lawn, peacock feathers and wilted violet. I let the paper dry, and then added more ink to get different shades on each splash of colors.

I added water splatters all over the panel and dried it with a paper towel, I mixed the same distress inks with water and used a slim brush to add matching splatters, next I did the same with copic opaque white ink, and then with matching distress spritz for shine and sparkles.

Sunny Studio Stamps: Two Scoops Birthday Card by Marine Simon (featuring Slimline Scalloped Frame Dies, Ribbon & Lace Border Dies, Notebook Photo Corner Dies)

Once my watercolored panel was dry, I attached it to a slightly larger slimline aqua panel using liquid glue, and then worked on the rainbow scalloped panel. I started by cutting multiple strips out of colored cardstock using a strip die from the Ribbon & Lace Borders die set. I attached each strip of paper to a large piece of cardstock in this order: pink, orange, yellow, green, aqua and purple, and then used the scalloped die from the Slimline Scalloped Frame die set to cut my rainbow strips panel. I attached this panel to an 8,5 x 3,5 inches white card base using 1mm foam tape, and then stuck my watercolored panel on top using foam tape again.

For my greeting, I cut two fishtail banners using a die from the Notebook Photo Corners die set: a pink one and a gold glitter one, and I white heat embossed "Hope you have a sweet birthday" from Summer Sweet on the pink one. I stuck the pink banner on top of the gold glitter one, shifted them for a little bit of more fun, using 1mm foam squares, and finally attached my banner at the bottom right hand corner of my card using foam squares again.

And that's it! I very much love how it all turned out, with all those beautiful layering stamps matching with the splashes of colors in the background. I hope that you like it too. Thanks so much for stopping by, and see you next time.

Sunny Studio Supplies Used:

Two Scoop Dies
Two Scoop Dies
Shop at:
Sunny Studio
Two Scoop Stamps
Two Scoop Stamps
Shop at:
Sunny Studio
Summer Sweets Stamps
Shop at:
Sunny Studio
Slimline Scalloped Frame
Shop at:
Sunny Studio
Ribbon & Lace Dies
Ribbon & Lace Dies
Shop at:
Sunny Studio
Notebook Photo Corners Dies
Shop at:
Sunny Studio

Thursday, May 22, 2025

Just Bee-Cause Card with Marine

Bzzz bzzz crafty friends! This is Marine here, and I'm super happy to be back with this extra buzzzy slimline card featuring Mr Bear and his bee friends. Another mix & match that I very much enjoyed working on.

Sunny Studio Stamps: Just Bee-Cause Card by Marine Simon (featuring Holiday Hugs, Picket Fence Border Dies, Slimline Scalloped Frame Dies, Little Birdie)

I started off by stamping the images on 110lb Neenah solar white cardstock using an alcohol marker friendly black ink, I used the coordinating dies to cut them all and then colored everything using my Ohuhu markers and Graph’it brush markers. Browns and greens for the branches, and of course a black and yellow color palette for the bees, beehives and Mr Bear's accessories.

Here is a detailed list of the stamp sets I used: • Just Bee-Cause - bees, beehives • Holiday Hugs - bear • Little Birdie - branches • Garden Critters - watering can • Chubby Bunny + Chickie Baby - flowers.

Sunny Studio Stamps: Just Bee-Cause Card by Marine Simon (featuring Holiday Hugs, Picket Fence Border Dies, Slimline Scalloped Frame Dies, Little Birdie)

Once the coloring was done, I added highlights and details to the images using a white gel pen, and moved on to the background. I cut a 7,75 x 2,75 inches Strathmore bristol smooth panel using the stitched mat die from the Slimline Scalloped Frame die set, and I covered the entire panel with clouds using a cloudy stencil from my stash along with salvaged patina and peacock feathers oxide inks. I splattered water all over the panel and dried it with a paper towel, mixed some copic opaque white ink with water and added more splatters to the panel using a slim brush, and then I did the same with peacock feathers oxide ink for more contrast.

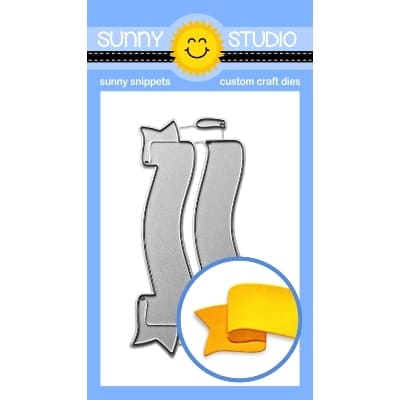
I used the same slimline die as my main panel to cut two pieces out of green cardstock, and cut a grass border out of each piece using a die from the Picket Fence die set. I added a little bit of rustic wilderness oxide ink to the edges of both borders, mixed a little bit of that same ink with water and added green splatters to the borders, as well as white ink splatters, and then I white heat embossed "Just bee-cause" from Just Bee-Cause on the smallest grass border.

Sunny Studio Stamps: Just Bee-Cause Card by Marine Simon (featuring Holiday Hugs, Picket Fence Border Dies, Slimline Scalloped Frame Dies, Little Birdie)

I assembled and attached everything to my panel, starting at the very bottom with the largest grass border first using 1mm foam squares. Next I stuck Mr Bear using the same foam adhesives, added the small grass border on the foreground using 2mm foam squares, and then attached the rest of the images using 1mm and 2mm foam squares again.

Next I created the card base and first cut a slimline scalloped panel out of dark gray cardstock using another die from the Slimline Scalloped Frame die set, I cut an 8 x 3 inches white slimline panel that I attached to the scalloped panel using 1mm foam tape, and stuck my scene panel to the white panel using liquid glue. I attached the whole thing to an 8,5 x 3,5 inches dark yellow card base, and to complete my card, I applied white blizzard nuvo drops to the bees wings to make them sparkle.

And that's it! Another super cute and fun mix & match that turned out pretty cool I think. I hope that you like it too! Thanks so much for stopping by, and see you next time!

Sunny Studio Supplies Used:

Chubby Bunny Stamps
Chubby Bunny Stamps
Shop at:
Sunny Studio
Chubby Bunny Dies
Chubby Bunny Dies
Shop at:
Sunny Studio
Just Bee-cause Stamps
Shop at:
Sunny Studio
Just Bee-cause Dies
Just Bee-cause Dies
Shop at:
Sunny Studio
Chickie Baby Stamps
Chickie Baby Stamps
Shop at:
Sunny Studio
Chickie Baby Dies
Chickie Baby Dies
Shop at:
Sunny Studio
Slimline Scalloped Frame
Shop at:
Sunny Studio
Little Birdie Stamps
Shop at:
Sunny Studio
Little Birdie Dies
Little Birdie Dies
Shop at:
Sunny Studio
Garden Critters Stamps
Shop at:
Sunny Studio
Garden Critters Dies
Shop at:
Sunny Studio
Holiday Hugs Stamps
Holiday Hugs Stamps
Shop at:
Sunny Studio
Holiday Hugs Dies
Holiday Hugs Dies
Shop at:
Sunny Studio
Picket Fence Border Dies
Shop at:
Sunny Studio

Sunday, May 4, 2025

Fabulous Flamingos Card with Hanh

Hello Crafty Friends! This is Hanh on the Sunny Studio Stamps blog with a fun birthday boxcard to share with you featuring the adorable images from the Fabulous Flamingos and Sending Sunshine sets. Aren't these flamingos just the cutest?! Today I'm going to share a quick and easy way to make a homemade boxcard to add just a little pizzazz to your birthday cards. So let's get started. 

Sunny Studio Stamps: Fabulous Flamingos Birthday Boxcard by Hanh Nguyen (featuring Sending Sunshine, Slimline Nature Border Dies)

I stamped the flamingos and palm trees from the Fabulous Flamingos and Sending Sunshine Stamps sets onto a piece of Neenah Solar White 110 lb cardstock with Memento Tuxedo Black ink and used the coordinating Fabulous Flamingos Dies and Sending Sunshine Dies to die cut them out. I colored them with Copic markers and highlighted them with a white gel pen.

COPIC COLORS:
Flamingos: RV000/00/02/06, Y13, C1
Palm Trees: YG01/03/17/67, E41/42/43/44

For the boxcard, I used a few pieces of sturdy white cardstock: base (1.5" x 10.5"), back panel (3.75" x 4.25"), background panel (3.25" x 3.75"), sentiment strip (3.25" x 1") and 3 shelves (4.75" x 2"). I also trimmed a few pieces of a contrasting teal cardstock for decorations: back mat (3.5" x 4"), sentiment strip mat (3.5" x 1.25") and 2 side panels (1" x 1.25").

Sunny Studio Stamps: Fabulous Flamingos Birthday Boxcard by Hanh Nguyen (featuring Sending Sunshine, Slimline Nature Border Dies)

To assemble the boxcard, I used a score board to score the base strip at the 0.5", 1.75", 5.5" and 6.75" marks. I folded the strips at the score lines and used a strong double sided tape on the 0.5" end tab to enclose the boxcard base.

Next, I lightly blended some Salvaged Patina Distress Oxide ink onto the background panel. Once it was dry, I added a few dots with a BG11 Copic marker and a white gel pen for a bit of interest. I adhered this background panel to the teal back mat, then to the white back panel with liquid adhesive. I adhered these panels as well as the teal sentiment strip mat and teal side panels to the boxcard base with liquid adhesive. 

For the shelves, I used one of the stitched slope dies from the Slimline Nature Borders Dies to die cut a slope with a nicely finished edge onto the 3 white shelves. I lightly blended some Scattered Straw and Tea Dye Distress Oxide inks onto the top finished edge of the shelves. I added a few dots with a E33 Copic marker, a black Pigma Micron pen (or you can use a Copic Multiliner pent) and a white gel pen to give the mounds a more realistic sand appearance. Once the inks were dried, I trimmed off 0.5" from each end of one of the shelves and adhered it to the inked background panel of the boxcard. Next, I used a score board to score at the 0.5" mark on each end of the remaining two shelves. I folded at the score line, added some double sided tape to the end tabs and adhered them into the boxcard.

Sunny Studio Stamps: Fabulous Flamingos Birthday Boxcard by Hanh Nguyen (featuring Sending Sunshine, Slimline Nature Border Dies)

For the sentiment, I stamped the "Have a" and "birthday" from the Harvest Mice Stamp set and the "flamazing" from the Fabulous Flamingos Stamp set onto the white sentiment strip with Memento Tuxedo Black ink. I adhered the strip to the front of the boxcard with liquid adhesive.

Finally, I decorated the boxcard with my colored images using liquid adhesive. HINT: for extra sturdiness, I sometimes use a thin strip of clear acetate to adhere behind my colored image (especially for thin images like these flamingos and their thin legs) before adhering the other end of the clear acetate strip to the boxcard shelf. These clear acetate strips are also super handy for adhering images that appear to be floating in midair like balloons, birds or clouds.

Sunny Studio Stamps: Fabulous Flamingos Birthday Boxcard by Hanh Nguyen (featuring Sending Sunshine, Slimline Nature Border Dies)

I love boxcards. I think they take a regular card to a whole new level of fun for the recipient. I also love that they can be flattened and fit into a regular envelope for mailing. My card today fit nicely into a standard A2 sized envelope

I appreciate you taking the time to stop by and visit today. I hope you liked my boxcard. For more info and ideas, be sure to visit the Sunny Studio Stamps Shop. Please also visit my INSTAGRAM feed for more inspirations.

Have a wonderful and crafty day!

Sunny Studio Supplies Used:

Fabulous Flamingos Stamps
Shop at:
Sunny Studio
Fabulous Flamingos Dies
Shop at:
Sunny Studio
Sending Sunshine Stamps
Shop at:
Sunny Studio
Sending Sunshine Dies
Shop at:
Sunny Studio
Slimline Nature Borders
Shop at:
Sunny Studio
Harvest Mice Stamps
Harvest Mice Stamps
Shop at:
Sunny Studio