Showing posts with label Background Basics 2. Show all posts

Wednesday, April 2, 2025

Background Basics 2 Card with Tina

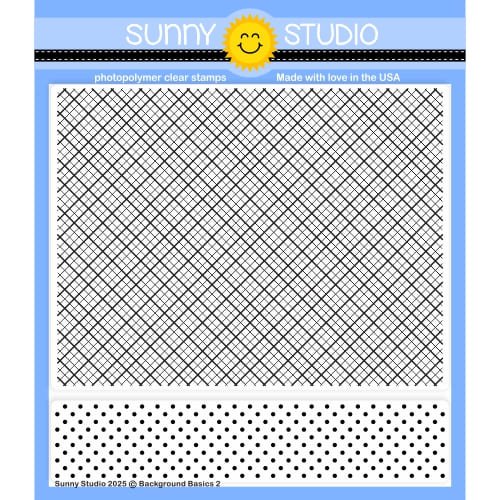
Hello crafters, it’s Tina and today I am making a sweet Easter card featuring the Background Basics 2 stamps, more specifically the large diagonal grid.

Sunny Studio Stamps: Background Basics 2 Focused Easter Card by Tina Henkens (featuring Big Bunny, Stitched Oval Dies, Scalloped Oval Mat Dies, Slimline Dies, Frilly Frame Dies, Dotted Diamond Dies)

I selected a white card base and cut a rectangle background panel from white paper with the outer die from the Frilly Frames Stripes die. I love the scalloped edge, but to enhance this piece even more I added an ‘embossed look’ with the Dotted Diamond Portrait die. Next, I simply glued this panel to the card base as my first layer.

The adorable Big Bunny is going to be my main focal point of this card and I discovered that she fits perfectly inside the largest of the Stitched Ovals. This pieces was then decorated with the big grid from Background Basics 2 stamps and Tumbled Glass Distress Oxide. I deliberately kept some areas of the stamping lighter or even white.

Sunny Studio Stamps: Background Basics 2 Focused Easter Card by Tina Henkens (featuring Big Bunny, Stitched Oval Dies, Scalloped Oval Mat Dies, Slimline Dies, Frilly Frame Dies, Dotted Diamond Dies)

For extra detail I glued this panel to a white Scalloped Oval Mat 1 piece and added the whole to the card with liquid glue. For the star of the show (the cutie from Big Bunny), the bouquet and the bow, I selected Copic markers in fun Spring colors matching the blue of my grid background. The combined sentiment is from the same set and stamped in Versafine Onyx Black ink.

To put the scene together, I cut a white strip with one of the Slimline Basic Borders and the largest of the Stitched Ovals to give this piece it’s rounded edges. I glued this piece in place and added the bunny with the bow and tulips. Lastly, I placed the sentiment on the bottom of the oval shape. As a final embellishment, I added a few Gold Jewels

I hope you will enjoy these fun background stamps as much as I did! Thank you for joining me and happy crafting!

Sunny Studio Supplies Used:

Stitched Oval Dies
Stitched Oval Dies
Shop at:
Sunny Studio
Frilly Frames Stripes Die
Shop at:
Sunny Studio
Slimline Basic Borders
Shop at:
Sunny Studio
Scalloped Oval Mat 1 Dies
Shop at:
Sunny Studio
Dotted Diamond Portrait
Shop at:
Sunny Studio
Big Bunny Stamps
Big Bunny Stamps
Shop at:
Sunny Studio
Big Bunny Dies
Big Bunny Dies
Shop at:
Sunny Studio
Background Basics 2 Stamps
Shop at:
Sunny Studio

Tuesday, March 25, 2025

Rounded Rectangle Window Die Focused Card & Tag with Amanda

Welcome back to the Sunny Studio Stamps Blog! Amanda here, and I’m glad you’re here with me today! I’m sharing this adorable duo I created using the Rounded Rectangle Window Dies! Keep reading to see how I created this card and coordinating tag!

Sunny Studio Stamps: Rounded Rectangle Window Die Focused Card and Tag by Amanda Fitterer (featuring Foxy Friends, Background Basics 2, Rounded Rectangle Mat Dies, Majestic Meadow)

First, we’ll start with the card! I trimmed a piece of white cardstock to 4”x5.25” and then taped the 4th largest rectangle in the center of the panel. I ran it through my die cutting machine.  

On a separate white cardstock panel, I stamped the background image from the Majestic Meadow Stamp. Then, I trimmed the stamped panel to fit in the opening of the window, including an extra 1/4” border. I was careful to leave the left side of the stamped image for my tag! Then, I stamped my sentiment.

I colored the background with Copic markers. Here are the colors I used:
Flowers: RV55, RV66, RV69
Grass: YG0000, YG00, YG01
Trees & Bushes: E43, E44, E47, E49, YG06, G07, G14

Sunny Studio Stamps: Rounded Rectangle Window Die Focused Card and Tag by Amanda Fitterer (featuring Foxy Friends, Background Basics 2, Rounded Rectangle Mat Dies, Majestic Meadow)

I glued this panel to an A2 card base in the center. On my window panel, I used double sided tape to attach a piece of acetate trimmed to 1/4” larger than the window. Then, I put foam tape strips all around the acetate to create a shaker pocket. I added extra foam tape strips on the border of the panel so it was the same depth all the way around.  

I placed a mixture of sequins in the center of my card base. Then, I carefully lined up my window panel and attached it to the card base, ensuring that the sequins stayed inside the shaker pocket.

Next, I stamped 2 foxes and and 2 birds from the Foxy Friends Stamps. I colored these with Copic markers, too.

I used these markers:
Birds: RV10,  RV52, RV55, Rv66, RV69, YR21, YR24
Foxes: YR20, YR21, YR24, YR27, E50, E53, R00, R20, R32, W8

Then, I cut the images out using the coordinating dies. I put 3D foam squares behind each of the images. I adhered the 2 birds and 1 fox to the card. I glued a few sequins from the my sequin mix to the front of the card as well.

Sunny Studio Stamps: Rounded Rectangle Window Die Focused Card and Tag by Amanda Fitterer (featuring Foxy Friends, Background Basics 2, Rounded Rectangle Mat Dies, Majestic Meadow)

For the tag, I cut the 4th largest Rounded Rectangle Mat Dies. I stamped the Background Basics 2 stamp with Catherine Pooler’s Pucker Up Ink onto this rectangle. I also die cut the 5th largest Rounded Rectangle Mat Dies. Then, I taped the 3rd smallest Rounded Rectangle Window Dies to the center of rectangle and put it through the die cutting machine to create a frame for my shaker.

On the leftover piece from the Majestic Meadow Stamp, I taped the same 3rd smallest Rounded Rectangle Window Die and ran it through my die cutting machine to get my background piece. I colored this background with the same Copic markers.

I punched a hole and added an eyelet with my Crop-a-dile Big Bite to my largest rectangle. To create the shaker, I folowed the same steps as I did for the card. I added some baker’s twine to finish the tag off!

The Rounded Rectangle Mat Dies and Rounded Rectangle Window Dies work so well together! I can’t wait to gift this card and tag to a FOXTASTIC friend! Thanks so much for coming by the blog today! Come back tomorrow for more inspo! 

Sunny Studio Supplies Used:

Background Basics 2 Stamps
Shop at:
Sunny Studio
Majestic Meadow Stamps
Shop at:
Sunny Studio
Majestic Meadow Dies
Shop at:
Sunny Studio
Foxy Friends Stamps
Foxy Friends Stamps
Shop at:
Sunny Studio
Foxy Friends Dies
Foxy Friends Dies
Shop at:
Sunny Studio
Rounded Rectangle Mat Dies
Shop at:
Sunny Studio
Rounded Rectangle Window Dies
Shop at:
Sunny Studio

Tuesday, March 18, 2025

Background Basics 2 Card with Amanda

Hello there, crafters, Amanda here! I hope your week is off to a great start! Today, I am sharing a cute little kitty card I created for a special birthday!

Sunny Studio Stamps: Background Basics 2 Focused Birthday Card by Amanda Fitterer (featuring Party Pets, Sprawling Surfaces, Fancy Frame Rectangle Dies, Moroccan Circles Embossing Folder)

This card has quite a few layers, so let me explain how I created each one! First, I used the Fancy Frames Rectangle Dies and cut both of the larger frames. I only used the outside layer of each cutout and saved the inside frames for another card. Next, I ran a piece of mint paper through my die-cutting machine with the Morrocan Circles Embossing Folder

Then, I trimmed a piece of white cardstock to 2.75” x 4” for my background panel. On this panel, I masked off the bottom portion with some tape. I ink blended Catherine Pooler's Hot Tub ink on the entire area. Then, I stamped the Background Basics 2 Stamps with Catherine Pooler’s Sea Glass ink.

I masked off the top portion of the panel and then stamped the wood floor image from the Sprawing Surfaces Stamps. I colored the floor with E21, E23, and E25 Copic markers.

Now, with all those layers complete, we can assemble the card! I glued the mint panel to an A2 card base. Then, I added the outside frame, adhering it with thin foam tape. Then, I glued the background panel to the center of the card. And finally, I used more thin foam tape to adhere the inner frame to the card.

Sunny Studio Stamps: Background Basics 2 Focused Birthday Card by Amanda Fitterer (featuring Party Pets, Sprawling Surfaces, Fancy Frame Rectangle Dies, Moroccan Circles Embossing Folder)

Now, we can move on to the main event: the kitties! I stamped the cats, accessories, and sentiment from the Party Pets Stamps with black ink. Then, I colored them in with Copic markers.

Here are the marker colors I used:
Cats: W8, YR24, YR27, N0, N1, N8, N9, R22, R30
Green Areas: YG000, YG00, YG01, YG03, YG05
Blue/Green Areas: BG 11, BG13, BG32
Pink Areas: RV10, RV21, RV23, RV25, R00, R20, R22


I die cut the images and sentiment out with the 
coordinating die set. I added them to the card using foam squares. To add a little bit of detail, I added 3 Iridescent Clear Jewels.

The card is finished!  I love how the layers make this card unique and eye-catching! Thanks for stopping by the Sunny Studio Stamps blog today! Come back tomorrow for more inspiration! 

Sunny Studio Supplies Used:

Fancy Frames- Rectangles
Shop at:
Sunny Studio
Moroccan Circles Embossing
Shop at:
Sunny Studio
Sprawling Surfaces Stamps
Shop at:
Sunny Studio
Background Basics 2 Stamps
Shop at:
Sunny Studio
Party Pets Stamps
Party Pets Stamps
Shop at:
Sunny Studio
Party Pets Dies
Party Pets Dies
Shop at:
Sunny Studio

Monday, March 17, 2025

Party Pets Card with Leanne

Hello Everyone! Leanne here and I have another birthday card to share this week. It's a simple one featuring cute images from the Party Pets stamp set.

Sunny Studio Stamps: Party Pets Birthday Card by Leanne West (featuring Background Basics 2, Rounded Rectangle Mat Dies)

All images plus the greeting and the background confetti are included in the Party Pets stamp set. I used Copic makers to color the balloons, dog, and present (colors used are listed at the end of this post). I stamped the confetti onto a Rounded Rectangle Mat, then adhered my colored images and greeting with foam squares. 

Copics used: pink- R00, R20, R21; blue- B21, B23, B26; brown- E41, E42, E71, E74; for shading on white areas- W1, YR30

Sunny Studio Stamps: Party Pets Birthday Card by Leanne West (featuring Background Basics 2, Rounded Rectangle Mat Dies)

I layered my completed Rounded Rectangle panel overtop an A2 kraft card stock panel. l used white pigment ink and the diagonal grid from the Background Basics 2 stamp set to add the grid pattern to this panel. And that's it! This card is ready to be sent to spread some birthday cheer. 

Sunny Studio Supplies Used:

Background Basics 2 Stamps
Shop at:
Sunny Studio
Party Pets Stamps
Party Pets Stamps
Shop at:
Sunny Studio
Party Pets Dies
Party Pets Dies
Shop at:
Sunny Studio
Rounded Rectangle Mat Dies
Shop at:
Sunny Studio

Friday, March 14, 2025

Cat Antics Card with Nicky

Hello there, this is Nicky with you today on the Sunny Studio Stamps blog and I have a new card for you that features the Cat Antics stamp set which is purrfect for all you cat lovers out there. Please read on for the details.

Sunny Studio Stamps: Cat Antics Everyday Card by Nicky Meeks (featuring Background Basics 2, Comic Strip Everyday Dies)

To create this card I started by die cutting some pink cardstock using the Comic Strip Everyday Die and then I snipped out the vertical  joins within the windows, leaving me with 3 mini scenes to fill which are the perfect size for this and many other Sunny stamp sets!

I used the Background Basics 2 stamp together with Cotton Candy ink by The Stamp Market to stamp the patterned background on an A2 panel of white cardstock. I then backed the pink frame with dimensional foam tape and attached it to the patterned background which in turn I glued to my card base.

Sunny Studio Stamps: Cat Antics Everyday Card by Nicky Meeks (featuring Background Basics 2, Comic Strip Everyday Dies)

Using Tuxedo Black in by Memento, I stamped all of the images from Cat Antics. I die cut the images using the coordinating die and then I coloured the images with the following Copic markers:

Silver Cats - C3, C1, C0
Ginger Cats - E33, E11, R00
Beige Cats - E31, E41, W3, W1, W0
Blushes - R22, R20, R00
Mint - G00, G000, C3, C1, C00

Sunny Studio Stamps: Cat Antics Everyday Card by Nicky Meeks (featuring Background Basics 2, Comic Strip Everyday Dies)

I arranged and backed the images with dimensional foam tape and adhered them to the background.

To complete the card, a few points were highlighted with a white gel pen.  I also stamped the sentiment from a choice included in the stamp set and attached these strips with foam tape and the final embellishment was the addition of dots of Nuvo Vintage Drops in 'Peppermint Candy'.

I very much appreciate you coming by to read about this card, I hope you have enjoyed it and I will see you back here next Friday with something brand new. Happy cardmaking!

Sunny Studio Supplies Used:
 

Comic Strip Everyday Dies
Shop at:
Sunny Studio
Background Basics 2 Stamps
Shop at:
Sunny Studio
Cat Antics Stamps
Cat Antics Stamps
Shop at:
Sunny Studio
Cat Antics Dies
Cat Antics Dies
Shop at:
Sunny Studio

Tuesday, March 11, 2025

Doggone Birthday Card with Amanda

Hey hey there, crafty friends! It’s Amanda here with you on this lovely day! What’s your feelings on slimline cards?! I honestly love them, but don’t make them too often! But, when you have all these adorable Doggone Birthday party pets, a slimline card is perfect!

Sunny Studio Stamps: Background Basics 2 Focused Birthday Card by Amanda Fitterer (featuring Doggone Birthday, Party Pets)

To create this card, I trimmed a piece of white cardstock to 3.5”x8.5". I blended Catherine Pooler Mint ink across the entire panel. I then stamped the dots from the Background Basics 2 Stamps with In The Park ink in the upper right and bottom left corners of the panel. I did the same thing with the diagonal grid stamp, but in the upper left and lower right corners.

Sunny Studio Stamps: Background Basics 2 Focused Birthday Card by Amanda Fitterer (featuring Doggone Birthday, Party Pets)

I then trimmed another piece of white cardstock to 3.25”x8.25”. On this piece, I masked off the bottom 3/4” with masking tape and then ink blended Cotton Candy across the entire panel. I glued the panels together.

Then, I started stamping the Party Pets and Doggone Birthday party animals. I colored them in with Copic markers and then die cut them out with their coordinating dies.

Sunny Studio Stamps: Background Basics 2 Focused Birthday Card by Amanda Fitterer (featuring Doggone Birthday, Party Pets)

I put 3D foam squares behind all the images and sentiment and adhered them to the card. I added a little shadow for each little pet with an N1 and N2 Copic marker. I also glued a few Onyx Black Jewels on the card for a finishing touch.

And that’s the finished card! I had so much fun coloring these little guys in!  So many adorable pets! I hope you find some time to get crafty today! 

Sunny Studio Supplies Used:

Background Basics 2 Stamps
Shop at:
Sunny Studio
Party Pets Stamps
Party Pets Stamps
Shop at:
Sunny Studio
Party Pets Dies
Party Pets Dies
Shop at:
Sunny Studio
Doggone Birthday Stamps
Shop at:
Sunny Studio
Doggone Birthday Dies
Shop at:
Sunny Studio

Saturday, March 8, 2025

Sunny Saturday Share: Customer Cards


Hey everyone, how are you all doing this weekend? I'm so excited to be popping in today with a Sunny Saturday Share. There have been so many amazing cards popping up on Instagram that have made my jaw drop so I couldn't wait to share them with all of you! 


Sunny Studio Stamps: Miss Moo Customer Card by Annie Collins


Thank you for sharing all these fabulous ideas with us! I hope you will continue to share your gorgeous projects with us--It always makes my day to see them. Please tag us on instagram @sunnystudiostamps or share your projects with us in our flickr group. Sadly we are no longer able to view all the posts using our hashtag on Instagram so it's super important for you to also tag us @sunnystudiostamps so we can find them and they don't get missed.


Sunny Studio Supplies Used:

Polka-dot Parade 6x6 Paper
Shop at:
Sunny Studio
Miss Moo Stamps
Miss Moo Stamps
Shop at:
Sunny Studio
Miss Moo Dies
Miss Moo Dies
Shop at:
Sunny Studio
Subtle Grey Tones Paper
Shop at:
Sunny Studio
Big Panda Stamps
Big Panda Stamps
Shop at:
Sunny Studio
Big Panda Dies
Big Panda Dies
Shop at:
Sunny Studio
Buffalo Plaid Diagonal Die
Shop at:
Sunny Studio
Diagonal & Straight Stripes Stencils
Shop at:
Sunny Studio
Background Basics 2 Stamps
Shop at:
Sunny Studio
Majestic Meadow Stamps
Shop at:
Sunny Studio
Majestic Meadow Dies
Shop at:
Sunny Studio
Tulip Path Background Stamps
Shop at:
Sunny Studio
Tulip Path Background Dies
Shop at:
Sunny Studio
Foxy Friends Stamps
Foxy Friends Stamps
Shop at:
Sunny Studio
Foxy Friends Dies
Foxy Friends Dies
Shop at:
Sunny Studio
Party Pets Stamps
Party Pets Stamps
Shop at:
Sunny Studio
Party Pets Dies
Party Pets Dies
Shop at:
Sunny Studio
Rounded Rectangle Window Dies
Shop at:
Sunny Studio
Brilliant Banner 2 Dies
Shop at:
Sunny Studio