Showing posts with label Bundle of Joy. Show all posts

Wednesday, August 5, 2026

Bundle Of Joy Card with Tina H

Hi there crafty friends, Tina here and I am always excited when I can make a sweet baby card (Bundle Of Joy)! I like to have a few of them ready in my card stash which means that I have to keep the color scheme neutral. Most of the time, I go for green or teal, my favourite colors! This card turned out to be a delicate balance between multiple design elements!

Sunny Studio Stamps: Bundle of Joy Baby Themed Card by Tina Henkens (featuring Frilly Frame Eyelet Lace Dies, Stitched Hearts Dies)

I started by creating a white envelope with the Gift Card Envelope die. After assembling this piece with some liquid glue, I thought it would be fun to add a sky portion to the inside of the envelope. It would have been easier if I had done that first, but I managed to ink blend with a very small brush and Salvaged Patina Distress Oxide ink.

While this piece was drying, I browsed through my stash to find a festive backdrop and went with the gorgeous Frilly Frames Eyelet Lace diesFor extra contrast, I glued this white piece to a green card base.

Sunny Studio Stamps: Bundle of Joy Baby Themed Card by Tina Henkens (featuring Frilly Frame Eyelet Lace Dies, Stitched Hearts Dies)

The main image of this card design is the cute stork from Bundle Of Joy. This set is just perfect for so many sweet baby cards! I kept the coloring simple and added some red pops of color with my Copics. My sentiment was taken from the same set and stamped on to a white strip with Versafine Onyx Black ink

With all the elements ready, assembling this card was easy, I added the envelope, sentiment and stork to the pretty background and finished this project with a cluster of white heart die cuts (Stitched Heart dies) in the sky.

What card would you make with this sweet Bundle Of Joy set? Thank you for joining me and happy crafting!

Sunny Studio Supplies Used:

Stitched Heart Dies
Stitched Heart Dies
Shop at:
Sunny Studio
Frilly Frames-Eyelet Lace
Shop at:
Sunny Studio
Gift Card Envelope Die
Shop at:
Sunny Studio
Bundle of Joy Stamps
Shop at:
Sunny Studio
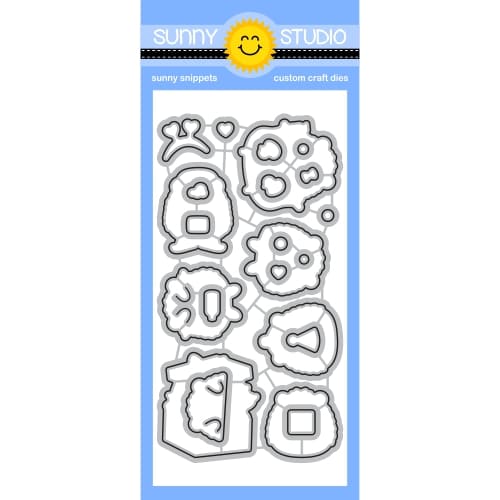
Bundle of Joy Dies
Bundle of Joy Dies
Shop at:
Sunny Studio

Friday, July 3, 2026

Background Basics 2 Gift Tags with Janneke

Hello crafty friends, Janneke here. Today I’m sharing cute baby gift tags featuring Background Basics 2 stamp set.

Sunny Studio Stamps: Background Basics 2 & Bundle Of Joy Baby Themed Gift Tags by Janneke Peters (featuring Build-A-Tag Dies)

For these tags, I started by die-cutting the base of the tags from light beige cardstock using the Build-A-Tag 1 die set. To add a little warmth and dimension, I softly blended some light brown ink along the bottom of each tag.

Sunny Studio Stamps: Background Basics 2 & Bundle Of Joy Baby Themed Gift Tags by Janneke Peters (featuring Build-A-Tag Dies)

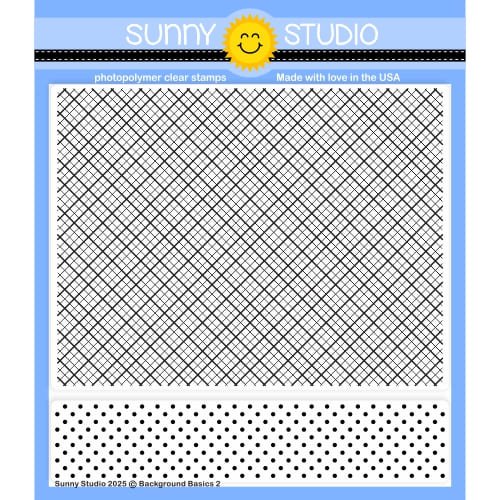
Next, I die-cut the top and bottom tag layers from light brown, light blue, and light pink cardstock. On these pieces, I stamped a pattern using the Background Basics 2 stamp set. I absolutely love how this background stamp creates your own custom pattern paper! After stamping, I adhered the colored pieces onto the beige tag bases.

Sunny Studio Stamps: Background Basics 2 & Bundle Of Joy Baby Themed Gift Tags by Janneke Peters (featuring Build-A-Tag Dies)

From the same beige cardstock, I also die-cut the rings from the same Tag die set and adhered them around the tag holes for an extra finished detail.

Sunny Studio Stamps: Background Basics 2 & Bundle Of Joy Baby Themed Gift Tags by Janneke Peters (featuring Build-A-Tag Dies)

After that, I stamped the adorable images from the Bundle of Joy stamp set and colored them with my Ohuhu markers. Once finished, I adhered the images onto the tags. To complete the tags, I stamped the sentiments with light brown ink and added ribbons through the top of each tag.

I really love how soft, sweet, and playful these baby gift tags turned out! Thanks for joining me, and see you next week.

Sunny Studio Supplies Used: 

Build-A-Tag #1 Dies
Build-A-Tag #1 Dies
Shop at:
Sunny Studio
Background Basics 2 Stamps
Shop at:
Sunny Studio
Bundle of Joy Stamps
Shop at:
Sunny Studio
Bundle of Joy Dies
Bundle of Joy Dies
Shop at:
Sunny Studio

Saturday, June 13, 2026

Guest Designer Spotlight: Gift Card Holders with Tammy Stark

Hello friends! Tammy here with a couple of fun onesie gift card holders, featuring the Bundle of Joy stamp set.

Sunny Studio Stamps: Bundle Of Joy Gift Card Holders by Tammy Stark (featuring Brilliant Banner Dies, Stitched Circle Dies, Scalloped Circle Mat Dies)

To begin, I stamped the images from the Bundle of Joy stamp set, colored with Copic markers, and die-cut with the coordinating Bundle of Joy dies.

To create the onesie shape, I started with an A2 rectangle (measuring 4 1/4X 5 1/2") cut from the Flirty Flowers Paper. I freehand cut the shape, taking inspiration from the onesie in the Bundle Of Joy set, then used the Stitched Circle Small Dies to cut the neck and leg openings. I then traced it onto heavy white cardstock and cut it out to create the back of the gift card holder.

Sunny Studio Stamps: Bundle Of Joy Gift Card Holders by Tammy Stark (featuring Brilliant Banner Dies, Stitched Circle Dies, Scalloped Circle Mat Dies)

Next, I cut 2 white Scalloped Circles Mat 1then layered a Stitched Small circle, cut from Bristol smooth cardstock. I ink blended one with pink ink and the other with light blue ink and adhered to the scalloped circles. I attached the scalloped circles onto the onesies using foam tape, then added the stamped images onto the circles. The sentiments were created using the Brilliant Banner 3 DieI die cut the banners using coordinating cardstock, then stamped the sentiments from the Bundle of Joy set in black ink, and attached to the gift card holders with foam tape. Lastly. I glued the white cardstock to the patterned paper, making sure to only adhere the bottom and sides of the onesie to create a pocket. 

Thanks so much for stopping by! I hope I inspired you to create a fun shaped card using dies, and a cute stamp set, of course!

Sunny Studio Supplies Used:

Flirty Flowers 6x6 Paper
Shop at:
Sunny Studio
Scalloped Circle Mat 1 Dies
Shop at:
Sunny Studio
Stitched Circle Small Dies
Shop at:
Sunny Studio
Brilliant Banner 3 Dies
Shop at:
Sunny Studio
Bundle of Joy Stamps
Shop at:
Sunny Studio
Bundle of Joy Dies
Bundle of Joy Dies
Shop at:
Sunny Studio

Thursday, May 28, 2026

Bundle Of Joy Card with Yan

Hello all, Yan here! Today I’m sharing a soft and sweet baby card featuring the adorable Bundle of Joy Stamp Set. This set is perfect for creating heartfelt handmade cards to celebrate a precious new arrival.

Sunny Studio Stamps: Bundle of Joy Baby Card by Yan X DIY (featuring Radiating Circles Dies)

To begin, stamp the images from the Bundle of Joy Stamp Set onto Neenah Solar White cardstock using Memento Tuxedo Black Ink. Color the images with Copic markers, then use the coordinating Bundle of Joy Dies to cut them out neatly.

COPIC COLOR:
Flying Stork : BG0000, B12, E31, E35, E41, E43, E44, R30, W1, W4, Y15
Baby Bodysuit : B12, BG0000, BG10, E31, E35, E41, E43, R30, R32, Y00, Y11, Y15

Sunny Studio Stamps: Bundle of Joy Baby Card by Yan X DIY (featuring Radiating Circles Dies)

Next, softly blend Distress Oxides in Squeezed Lemonade and Tumbled Glass onto another piece of white cardstock to create a gentle background that complements the baby theme. Then, use the Radiating Circle Dies to die cut a circle from vellum paper, adding a soft layered detail to the card design.

Finally, stamp the sentiment directly onto the card and assemble all the elements using foam tape to create dimension and complete the project.

This soft color combination and layered design create a sweet and delicate look that works perfectly for welcoming a new baby. I hope this project inspires your next handmade baby card.

Sunny Studio Supplies Used:

Radiating Circle Dies
Shop at:
Sunny Studio
Bundle of Joy Stamps
Shop at:
Sunny Studio
Bundle of Joy Dies
Bundle of Joy Dies
Shop at:
Sunny Studio

Friday, May 22, 2026

Bundle of Joy Card with Janneke

Hello crafty friends, Janneke here. Today I’m sharing a cute baby card featuring  Bundle of Joy stamp set. I originally had blue ink ready to go, but I decided to switch things up and use non-traditional colors instead.

Sunny Studio Stamps: Bundle Of Joy Baby Themed Card by Janneke Peters (featuring Icing Rectangle Frame Dies, Sydney Alphabet Dies, Dotted Diamond Dies)

I started by die-cutting the base from light beige cardstock using the Icing Rectangle Frame die. For the inside of the frame, I added texture by die-cutting a pattern with the Dotted Diamond Portrait die. I then softly ink blended the bottom part with a light brown ink to create a subtle grounded effect.

Sunny Studio Stamps: Bundle Of Joy Baby Themed Card by Janneke Peters (featuring Icing Rectangle Frame Dies, Sydney Alphabet Dies, Dotted Diamond Dies)

Next, I die-cut the frame again from light brown cardstock and layered everything onto a light beige card base for a soft tone-on-tone look.

For the baby’s name, I used the Sydney Alphabet dies and cut the letters twice: once from light brown cardstock and once from a darker brown. I adhered the darker layer slightly offset behind the lighter one to create a shadow effect.

Sunny Studio Stamps: Bundle Of Joy Baby Themed Card by Janneke Peters (featuring Icing Rectangle Frame Dies, Sydney Alphabet Dies, Dotted Diamond Dies)

Then it was time to use the Bundle of Joy stamp set. I stamped the images and colored them in monochrome shades of brown and beige using my Ohuhu markers. I also stamped the “welcome” sentiment on dark brown cardstock using white embossing powder. Finally, I adhered all the elements onto the card and added some highlights with a white gel pen.

Card done, ready to send joy! Thanks for joining me, and see you next week.

Sunny Studio Supplies Used:

Dotted Diamond Portrait
Shop at:
Sunny Studio
Icing Rectangle Frame Dies
Shop at:
Sunny Studio
Sydney Alphabet Dies
Shop at:
Sunny Studio
Bundle of Joy Stamps
Shop at:
Sunny Studio
Bundle of Joy Dies
Bundle of Joy Dies
Shop at:
Sunny Studio

Monday, May 18, 2026

Bundle Of Joy Card with Tina M

Hi there! Tina M here! Today I’m sharing a card featuring the new Bundle Of Joy Stamps set from the new Summer Release! There are so many cute images in this set! I just love the little clothes hanger, it´s such an adorable detail!

Sunny Studio Stamps: Bundle of Joy Baby Themed Card by Tina Magnusson (featuring Dotted Diamond Dies, Icing Rectangle Frame Dies)

I started by stamping all the images I wanted to feature on my card from the Bundle Of Joy Stamps set using Memento Tuxedo Black ink on alcohol ink friendly card stock and used the coordinating Bundle Of Joy Dies to die cut them out and colored them with my Copic Markers, see list below.

Copic colors used:
Baby: E000/00/11/21, R30/32, C0/1
Hangers: E21/23/25, C3
Green: G94, YG61/63
Turquoise: BG10/11/13
Pink: RV10/11/13

I then die cut out the smallest of the Icing Rectangle Frame Dies, from white card stock.
I ink blended the inside piece using turquoise ink and adhered it to the white frame. For the sentiment I stamped the “Welcome baby girl” from the 
Bundle Of Joy Stamps set in the center.

Sunny Studio Stamps: Bundle of Joy Baby Themed Card by Tina Magnusson (featuring Dotted Diamond Dies, Icing Rectangle Frame Dies)

For my card I used an A2 size card base, I used soft green ink and ink blended directly on the card base. I then trimmed a piece of white cardstock to 5 x 3,75 inches and ran it through my die cutting machine with the Dotted Diamond Portrait Die. Next, I ink blended the panel using pink and orange ink. I then trimmed a slightly larger white panel to go behind my ink blended panel and adhered them to the card base, using double sided tape.

I added foam dots to the back of the die cut images for dimension and adhered them to the card, the baby and items of clothing in a grid pattern at the top half and the rectangle frame with the stamped sentiment at the bottom.

Thank you for stopping by! Wishing you all a happy and colorful day!

Sunny Studio Supplies Used:

Dotted Diamond Portrait
Shop at:
Sunny Studio
Icing Rectangle Frame Dies
Shop at:
Sunny Studio
Bundle of Joy Stamps
Shop at:
Sunny Studio
Bundle of Joy Dies
Bundle of Joy Dies
Shop at:
Sunny Studio

Wednesday, May 13, 2026

Bundle of Joy Card with Tina H

Hello crafters, it’s Tina with an adorable baby card made with the Bundle of Joy stamp and die set! Instead of the more traditional pink or blue tones, I went with a coral, yellow and green palette for this project.

Sunny Studio Stamps: Bundle Of Joy Baby Themed Card by Tina Henkens (featuring Inside Greetings Congrats, Rounded Rectangle Mat Dies)

I started with a white card base slightly smaller than my panels which were created with the largest of the Rounded Rectangle Mat dies. After cutting two of these pieces from white card stock, I used a cloud die from my stash to create three individual layers of clouds. Two of them were then inked with a square pattern stencil and Cracked Pistachio Distress Oxide. The two remaining parts were also colored with the same ink.

I used liquid glue to adhere the four pieces together and added them to the smaller card base which will not be visible from the front of the card.  For my cloudy scene, I selected some cute baby clothes, hangers and the stork from the Bundle of Joy set. As an extra detail I stamped an adorable little duck (Quill Cuties) on the onesie and added a part of the bib to the playsuit. All these images were colored with coral, green and yellow Copic markers. 

Sunny Studio Stamps: Bundle Of Joy Baby Themed Card by Tina Henkens (featuring Inside Greetings Congrats, Rounded Rectangle Mat Dies)

My sentiment was taken from the versatile Inside Greetings Congrats set and stamped with a green ink from my stash on a strip of white paper. 

Next, I laid out my images and sentiment on the cloud background to decide where I needed to draw a clothesline. For this I used a green colored pencil and the largest of the Stitched Oval dies as a guide. Now I was ready to adhere my images and sentiment with foam tape. Lastly I sprinkled a few Iridescent Jewels for that extra sparkle!

This set is so sweet and I look forward to all your adorable baby cards! Thank you for joining me and happy crafting!

Sunny Studio Supplies Used:

Stitched Oval Dies
Stitched Oval Dies
Shop at:
Sunny Studio
Inside Greetings Congrats
Shop at:
Sunny Studio
Rounded Rectangle Mat Dies
Shop at:
Sunny Studio
Quill Cuties Stamps
Quill Cuties Stamps
Shop at:
Sunny Studio
Quill Cuties Dies
Quill Cuties Dies
Shop at:
Sunny Studio
Bundle of Joy Stamps
Shop at:
Sunny Studio
Bundle of Joy Dies
Bundle of Joy Dies
Shop at:
Sunny Studio