Showing posts with label Fluffy Clouds Border. Show all posts

Friday, March 29, 2024

Sprawling Surfaces Card with Nicky

Happy Friday everyone this is Nicky with you today on the Sunny Studio blog and I have a card featuring the Sprawling Surfaces Stamp set to share with you. This is such a handy stamp set for scene building or just grounding other stamp images.

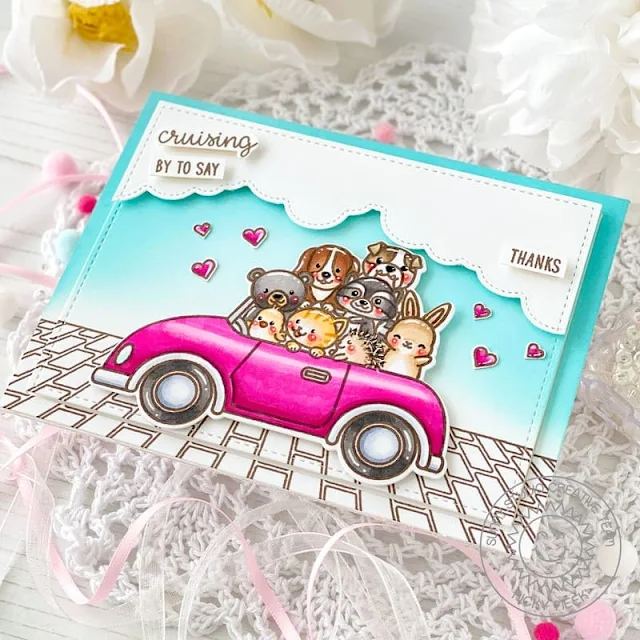
Sunny Studio Stamps: Sprawling Surfaces Card by Nicky Meeks (featuring Fluffy Cloud Border Dies, Cruising Critters, Stitched Rectangle Dies)

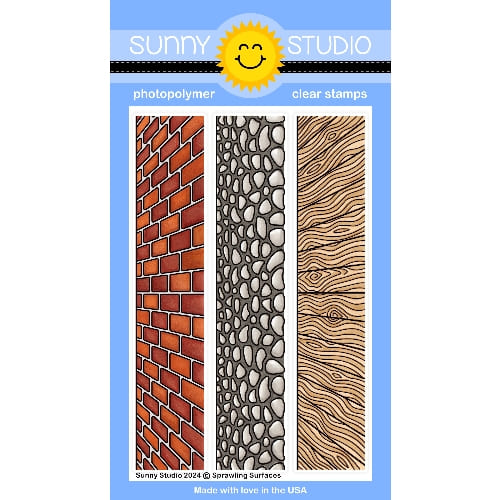
I took an A2 panel of white cardstock. I stamped the brick pattern from the Sprawling Surfaces Stamp set and then ink blended the sky. I die cut the panel using the Stitched Rectangle Die and backed the centre portion with white craft foam. The outer cut was adhered to an A2 panel and then I nestled the inside cut in the centre with glue.

I used the Fluffy Clouds Border Die to create some interest and sized it by again using the Stitched Rectangle Die and I applied with foam tape.

Sunny Studio Stamps: Sprawling Surfaces Card by Nicky Meeks (featuring Fluffy Cloud Border Dies, Cruising Critters, Stitched Rectangle Dies)

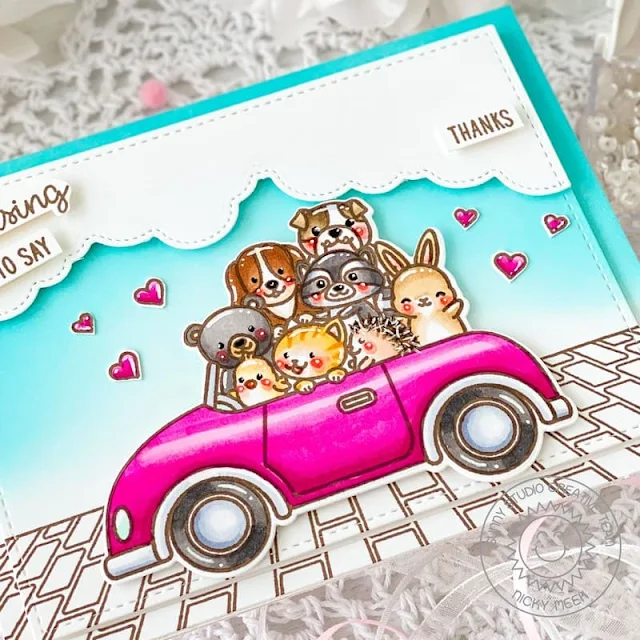
Using Memento Ink in Rich Cocoa I stamped the Cruising Critters image and coloured with the following Copic marker combinations:

Car - RV17, RV55, RV06, RV04, RV02
Car Trim - C3, C1, C00
Tires - T6, T4, T3
Hearts - RV17, RV06, RV02
Raccoon - T6, T4, T3
Bunny - E31, E41
Hedgehog - E44, E42, E31, E41
Kitten - YR24, YR31, YR20
Chick - YR00, YR31, YR21
Black Bear - T6, T4, T2, E31
Dog (left) - E57, E23
Dog (right) - E44, E42
Blushes - R22, R20, R00

Sunny Studio Stamps: Sprawling Surfaces Card by Nicky Meeks (featuring Fluffy Cloud Border Dies, Cruising Critters, Stitched Rectangle Dies)

I die cut the image using the Cruising Critters Dies and added it to the background with foam tape then fussy cut and glued on the hearts. Points were highlighted with a white gel pen including adding 'prickles' to the hedgehog and the sentiments stamped on strips and applied with foam tape.

Many thanks for coming by to read the blog today, I'll be back next Friday with something new. Happy crafting!

Sunny Studio Supplies Used:

Stitched Rectangle Dies
Shop at:
Sunny Studio
Cruising Critters Stamps
Shop at:
Sunny Studio
Cruising Critters Dies
Shop at:
Sunny Studio
Fluffy Clouds Border Dies
Shop at:
Sunny Studio
Sprawling Surfaces Stamps
Shop at:
Sunny Studio

Monday, March 18, 2024

Tree Branch Die Focused Card with Leanne

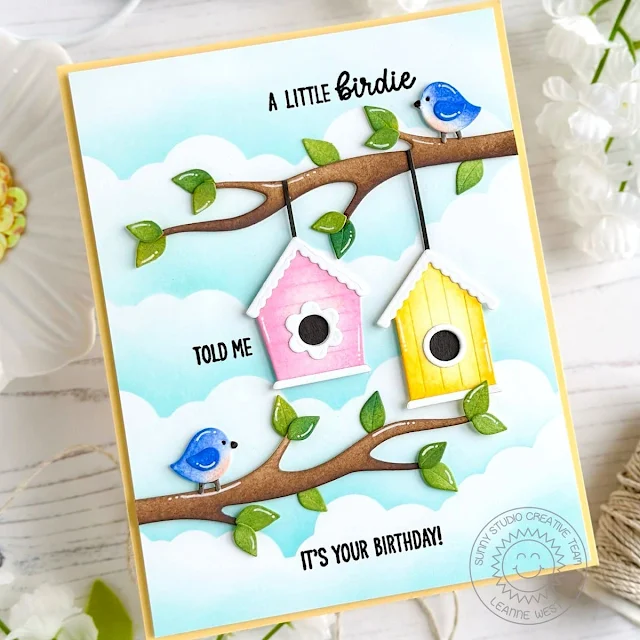
Hello friends! Leanne here and today I'm sharing an easy to make birthday card. I've created an outdoor scene featuring two sweet birdies and their neighboring houses hanging from a tree branch. 

Sunny Studio Stamps: Tree Branch & Little Birdie Birthday Card by Leanne West (featuring Fluffy Cloud Border Dies, Build-A-Birdhouse Dies)

Now of course my branch and birdhouse scene first needed a pretty sky background. I used the Fluffy Cloud Border dies to cut masks for creating some soft billowy clouds with Salvaged Patina Distress Oxide ink.  

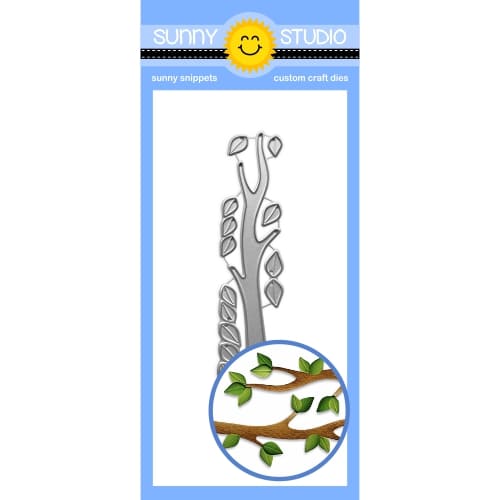
Next I used the Tree Branch and Build-a-Birdhouse die sets for the branches, birdhouses, and little birds. I die cut all the pieces from white card stock. I used small blending brushes and the following Distress Oxide inks to color: Blueprint Sketch, Tattered Rose, Rustic Wilderness, Crushed Olive, Kitsch Flamingo, Wild Honey, and Walnut Stain. I added all the die cut elements onto the background with thin foam adhesive so they all would be popped up a bit. 

Sunny Studio Stamps: Tree Branch & Little Birdie Birthday Card by Leanne West (featuring Fluffy Cloud Border Dies, Build-A-Birdhouse Dies)

For the birthday sentiment I used stamps from the Little Birdie stamp set. There's separate words and short phrase stamps in this set. That made it easy to customize a birthday greeting and integrate it into the scene in three places.  Lastly, I trimmed the completed scene panel down to be slightly smaller than A2 size and adhered it to a pale yellow card base. 

Sunny Studio Supplies Used: 

Fluffy Clouds Border Dies
Shop at:
Sunny Studio
Little Birdie Stamps
Shop at:
Sunny Studio
Build-A-Birdhouse Dies
Shop at:
Sunny Studio
Tree Branch Die
Tree Branch Die
Shop at:
Sunny Studio

Monday, February 12, 2024

Sprawling Surfaces Card with Leanne

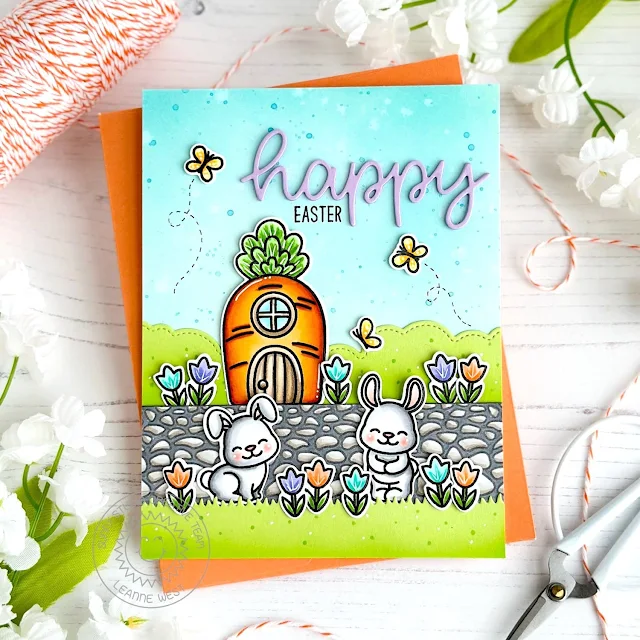
Hello everyone! Leanne here and I have an Easter card to share today. Did you know Easter is early this year? It's on March 31st. So it's time to get started on those Easter cards! This fun one showcases how I've used the Cobblestone image from Sprawling Surfaces to create a pathway for my tulip garden scene.   

Sunny Studio Stamps: Sprawling Surfaces Easter Card by Leanne West (featuring Bunnyville, Mini Grass Border Dies, Fluffy Cloud Border Dies)

I started with an ink blended sky on an A2 card base (a combo of Broken China & Salvaged Patina Distress Oxides). Next I used the Mini Grass Border and Fuffy Cloud Border to create a grass and shrub border. I used a green Copic marker and a white gel pen to add random dot detail to the grass and shrubs. I stamped the Cobblestone from Sprawling Surfaces with dark grey ink then Copic colored. I used W0 + W1 for the stones and N4 in between the stones. I then adhered the grass, pathway, and shrub border onto the card base.

Copic colors: YR01, YR02, YR12, YR14, YR18, Y11, Y17, YG11, YG13, YG17, BG11, BG13, BV01, BV02, BV04

Sunny Studio Stamps: Sprawling Surfaces Easter Card by Leanne West (featuring Bunnyville, Mini Grass Border Dies, Fluffy Cloud Border Dies)

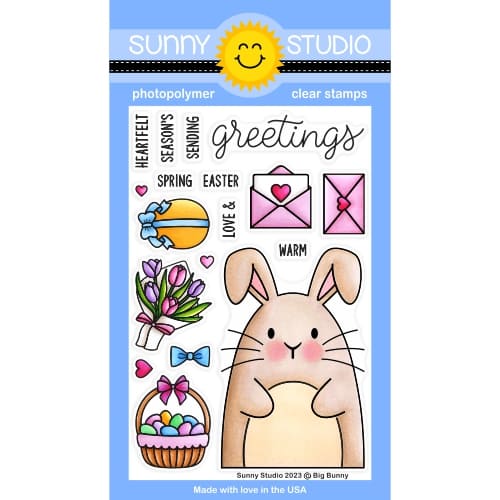
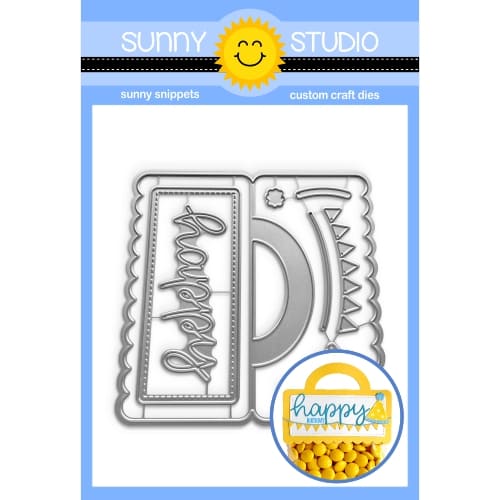
I picked out several images from the Bunnyville stamp set to create my little garden scene. I Copic colored all these images. I die cut all the colored images with the coordinating Bunnyville dies and then adhered them onto the scene with thin foam squares so they would be popped up a bit. I hand drew the butterfly trails and lastly I added the greeting. The word "Easter" is from the Big Bunny stamp set. The die cut word "happy" is from Treat Bag Topper.  

Sunny Studio Supplies Used:

Fluffy Clouds Border Dies
Shop at:
Sunny Studio
Bunnyville Stamps
Bunnyville Stamps
Shop at:
Sunny Studio
Bunnyville Dies
Bunnyville Dies
Shop at:
Sunny Studio
Big Bunny Stamps
Big Bunny Stamps
Shop at:
Sunny Studio
Sprawling Surfaces Stamps
Shop at:
Sunny Studio
Treat Bag Topper Die
Shop at:
Sunny Studio
Mini Grass Border Dies
Shop at:
Sunny Studio

Saturday, February 10, 2024

Love Birds & Tree Branch Die Focused Card with Cathy

Hey friends! Cathy here today sharing a sweet welcome baby card using the Love Birds Stamps and Tree Branch Die. Aren’t they just the most adorable couple?!

Sunny Studio Stamps: Love Birds & Tree Branch Die Card by Cathy Chapdelaine (featuring Fluffy Cloud Borders Dies, Inside Greetings, Little Birdie)

I started this A2 card by inking a pink cloud background on a 4 1/4" x 5 1/2” piece of white cardstock. I die-cut 3 pieces of white cardstock using the Fluffy Clouds Border Dies and used them as a stencil with Spun Sugar Distress ink. I wanted a soft background of cherry blossoms in the distance so I die-cut vellum several times using the Tree Branch Die and a flower from the Spring Garden Dies. I then lightly inked the vellum branches with Antique Linen Distress ink and the flowers with Saltwater Taffy Distress ink.

Before adhering the vellum pieces, I stamped a sentiment from the Little Birdie Stamps in brown ink. I lightly dabbed Tombow Mono liquid adhesive on the back of the vellum pieces so the adhesive wouldn’t show through and trimmed any excess from the edges of the cardstock.

Sunny Studio Stamps: Love Birds & Tree Branch Die Card by Cathy Chapdelaine (featuring Fluffy Cloud Borders Dies, Inside Greetings, Little Birdie)

Next, I die-cut 2 branches and flowers from white cardstock and inked them with Frayed Burlap Distress ink and Saltwater Taffy Distress ink. I also added a little shading with Copics and white gel pen details on the flowers. I stamped all images on Neenah Classic Crest 80lb solar white cardstock in a brown ink, colored them with Copics and die-cut them using the coordinating dies. I adhered the branches, flowers and images to the card front using foam dimensional tape and trimmed the excess branches from the edges.

I used the following stamps and dies:
Love Birds Stamps/Dies
Little Birdie Stamps/Dies
 (bow, nest)
Clucky Chickens Stamps/Dies (egg)
 

Sunny Studio Stamps: Love Birds & Tree Branch Die Card by Cathy Chapdelaine (featuring Fluffy Cloud Borders Dies, Inside Greetings, Little Birdie)

To finish, I stamped a sentiment for the inside of the card from the Inside Greetings Congrats Stamps and a baby bird from the Clucky Chickens Stamps on white cardstock and colored the baby with Copics. I then die-cut around the sentiment using a label die from the Sliding Window Dies. 

I hope you enjoyed and thanks for stopping by today! For more inspiration, please visit my blog www.inkredibleadventures.com and you can also find me on Instagram as @cathy.chapdelaine.


Sunny Studio Supplies Used:

Sliding Window Dies
Sliding Window Dies
Shop at:
Sunny Studio
Fluffy Clouds Border Dies
Shop at:
Sunny Studio
Little Birdie Stamps
Shop at:
Sunny Studio
Little Birdie Dies
Little Birdie Dies
Shop at:
Sunny Studio
Inside Greetings Congrats
Shop at:
Sunny Studio
Clucky Chickens Stamps
Shop at:
Sunny Studio
Clucky Chickens Dies
Shop at:
Sunny Studio
Love Birds Stamps
Love Birds Stamps
Shop at:
Sunny Studio
Love Birds Dies
Love Birds Dies
Shop at:
Sunny Studio
Tree Branch Die
Tree Branch Die
Shop at:
Sunny Studio
Spring Garden Dies
Spring Garden Dies
Shop at:
Sunny Studio

Monday, December 25, 2023

Introducing Love Birds Stamps & Tree Branch Die For Valentine's Day!

Merry Christmas!  I hope you all are enjoying a fun and relaxing holiday with your loved ones today. This week our team will be transitioning from Christmas to Spring, featuring a new mini stamp set called Love Birds that is perfect for Valentine's Day, however as I think my cards will illustrate this set doesn't have to be limited to a single holiday. Let's jump right in!

Card No.1: For my first card featuring the Love Birds Stamps, I started by creating my pastel rainbow cloud background by inking on alternating distress inks together with masks I had cut from our Fluffy Cloud Border Dies. I then trimmed down my panel to 3.5" wide and added the stitching and scalloped trim to the edges with our Slimline Basic Border Dies

The love bird set comes with a bare tree branch and individual leaves making it easy to customize for both winter and spring scenes and to best position the leaves to suit your card. In this case, I was able to use the same tree branch three times, but by rotating it and placing the leaves in different spots for each of them, I was able to give my card a bit more personality. Finally, I heat-embossed a punny greeting from the set onto our Brilliant Banner 1 Dies which I had inked with a coordinating shade of Picked Raspberry distress ink to tie in with the pink cloud below.

Sunny Studio Blog: Tweetheart Birds on Tree Branches With Rainbow Clouds Valentine's Day Card using Love Birds Clear Stamps

Card No.2: Next up I paired two of those same adorable birds from the new Love Birds Stamps with our new Tree Branch Dies and the birdhouses from our A Bird's Life Stamps and Little Birdie Stamps. To create my cloud background, I used the coordinating cloud dies from our Plane Awesome Die set which I cut from masking material and then inked over using my favorite Jumbo Dauber. I then added the stitched edge along the bottom of my panel using that same Slimline Basic Border die.

To give my birdhouses the appearance they were hanging from the tree, I poked holes in my background panel and used a fat needle with some embroidery floss to string them on, taping the ends of the floss to the back of my panel before adhering the panel to my card base. I then was able to adhere my birdhouses onto my card and hide any holes. Before doing this though, I first adhered a 1" thick strip of red gingham patterned paper to the bottom of my card from our Classic Gingham Paper pack and layered a lacy scalloped edge from our Eyelet Lace Border Dies

Sunny Studio Blog: Love Is In The Air Birds on Tree Branch Red Gingham Scalloped Valentine's Day Card by Mendi Yoshikawa

Card No.3: For my next card featuring the adorable Love Birds, I paired them with a greeting from our new My Heart Stamps (which won't be fully unveiled or available to purchase until next week). This greeting was designed to perfectly fit within our Stitched Heart 2 Dies and Scalloped Heart Dies.

In this case, I stamped the greeting first with dye ink, and then while it was still in my MISTI tool, I stamped it again with VersaMark Ink so I could sprinkle the greeting with a little bit of clear embossing powder. In this case, my dye ink wasn't matching my cardstock as well as I would have liked, and heat embossing it warmed up the tones just enough to make them match better. It also has the added bonus of lending a bit of shine and sparkle to my card in person. 

To complete my card, I pierced my background using our Dotted Diamond Landscape Die, added the new Tree Branch Die for my birdie to perch on, and our Pink Spinel Jewels to the center of each stamped flower blossom. It was a fairly quick and simple card to create, but I love how adding the little flowers with the jewels gave it just the touch of oomph it was missing.

Sunny Studio Blog: You Are Always In My Heart Birds with Tree Branch Valentine's Day Card using Love Birds 3x4 Clear Stamps

Card No.4: For my last Love Birds card of the day, I paired them with our larger Out On A Limb tree branch die which I thought was a better scale to match the new free Cherry Blossom die that will automatically come with all retail orders placed in our store starting today! I repeatedly cut the blossoms from white cardstock, inked them with Spun Sugar Distress Ink, and then accentuated the veining detail using my Copic Marker before adding the little center portion which I had also colored with my Copics over a piece of scratch paper. For my background, I inked it up using the same masks I had cut from our Fluffy Clouds Border Dies for my first card.

Sunny Studio Stamps Love Is In The Air Birds on Cherry Blossoms Tree Branch Spring Valentine's Day Card by Mendi Yoshikawa

Here's a closer look at the new Love Birds Stamps, Love Bird Dies, and Tree Branch Dies. While these are available in our store now, the rest of our Spring Release will be shared with our Sneak Peek Week starting on January 1st and available to purchase on January 5th. 


I hope you enjoy the rest of your day and will continue to check back each day this week to see more fun ideas using this cute set by the rest of the team. :)

Other Sunny Studio Supplies Used:

A Bird's Life Stamps
Shop at:
Sunny Studio
A Bird's Life Dies
A Bird's Life Dies
Shop at:
Sunny Studio
Tsukineko Jumbo Dauber
Shop at:
Sunny Studio
Versafine Onyx Black Ink
Shop at:
Sunny Studio

Plane Awesome Stamps
Shop at:
Sunny Studio
Plane Awesome Dies
Plane Awesome Dies
Shop at:
Sunny Studio
Fluffy Clouds Border Dies
Shop at:
Sunny Studio
Eyelet Lace Borders
Eyelet Lace Borders
Shop at:
Sunny Studio
Slimline Basic Borders
Shop at:
Sunny Studio
Little Birdie Stamps
Shop at:
Sunny Studio
Little Birdie Dies
Little Birdie Dies
Shop at:
Sunny Studio
Out on A Limb Dies
Out on A Limb Dies
Shop at:
Sunny Studio
Scalloped Heart Dies
Shop at:
Sunny Studio
Stitched Heart 2 Dies
Shop at:
Sunny Studio
Brilliant Banner 1 Dies
Shop at:
Sunny Studio
Dotted Diamond Landscape
Shop at:
Sunny Studio
My Heart Stamps
My Heart Stamps
Shop at:
Sunny Studio
My Heart Dies
My Heart Dies
Shop at:
Sunny Studio
Pink Spinel Jewels
Pink Spinel Jewels
Shop at:
Sunny Studio
Cornflower Blue Jewels
Shop at:
Sunny Studio
Classic Gingham 6x6 Paper
Shop at:
Sunny Studio
Hero Arts Ultra Fine Clear
Shop at:
Sunny Studio
Hero Arts White Detail
Shop at:
Sunny Studio
VersaMark Watermark Ink
Shop at:
Sunny Studio