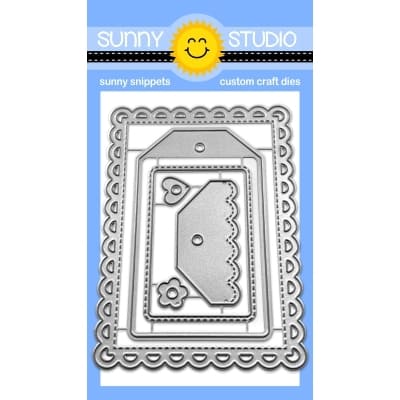
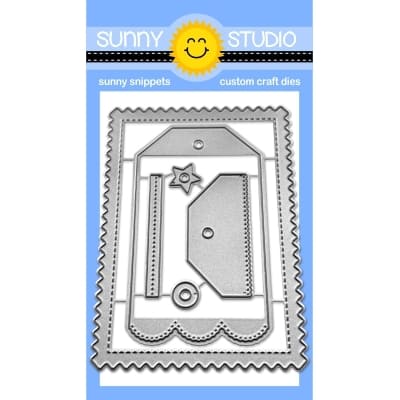
Showing posts with label Comic Strip Speech Bubble Dies. Show all posts

Thursday, May 11, 2023

Grad Cat Gift Tags with Marine

Hello crafty friends! Marine here, I'm super happy to be back on the blog with those six graduation shaker tags showcasing the ever so cute kitty from Grad Cat. Love this sweet little guy so much I thought it would be fun to create a variety of cats with matching bow ties and books.

Sunny Studio Stamps: Grad Cat Graduation Shaker Tags by Marine Simon (featuring Mini Mat & Tag Dies)

I started off by stamping six kitties, books and bow ties, all from Grad Cat, on Transotype perfect coloring paper using an alcohol marker friendly black ink, I cut them all using the coordinating dies, and colored everything using my Spectrum Noir Illustrator markers and Graph'it Brush markers. I colored each kitty in a different way to make each one of them unique, and once the coloring was done, I stamped a star, again from Grad Cat, on each book spine.

Sunny Studio Stamps: Grad Cat Graduation Shaker Tags by Marine Simon (featuring Mini Mat & Tag Dies)

Next I created six shaker tags using the same process as the Meow & Furever tags I made back in January. The papers I used are from the Heroic Halftones paper pack, and these are perfect because they look like they're shining a light on each kitty that just graduated. So, I made those tags using the Mini Mat & Tags 3 die set, and to decorate the top I cut and glued a gold glitter star using a die from the Mini Mat & Tags 4 die set, and used gold thread from my stash to make handles.

Sunny Studio Stamps: Grad Cat Graduation Shaker Tags by Marine Simon (featuring Mini Mat & Tag Dies)

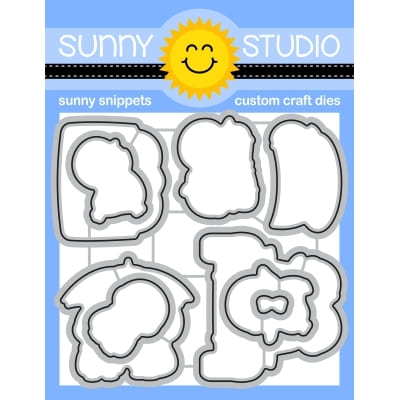
I attached each kitty and book on their matching tags using 1mm foam squares, and then I created the greetings. I cut six speech bubbles out of matching cardstock using a die from the Comic Strip Speech Bubbles die set, next I cut six more speech bubbles out of gold glitter cardstock, I attached a gold glitter speech bubble behind each colored speech bubble, and then stuck the elements on the tags using 1mm foam squares again.

As always I finished the tags by adding highlights and details on the images and speech bubbles using a white gel pen. And that's it! I hope you like those cute and colorful graduation shaker tags. Thanks so much for stopping by, and see next time!

Sunny Studio Supplies Used:

Heroic Halftones 6x6 Paper
Shop at:
Sunny Studio
Comic Strip Speech Bubble Dies
Shop at:
Sunny Studio
Grad Cat Stamps
Grad Cat Stamps
Shop at:
Sunny Studio
Grad Cat Dies
Grad Cat Dies
Shop at:
Sunny Studio
Mini Mat & Tag 3 Dies
Shop at:
Sunny Studio
Mini Mat & Tag 4 Dies
Shop at:
Sunny Studio

Wednesday, January 4, 2023

Valentine's Day Cards with Marie and Catherine

Happy New Year Crafty Friends, Marie here! I hope you had a wonderful Christmas! I still can't believe we are at the beginning of a brand new year! To kick off the New Year, I am sharing my first card inspiration of 2023 featuring Sunny Studio's Love Monkey Stamps. This stamp set is full of so many adorable monkey images perfect for projects all year round! 

Sunny Studio Stamps: Love Monkey Card by Marie Marco (featuring Fancy Frame Rectangle Dies)

To create this Valentine's themed card, I cut out 3 A2 sized panels from Bristol Smooth Cardstock. For the first panel, I used the Fancy Frames Rectangle Dies for the scalloped frames. I then inked the outer frame with Seedless Preserves Distress Ink. For the second panel, I die cut an oval from the center and with a leaf pattern embossing folder gave it texture. For the 3rd panel, I distress inked my night time background using a combination of Seedless Preserves, Uncharted Mariner, and Chipped Sapphire Distress Inks. I gave it some water splatter for a subtle star texture. 

I stamped all my images onto watercolor paper with distress ink in Antique Linen, and used water color pencils to color them. I cut them out using the Love Monkey Dies

Sunny Studio Stamps: Love Monkey Card by Marie Marco (featuring Fancy Frame Rectangle Dies)

I then adhered the panel with the cut out oval center to the inked background panel, and adhered my scalloped frames as well. I also adhered the monkey images using double sided foam tape. I used bearly art precision craft glue to adhere all the other images. I stamped out my sentiments onto 110 lb cardstock and fussy cut them out and adhered them in wonky positions to mimic the playfulness of my card. I also die cut some random hearts and incorporated them into my scene. I decided to give my elements some dimension by using Ranger Glossy Accents on the tree leaves and vines, and all the hearts. I just love how the glossy accents make things you want to highlight just pop!

And that does it for today's card inspiration! Thank You so much for joining me today!!! Until Next time, Happy Crafting!!

---------------------------------------------

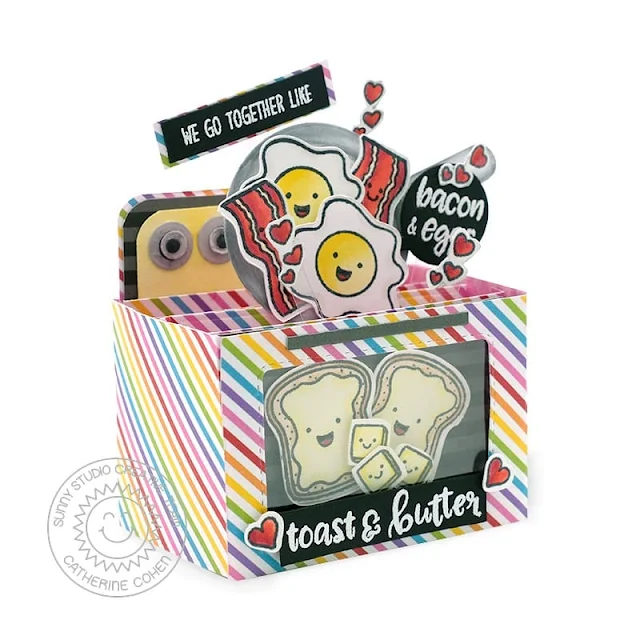
Hello and Happy New Year Crafty Friends! Catherine here and I am so excited to be back on the Sunny Studio Creative Team for the Spring 2023 term! For my Valentine’s Day Card, I created a pop-up oven card featuring the cute Breakfast Puns Stamps.

Sunny Studio Stamps: Breakfast Puns Card by Catherine Cohen (featuring Mini Mat & Tag Dies, Comic Strip Speech Bubble Dies)

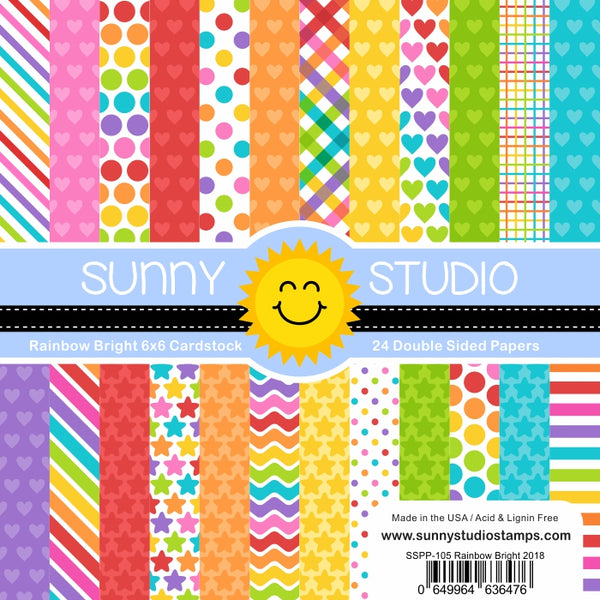
For the base, I pieced together a pop up box card without the flaps using some colorful cardstock from Rainbow Bright 6x6 Paper Pack. I created an oven window using the rectangle die from Mini Mat & Tag 3 Dies and added a piece of acetate. I adhered cardstock from Sleek Stripes Paper for the inside of the oven. For the oven control panel, I layered three pieces of cardstock with rounded corners made with a corner punch. I used the colorful cardstock from Rainbow Bright 6x6 Paper Pack for the first layer (bottom), followed by cardstock from Sleek Stripes Paper Pack, and the top layer was created by ink blending white cardstock with Squeezed Lemonade Distress Oxide.

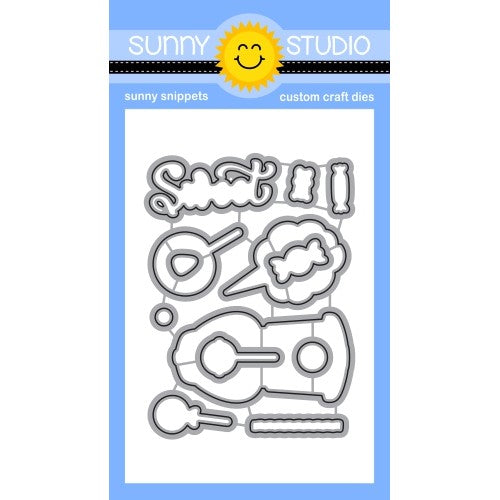
I added some stove knobs made with circle dies from Candy Shoppe Dies using white cardstock ink blended with Hickory Smoke and Black Soot Distress Oxide. For the oven door handle, I cut a thin strip of paper out of white cardstock sized 2”x ¼” and I ink blended it with Hickory Smoke Distress Oxide.

Sunny Studio Stamps: Breakfast Puns Card by Catherine Cohen (featuring Mini Mat & Tag Dies, Comic Strip Speech Bubble Dies)

Next, I stamped the images from Breakfast Puns Stamps and die cut with Breakfast Puns Dies. I made the frying pan using a 2’1/4’ circle die and trimmed the baseball bat from Team Player Stamps for the handle. I colored the pan and images with Copic Markers listed in my blog link below. I adhered the images onto the box card using Acetate strips.

I added two White Heat Embossed sentiments. I thought it would be fun to use Comic Strip Speech Bubbles Die for one of them. I finished off the card by added some adorable cascading hearts from Passionate Penguins Stamps.

Thank you so much for stopping by. For more inspiration, please visit me at Crafti-Cat!  Wishing you and your families a healthy and happy 2023!

Sunny Studio Supplies Used:

Candy Shoppe Dies
Candy Shoppe Dies
Shop at:
Sunny Studio
Breakfast Puns Stamps
Shop at:
Sunny Studio
Breakfast Puns Dies
Breakfast Puns Dies
Shop at:
Sunny Studio
Team Player Stamps
Team Player Stamps
Shop at:
Sunny Studio
Fancy Frames- Rectangles
Shop at:
Sunny Studio
Rainbow Bright 6x6 Paper
Shop at:
Sunny Studio
Love Monkey Stamps
Love Monkey Stamps
Shop at:
Sunny Studio
Love Monkey Dies
Love Monkey Dies
Shop at:
Sunny Studio
Comic Strip Speech Bubble Dies
Shop at:
Sunny Studio
Sleek Stripes Paper
Sleek Stripes Paper
Shop at:
Sunny Studio
Passionate Penguins Stamps
Shop at:
Sunny Studio
Passionate Penguins Dies
Shop at:
Sunny Studio
Mini Mat & Tag 3 Dies
Shop at:
Sunny Studio

Wednesday, December 28, 2022

Puppy Love Cards with Marie and Alma

Hello Crafty Friends, Marie here. I hope you had a wonderful Christmas!  Today I am sharing a love themed box card featuring Sunny Studio's Puppy Love Stamp. This tiny set is so cute and perfect for all the dog lovers out there as well as for the upcoming Valentine's season.

Sunny Studio Stamps: Puppy Love Love Themed Card by Marie Marco (featuring Mini Mat & Tag Dies, Loopy Letter Dies)

The box card die that I am using is from Lawn Fawn. My first step was to die cut all the box card pieces from Bristol Smooth cardstock paper. I then cut off the two side flaps and the front flap of the box leaving only the back panel. I wanted to create a very pink card to give to my mom, so I softly ink blended the outside of the box and the back panel using Kitsch Flamingo Distress Ink Oxide. I also distress inked the grass panels using Twisted Citron and Mowed Lawn. To create some cute texture to the the fresh grass, I used some water splatters and quickly dabbed it off with a paper towel. 

After assembling my card, I stamped my images with Distress Ink in Antique Linen onto watercolor paper and colored them using watercolor pencils. I cut my images out using the corresponding Puppy Love Dies. Using the Mini Mat & Tag 1 Dies. Using just the mat portion, I cut out a scallop edged background panel. With a cloud stencil, I created some soft pink clouds for the backdrop which I then attached to the back using double sided tape adhesive. 

Sunny Studio Stamps: Puppy Love Love Themed Card by Marie Marco (featuring Mini Mat & Tag Dies, Loopy Letter Dies)

To decorate the sides of the box, I used some pink pattern paper from the All Is Bright 6x6 Paper. For the front of the box card, I used the Loopy Letters Dies to create my own " I woof you "sentiment. 

To finish off my card, I adhered my puppies to the inside of the box and embellished their little hearts using Stickles Glitter Glue. I also took some die cut hearts and placed them all over my scene using clear acetate for that awesome floating illusion!  I also added some Glossy Accents to all the hearts for that gorgeous glossy look. 

And that does it for another week of paper crafting inspiration! Until next time, Have a Very Happy New Year!!! I'll see you in 2023!! Love and Peace

--------------------------------------------

Hi to all, Alma here. Today my card looks a lot like Valentine! I love it to use the bright and colourful pink shades after Christmas. 

Sunny Studio Stamps: Puppy Love Love Themed Card by Alma Störk (featuring Comic Strip Speech Bubble Dies)

The highlight of my card is the cute new Puppy Love Stamps set. I stamped the cute dogs and coloured them with Copic Markers. Then I die-cut the images with the Puppy Love Dies

After that I decided to create a shaker card with the Comic Strip Speech Bubbles Die. I die-cut the frame and cut a rectangle card in the same size, that I wanted to use as a background for the shaker card. Then I whipped the background with Distress Oxide Inks Worn Lipstick, Wilted Violet and Picked Raspberry. 

Sunny Studio Stamps: Puppy Love Love Themed Card by Alma Störk (featuring Comic Strip Speech Bubble Dies)

Then I glued the back and front of the shaker card with 3D Pads together and filled a lot of pink sequins in the card. After that I created glitter clouds with the Fluffy Clouds Dies.

For the decoration of my card I die-cut a lot of hearts with Puppy Love Dies. I stamped the sentiment from the Puppy Love Stamps on the Speech Bubbles from the Comic Strip Speech Bubbles Die

Now I glued all together! Ready!

Sunny Studio Supplies Used:

Loopy Letters Dies
Loopy Letters Dies
Shop at:
Sunny Studio
Comic Strip Speech Bubble Dies
Shop at:
Sunny Studio
All Is Bright Paper
All Is Bright Paper
Shop at:
Sunny Studio
Mini Mat & Tag 1 Dies
Shop at:
Sunny Studio
Puppy Love Stamps
Puppy Love Stamps
Shop at:
Sunny Studio
Puppy Love Dies
Puppy Love Dies
Shop at:
Sunny Studio

Thursday, December 8, 2022

Winter Wreaths with Marine and Waleska

Hello crafty friends, Marine here, super happy to be back with this new shaker card showcasing the beautiful Winter Wreaths stamp set. As very often I went for non-traditional colors, and I started off by stamping the wreath using blue ink. I used blue shades to stamp the poinsettias, and a light grey ink to stamp the bow. And I added embossed details in silver on those elements to bring some shine.

Sunny Studio Stamps: Winter Wreaths Holiday Card by Marine Simon (featuring Comic Strip Speech Bubble Dies, Holiday Greetings)

Next I created the window. I cut a white Comic Strip Speech Bubble panel, a second one out of scrap paper, and an acetate panel. I temporarily taped the second frame to the acetate panel, and used white ink along with a sponge dauber to create a frosty look on the acetate. And I also added splatters of that same white ink all over the acetate.

Sunny Studio Stamps: Winter Wreaths Holiday Card by Marine Simon (featuring Comic Strip Speech Bubble Dies, Holiday Greetings)

Next I worked on the shaker panel. I first attached the white frame to the acetate using double sided tape. At the back of the panel, I added foam strips on the four edges and on the slim strips as well. I made the inside foam edges non sticky using my powder tool, added White Snowflake Confetti and iridescent confetti inside each small window, and closed the shaker panel using a pattern paper from the Very Merry paper pack.

I heat embossed my "Happy Holidays" greeting from Holiday Greetings in silver on black cardstock, cut it using the coordinating die and attached it below the wreath using foam squares. And finally I added a few clear droplets here and there to bring more shine to the card.

Sunny Studio Stamps: Winter Wreaths Holiday Card by Marine Simon (featuring Comic Strip Speech Bubble Dies, Holiday Greetings)

And that's it, this is the final result and I hope you like it. As always, you are welcome to check the process video for more details (click on the image above). Thank you so much for stopping by, and see you next time.

-------------------------------------------------

Hello there, Waleska here. Today I have card inspiration for you with two of my favorite elements, rainbow colors and inks! This colorful card is just so happy and bright I hope you like it!


Sunny Studio Stamps: Winter Wreaths Holiday Card by Waleska Galindo (featuring Gingerbread House Dies, Fancy Frame Dies)


For this card I started by creating the inky background I used some of my favorite Oxide Ink colors on Nina Solar White cardstock. The colors I used are Festive Berries, Mustard Seed, Spiced Marmalade, Mowed Lawn, Peacock Feathers and Wilted Violet. I added water splashes to this panel to add interest and for some shine I added glitter watercolor too. I then stamped the wreath from 
Winter Wreaths, I used the pine bough with white embossing powder and I inked it with the same colors I used for the background panel, I cut the wreath with the coordinating die and I adhere it to the center of my front panel.

I stamped the beautiful layered bow that comes in the stamp set trying to match the colors I previously used. I used Spectrum Noir Inks in tones: Red: bordeaux, orange and Chinese red; Yellow: honey pot, lemon tonic and straw bale; Purple: damson wine, crushed velvet and pale fig; Aqua: Lagoon, parakeet and Oasis. I love the 3D look of this bow.  

Sunny Studio Stamps: Winter Wreaths Holiday Card by Waleska Galindo (featuring Gingerbread House Dies, Fancy Frame Dies)

I cut some peppermint candies from the Gingerbread House dies and I started decorating the wreath with all this elements. Finally I added a frame from the Fancy Frame Rectangle dies with white cardstock and stamped the sentiment from the Jolly Gingerbread stamp set. Super fun and colorful card, thank you so much for stopping by, have a wonderful rest of your day!

Sunny Studio Supplies Used:

Gingerbread House Dies
Shop at:
Sunny Studio
Jolly Gingerbread Stamps
Shop at:
Sunny Studio
Fancy Frames- Rectangles
Shop at:
Sunny Studio
Comic Strip Speech Bubble Dies
Shop at:
Sunny Studio
Very Merry 6x6 Paper
Shop at:
Sunny Studio
Holiday Greetings Stamps
Shop at:
Sunny Studio
Holiday Greetings Dies
Shop at:
Sunny Studio
Winter Wreaths Stamps
Shop at:
Sunny Studio
Winter Wreaths Dies
Winter Wreaths Dies
Shop at:
Sunny Studio

Friday, November 11, 2022

Snowman Kisses Cards with Vanessa and Tina

Hello to you! Vanessa here with a fun winter card using the adorable Snowman Kisses set.

Sunny Studio Stamps: Snowman Kisses Winter Themed Holiday Card by Vanessa Menhorn (featuring Scenic Route, Comic Strip Speech Bubble Dies)

I die-cut the Comic Strip Speech Bubble Dies from white cardstock and inked the inside parts with Dried Marigold and Salvaged Patina Distress Oxide inks. Now I stamped all my images, colored everything with Copics and die-cut the pieces with the matching dies. Then I adhered the Scenic Route images to the little squares and rectangles, trimmed them and adhered these to the card base. 

Sunny Studio Stamps: Snowman Kisses Winter Themed Holiday Card by Vanessa Menhorn (featuring Scenic Route, Comic Strip Speech Bubble Dies)

I adhered the snowmen with foam tape and added the cute banner from Balloon Rides. Finally, I added snow with a white gel pen.

Have a happy weekend, everybody! 

--------------------------------------------

Hello crafty friends, Tina here with an ornament shaped Christmas card featuring the new Snowman Kisses stamp and die set!  How adorable is this set, and perfect for your holiday projects!

Sunny Studio Stamps: Snowman Kisses Winter Themed Holiday Card by Tina (featuring Forest Tree Stencils)

To create this ornament card, I used shaped dies from my stash. But it works just as great with two nesting circle dies. The biggest die creates our panel and our card base, while the two dies together cut a circular frame. I also had an ornament topper die, but you can add a small rectangle piece as well.

The sky portion of the circular panel was inked with Distress Oxide Saltwater Taffy and I splattered it with white paint droplets to give the illusion of snowflakes. Once this was dry, I stamped the sentiment from the Snowman Kisses stamp set directly onto the panel.

Next, I used Salvaged Patina on the layers of the Forest Trees stencil and fussy cut these tree borders from some Neenah card stock. As extra dimension, I also created two snowbanks from the same Neenah paper.

For a ‘frosted’ look on the snowbanks, I added an opaque white layer with a snow pen and sprinkled some fine white glitter on top. While this was drying, I stamped and die cut my three darling snowmen. Going for a nontraditional color scheme, I colored these cuties with my copics and added a ‘knit’ detail to the hat of the middle snowman. And put in lots of snowdrops with my white gel pen!

Sunny Studio Stamps: Snowman Kisses Winter Themed Holiday Card by Tina (featuring Forest Tree Stencils)

All the elements were ready, and I could start assembling the shaped card by gluing the trees and snowbanks to the circular panel. Next, I added the panel to the card base and lastly, adhered the circular frame, three snowmen and topper (that was cut from glitter card stock).

To embellish the card, I added a few of the Pure White Jewels scattered around the sentiment. These jewels are my favorite on snowy projects!! I thought it would be fun to include a few small jingle bells from my stash to the ornament topper, using some white thread.

Another sweet Christmas card finished and ready to send in December! Thank you for joining me and happy crafting!

Sunny Studio Supplies Used:

Comic Strip Speech Bubble Dies
Shop at:
Sunny Studio
Scenic Route Stamps
Scenic Route Stamps
Shop at:
Sunny Studio
Scenic Route Dies
Scenic Route Dies
Shop at:
Sunny Studio
Balloon Rides Stamps
Shop at:
Sunny Studio
Balloon Rides Dies
Balloon Rides Dies
Shop at:
Sunny Studio
Forest Trees Stencils
Shop at:
Sunny Studio
Snowman Kisses Stamps
Shop at:
Sunny Studio
Snowman Kisses Dies
Snowman Kisses Dies
Shop at:
Sunny Studio

Tuesday, August 16, 2022

Designer's Choice Cards with Isha and Kavya

Hello everyone! Isha here with a mixed media card as my designer's choice feature today. I love creating layers while still keeping it one layer. So I used various stamps and dies, even used the dies as stencils.

Sunny Studio Stamps: Spring Greenery Friendship Card by Isha Gupta (featuring Watering Can, Summer Greenery, Comic Strip Speech Bubble Dies, Scalloped Oval Mat Dies)

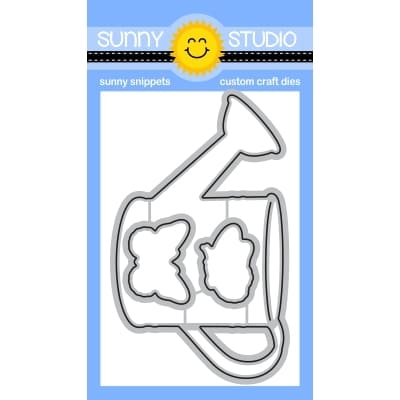
I started by creating the background panel by adding some inks to the gelli plate. Take the print onto a white card. I then stamped the butterflies from the Watering Can stamp, using the pink ink. Die-cut the leaves from the Spring Greenery dies, use these as a stencil to sponge some leaves onto the panel. Flick some black watercolor.

Stamp the butterflies from the Watering Can stamp, add touch of color using copic markers and die-cut using the coordinating dies. Add spectrum noir clear sparkle pen. die-cut leaves from the Summer Greenery dies, thrice from the white card and also vellum. Die-cut the oval from the Scalloped Oval Mat 3 dies, die-cut the word hugs in the center. Sponge some pink ink to the edges.

Sunny Studio Stamps: Spring Greenery Friendship Card by Isha Gupta (featuring Watering Can, Summer Greenery, Comic Strip Speech Bubble Dies, Scalloped Oval Mat Dies)

Die-cut the speech bubble from pink and yellow card using the Comic Strip Speech Bubbles dies, adhere the yellow to the pink slightly offset. Stamp the sentiment. Adhere the panel to the white card and adhere all the elements to it. I used 3d foam on some for added dimension.

Thank you for dropping by and have a nice day!

----------------------------------------------

Hi folks, Kavya here. I am back on the blog with another fun project! I love the layering stamps from SSS as they are just so realistic and so easy to use! 

Sunny Studio Stamps: Lovely Lilacs Box Card by Kavya (featuring Watering Can)

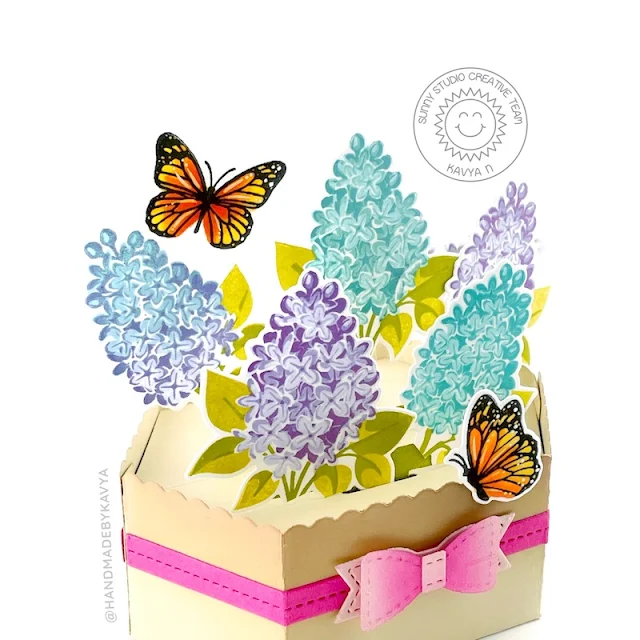
I decided to pull out some of my favorite layering stamps from the latest release and create a fun 3D bouquet of flowers with the help of Lawn Fawn’s Platform die. I first created my platform base using LF’s die and some cardstock. 

Sunny Studio Stamps: Lovely Lilacs Box Card by Kavya (featuring Watering Can)

Then, I stamped and die cut the flowers and butterflies from Lovely Lilacs and Watering Can stamp sets. I added this to the platform die with the help of some double sided tape and some clear acetate (for support). I decided to not add a sentiment so that I can use it for any occasion. That’s it!

I hope you loved this super fun and easy project! Happy Crafting!

Sunny Studio Supplies Used:

Comic Strip Speech Bubble Dies
Shop at:
Sunny Studio
Scalloped Oval Mat 3 Dies
Shop at:
Sunny Studio
Spring Greenery Dies
Shop at:
Sunny Studio
Lovely Lilacs Stamps
Shop at:
Sunny Studio
Lovely Lilacs Dies
Lovely Lilacs Dies
Shop at:
Sunny Studio
Watering Can Stamps
Watering Can Stamps
Shop at:
Sunny Studio
Watering Can Dies
Watering Can Dies
Shop at:
Sunny Studio
Summer Greenery Die
Summer Greenery Die
Shop at:
Sunny Studio