Wednesday, July 24, 2024

Limitless Labels Die Focused Card with Tina

Hello crafters, it’s Tina and today I have a fun shaker card for you made with one of the nesting Limitless Labels dies combined with some yummy treats from the Candy Shoppe set.

Sunny Studio Stamps: Limitless Label Die Focused Candy Shoppe Best Wishes Card by Tina Henkens (featuring Frilly Frame Dies)

My background panel was made from a sheet of beautiful grey paper (Subtle Grey Tones) since I knew I’d be selecting bright colors for the sweets.

To create the shaker I used the outside die from the Frilly Frames Eyelet Lace dies and one of the Limitless Labels dies. Next, I adhered some clear acetate to the back of this panel using strong double-sided tape. Then, I build my shaker wall with foam tape and filled up the shaker with clear and pink sequins from my 
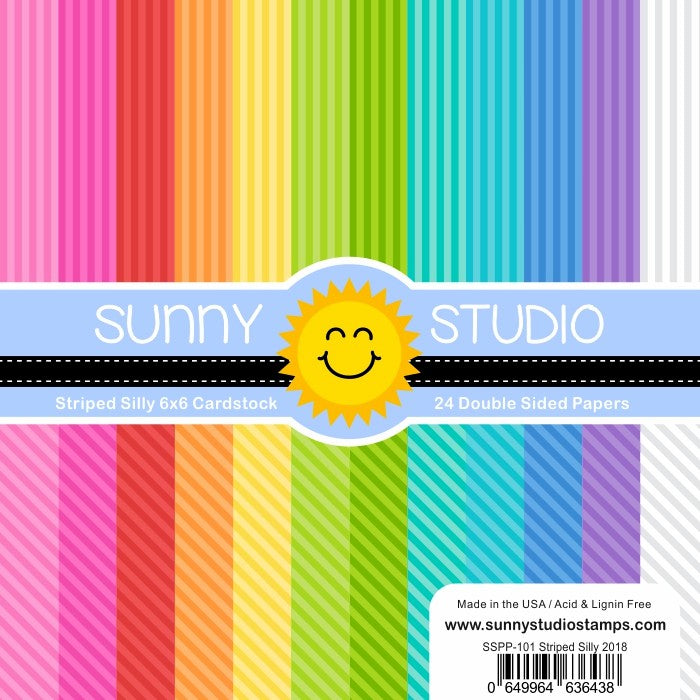
stash. To close this shaker, I cut a pink piece of the Striped Silly papers.

Sunny Studio Stamps: Limitless Label Die Focused Candy Shoppe Best Wishes Card by Tina Henkens (featuring Frilly Frame Dies)

After stamping the gumball machine, gummi bears and other sweets I started coloring with my trusted Copic markers. I went with fun and happy colors! I stamped the sentiment from Heartfelt Wishes in pink ink on a white banner and adhered it to the bottom of my shaker card.

Next, I mounted the gumball machine and arranged the other sweets left and right. I love finishing a card with some embellishments and today I chose for the Crystal Clear Jewels since my project was so colorful.

This card was fun to make, and I hope it inspired you to create a shaker card as well! Happy crafting!

Sunny Studio Supplies Used:

Candy Shoppe Stamps
Candy Shoppe Stamps
Shop at:
Sunny Studio
Candy Shoppe Dies
Candy Shoppe Dies
Shop at:
Sunny Studio
Striped Silly 6x6 Paper
Shop at:
Sunny Studio
Subtle Grey Tones Paper
Shop at:
Sunny Studio
Frilly Frames-Eyelet Lace
Shop at:
Sunny Studio
Limitless Labels 1 Dies
Shop at:
Sunny Studio

Monday, July 22, 2024

Summer Jar Mug Die Focused Card with Leanne

Hello everyone! Leanne here to share a friendship card featuring the Summer Jar Mug. I have made the jar mug into a shaker for this card and I've colored plus filled it to look like a refreshing cup full of pink lemonade. 

Sunny Studio Stamps: Summer Jar Mug Die Focused Card by Leanne West  (featuring Punny Fruit Greetings, Sweet Word Die, Strawberry Patch Dies, Scalloped Oval Mat Dies)

Here's a list of the Sunny Studio products you'll need to create this A2 card design: 

Summer Jar Mug dies - for the mug, straw, and tiny lemon slice die cuts 
Scalloped Oval Mat 3 dies - for the scalloped oval mat
Punny Fruit Greetings -  for the stamped words "friends make life" 
Sweet Word die -  for the die cut word "sweet"
Strawberry Patch dies - for the tiny flower die cut
Classic Gingham Paper - for the gingham background mat

The Sweet Word die is retired but if you don't have it you can use alphabet dies to spell out the word. The Hayley Upper Case or Chloe Alphabet dies would work great! 

Sunny Studio Stamps: Summer Jar Mug Die Focused Card by Leanne West  (featuring Punny Fruit Greetings, Sweet Word Die, Strawberry Patch Dies, Scalloped Oval Mat Dies)

To make this jar mug into a fun shaker, I have adhered several layers of the jar mug frame together. I die cut one solid mug shape for the back and 5 layers of the open mug frame to make it thick enough to allow for the shaker bits to move around freely. I filled the shaker well with tiny pink balls and iridescent confetti bits. I then adhered clear acetate and one final mug frame piece over top. The back solid piece and top frame piece were lightly colored with pink ink prior to assembly to enhance the pink lemonade look. 

When adhering the jar mug frame layers together to build up the shaker well, be sure to include the straw in between two layers toward the back. I forgot to do this and after I had my shaker completely assembled, I had to cut a small slit in the back to slide the straw inside the mug. 

Sunny Studio Supplies Used:

Sweet Word Die
Sweet Word Die
Shop at:
Sunny Studio
Classic Gingham 6x6 Paper
Shop at:
Sunny Studio
Scalloped Oval Mat 3 Dies
Shop at:
Sunny Studio
Punny Fruit Greetings
Shop at:
Sunny Studio
Strawberry Patch Dies
Shop at:
Sunny Studio
Summer Jar Mug Dies
Summer Jar Mug Dies
Shop at:
Sunny Studio

Sunday, July 21, 2024

Wild Cherry Die Focused Card with Cathy

Hey friends! Cathy here today with a clean and simple card for you featuring the Wild Cherry Dies.

Sunny Studio Stamps: Wild Cherry Die Focused Card by Cathy Chapdelaine (featuring Frilly Frame Eyelet Lace Dies, Scalloped Oval Mat Dies, Stitched Oval Dies, Brilliant Banner Dies, Punny Fruit Greetings)

I love the look of retro vintage fruit labels and I thought the Wild Cherry Dies would be perfect for this. First, I cut a piece of light aqua cardstock 4 1/2" x 6” and die-cut the piece using the Frilly Frames Eyelet Lace Die (I die-cut it twice to span the entire cardstock piece). I then die-cut the piece with the largest Stitched Rectangle Die and adhered it centered on an A2 card front.

Next, I die-cut the second largest Scalloped Oval Mat 2 Dies from black and white cardstock. I adhered the black oval centered on the card front and inlaid the white circles from the white die-cut oval. I die-cut the third largest Stitched Oval Die from white cardstock and inked the top half lightly with Spun Sugar Distress ink. I then inked a sun ray stencil on the top half of the oval with Spun Sugar applying harder pressure for a subtle effect. I die-cut a piece of paper from the All is Bright Paper using the same Stitched Oval Die, cut across the oval at 1 1/2" and adhered it to the bottom of the inked oval. I then adhered this combined piece to the black oval.

Sunny Studio Stamps: Wild Cherry Die Focused Card by Cathy Chapdelaine (featuring Frilly Frame Eyelet Lace Dies, Scalloped Oval Mat Dies, Stitched Oval Dies, Brilliant Banner Dies, Punny Fruit Greetings)

To finish, I die-cut the Brilliant Banner 1 Die from white cardstock and stamped the sentiment using the Punny Fruit Greetings Stamps (I used Memento “LadyBug” ink for the “cherry” sentiment). I also heat embossed the sentiment with clear embossing powder for a little shine. I then inked the banner with Lost Shadow Distress ink and added some shadows with gray Copics. I die-cut the banner again from black cardstock and layered/adhered the two together. I die-cut the cherries from white cardstock and colored them with Copics. Sweet and simple!

I hope you enjoyed and thanks for stopping by today! For more inspiration, please visit my blog www.inkredibleadventures.com and you can also find me on Instagram as @cathy.chapdelaine.

Sunny Studio Supplies Used:

Stitched Rectangle Dies
Shop at:
Sunny Studio
Stitched Oval Dies
Stitched Oval Dies
Shop at:
Sunny Studio
Frilly Frames-Eyelet Lace
Shop at:
Sunny Studio
Scalloped Oval Mat 2 Dies
Shop at:
Sunny Studio
All Is Bright Paper
All Is Bright Paper
Shop at:
Sunny Studio
Brilliant Banner 1 Dies
Shop at:
Sunny Studio
Punny Fruit Greetings
Shop at:
Sunny Studio
Wild Cherry Dies
Wild Cherry Dies
Shop at:
Sunny Studio

Saturday, July 20, 2024

Guest Designer Spotlight: Tropical Birds Cards with Sara Zoppi

Hi crafty friends, Sara here! Today I am really thrilled to be here again, guesting for Sunny Studio Stamps! And today I have two cards featuring the recent released Tropical Birds stamp set. So, let's dive into the first one!

Sunny Studio Stamps: Tropical Birds Card by Sara Zoppi (featuring Chloe Alphabet Dies)

Look, how cure are all those parrots? You might know I love playing with sentiments and customizing them, and that's what I did here. I knew I wanted to use the rainbow palette since the tropical birds are always so colorful, so I stamped all the parrots and I figured out how I would have arranged them from left to right.

Sunny Studio Stamps: Tropical Birds Card by Sara Zoppi (featuring Chloe Alphabet Dies)

I then colored them all using the Copics listed below and I die cut them with coordinating dies.

- First parrot: RV69 – RV66 – V04 – V01 – RV00 – YR61 – E000 – YR09
- Second parrot: YR09 – YR04 – Y38 – Y35 – Y11 – YG00
- Third parrot: YG17 – YG25 – YG23 – YG01 – YG00 – BG11 – BG23 – BG13
- Fourth parrot:  BG11 – BG23 – B69 – B66 – BV13 – BV01

Sunny Studio Stamps: Tropical Birds Card by Sara Zoppi (featuring Chloe Alphabet Dies)

I then moved into the background, which I wanted to keep simple. I took a piece of 4"x5.5" white cardstock and I stamped the branch included in the Tropical Birds stamp set with black ink: I also did some mirror stamping to create the right side of the branch. Then I die cut the word PARROT using the Chloe Alphabet dies and some coordinated colored cardstock; I arranged them below the branch and I attached the parrots using foam tape. To complete the card, I stamped the rest of the sentiment (which is included in the same set) with black ink and I matted the panel with one of the patterned sheet included in the Rainbow Bright 6x6 Paper. And here's the finished result!

Sunny Studio Stamps: Tropical Birds Card by Sara Zoppi

My second and last inspiration for today features the same Tropical Birds stamp set but I was inspired to create a scene with them.  

You might recognize the background: I took inspiration from one of Sandy Allnock's copic coloring (Magical Rainforest), which was perfect to set the two toucans included in the set.

Sunny Studio Stamps: Tropical Birds Card by Sara Zoppi

I firstly hand drew the branch where the two toucans are sit and I stamped them with Memento Black ink. I colored everything with the Copics listed below, creating a one layer scene.

- Male toucan: 100 – C9 – BV29 – BV17 – YG00
- Female toucan: 100 – C9 – C7 – RV66 – Y00
- Toucans beaks: 100 – C8 – C7  C6 | YR68 – Y38 – Y19
- Background: 100 – C7 – E47 – YG17 – YG03 – YG97 – V04 – BG09 – BG18 – B000 – BG23 – BG11 – RV69 – RV14 – Y19 – Y38

Sunny Studio Stamps: Tropical Birds Card by Sara Zoppi

I then trimmed the panel to 4,25"x5,5" and I decided to mat it with a 4,75"x6" white panel in order to create a white frame around. For the sentiment, I stamped it on two white strips and I attached them with foam tape below the branch. And here's the finished result!

Thanks for stopping by! I really hope you will like my projects and you will be inspired to create something! Hugs from Italy!

Sunny Studio Supplies Used:

Chloe Alphabet Dies
Chloe Alphabet Dies
Shop at:
Sunny Studio
Rainbow Bright 6x6 Paper
Shop at:
Sunny Studio
Tropical Birds Stamps
Shop at:
Sunny Studio
Tropical Birds Dies
Tropical Birds Dies
Shop at:
Sunny Studio

Friday, July 19, 2024

Designer's Choice: Cupcake Shape Die Focused Card with Nicky

Hello! This is Nicky with you on the Sunny blog today with a birthday card that uses the Cupcake Shape Dies.

Sunny Studio Stamps: Cupcake Shape Die Focused Birthday Cat Card by Nicky Meeks (featuring Chloe Alphabet Dies)

To create this card, I took some sturdy white cardstock and I die cut the largest (outline) die twice because these pieces would form the front and back of the card. I used scissors to trim off the merest sliver from the bottom of the back cupcake panel so that the card wouldn't rock when it was standing upright on display. Also with this back panel I scored a line close to the top and applied ScorPal tape to the little section above the scored line and adhered the front and back of the card forms together. I then die cut most of the other elements from the die set from the same white cardstock and I began to colour all of the elements using Copic markers.

Cupcake Liner - RV17, RV06, RV13, RV21, RV000, RV0000
Cupcake Icing - E31, E51, E50
Cherry & Heart - R59, R39, R29, R27, R24
Cake - E24, E43, E42
Candle - RV21, W1, W0, W00, Y38, Y17, Y06

Sunny Studio Stamps: Cupcake Shape Die Focused Birthday Cat Card by Nicky Meeks (featuring Chloe Alphabet Dies)

I glued the coloured elements to the front of the card base and attached the heart, candle and cherry with foam tape. I die cut the sentiment using the Chloe Alphabet Die from white then gold cardstock and adhered the letters together slightly offset for a white 'shadow' and then glued the sentiment in place.

To finish the card I stamped the 'wish you a' portion of the sentiment in Versamark Ink and heat embossed in white and added the strip with foam tape.

Sunny Studio Stamps: Cupcake Shape Die Focused Birthday Cat Card by Nicky Meeks (featuring Chloe Alphabet Dies)

I stamped the cat of my choosing from Birthday Cat with black ink and made her to be a ginger tabby by colouring with Copics in YR24, Y26, YR20 and E00. I die cut the image with the Birthday Cat Dies and applied the image with more foam tape.

Last but by no means least, I applied some blobs of glue in several places on the icing and then scattered on some multi-coloured embellishments from my stash. I tapped off any excess and then the card was complete.

See you next Friday with something new and thanks for stopping by to read today.

Sunny Studio Supplies Used:

Chloe Alphabet Dies
Chloe Alphabet Dies
Shop at:
Sunny Studio
Cupcake Shape Dies
Cupcake Shape Dies
Shop at:
Sunny Studio
Birthday Cat Stamps
Birthday Cat Stamps
Shop at:
Sunny Studio
Birthday Cat Dies
Birthday Cat Dies
Shop at:
Sunny Studio