Showing posts with label Staggered Circles. Show all posts

Friday, August 6, 2021

Happy Hamster Cards with Kay and Candice

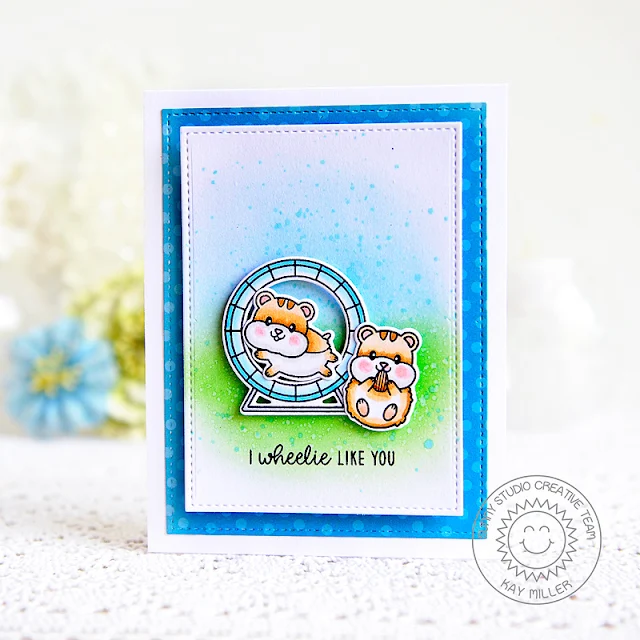
Hi there! Kay here and I have a fun card to share with you today using the super cute Happy Hamsters stamp set and the coordinating dies. I also used the Stitched Rectangle dies and some patterned paper from the Holiday Cheer 6x6 Cardstock pad.

Sunny Studio Stamps: Happy Hamsters Stitched Rectangle Dies Hamster Themed Card by Kay Miller

First off, I created a background for the cute little hamsters by blending some distress ink onto white cardstock. I used Mowed Lawn for the grass and Tumbled Glass for the sky. I then speckled some darker blue Peacock Feathers ink mixed with water over all of it. I stamped the sentiment from the Happy Hamsters stamp set along the bottom and then cut this panel out with the medium Stitched Rectangle dies. I then cut out a panel of patterned paper from the Holiday Cheer paper pack just one size larger using the largest of the Stitched Rectangle dies. I then layered both of these onto my white card base.

Sunny Studio Stamps: Happy Hamsters Stitched Rectangle Dies Hamster Themed Card by Kay Miller

Next I colored the cute little hamsters and wheel with Copic markers and cut them out with the Happy Hamsters coordinating dies. I added these to my card using foam tape.

I hope you have enjoyed my card today! Thanks so much for stopping by and happy weekend!

------------------------------------------------

Have you seen these absolutely adorable Happy Hamsters from Sunny Studio stamps yet?! Candice with you today sharing a fun slimline card highlighting these sweeties!

Sunny Studio Stamps: Happy Hamsters Staggered Circle Dies Frilly Frame Dies Hamster Themed Card by Candice Fisher

I used these Sunny Studio products to create my slimline design:

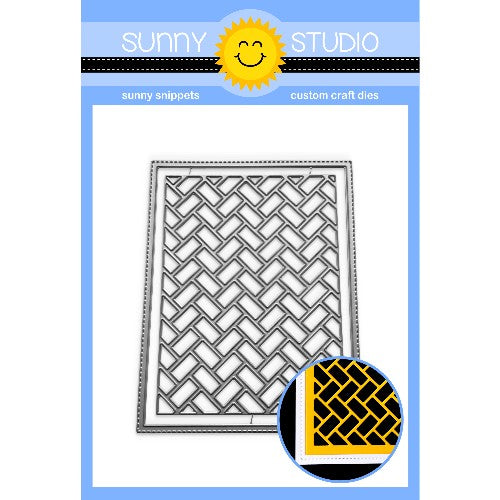
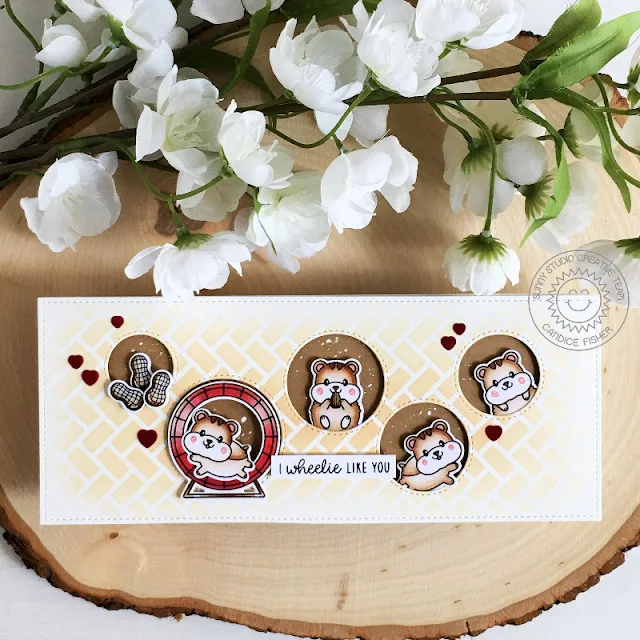
I began my slimline with an 8 1/2 x 3 1/2 card base. For the background, I first created the stitched panel using the Slimline Pennant dies using the partial die cut method (run partway through your machine, rotate and line up, and run partway through again!) I then die cut the Herringbone using this same partial die cut method to create my stencil, inking my panel with tea dye, and then die cutting the staggered stitched circles. I finished the background by gluing a piece of Kraft cardstock that was splattered with white paint and adhered the panel over it with foam tape.

Sunny Studio Stamps: Happy Hamsters Staggered Circle Dies Frilly Frame Dies Hamster Themed Card by Candice Fisher

Next, I stamped the hamsters, wheel, and peanuts, colored them with Copic markers, and used the coordinating dies to cut them out. I added a few white accents with a pen and then put them in the circles with foam tape. I stamped my sentiment on a white banner adding it with foam tape and glued a few die cut hearts from red velvet cardstock!

Thank you so much for stopping by today!

Sunny Studio Supplies Used:

Happy Hamsters Stamps
Shop at:
Sunny Studio
Happy Hamsters Dies
Happy Hamsters Dies
Shop at:
Sunny Studio
Stitched Rectangle Dies
Shop at:
Sunny Studio
Staggered Circles Die
Shop at:
Sunny Studio
Frilly Frames Herringbone
Shop at:
Sunny Studio
Slimline Pennant Dies
Shop at:
Sunny Studio

Thursday, June 10, 2021

Beach Buddies Cards with Anja and Vanessa

Hello everyone, Anja here and today's card features the adorable Beach Buddies which I combined with some fun summer accessories.

Sunny Studio Stamps: Beach Buddies Tiki Time Balloon Rides Best Fishes Staggered Circle Dies Summer Themed Cards by Anja Bytyqi

I went with a non-ordinary card size (6"w x 4"h) because I wanted to use one of my all-time favorite dies – the Staggered Circle Die which is perfect to pair with cute critters. I cut it from a blue Sleek Stripes Paper as well as from cream cardstock. I inlaid the cream stitched circles into the window openings of the striped paper.

Next, I stamped the images in Memento Tuxedo Black Ink and colored them with Copic Markers. I cut everything out with the coordinating dies.

I picked additional accessories from the following sets:
Tiki Time and Dies (drink)
Balloon Rides Stamps and Dies (sun)
Best Fishes and Dies 
(starfish)
Sealiously Sweet and Dies (flipflops)

Sunny Studio Stamps: Beach Buddies Tiki Time Balloon Rides Best Fishes Staggered Circle Dies Summer Themed Cards by Anja Bytyqi

The sentiments were stamped in VersaMark Ink onto black cardstock strips and heat embossed in white. I scattered the images and sentiment strips all over my card and added Cornflower Blue Jewels as a finishing touch.

Thank you so much for stopping by! Have a day full of sunshine!

-------------------------------------------

Hello to you! Vanessa here with a summer-themed card using the cute Beach Buddies set.

Sunny Studio Stamps: Beach Buddies Summer Themed Card by Vanessa Menhorn

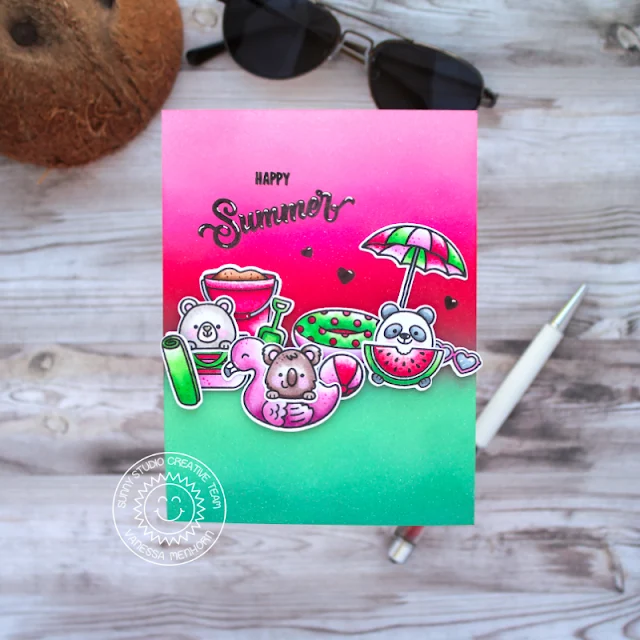
I started with a white card base and inked the front from bottom to top using these Distress Oxide Inks: Pine Needles, Lucky Clover, Cracked Pistachio, Festive Berries, Picked Raspberries, Kitsch Flamingo. Then I stamped the images onto white cardstock, colored everything with Copic markers, die-cut the pieces with the matching dies and arranged the elements on the card, popping up some with foam tape.

Sunny Studio Stamps: Beach Buddies Summer Themed Card by Vanessa Menhorn

Now I stamped the sentiment and the hearts and added details with a white gel pen.

What fun it would be to join these cuties at the beach! Thank you for stopping by today, have a wonderful day!

Sunny Studio Supplies Used:

Beach Buddies Stamps
Shop at:
Sunny Studio
Beach Buddies Dies
Beach Buddies Dies
Shop at:
Sunny Studio
Tiki Time Stamps
Tiki Time Stamps
Shop at:
Sunny Studio
Tiki Time Dies
Tiki Time Dies
Shop at:
Sunny Studio
Staggered Circles Die
Shop at:
Sunny Studio
Best Fishes Stamps
Best Fishes Stamps
Shop at:
Sunny Studio
Best Fishes Dies
Best Fishes Dies
Shop at:
Sunny Studio
Sealiously Sweet Stamps
Shop at:
Sunny Studio
Sealiously Sweet Dies
Shop at:
Sunny Studio
Sleek Stripes Paper
Sleek Stripes Paper
Shop at:
Sunny Studio
Balloon Rides Stamps
Shop at:
Sunny Studio
Balloon Rides Dies
Balloon Rides Dies
Shop at:
Sunny Studio

Friday, May 7, 2021

Scalloped Fence Die Focused Cards with Tammy and Candice

Hi there! Tammy here with a sweet and simple card, featuring the newly released Scalloped Fence Die. I love how easy it is to piece together to create a custom size fence border for any size card! The adorable critters from Beach Buddies are sweetly perched on the fence, sending lots of smiles!

Sunny Studio Stamps: Scalloped Fence Dies Beach Buddies Everyday Cards by Tammy Stark

To begin, I cut a rectangle panel of Bristol smooth cardstock a little smaller than A2 size and ink blended it with Salty Ocean and Tumbled Glass Distress Oxide inks. I splattered a bit of watered down Salty Ocean ink onto the background to add a bit of interest to the sky. Next, I cut a grassy border from Bristol paper using the Slimline Nature Borders Dies, ink blended with Twisted Citron and Mowed Lawn Distress Oxide inks, and attached to the inked background, cutting off the excess. I then cut the Scalloped Fence from white cardstock three times and pieced together to create a border, tucking it behind the grassy border. I matted my panel on a piece of white cardstock, then onto a yellow A2 rectangle cut from the Classic Sunburst Paper.

I stamped, colored with Copic markers, and die cut images from the following sets:
Beach BuddiesCoordinating Dies
Balloon RidesCoordinating Dies

Sunny Studio Stamps: Scalloped Fence Dies Beach Buddies Everyday Cards by Tammy Stark

I arranged the colored images onto my card, attaching some with foam tape for dimension. Lastly, I white heat embossed the sentiment from Beach Buddies onto a strip of black cardstock, and attached the card front to a white A2 card base to complete my card.

Thanks so much for stopping by...I hope your day is full of smiles!!

-------------------------------------------------

Hello my crafty friends! Candice with you today sharing a fun rainbow CAS card highlighting the fabulous new Scalloped Fence die!

Sunny Studio Stamps: Scalloped Fence Dies Looking Sharp Staggered Circle Dies Everyday Card by Candice Fisher

I used these Sunny Studio products on my slimline design:

I began my slimline with an 8 1/2 x 3 1/2 card base. For my background, I trimmed a piece of Bristol Smooth a little smaller than my card front, die cut the staggered circles closer to the top and then stamped my sentiment along the bottom.

Sunny Studio Stamps: Scalloped Fence Dies Looking Sharp Staggered Circle Dies Everyday Card by Candice Fisher

Next, I die cut the scalloped fences from rainbow colors of striped pattern paper and tucked into the circles. I inked the stitched inside circles with cracked pistachio and adhered the panel with the fences over them with foam tape to give dimension. I then stamped the cacti, colored them with copic markers and used the coordinating dies to cut them out. I added them with over the fences with some matching jewels!

I hope you are inspired to create with rainbow on your next card using the amazing new release!

Sunny Studio Supplies Used:

Beach Buddies Stamps
Shop at:
Sunny Studio
Beach Buddies Dies
Beach Buddies Dies
Shop at:
Sunny Studio
Looking Sharp Stamps
Shop at:
Sunny Studio
Looking Sharp Dies
Looking Sharp Dies
Shop at:
Sunny Studio
Scalloped Fence Die
Scalloped Fence Die
Shop at:
Sunny Studio
Dots & Stripes Pastels 6x6 Paper
Shop at:
Sunny Studio
Staggered Circles Die
Shop at:
Sunny Studio
Slimline Nature Borders
Shop at:
Sunny Studio
Classic Sunburst Paper
Shop at:
Sunny Studio
Balloon Rides Stamps
Shop at:
Sunny Studio
Balloon Rides Dies
Balloon Rides Dies
Shop at:
Sunny Studio

Friday, July 3, 2020

Sea You Soon Card and Video Tutorial with Franci and Candice

Hello there and happy Friday! It's Franci here with you today, with a fun summer card! 

Sunny Studio Stamps: Sea You Soon Best Fishes Staggered Circle Dies Everyday Cards by Franci Vignoli

I love the new Sea You Soon ocean cuties so much I decide to pair them with my other favorites from the Best Fishes set to crate this happy under the sea big scene :) I also featured the Staggered Circle dies in my design and this helped me creating lots of different little scenes in the big scene on my card!

Sunny Studio Stamps: Sea You Soon Best Fishes Staggered Circle Dies Everyday Cards by Franci Vignoli

Please enjoy my card video tutorial here! 


These are all the Copic markers I used for my images: R35, R29, R20, R32, RV00, Y35, Y21, YG63, YG03, V15, V01, W-0, W-2, C-0, C-2 and B00.

Hope you like my projects and thanks a lot for stopping by! 

-----------------------------------------------------------

Hello! It's Candice with you today with a fun underwater scene using the adorable Sea You Soon stamp set! Can you tell which movie these cuties remind me of?!

Sunny Studio Stamps: Sea You Soon Best Fishes Tropical Scenes Everyday Card by Candice Fisher

I used these Sunny Studio products to create my scene:
I began with an 8 1/2 x 3 1/2 card base that fits nicely into your standard size envelopes. For the background, I first die cut the circle template from my cameo silhouette using thick white cardstock and inked a piece of Bristol Smooth with Altenew inks in Starlight, Tide Blue, Turquoise & Sea Breeze to go behind the circles. I then stamped the coral bottom twice, colored with Copic markers and used the coordinating dies to cut out and trimmed the edges to fit on my inked ocean. To cover the seam, I stamped one more coral, colored and die cut out with the coordinating die.

Sunny Studio Stamps: Sea You Soon Best Fishes Tropical Scenes Everyday Card by Candice Fisher

Next, I stamped all the fishes and sharks from the Sea You Soon and Best Fishes stamp sets, colored with Copic markers and cut out with the coordinating dies listed above. To make the banners, I trimmed some leftover Bristol Smooth, inked them with the same colors used for the ocean, and stamped my sentiment using a variety of words from different sets.

To put the card together, I trimmed a piece of vellum to fit in the center to put my images on and soften the background for them to stand out. I laid it all out first and used glue dots behind the images to adhere the vellum and added all the rest with foam tape. I then put a few blue domes to finish my scene!

Thank you for stopping by today!

Sunny Studio Supplies Used:

Staggered Circles Die
Shop at:
Sunny Studio
Best Fishes Stamps
Best Fishes Stamps
Shop at:
Sunny Studio
Best Fishes Dies
Best Fishes Dies
Shop at:
Sunny Studio
Just Bee-cause Stamps
Shop at:
Sunny Studio
Cruisin' Cuisine Stamps
Shop at:
Sunny Studio
Sea You Soon Stamps
Sea You Soon Stamps
Shop at:
Sunny Studio
Sea You Soon Dies
Sea You Soon Dies
Shop at:
Sunny Studio
Tropical Scenes Stamps
Shop at:
Sunny Studio
Tropical Scenes Dies
Shop at:
Sunny Studio