Showing posts with label Sliding Window. Show all posts

Tuesday, May 11, 2021

Poppy Fields Cards with Kavya and Isha

Hi folks, Kavya here. I am back on the blog with another fun card! If you follow me on IG, you might have heard about my recent paper debacle. I ended up with 100lb of cardstock (no regrets!). With this tiny incident, I am no longer frugal with my cardstock and I have started exploring color combinations that I haven’t tried before! Here is a card made using some mustard yellow cardstock for the first time :) 

Sunny Studio Stamps: Poppy Fields Inside Greetings Floral Birthday Cards by Kavya

This card is super easy to put together with the new Poppy Fields stamp set. I also picked a sentiment that is perfect for anyone and any special occasion.. Father’s Day, Mother’s Day, Birthday, Valentine’s Day etc.

Sunny Studio Stamps: Poppy Fields Inside Greetings Floral Birthday Cards by Kavya

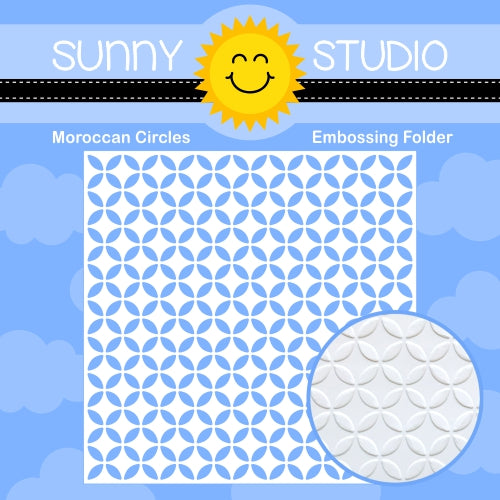
I first started off by ink blending the top half of yellow mustard cardstock with shades of brown. I then embossed this panel using the Moroccan embossing folderFor the sentiment panel, I partially die cut the edge using a die from the Sliding Window die set and stamped a sentiment from Inside Greetings Birthday. The ‘for you’ was die cut using rose gold foil cardstock and Gift Card Pocket die. Then, I stamped a bunch of poppies using the Poppy Field stamp set and arranged them around the sentiment panel! I finished it off by adding some bling using Snow White Crystals

I hope you liked this fun card! Check back tomorrow for more inspiration!

-------------------------------------------------

Hello everyone! Isha today, with a card featuring the Poppy Fields stamps and dies from the new release. You will love this layering stamp as it makes the florals look so real by simply stamping. 

Sunny Studio Stamps: Poppy Fields Inside Greetings Floral Birthday Card by Isha Gupta

I started by stamping all the layers of the images from Poppy Fields as per the layering guide HERE. I then die-cut the images using the coordinating dies.

Take a black mat layer and create floral clusters. This is the step where I take the most time. Once, I was happy, I adhered the elements using liquid glue and also 3d foam for added depth and dimension. Flick some gold splatters. Adhere this to a black card base.

Sunny Studio Stamps: Poppy Fields Inside Greetings Floral Birthday Card by Isha Gupta

Stamp the sentiment from the Inside Greetings Birthday onto black card, sprinkle WOW! opaque white embossing powder and heat set. Adhere the sentiment stripe to a vellum mat. Add gold floss behind this and adhere to the card.

The colors I used for the flowers and leaves are: Red Flowers: Altenew Pink Pearl, Coral Bliss, Heart Beat, Vineyard Berry, Grapevine, Black and Moon Rock; Orange Flowers: Altenew Sunkissed, Orange Cream, Autumn Blaze, Fire Brick, Grapevine, Moon Rock, Black; Leaves: Altenew Parrot, Moss

Thank you for dropping by. Have a nice day!

Sunny Studio Supplies Used:

Gift Card Pocket
Gift Card Pocket
Shop at:
Sunny Studio
Poppy Fields Stamps
Poppy Fields Stamps
Shop at:
Sunny Studio
Poppy Fields Dies
Poppy Fields Dies
Shop at:
Sunny Studio
Sliding Window Dies
Sliding Window Dies
Shop at:
Sunny Studio
Moroccan Circles Embossing
Shop at:
Sunny Studio
Inside Greetings Birthday
Shop at:
Sunny Studio

Wednesday, March 10, 2021

Feeling Froggy Cards and Video Tutorial with Julia and Franci

Hey crafty friends! It’s Julia here with a fun birthday card! I used the super cute Feeling Froggy stamp set for this one! 

Sunny Studio Stamps: Feeling Froggy Country Scenes Spring Scenes Birthday Card by Julia Englich

To set my scene I also used the Country Scenes and Spring Scenes stamp sets as well as the Rustic Winter die set.

Sunny Studio Stamps: Feeling Froggy Country Scenes Spring Scenes Birthday Card by Julia Englich

I also did some mirror stamping for the reflection in the pond! If you would like to see how I did it and how this card came together, you can watch the video below - or on my YouTube channel, Craft Room Adventures.


Inks used: background: Squeezed Lemonade, Dried Marigold, Abandoned Coral, Shabby Shutters, Cracked Pistachio, Pine Needles Distress Ink. Zig Markers used: 41, 45, 42, 44, 40, 400; 62, 64, 60, 72, 61, 67; 999; 55, 50, 52; 36; 26, 29, 21.

Thank you so much for spending time with me today! Have an awesome week!

---------------------------------------------

Hi there! Franci here with you today, with a super cute interactive card. Awww, isn't this birthday card the cutest ever?! 

Sunny Studio Stamps: Feeling Froggy Sliding Window Dies Balloon Rides Birthday Card by Franci Vignoli


First of all I created my card base out of white cardstock and the interactive card mechanism out of this happy patterned paper from the Spring Sunburst 6x6 paper set using the Sliding Window Dies set.

Then I cut out my white panel that needs to be on the back of my decorated panel (to make the mechanism work!) and a light blue panel for the front. I assembled my card and then I started working on my images.

Sunny Studio Stamps: Feeling Froggy Sliding Window Dies Balloon Rides Birthday Card by Franci Vignoli

I combined lots of different sets here: Feeling Froggy coordinated diesBalloon Rides + coordinated dies, Lovable Llama coordinated dies. I stamped all the elements, colored them with Copics and cut them out, the I glued them onto my card into this cute little scene with foam adhesive.

I also added my sentiment from the Inside Greetings Birthday set and some clear sequins here and there, plus little hearts from the Meow & Furever set.

Sunny Studio Stamps: Feeling Froggy Sliding Window Dies Balloon Rides Birthday Card by Franci Vignoli

Of course you can fill the inside with a sentiment, more images or with a gift card, like I did here. Hope you like this card as much as I do and thanks a lot for stopping by today! 

Sunny Studio Supplies Used:


Sliding Window Dies
Sliding Window Dies
Shop at:
Sunny Studio
Rustic Winter Dies
Rustic Winter Dies
Shop at:
Sunny Studio
Spring Sunburst 6x6 Paper
Shop at:
Sunny Studio
Spring Scenes Stamps
Shop at:
Sunny Studio
Spring Scenes Dies
Spring Scenes Dies
Shop at:
Sunny Studio
Balloon Rides Stamps
Shop at:
Sunny Studio
Balloon Rides Dies
Balloon Rides Dies
Shop at:
Sunny Studio
Country Scenes Stamps
Shop at:
Sunny Studio
Country Scenes Dies
Country Scenes Dies
Shop at:
Sunny Studio
Feeling Froggy Stamps
Shop at:
Sunny Studio
Feeling Froggy Dies
Feeling Froggy Dies
Shop at:
Sunny Studio
Inside Greetings Birthday
Shop at:
Sunny Studio
Lovable Llama Stamps
Shop at:
Sunny Studio
Lovable Llama Dies
Lovable Llama Dies
Shop at:
Sunny Studio
Meow & Furever Stamps
Shop at:
Sunny Studio
Meow & Furever Dies
Meow & Furever Dies
Shop at:
Sunny Studio

Wednesday, February 17, 2021

Slimline Pennant Die Focused Cards and Video Tutorial with Julia and Franci

Hello crafty friends! I hope your week is going well! It’s Julia here - this time with a cute fairytale themed bookmark! I created this magical little scene using the Slimline Pennant dies and I paired it with the adorable Enchanted and Garden Fairy stamp sets! I really just can't get enough of those sweet fairies!!

Sunny Studio Stamps: Slimline Dies Enchanted Garden Fairy Card by Julia Englich


I die cut the fluffy clouds using the
Slimline Nature Borders and for the backing of the stitched panel I cut down a piece of pink cardstock and die cut the bottom edge with the Fishtail Banner II dies to add the beautiful scalloped detail. I really wanted to add a sentiment that would fit well with a bookmark, so I masked off the first two letters of the word "spreading" from the North Pole stamp set to spell "reading" and for the rest I used the Garden Fairy set!

Sunny Studio Stamps: Slimline Dies Enchanted Garden Fairy Card by Julia Englich


If you would like to see how this bookmark came together, you can watch the video below - or on my YouTube channel,
Craft Room Adventures.


Inks: background: Spun Sugar and Worn Lipstick Distress Ink. Grass: Cracked Pistachio and Lucky Clover Distress Oxide. Copic Markers: E000, E00, E11, E13; RV10, RV21, RV23, RV25, RV29; Y000, Y00, Y11, Y13; BG0000; C00, C0, C1, C3, C5; E30, E31 E33, E35, E37.

Sunny Studio Stamps: Slimline Dies Enchanted Garden Fairy Card by Julia Englich

Thank you so much for joining me today! Have an amazing week!

----------------------------------------------

Hi there! It's Franci here with you today, with a fun and colorful interactive card to share! I'm in love! This llama is one of my favorite new critter and I love all the banner/ pennant details here, plus this is an interactive card, YAY!!

Sunny Studio Stamps: Slimline Dies Sliding Window Dies Lovable Llama Balloon Rides Card by Franci Vignoli

So first of all I created a standard size card base out of white cardstock, then I cut a matching panel out of some patterned paper from the Surprise Party 6x6 paper set and I die cut it with the Sliding Window dies set. I also cut out a thin stripe out of the same patterned paper that measures 1/2 x 3 inches.

Sunny Studio Stamps: Slimline Dies Sliding Window Dies Lovable Llama Balloon Rides Card by Franci Vignoli

Then I cut out a 3 x 4 inches panel out of some light blue cardstock and the smallest pennant from the Slimline Pennant Dies set out of white cardstock. I stamped, colored and die cut all my images from these sets: 
Lovable Llama + coordinated dies and Balloon Rides set + coordinated dies. I assembled my interactive mechanism and mounted everything onto my card base and then I decorated the little light blue panel by adhering down the stitched pennant in the middle and all my images on top with foam adhesive.

Sunny Studio Stamps: Slimline Dies Sliding Window Dies Lovable Llama Balloon Rides Card by Franci Vignoli

Finally I added some clear sequins and I just put a gift card in there to share that it fits perfectly! You can also add a sentiment, some more images. I left it blank for now because I kind of like the idea I can customize it last minute. And also it's a design that can work for lot of occasions. A birthday card, a Congratulations card, even a baby card! 

I hope you like it and thank you so much for stopping by today!

Sunny Studio Supplies Used:


Fishtail Banner II Dies
Shop at:
Sunny Studio
Sliding Window Dies
Sliding Window Dies
Shop at:
Sunny Studio
Surprise Party 6x6 Paper
Shop at:
Sunny Studio
Enchanted Stamps
Enchanted Stamps
Shop at:
Sunny Studio
Enchanted Dies
Enchanted Dies
Shop at:
Sunny Studio
North Pole Stamps
North Pole Stamps
Shop at:
Sunny Studio
Balloon Rides Stamps
Shop at:
Sunny Studio
Balloon Rides Dies
Balloon Rides Dies
Shop at:
Sunny Studio
Garden Fairy Stamps
Garden Fairy Stamps
Shop at:
Sunny Studio
Garden Fairy Dies
Garden Fairy Dies
Shop at:
Sunny Studio
Lovable Llama Stamps
Shop at:
Sunny Studio
Lovable Llama Dies
Lovable Llama Dies
Shop at:
Sunny Studio
Slimline Pennant Dies
Shop at:
Sunny Studio