Showing posts with label Shaker Card. Show all posts

Wednesday, April 12, 2023

Spring Bouquet Cards with Catherine and Marie

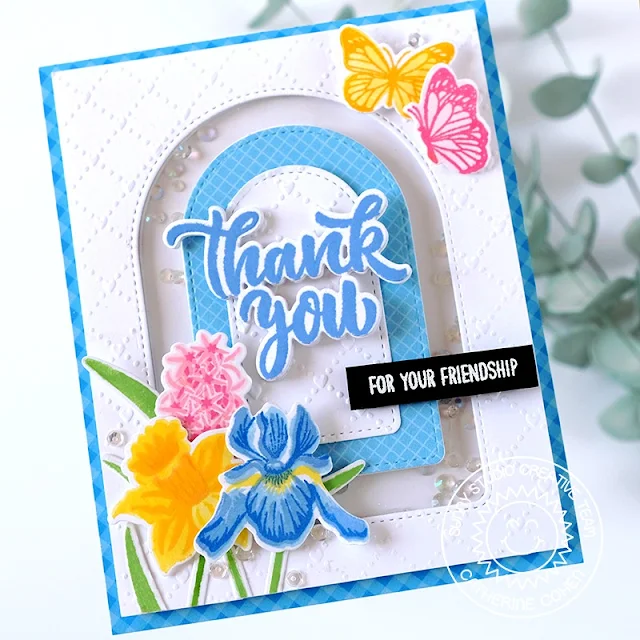
Hello Crafty Friends! Catherine here, and today I am sharing a friendship shaker card created with the pretty Spring Bouquet Stamps and Stitched Arch Dies.

Sunny Studio Stamps: Spring Bouquet Thank You Card by Catherine Cohen (featuring Stitched Arch Dies, Big Bold Greetings)

To start, I embossed A2 white cardstock with Quilted Hearts Embossing Folder. To make the opening, I die cut the embossed panel with the largest arch in Stitched Arch Dies. I then die cut a small arch using the leftover large arch. I then die cut a medium size arch with paper from Gingham Pastels Paper. I adhered the small white arch onto the medium arch and set it aside.

To make the shaker, I flipped my embossed panel over and adhered A2 acetate onto the back. Next, I die cut the large arch using a double-sided foam sheet. I then die cut the medium sized arch with double sided foam sheet. I removed the backing on the foam sheet and adhered the foam arches onto the back of the panel. I nested the medium arch inside the large arch and taped it together with craft tape. I placed the arches onto  A2 white cardstock, and added some Iridescent Clear Jewels inside the space between the two arches. I removed the arches and placed the embossed panel onto the background. I adhered the medium and small arches onto the center.

Sunny Studio Stamps: Spring Bouquet Thank You Card by Catherine Cohen (featuring Stitched Arch Dies, Big Bold Greetings)

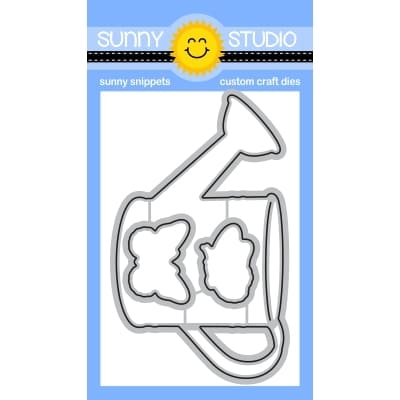
Using white cardstock, I die cut the flowers from Spring Bouquet and the butterflies from Watering Can with the coordinating dies. I placed the negative die cut cardstock onto my Misti stamping tool, placed the images back inside the negative space, and inked the images with the following Altenew Inks:

Pinks:  Frosty Pink, Cotton Candy, Coral Berry
Yellows: Citrus Burst, Fresh Lemon, Sunkissed
Blues: Iceberg, Ultramarine, Sapphire
Green: Firefly, Grass Field

I adhered the images onto the card front. I added a “Thank You” sentiment from Big Bold Greetings inked with Altenew Persian Blue Dye Ink. I added a White Heat Embossed sentiment from Words of Gratitude and a few sequins from Majestic Fusion Sequins. I wanted to balance the blue arch in the center of the card so I added a border using Gingham Pastels Paper.

Thank you so much for joining me today! Have a wonderful week!

-----------------------------------------------

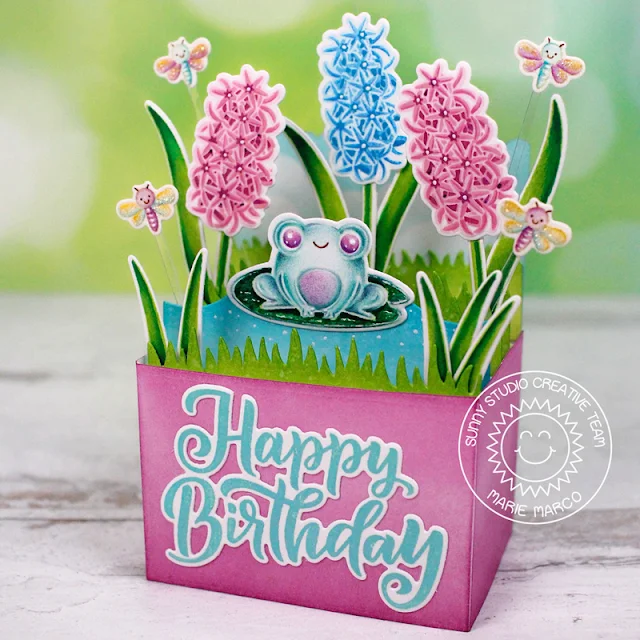
Hello Crafty friends, Marie here! Today I’m back on the blog and excited to share my latest card creation featuring the beautiful hyacinth flower from the lovely layering Spring Bouquet Stamps alongside the adorable Feeling Froggy Stamp. I love hyacinths and I love frogs and the two combined just makes me smile! 

Sunny Studio Stamps: Spring Bouquet Birthday Card by Marie Marco (featuring Feeling Froggy, Big Bold Greetings)

This springtime birthday box card was crafted using Lawn Fawn’s Scalloped Box Card Pop-Up die. I die cut all the box card components from Bristol smooth cardstock paper for the smoothest ink blending experience. I ink blended the outside of the box in Seedless Preserves distress Ink, and used a cloud stencil to ink blend the back panel with Salvaged Patina Distress Oxide ink. For the grass panels, I used a combination of Twisted Citron and Mowed Lawn Distress Ink and for the water panel, I used Salvaged Patina with Mermaid Lagoon Distress Oxide. 

After assembling my box card and cutting off the front and side flaps, I stamped out the hyacinth flowers onto 110 lb. Neenah Solar White Cardstock. When stamping each layer of the flower, I used a sponge dabber to lightly add ink to my stamp instead of directly applying the stamp into the ink pad. I do this technique so that each stamped layer is even and not too saturated. I also give each layer time to dry before stamping the next layer. For my blue hyacinth, I used a combination of Tumbled Glass Distress Oxide, followed by Salty Ocean Distress Oxide, and Mermaid Lagoon Distress Oxide. For the purple hyacinths, I used Spun Sugar Distress ink, Cotton Candy Dye Ink from MftStamps, and finally Seedless Preserves Distress Oxide. I stamped out all the leaves and stems with Twisted Citron Distress ink, and shaded them used Copics In Forest Green (G17), Emerald Green (G05) and Yellow Green (YG03). 

Sunny Studio Stamps: Spring Bouquet Birthday Card by Marie Marco (featuring Feeling Froggy, Big Bold Greetings)

Next, I stamped the adorable frog onto Bristol Smooth Cardstock with InkOn3 Fadeout ink, and colored him with PolyChromos Color Pencils, and copics for the lilly pad ( G17, G05, and BG09). For the tiny dragonfly images, I stamped them onto watercolor paper using Antique Linen Distress Ink and colored them with watercolor pencils. To make their dainty little wings pop, I added some Stickles Glitter Glue in the shade Diamond. I then cut out all my flowers and stems with the corresponding Spring Bouquet Dies. I used the Feeling Froggy Dies to cut all the little dragon flies and froggy. I then adhered all my images to my scene with a combination of double sided tape adhesive and Bearly Art Precision Craft Glue. To make all the little dragonflies look like they're flying, I cut super thin strips of thick acetate and attached them to the tip. 

Sunny Studio Stamps: Spring Bouquet Birthday Card by Marie Marco (featuring Feeling Froggy, Big Bold Greetings)

Finally, I stamped out a Happy Birthday sentiment with my favorite Big Bold Greetings Stamps. I used the color Salvaged Patina Distress Oxide to stamp my sentiment and cut it out using the corresponding Big Bold Greetings Dies. I absolutely love how this box card came together!! It's absolutely perfect for a spring or summer Birthday, and luckily for me, I have many Summer birthdays ahead! Thank you for joining me today, friends !!! Until next time, stay crafty and happy cardmaking!!! 

Sunny Studio Supplies Used:

Words of Gratitude Stamps
Shop at:
Sunny Studio
Gingham Pastels 6x6 Paper
Shop at:
Sunny Studio
Quilted Hearts Embossing
Shop at:
Sunny Studio
Stitched Arch Dies
Stitched Arch Dies
Shop at:
Sunny Studio
Feeling Froggy Stamps
Shop at:
Sunny Studio
Feeling Froggy Dies
Feeling Froggy Dies
Shop at:
Sunny Studio
Watering Can Stamps
Watering Can Stamps
Shop at:
Sunny Studio
Watering Can Dies
Watering Can Dies
Shop at:
Sunny Studio
Big Bold Greetings Stamps
Shop at:
Sunny Studio
Big Bold Greetings Dies
Shop at:
Sunny Studio
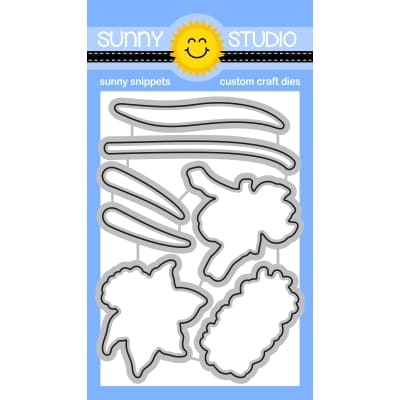
Spring Bouquet Stamps
Shop at:
Sunny Studio
Spring Bouquet Dies
Spring Bouquet Dies
Shop at:
Sunny Studio

Wednesday, March 29, 2023

Spring Fever Patterned Paper Focused Cards with Catherine and Marie

Hello Crafty Friends! Catherine here, and today I am sharing a colorful spring card created with Spring Fever Paper and Rainy Days Dies.

Sunny Studio Stamps: Spring Fever Paper Focused Rainy Day Friendship Card by Catherine Cohen (featuring Scalloped Tag Dies)

To start, I added a stitched border by die cuting a stitched rectangle die onto a piece of  A2 white card stock.  Using Versamark Ink, I stamped the rain drops onto the background with the Rain Showers Stamp. I heat embossed the rain drops with clear embossing powder and set the card background aside.

For the tag, I die cut paper from Spring Fever Paper using Scalloped Tag Square Dies. Next, I die cut the cloudy background using a square die 3”x 3”.  Using the same die, I die cut a piece of acetate and wiped it with a dryer sheet to avoid static.  To make the white frame, I nested a 2.5” x 2.5” square die inside the 3”x 3” square die and ran it through my die cut machine with white cardstock. I repeated this with a piece of double-sided foam. I glued the acetate onto the white cardstock frame and then adhered it onto the foam frame. 

Sunny Studio Stamps: Spring Fever Paper Focused Rainy Day Friendship Card by Catherine Cohen (featuring Scalloped Tag Dies)

The umbrella was made using Rainy Days Dies with paper from Spring Fever Paper. I ink blended the umbrella frame and the tip with Hickory Smoke Distress Oxide. I glued the umbrella onto the cloudy background and added Crystal Clear Jewels and attached the acetate frame onto the background forming the shaker.  I glued the umbrella shaker onto the square tag. I adhered the entire tag onto the white embossed card background.

I added a colorful border using paper from the same pack die cut with Ribbon & Lace Border Dies. I added some rain drops from the Rainy Days Dies using blue cardstock and  highlighted a few with Clear Rain DropsI finished the card by tying a bow with yellow twine and a White Heat Embossed sentiment from Spring Showers Stamps.

Thank you so much for joining me today! Have a wonderful week!

--------------------------------------

Hello Crafty Friends, Marie here! I hope you are having a great Spring season so far! I'm happy to be back on the blog sharing a brand new card inspiration featuring Sunny Studio Stamps' Spring Fever Paper. Bright cheerful colors, and an array of beautiful patterns of polka dots, and florals are among the features I absolutely love about this amazing 6x6  paper pack! I love the variety of papers that can be used all year round and for so many different occasions, makes this pack one of my favorites in my stash! Today, I paired the Spring Fever pattern papers with Sunny's adorable Looking Sharp Stamps to create a fun and extra happy birthday card. 

Sunny Studio Stamps: Spring Fever Paper Focused Looking Sharp Birthday Card by Marie Marco

To start, I cut an A2 sized base panel from 110 lb. Neenah Solar white heavyweight cardstock. I cut another A2 sized panel of rainbow pattern paper from the Spring Fever Paper. I adhered the pattern paper to my base using double sided tape adhesive to ensure the paper lay super flat without any bubbles. Then,  I cut out three circles using 2 different sized circle dies from a bright yellow polka dot paper. I played around with the placement of the circles before adhering them to my card front. 

Next, I stamped out all the adorable cacti images on watercolor paper using Antique Linen Distress Ink. I also used a birthday cupcake image from the Panda Party Stamps.  I then water colored my images using Faber-Castell watercolor pencils. I used the corresponding Looking Sharp Dies to cut out the cacti images and used the Panda Party Dies to cut out the cupcake. I adhered all the images inside the yellow circles using double sided tape adhesive, and used small cuts of double sided foam strips to give the cupcakes dimension. 

Sunny Studio Stamps: Spring Fever Paper Focused Looking Sharp Birthday Card by Marie Marco

Lastly, I stamped out my sentiment onto some banner strips and adhered them to the card, and presto! A super fun birthday card for any of your cacti and succulent loving friends or family! I certainly have many people in my life that are  huge fans of these prickly plants so this card will find a home soon! Thank you so much for joining me today, friends! I hope I've inspired you to use more pattern papers in your creations! Until next week, stay safe and Happy Cardmaking! 

Sunny Studio Supplies Used:

Rain Showers Stamps
Rain Showers Stamps
Shop at:
Sunny Studio
Scalloped Tags-Square
Shop at:
Sunny Studio
Spring Showers Stamps
Shop at:
Sunny Studio
Panda Party Stamps
Panda Party Stamps
Shop at:
Sunny Studio
Panda Party Dies
Panda Party Dies
Shop at:
Sunny Studio
Rainy Days Dies
Rainy Days Dies
Shop at:
Sunny Studio
Ribbon & Lace Dies
Ribbon & Lace Dies
Shop at:
Sunny Studio
Spring Fever Paper
Spring Fever Paper
Shop at:
Sunny Studio

Thursday, March 2, 2023

Tranquil Tulips Cards with Waleska and Marine

Hello there friends, Waleska here! My card today features the beautiful Tranquil Tulips Stamps from the most recent release mixed with the Moroccan Circles Embossing folder and the Mini Mat and Tag Dies #3.

Sunny Studio Stamps: Tranquil Tulips Thank You Card by Waleska Galindo (featuring Mini Mat & Tag Dies, Moroccan Embossing Folder)

For this card I wanted the Tulips to be the focal point in my card, to do that I decided to leave the tulips very colorful and the background white so they can really stand out.  I started by stamping the different layers of the tulips with the following inks: Hero Arts Ombre Pink Ink, Lawn Fawn Plastic Flamingo Ink and Lawn Fawn Lobster Ink, for the leaves I used Lawn Fawn Jalapeno Ink and Lawn Fawn Noble Fir Ink. I hand cut the tulips and arrange them in the way I wanted.

Sunny Studio Stamps: Tranquil Tulips Thank You Card by Waleska Galindo (featuring Mini Mat & Tag Dies, Moroccan Embossing Folder)

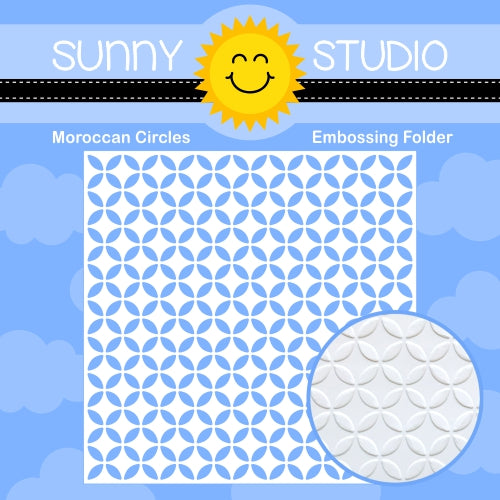
I then embossed a white panel with the Moroccan Circles Embossing folder and cut 4 of the scalloped rectangle from the Mini Mat and Tag Dies #3, I wanted to have dimension to this piece so I adhere them together.  Finally I assemble my card by using the pattern paper as a base layer from the Dots and Stripes Jewel Tones, then the embossed panel and finally the small scalloped rectangle, my sentiment is from the Big Bold Greetings.

Thank you so much for stopping by today I hope you will be inspired to create today by my post!

------------------------------------------

Hello crafty friends! Marine here, so happy to be back on the blog today with a bright & beautiful bouquet showcasing Tranquil Tulips! It's no secret that I love to create little scenes with multiple images and details, but I also really love to play with the amazing layering stamp sets we have in the Sunny Studio catalogue.

Sunny Studio Stamps: Tranquil Tulips Thank You Card by Marine Simon (featuring Thank You Word Dies, Words of Gratitude)

I started off with the background. I knew that the flowers, watering can & shaker accessories would be very bright, and I didn't want all those elements to get lost on a too colorful background, so I picked a light pattern paper from the Subtle Grey Tones paper pack, and cut a 5,5 x 4,25 inches panel. Next I took a sheet of plastic from my stash a little bit bigger than my panel, added double sided tape along the four edges, placed my grey panel in the middle of it, and while keeping the panel in place with my left hand, I cut the four plastic corners off, and this way created four plastic tabs on each side of the grey panel. I folded and attached three of those tabs at the back of the grey panel, added a mix of sequins, jewels & confetti inside the plastic pocket, and then folded and attached the fourth tab to totally close the pocket. I attached my infinity shaker panel on a white card base using double sided tape, and then moved on to the images.

Sunny Studio Stamps: Tranquil Tulips Thank You Card by Marine Simon (featuring Thank You Word Dies, Words of Gratitude)

I stamped the tulips and leaves from Tranquil Tulips, as well as the watering can from Watering Can on Strathmore bristol smooth cardstock using distress oxide inks. For the tulips, I used spun sugar + kitsch flamingo + picked raspberry. For the leaves, I used shabby shutters + mowed lawn. And for the watering can, I used salvaged patina + hickory smoke. Once all the images were stamped, I used the coordinating dies to cut them all, and then I attached everything on the infinity shaker panel using foam squares.

And finally I created my greeting in two parts. I started by cutting the word "Thanks" out of gold mirror cardstock using a die from the Thank You Words die set. Next I white heat embossed the phrase "for always being there" from Words Of Gratitude on a dark grey slim banner, and then I attached both elements on the bottom left corner of my card using liquid glue and foam squares.

And that's it! I hope that you like this new shaker card! Feels like Spring, right? Thanks for stopping by, and see you next week with more flowers!

Sunny Studio Supplies Used:


Words of Gratitude Stamps
Shop at:
Sunny Studio
Thank You Words Die
Thank You Words Die
Shop at:
Sunny Studio
Dots & Stripes Jewel Tones 6x6 Paper
Shop at:
Sunny Studio
Moroccan Circles Embossing
Shop at:
Sunny Studio
Subtle Grey Tones Paper
Shop at:
Sunny Studio
Watering Can Stamps
Watering Can Stamps
Shop at:
Sunny Studio
Watering Can Dies
Watering Can Dies
Shop at:
Sunny Studio
Mini Mat & Tag 3 Dies
Shop at:
Sunny Studio
Tranquil Tulips Stamps
Shop at:
Sunny Studio
Tranquil Tulips Dies
Shop at:
Sunny Studio

Thursday, February 2, 2023

Rainy Days Die Focused Cards with Waleska and Marine

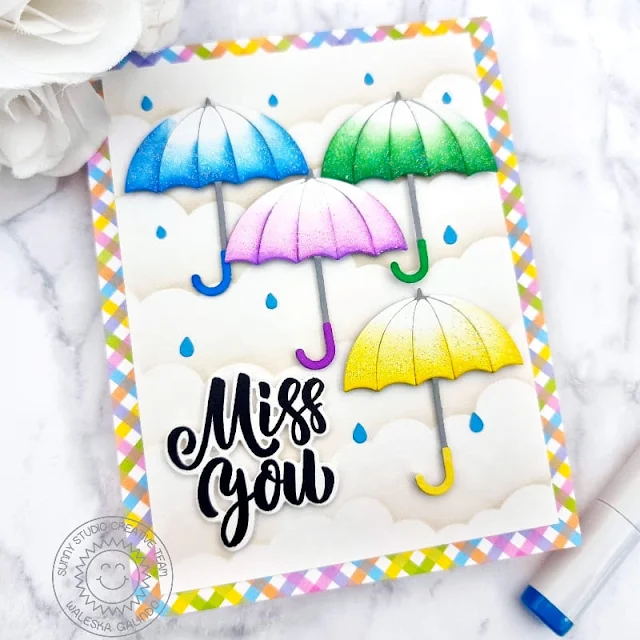
Hello Friends. Waleska here, and I am so happy to be back with a new card inspiration for you. I used the super cute Rainy Day Dies and the beautiful Big Bold Greetings stamps.

Sunny Studio Stamps: Rainy Days Die Focused Card by Waleska Galindo (featuring Big Bold Greetings)

To create this card I started choosing a pattern paper from the Spring Fever patterned paper as color inspiration. I had the idea of creating a rainy day with lots of grey clouds, to do that I used a cloud stencil and Pumice Stone Oxide ink. I then cut all the pieces to create four umbrellas from white cardstock, I added some color to them with the following inks: Salty Ocean, Mustard Seed, Wilted Violet and Lucky Clover Oxide inks. For the umbrella bases I used grey cardstock. I wanted to add some sparkle to this cute umbrellas so I used Moonstone Glimmer paste to the bottom of all the umbrellas, for the umbrella handles I used copic markers trying to match the same colors I used before.

Sunny Studio Stamps: Rainy Days Die Focused Card by Waleska Galindo (featuring Big Bold Greetings)

I finally adhered the umbrellas with 3D foam tape and cut a bunch of water drops from a blue cardstock and I add them around my rainy day scene. For the sentiment I used the handwritten phrase "Miss You" from the Big Bold Greetings stamps. I love how this card, specially to give it to someone you miss in your life. Thank you so much for stopping by today! I hope you have a wonderful day!

-------------------------------------

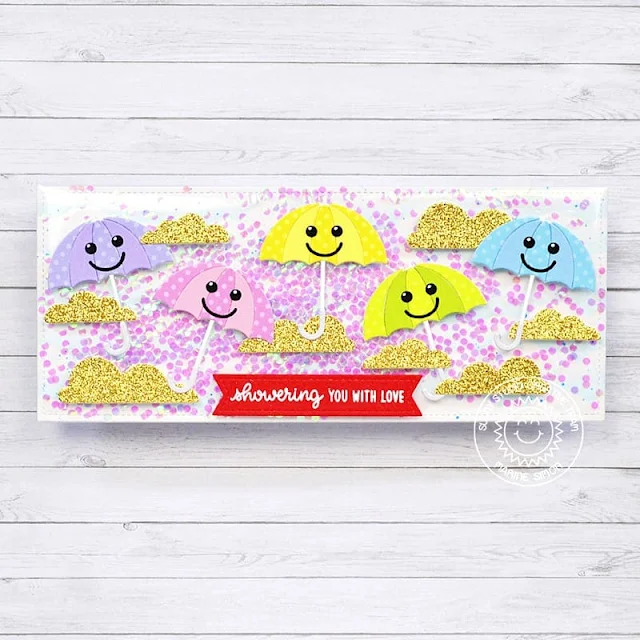
Hi crafty friends! Marine here, back with a happy and cheerful slimline infinity shaker card showcasing the adorable Rainy Days from the new Spring 2023 collection. 

Sunny Studio Stamps: Rainy Days Die Focused Card by Marine Simon (featuring Tropical Trees Backdrop, Nutty For You)

I started off by cutting an 8,5" x 4,5" bristol panel, and I used a cloud stencil along with tumbled glass and salty ocean oxide inks to create a very simple background.

Next I created the infinity shaker pocket. I cut a plastic sleeve (like the ones we put in binders for school) to get a single sheet of plastic. I added double sided tape on the four edges of that plastic sheet, I placed my cloudy panel in the middle of it, and while keeping the panel in place with my left hand, I cut the four plastic corners off, and this way created four plastic tabs on each side of the cloudy panel. I folded and attached three of those tabs at the back of the cloudy panel, poured a million iridescent confetti inside the plastic pocket, and then folded and attached the remaining tab to totally close the pocket. 

Sunny Studio Stamps: Rainy Days Die Focused Card by Marine Simon (featuring Tropical Trees Backdrop, Nutty For You)

Next I cut the different elements using Rainy Days. I cut the base of the umbrellas out of white cardstock. For the handle I used a light grey cardstock. And for the top and main part, I cut two types of papers: plain colored cardstock, and Spring Fever pattern papers. I assembled the colorful top pieces, as well as the handles on the plain white umbrellas, and once my five umbrellas were complete, I attached them on the shaker panel using 1mm foam squares. And to bring even more sparkles to this card, I cut and attached some gold glitter clouds using dies from the Tropical Trees Backdrop die set.

And then I asked myself "What could I add to bring more cuteness to those umbrellas?" And I thought that smiley faces would be fun. So I searched my entire collection of Sunny Studio die sets, and came across the Nutty For You die set that includes small dies to create cute faces. So I cut those five smiles and five pairs of eyes out of black cardstock, and glued them all on the umbrellas.

Sunny Studio Stamps: Rainy Days Die Focused Card by Marine Simon (featuring Tropical Trees Backdrop, Nutty For You)

For my greeting, I started by cutting a red banner using a die from the Stitched Rectangle die set. I white heat embossed the phrase "Showering you with love" from Spring Showers, and I attached that banner using foam squares again. And last but not least, I added white highlights to the umbrella's eyes to kind of give them more personality. And that's it, the cutest umbrellas to brighten someone's day! Thanks so much for stopping by, and see you next time!

Sunny Studio Supplies Used:

Stitched Rectangle Dies
Shop at:
Sunny Studio
Nutty For You Dies
Nutty For You Dies
Shop at:
Sunny Studio
Spring Showers Stamps
Shop at:
Sunny Studio
Tropical Trees Backdrop
Shop at:
Sunny Studio
Big Bold Greetings Stamps
Shop at:
Sunny Studio
Big Bold Greetings Dies
Shop at:
Sunny Studio
Rainy Days Dies
Rainy Days Dies
Shop at:
Sunny Studio
Spring Fever Paper
Spring Fever Paper
Shop at:
Sunny Studio

Wednesday, January 18, 2023

Clucky Chickens Cards with Catherine and Marie

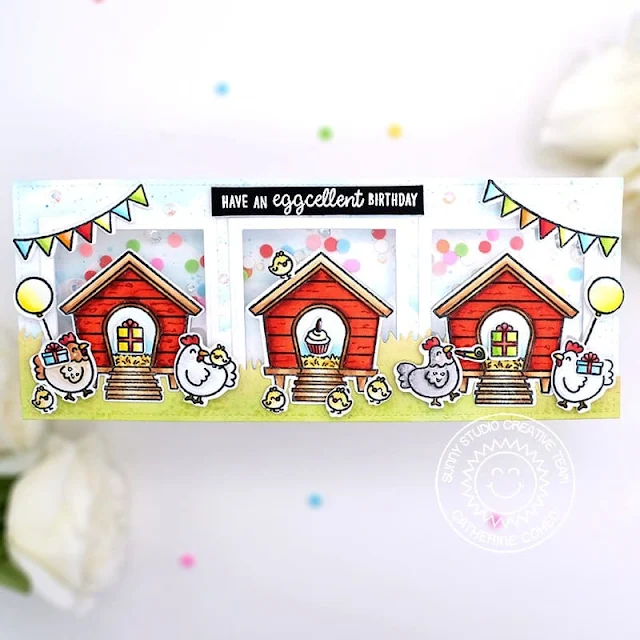
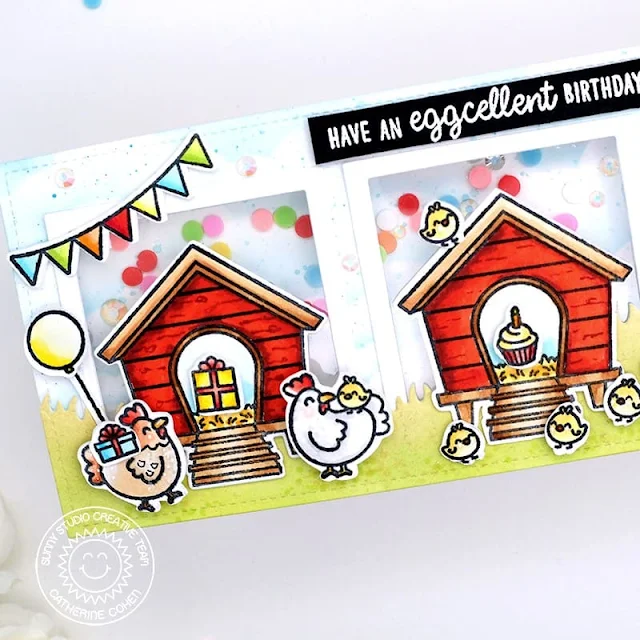
Hello Crafty Friends! Catherine here and I am so “eggcited” to share a Slimline card created with the adorable Clucky Chickens Stamps!

Sunny Studio Stamps: Clucky Chickens Birthday Card by Catherine Cohen (featuring Slimline Dies)

To start, I trimmed two pieces (A) and (B) of white cardstock to 3 ½” x 8 ½”. To make the square window openings, I die cut three squares using a 2 ¼” square die. I traced the area where I wanted the square windows onto the cardstock making sure that the squares were centered (A). I adhered acetate onto the back of (A). I added white frames by taping together a 2 ¼’ square die and a 2” square die and running it through my die cut machine with white cardstock.

Sunny Studio Stamps: Clucky Chickens Birthday Card by Catherine Cohen (featuring Slimline Dies)

I made a cloud stencil using the cloud from Slimline Nature Borders Dies. I placed (A) on top of (B) and ink blended both with Tumbled Glass Distress Oxide using the stencil. I splattered some blue watercolor onto both for interest.

For the grass, I die cut white cardstock using the grass from Slimline Nature Borders Dies. I ink blended the grass with Twisted Citron, Shabby Shutters, and Antique Linen Distress Oxides and splattered some green watercolor. I adhered the grass onto the bottom of (A).

I added some fun shaker elements with Birthday Cake Dot Sprinkles and Iridescent Clear Jewels onto the window areas on (B) and adhered (A) on top of (B) using foam tape.

Sunny Studio Stamps: Clucky Chickens Birthday Card by Catherine Cohen (featuring Slimline Dies)

I stamped and die cut the cute chickens and chicken coops using Clucky Chickens Stamps and Clucky Chicken Dies. I added presents from Turtley Awesome and Happy Owlidays, birthday cupcake and bunting from Panda Party, and balloons from Bear Hugs. I colored all the images with Copic Markers listed in my blog link below. I finished off the card with a White Heat Embossed Sentiment from Clucky Chickens Stamps.

Thanks so much for joining me today!  For more inspiration, please feel free to visit me at Crafti-Cat.

------------------------------------------------

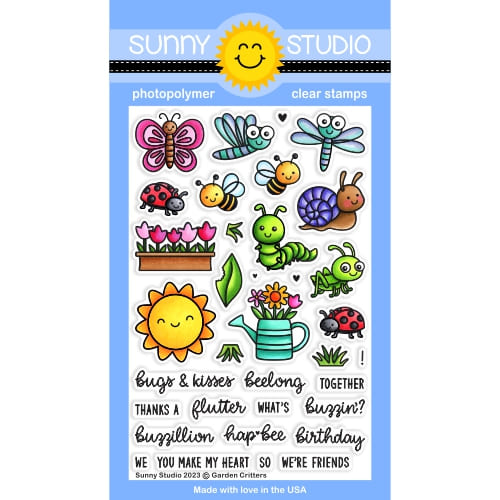
Hello Crafty Friends, Marie here with you! I hope you've been having a great new year so far ! I'm super excited that with a new year comes a brand new 2023 Spring Release from Sunny Studio Stamps! I am a huge fan of everything Spring themed and this Spring Collection is jam packed with so many fabulous things one of which is the Clucky Chickens Stamps. I am happy to be featuring this stamp set along with some floral elements from the new Garden Critters Stamps.  

Sunny Studio Stamps: Clucky Chickens Mother's Day Card by Marie Marco (featuring Garden Critters)

For today's project inspiration, I created a Mom appreciation platform pop-up card using Lawn Fawn's Platform Pop-Up Die. To create this card, I die cut all the needed pieces from bristol smooth cardstock paper. I also die cut some decorative paper from the brand new Spring Fever Paper

After die cutting all the pieces, I ink blended everything starting with the background panel done using a sky stencil and ink blending with Distress Oxide in the color  'Kitsch Flamingo'. The grass was inked using a combination of 'Bundled Sage' and 'Mowed Lawn' Distress Oxide. The inside platform was inked using 'Vintage Photo' Distress Oxide and 'Walnut Stain' Distress Ink. This combination is perfect for soil and with a few walnut stain splatters creates some nice textured dirt.  I used 'Salvaged Patina' Distress Oxide on the base for a pretty shade of aqua. 

Sunny Studio Stamps: Clucky Chickens Mother's Day Card by Marie Marco (featuring Garden Critters)

Next step was stamping out all my images from the Clucky Chickens Stamps and the Garden Critters Stamps. I used Antique Linen Distress Ink on watercolor paper, then I cut out my images using the Clucky Chickens Dies and the Garden Critters Dies

Finally, I used a dark pink dye ink to stamp my sentiment on the pink pattern paper from the Spring Fever Paper. I adhered all the images using a combination of double sided tape adhesive and Bearly Art Precision craft glue. And that does it for another card inspiration! Creating this card was so fun and seeing it in its finished state makes me so happy. I can't wait to give this one to my mom! She's going to love all the tiny chickies! Thank you so much for joining me today! Until next time, Happy Cardmaking!!

Sunny Studio Supplies Used:

Turtley Awesome Dies
Shop at:
Sunny Studio
Turtley Awesome Stamps
Shop at:
Sunny Studio
Bear Hugs Stamps
Bear Hugs Stamps
Shop at:
Sunny Studio
Bear Hugs Dies
Bear Hugs Dies
Shop at:
Sunny Studio
Happy Owlidays Stamps
Shop at:
Sunny Studio
Happy Owlidays Dies
Happy Owlidays Dies
Shop at:
Sunny Studio
Slimline Nature Borders
Shop at:
Sunny Studio
Clucky Chickens Stamps
Shop at:
Sunny Studio
Clucky Chickens Dies
Shop at:
Sunny Studio
Garden Critters Stamps
Shop at:
Sunny Studio
Garden Critters Dies
Shop at:
Sunny Studio
Panda Party Stamps
Panda Party Stamps
Shop at:
Sunny Studio
Panda Party Dies
Panda Party Dies
Shop at:
Sunny Studio
Spring Fever Paper
Spring Fever Paper
Shop at:
Sunny Studio