Showing posts with label Scalloped Oval Mat. Show all posts

Friday, June 30, 2023

Radiant Plumeria Card with Tina

Hello crafty friends, Tina here featuring the gorgeous ‘Radiant Plumeria’ flowers! I really enjoyed creating with this layered stamp and die set!

Sunny Studio Stamps: Radiant Plumeria Summer Themed Card by Tina Henkens (featuring Fabulous Flamingos, Scalloped Oval Mat Dies)

As always with stamp layering, I used the backing sheet the stamps come on to help me with my placement. I find this ‘trick’ so incredibly useful! This time I selected some Memento inks from my stash, these dye inks are great for layering. They dry instantly, so no risk of smudging when you are placing the next layering stamp! I stamped and cut three flowers and several of the leaves.

Whenever I can, I love to add some adorable critters to my cards! The cuties from Fabulous Flamingos were a perfect match for the bright flowers and tropical theme for this weeks project. I colored them with some flashy pink copic markers.

Also included in the Radiant Plumeria set is a nice bold ‘Summer’ stamp and I knew I wanted to use this as my main sentiment. Because this stamp is a bit rounded, I opted for an oval shaped card.

Sunny Studio Stamps: Radiant Plumeria Summer Themed Card by Tina Henkens (featuring Fabulous Flamingos, Scalloped Oval Mat Dies)

The largest die of the Scalloped Oval mat 1 was cut from some white Neenah card stock. Today I opted for a bright yellow background spritzed with Distress Oxide spray Squeezed Lemonade. I really should use my sprays more, they create beautiful backgrounds in no time! Next, I splattered some white droplets for extra dimension.

It was easy to create an oval card base with one of the Infinity dies from my stash that was slightly smaller than my oval card panel. After adhering my card panel to the base, I stamped (in Versafine Onyx black ink) a little word banner using the ‘greetings’ sentiment from the Radiant Plumeria set.

Then it was time to create a layout with all my card elements. I started with the two sentiments and placed the flamingos underneath in the center of the card. Next, I layered the leaves and flowers on both sides, using foam tape for dimension where needed. A few from the Magic Gold Jewels were placed in the centers of the flowers.

I am sure you will love these beautiful flowers as much as I do! Can’t wait to see all your creations! Thank you for visiting the blog and happy crafting!

Sunny Studio Supplies Used:

Fabulous Flamingos Stamps
Shop at:
Sunny Studio
Fabulous Flamingos Dies
Shop at:
Sunny Studio
Radiant Plumeria Stamps
Shop at:
Sunny Studio
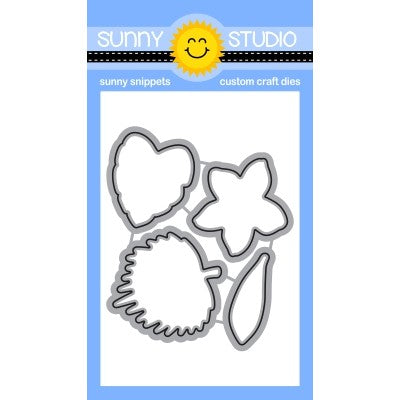
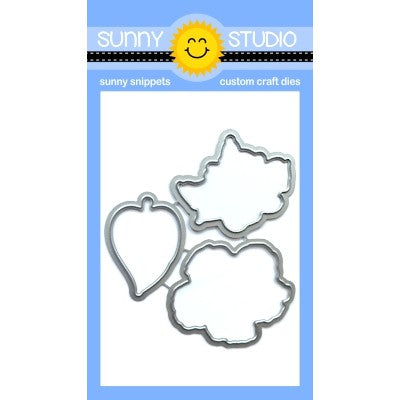
Radiant Plumeria Dies
Shop at:
Sunny Studio
Scalloped Oval Mat 1 Dies
Shop at:
Sunny Studio

Wednesday, June 28, 2023

Hawaiian Hibiscus Card with Catherine

Hello Crafty Friends! It’s Catherine here! Today, I am sharing an Aloha card perfect for the summer season created with Hawaiian Hibiscus Stamps and Radiant Plumeria Stamps!

Sunny Studio Stamps: Hawaiian Hibiscus Summer Themed Shaker Card by Catherine Cohen (featuring Frilly Frame Dies, Stitched Oval Dies, Scalloped Oval Mat Dies, Summer Greenery, Tiki Time)
For the back panel, I die cut A2 white cardstock with the largest rectangle from Stitched Rectangle Dies. Next, I die cut the Frilly Frames Stripes Dies out of white cardstock. I adhered the stripes die onto the stitched back panel.

I die cut the hibiscus and leaves using Hawaiian Hibiscus Dies and Radiant Plumera Dies. I placed the negative back into my Misti and began stamping the Hibiscus and leaves with the following inks:

Pinks: Altenew Rose Quartz, Frosty Pink, Pink Diamond, Coral Berry
Yellows: Citrus Burst, Lemon Ice
Greens: Just Green, Green Fields, Sweet Leaf

I added some palm leaves using Summer Greenery Dies ink blended with Mowed Lawn Distress Oxide. I stamped the Macaw bird from Tiki Time Stamps, die cut with Tiki Time Dies, and colored with Copic Markers listed in my blog link below. For the back of the  shaker, I die cut an oval, 3 7/8” x 2 ¾” from Stitched Oval 2 Dies, added some Party Confetti and Crystal Clear Jewels and put it aside.

Sunny Studio Stamps: Hawaiian Hibiscus Summer Themed Shaker Card by Catherine Cohen (featuring Frilly Frame Dies, Stitched Oval Dies, Scalloped Oval Mat Dies, Summer Greenery, Tiki Time)

To make the frame,  I die cut a scalloped oval 3 3/16” x 4 5/16” from Scalloped Oval Mat 1 Dies. I nested the 3 7/8” x 2 ¾” die inside the scalloped oval and ran it through my die cut machine. Using the same die, I die cut one more oval out of acetate. I adhered the frame on top of the acetate oval. I added foam tape around the edges and adhered it onto the back of the shaker.

I adhered the shaker onto the back panel followed by the flowers, leaves, and the parrot. I finished off the card by adding “ALOHA” die cut from Chloe Alphabet Dies ink blended with Spun Sugar Distress Oxide.

Thank you so much for joining me today!  For a list of Copic Markers used, please visit me at Crafti-Cat. Have a wonderful week!

Sunny Studio Supplies Used:

Tiki Time Stamps
Tiki Time Stamps
Shop at:
Sunny Studio
Tiki Time Dies
Tiki Time Dies
Shop at:
Sunny Studio
Chloe Alphabet Dies
Chloe Alphabet Dies
Shop at:
Sunny Studio
Stitched Rectangle Dies
Shop at:
Sunny Studio
Frilly Frames Stripes Die
Shop at:
Sunny Studio
Hawaiian Hibiscus Stamps
Shop at:
Sunny Studio
Hawaiian Hibiscus  Dies
Hawaiian Hibiscus Dies
Shop at:
Sunny Studio
Radiant Plumeria Stamps
Shop at:
Sunny Studio
Radiant Plumeria Dies
Shop at:
Sunny Studio
Scalloped Oval Mat 1 Dies
Shop at:
Sunny Studio
Stitched Oval 2 Dies
Shop at:
Sunny Studio
Summer Greenery Die
Summer Greenery Die
Shop at:
Sunny Studio

Friday, May 26, 2023

Birthday Cat Card with Tina

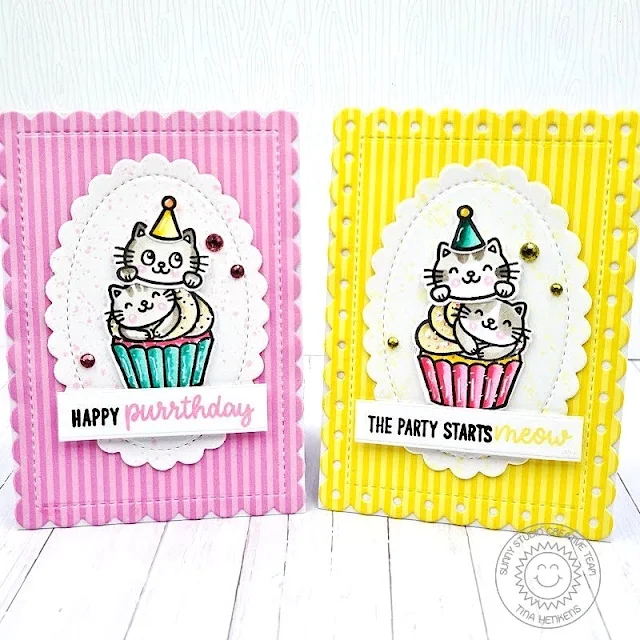
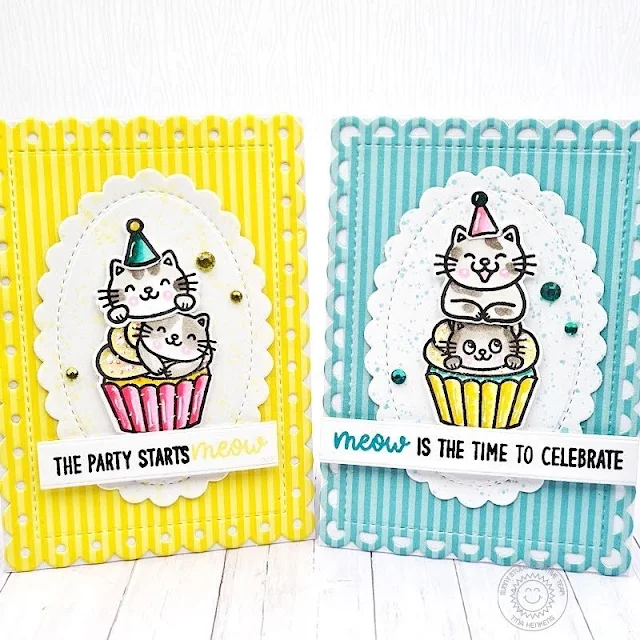
Hello crafty friends, it’s Tina and today’s project consists of three adorable mini cards featuring the sweet Birthday Cat stamp and die set. As usual, I browsed through my stash to create a mix and match design. It’s always fun to see how well old and new products can work together!

Sunny Studio Stamps: Birthday Cat Mini Birthday Card Set by Tina Henkens (featuring Mini Mat & Tag Dies, Scalloped Oval Mat Dies)

The cute birthday kitties take center stage in these cards. I love that you can stack them for a fun and whimsical look! I stamped all these images on Neenah Solar White paper, colored them with my Copic markers (trying to create a different fur pattern for each cat) and adding white details with a gel pen.

The card panels were made with a pink, yellow and teal pattern paper from the Dots & Stripes Pastel pad. I used the Mini Mat & Tag 1, Mini Mat & Tag 2 and Mini Mat and Tag 3 dies. Next, I cut three ovals from Neenah paper with the second smallest die from the Scalloped Oval Mat 1 set.

Sunny Studio Stamps: Birthday Cat Mini Birthday Card Set by Tina Henkens (featuring Mini Mat & Tag Dies, Scalloped Oval Mat Dies)

I didn’t want these ovals to be just stark white so I added ink splatters in matching Distress Oxide colors (Squeezed Lemonade for the yellow card, Peacock Feathers for the teal one and finally some pink Kitsch Flamingo). These Oxides were also used to stamp the ‘pun’ word in the sentiments from the Birthday Cat stamp set.

To assemble the cards, I first glued the pastel panels to mini white card bases. Next, I adhered the scalloped ovals directly to the bases. I send most of my cards through the mail, so I am trying to reduce bulk when stacking elements to my cards. But I did mount all the sweet cat images with thin foam tape so they would really stand out! Lastly, I added the sentiment strips at the bottom of the cupcakes.

Sunny Studio Stamps: Birthday Cat Mini Birthday Card Set by Tina Henkens (featuring Mini Mat & Tag Dies, Scalloped Oval Mat Dies)

I found the perfect matching embellishments in the Jewels Pastel Mix and Jewels Bright mix. These mixes contain so many gorgeous colors that I can use them on lots of my cards.

Since I often send birthday cards, I am super happy to have not one but three cute mini cards ready to go! Thank you for joining me and I hope you have fun creating cards with these adorable birthday cats! Happy crafting!

Sunny Studio Supplies Used:

Dots & Stripes Pastels 6x6 Paper
Shop at:
Sunny Studio
Scalloped Oval Mat 1 Dies
Shop at:
Sunny Studio
Mini Mat & Tag 1 Dies
Shop at:
Sunny Studio
Mini Mat & Tag 2 Dies
Shop at:
Sunny Studio
Mini Mat & Tag 3 Dies
Shop at:
Sunny Studio
Birthday Cat Stamps
Birthday Cat Stamps
Shop at:
Sunny Studio
Birthday Cat Dies
Birthday Cat Dies
Shop at:
Sunny Studio

Friday, May 12, 2023

Grad Cat Card with Tina

Hello crafty friends, it’s Tina with a colorful graduation card for you today! It’s that time of the year when we all need such a congratulations card. Mine is for my niece who will receive her bachelor’s degree in bioengineering sciences. I am sure she will love this sweet cat with the hat and diploma! 

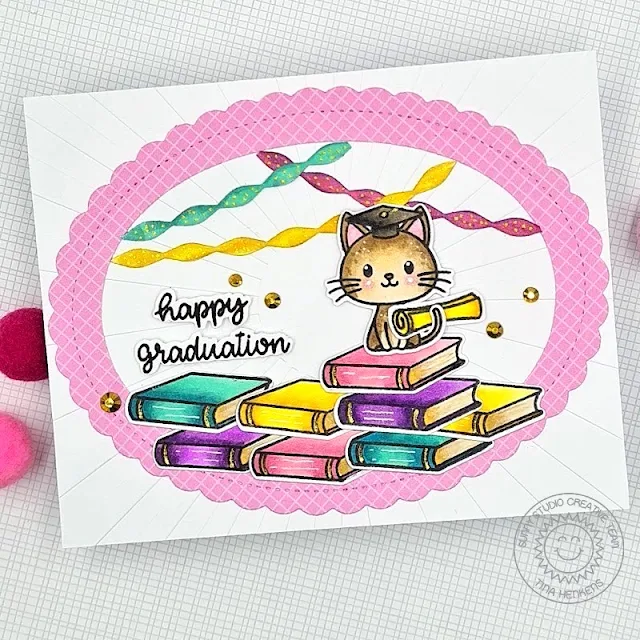
Sunny Studio Stamps: Grad Cat Graduation Card by Tina Henkens (featuring Woo Hoo, Happy Thoughts, Scalloped Oval Mat Dies, Crepe Paper Streamer Dies)

My white card panel is dry embossed with the Sunburst Embossing Folder. I really love the extra texture this gives to a simple base. To highlight my scene I die cut the largest oval from the Scalloped Oval Mat 1 set and turned it into a frame with a smaller oval die from an infinity set. The sweet pink paper is from the Gingham Pastels pack.

Next, I stamped and die cut all my images for this card using the Cat Grad and Woo Hoo sets. These products work so well together! I colored everything with my Copic markers.

As an extra festive detail I also die cut three Crepe Paper Streamers and used the same markers to make them match the color scheme. I added some golden and white details with gel pens from my stash.

Sunny Studio Stamps: Grad Cat Graduation Card by Tina Henkens (featuring Woo Hoo, Happy Thoughts, Scalloped Oval Mat Dies, Crepe Paper Streamer Dies)

As a sentiment, I combined the ‘happy graduation’ from Happy Thoughts which is a very versatile set to have at hand for lots of occasions.

I glued my embossed panel to a card base and started layering all the images, creating a pile of books for the sweet cat to sit on. I tucked the diploma under the tail and added the streamers to the background. Lastly, I adhered the sentiment and some Gold Jewels.

I hope you got inspired to make some fun grad cards with this cute Grad Cat! Thank you for joining me and happy crafting!

Sunny Studio Supplies Used:

Woo Hoo Dies
Woo Hoo Dies
Shop at:
Sunny Studio
Woo Hoo Stamps
Woo Hoo Stamps
Shop at:
Sunny Studio
Happy Thoughts Stamps
Shop at:
Sunny Studio
Gingham Pastels 6x6 Paper
Shop at:
Sunny Studio
Sunburst Embossing
Sunburst Embossing
Shop at:
Sunny Studio
Grad Cat Stamps
Grad Cat Stamps
Shop at:
Sunny Studio
Grad Cat Dies
Grad Cat Dies
Shop at:
Sunny Studio
Scalloped Oval Mat 1 Dies
Shop at:
Sunny Studio
Crepe Paper Streamers Dies
Shop at:
Sunny Studio

Tuesday, April 11, 2023

Build-A-Birdhouse Cards with Lien and Isha

Hi crafty friends! It's Lien here, with a great way to add some forced perspective on a card using different-sized images.

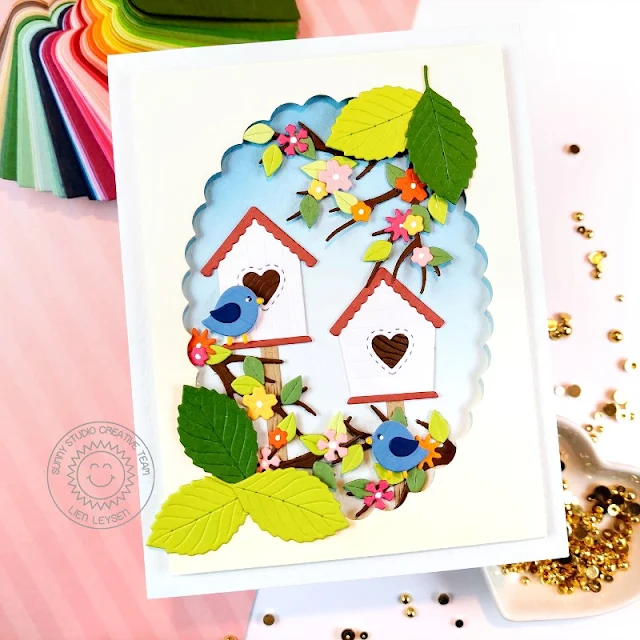
Sunny Studio Stamps Blog: Build-A-Birdhouse Metal Cutting Dies Scalloped Oval Spring Birds & Tree Branch Card by Lien Leysen

To get the most out of this forced perspective effect, I started out by creating a little window or frame for my scene. I die-cut one of the Scalloped Oval Mat 1 Dies from the center of some cream cardstock. This is cut slightly smaller than an A2 card so I'd have a nice margin all around in the end. My background is made from a very pale blue cardstock and I added a little bit of ink blending at the top to darken it up and add some more depth.
 
I propped my frame piece up on foam tape and then assembled two birdhouses from the fun Build-A-Birdhouse dies and also put the two birds together, setting those aside for later. I adhered to the birdhouses in the frame. I also cut the Autumn Tree die from brown cardstock, I'm just going to use the branches and some of the small leaves, tucking the branches underneath the frame. Using a jewel picker it's easy to add all the small leaves and to add more color I also added some tiny flowers on the branches. These flower dies are included in the Wonderful Windows dies

Sunny Studio Stamps Blog: Build-A-Birdhouse Metal Cutting Dies Scalloped Oval Spring Birds & Tree Branch Card by Lien Leysen
 
Because the birdhouses and the branches are quite small, the scene looks to be pretty far away. However, there's no real perspective on a card like this, in the end, these could just be small elements on a card. To force the perspective, to make the things inside the window look small and far away, add something outside of the window that is noticeably larger. A great element to do that with on this card would be some flowers or leaves. I opted for the leaves, using the Autumn Greenery dies to create some larger leaves for the outside of the window.

--------------------------------------------

Hello everyone! Isha here today with an adorable thanks card featuring the Build-A-Birdhouse dies. Past few weeks I have been using pastel colors on my cards and as you know me I love colors, so for this card, I went with some bold colors.

Sunny Studio Stamps: Build-A-Birdhouse Thank You Card by Isha Gupta (featuring Little Birdie, Big Bold Greetings)

I started by creating the background using various colors of Distress inks. Sponged them by keeping the darker colors to the edges. Flick, black and white paint to the panel. Adhere the panel to a white card base. Stamp the tree branch from the Little Birdie stamp set, color, and die-cut using the coordinating dies.

Sunny Studio Stamps: Build-A-Birdhouse Thank You Card by Isha Gupta (featuring Little Birdie, Big Bold Greetings)

Die-cut the images from white cardstock using the Build-A-Birdhouse dies. Color the images using Copic markers. Adhere to various layers to finish the images. Adhere all the images to the card. Stamp the word thanks from the Big Bold Greetings stamp set onto a black card using Versamark ink. Sprinkle WOW! opaque white embossing powder. Heat set. Die-cut using the coordinating dies. Adhere the word to the card. 

Add Nuvo crystal glaze to some of the elements and the card is ready. Thank you for dropping by!

Sunny Studio Supplies Used:

Scalloped Oval Mat 1 Dies
Shop at:
Sunny Studio
Little Birdie Stamps
Shop at:
Sunny Studio
Little Birdie Dies
Little Birdie Dies
Shop at:
Sunny Studio
Autumn Greenery Dies
Shop at:
Sunny Studio
Autumn Tree Die
Autumn Tree Die
Shop at:
Sunny Studio
Big Bold Greetings Stamps
Shop at:
Sunny Studio
Big Bold Greetings Dies
Shop at:
Sunny Studio
Build-A-Birdhouse Dies
Shop at:
Sunny Studio
Wonderful Windows Dies
Shop at:
Sunny Studio

Saturday, April 8, 2023

Sunny Saturday Share: Customer Cards


Hey everyone, how are you all doing this weekend? I'm so excited to be popping in today with a Sunny Saturday Share. There have been so many amazing cards popping up on Instagram that have made my jaw drop so I couldn't wait to share them with all of you! 


Bunnyville shaker card by Teresa


Thank you for sharing all these fabulous ideas with us! I hope you will continue to share your gorgeous projects with us--It always makes my day to see them. You can tag us on instagram with the hashtag #sunnystudiostamps or share your projects with us in our flickr group or on our facebook page. ☺


Sunny Studio Supplies Used:

Beach Buddies Stamps
Shop at:
Sunny Studio
Beach Buddies Dies
Beach Buddies Dies
Shop at:
Sunny Studio
Picket Fence Border Dies
Shop at:
Sunny Studio
Chubby Bunny Stamps
Chubby Bunny Stamps
Shop at:
Sunny Studio
Chubby Bunny Dies
Chubby Bunny Dies
Shop at:
Sunny Studio
Frilly Frames-Eyelet Lace
Shop at:
Sunny Studio
Spring Fling Paper
Spring Fling Paper
Shop at:
Sunny Studio
Frilly Frames Herringbone
Shop at:
Sunny Studio
Captivating Camellias Stamps
Shop at:
Sunny Studio
Captivating Camellias Dies
Shop at:
Sunny Studio
Scalloped Oval Mat 1 Dies
Shop at:
Sunny Studio
Scalloped Oval Mat 2 Dies
Shop at:
Sunny Studio
Forest Trees Stencils
Shop at:
Sunny Studio
Bunnyville Stamps
Bunnyville Stamps
Shop at:
Sunny Studio
Bunnyville Dies
Bunnyville Dies
Shop at:
Sunny Studio
Little Birdie Stamps
Shop at:
Sunny Studio
Little Birdie Dies
Little Birdie Dies
Shop at:
Sunny Studio
Country Carnival Stamps
Shop at:
Sunny Studio
Country Carnival Dies
Shop at:
Sunny Studio
Ocean View Stamps
Ocean View Stamps
Shop at:
Sunny Studio
Ocean View Dies
Ocean View Dies
Shop at:
Sunny Studio
Wedded Bliss Stamps
Wedded Bliss Stamps
Shop at:
Sunny Studio
Wedded Bliss Dies
Wedded Bliss Dies
Shop at:
Sunny Studio
Wonderful Windows Dies
Shop at:
Sunny Studio