Showing posts with label Potted Rose. Show all posts

Friday, May 1, 2020

Potted Rose Cards with Candice and Rachel

Candice with you today and it is the exciting time of a whole new release over at Sunny Studio Stamps and I am kicking it off with the new layered stamp set, Potted Rose!

Sunny Studio Stamps: Potted Rose Frilly Frame Dies Stitched Arch Dies Friendship Card by Candice Fisher

I used a few new release products for my card:
I began the card with an 8 1/2 x 3 1/2 card base perfect for your standard size envelopes. For the background, I first die cut the three stitched arches and then inked the inside pieces with broken china and tumbled glass. I created my own stencil by die cutting a piece of thick cardstock from the new herringbone die. I taped off and worked in sections inking with tea dye and antique linen to give it a Tuscan feel.

Next, I stamped the layered roses in rainbow colors using oxide inks and 4 of the 6 layers and then die cut out using the coordinating dies. Then I stamped the pots using the 3 layers in some Close to My Heart inks and used the coordinating dies to cut out and trimmed the bottoms.

Sunny Studio Stamps: Potted Rose Frilly Frame Dies Stitched Arch Dies Friendship Card by Candice Fisher

To add the roses to the pots, I simply used my paper trimmer and cut slits in the dirt and tucked the roses in. I used foam tape to pop them in the windows. I do love the effect it gives! To finish, I stamped the hello in versafine black and fussy cut out and then stamped the friend on Kraft cardstock and trimmed into a banner. I also adhered this with foam tape and added some Rainbow Pearls for a bit of shine.

Thank you for visiting with me today!

----------------------------------------------------------------

Hello crafty friends, Rachel here! I hope you have been enjoying all of the amazing new stamps and dies that have just been released! My card today showcases the new Potted Rose Stamp Set. I love how these layering stamps allow you to achieve so much detail from just stamping.

Sunny Studio Stamps: Potted Rose Frilly Frame Dies Everything's Rosy Friendship Card by Rachel Alvarado

To start, I stamped a few roses from this set using some pink inks (Ballet Slipper, Sparkling Rose, Bubble Gum, and Raspberry Bliss) from Pinkfresh Studio. I also stamped a few darker roses from the Everything's Rosy Stamp Set using some pink inks (Pink Diamond, Pinkalicious, Rubellite, and Razzleberry) from Altenew. I used the coordinating Potted Rose and Everything's Rosy dies to cut everything out.

Sunny Studio Stamps: Potted Rose Frilly Frame Dies Everything's Rosy Friendship Card by Rachel Alvarado

I also used some orange Pinkfresh Studio Inks to stamp my pot (Peach Fuzz, Apricot, and Clementine) as well as some green inks (Fresh Pear, Grassy Knoll, and Key Lime) for my leaves. For my background, I die cut some white card stock using the new Frilly Frames Herringbone Die Set and blended some Catherine Pooler Garden Party Ink onto my base prior to adhering my die cut panel with liquid adhesive. 

I used Memento Tuxedo Black Ink to stamp my sentiment and then adhered my pot and roses to my card front using some subtle 3D Foam Adhesive Squares. Voila! Super easy and perfect for quick, yet elegant cards.

Thank you all for dropping by today! Wishing you a safe and wonderful weekend!

Sunny Studio Supplies Used:

Everything's Rosy Stamps
Shop at:
Sunny Studio
Everything's Rosy Dies
Shop at:
Sunny Studio
Potted Rose Stamps
Potted Rose Stamps
Shop at:
Sunny Studio
Potted Rose Dies
Potted Rose Dies
Shop at:
Sunny Studio
Frilly Frames Herringbone
Shop at:
Sunny Studio
Stitched Arch Dies
Stitched Arch Dies
Shop at:
Sunny Studio

Monday, April 20, 2020

Sneak Peek: Radiant Plumeria, Potted Rose & Frilly Frames Herringbone

Hello and welcome to day 1 of our Summer Sneak Peek Week!  All this week I am showcasing cards using our newest collection which will begin shipping on Friday, April 24th

Today's sneak peeks include two new 4x6 layering stamp sets for Summer, matching dies and a new standalone die set. Let's jump right in!

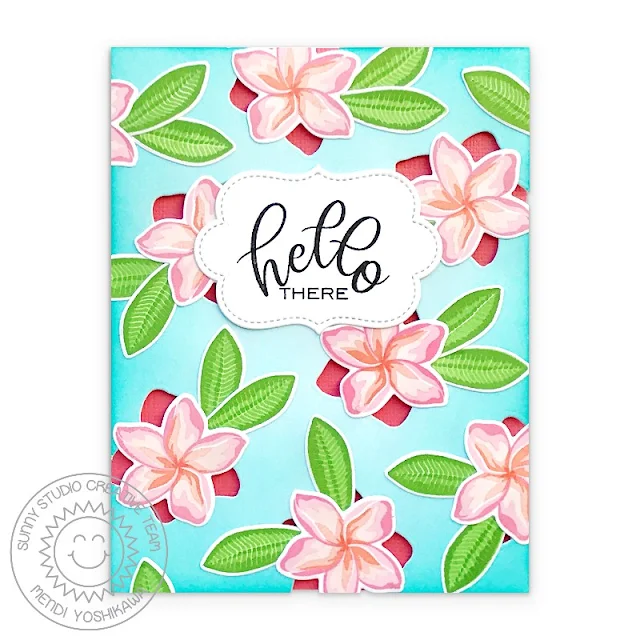
Card No. 1:  My first card showcases our new Radiant Plumeria stamps. I started by inking up my cardstock panel with peacock feathers distress ink and then using the Radiant Plumeria Die to cut out an overall flower pattern on my background, leaving ample space between them for my leaves. I then adhered my stamped flowers, twisting and offsetting the petals to allow my card base background to peek through. To emphasize the cutouts, I added foam tape to the back of my card panel before adhering it to my coral cardstock.  For my greeting, I stamped "hello there" from the stamp set onto a stitched label from our Sliding Window Dies
Sunny Studio Blog: Hello There Tropical Flower Cutout Card (using Radiant Plumeria, Potted Rose & Label from Sliding Window Dies)

Card No. 2:  The plumeria flower in our Radiant Plumeria stamps can be layered in one of two ways; one going the traditional route with a series of colors in the same color group or using an alternate layer that allows you to change the center color.  For these plumeria's I chose to forgo the B layer to create a white & yellow plumeria and them paired them with our Hawaiian Hibiscus Stamps.

The radiant plumeria set comes with a really awesome split leaf philodendron that is magical to layer and even better it's so easy to line up, you don't even need a positioning tool to mass produce them. I arranged my floral arrangement on a slimline style card (9" wide x 4" high) which I inked up in the center with salty ocean distress ink, adding a custom sentiment using our Phoebe Alphabet Stamps together with our Banner Basics Stamps.


Sunny Studio Blog: Aloha Tropical Flower Slimline Card (using Radiant Plumeria, Banner Basics & Hawaiian Hibiscus Stamps)


Card No. 3:
 My third card showcases all the leaves from the Radiant Plumeria Stamps, as well as the flower which I stamped in two different shades of pink. The fan palm leaf is just one layer so to add some extra variation I first stamped it in one color and then used a finger dauber to sponge on some darker ink onto my stamp before stamping it again.  It gives it a shaded appearance and the look of a multi-layered image.

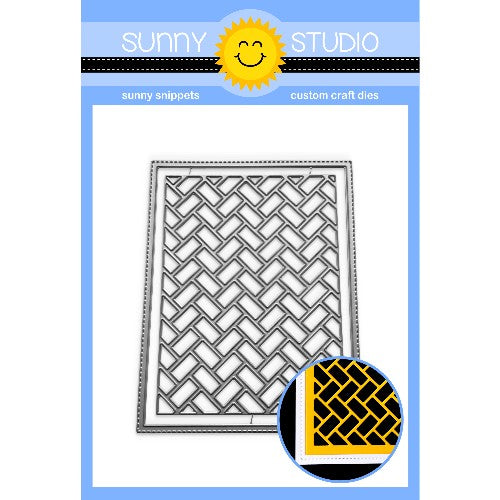
With this release we have a new Frilly Frame to add to our series called Frilly Frames Herringbone Dies. For this card I used them in a different way, using the negative space that the dies cut out.  I cut a template with the die from copy paper that I added to my card panel with some washi tape.  I then set to work adhering cut down pieces of foam tape to the back of each piece, using my template to position them on my card. When I was done, it was easy to just pull out the template and if I need to tear it out that would be easy to do as well (but it didn't turn out to be necessary).  I used the word "birthday" for my sentiment using the word die from our Blooming Frame Dies.
Sunny Studio Blog: Tropical Flowers Birthday Card (using Radiant Plumeria, Frilly Frames Herringbone Dies & Birthday word from Blooming Frame Dies)


Card No. 4:  Up next is a card using our scalloped Fancy Frames Square dies arranged on the diagonal like a diamond.  I backed the opening with a piece of hot pink cardstock and heat embossed my greeting using the sentiment stamps from the Radiant Plumeria stamps

I then adhered the flowers and leaves in a symmetrical pattern to the back of my frame before adhering it to a navy card base, trimming off the excess with my scissors. Some pink iridescent confetti from our iridescent pastel confetti pack were the perfect finishing touch to give my card a little shine.
Sunny Studio Blog: Tropical Flowers Summer Hugs Pink & Navy Diamond Card (using Radiant Plumeria & Fancy Frames Square Dies)

Here's an example of all the leaves and flowers I stamped out using the Radiant Plumeria set.  Sadly I didn't get around to using a couple of the color combinations for today's cards, but I wanted to make sure to share them...
Sunny Studio Stamps: Radiant Plumeria Layered Flower & Tropical Leaves Stamp Set Summer 2020 Sneak Peek

Card No. 5:  Switching gears, my next set of cards feature our new Potted Rose stamps. The set includes a layered rosebud, leaf, terracotta pot (both layered and an outline version for two different looks) and a beautiful hello word with 3 supporting words to pair with it.

For my first card I focused on just the rose and leaf to create an overall background.  I started by inking up a card panel and then stamping it in the same color using the polka-dot print from our Background Basics Stamps.  When I was done I felt it was a bit darker than I had wanted so I added a piece of vellum over the top adhering it to my cardstock, hiding the adhesive behind each of my roses. When I trimmed down my panel, the edge caught and tore in my trimmer so I decided to just embrace it and cut the panel down more and add the gingham print edge using our Classic Gingham Papers.

As finishing touches, I used the label from our Fancy Frames Rectangle Dies which I stamped with a sentiment from our Heartfelt Wishes Stamps.  I then added a little scalloped edge using our Eyelet Lace Border Dies.

Sunny Studio Blog: Yellow & Blue Polka-dot Rosebud Best Wishes Card (using Potted Rose, Background Basics & Heartfelt Wishes Stamps, Fancy Frames Rectangle Dies & Classic Gingham Paper)

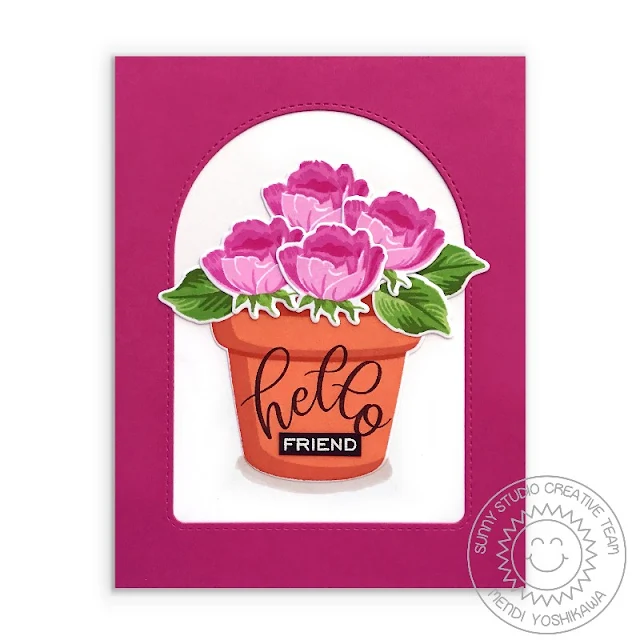
Card No. 6:  My next card is a clean & simple design which was created almost entirely with our Potted Rose stamps (aside from the Stitched Arch Dies which I will be sharing more of on Thursday).  I arranged my four roses together in the pot which I stamped my sentiment directly onto.  To give my pot a bit of weight and not make it look like it's just floating there, I added a little shadow with my Copic W1 marker.
Sunny Studio Blog: Hello Friend Rosebuds in Terracotta Pot Card (using Potted Rose Stamps & Stitched Arch Dies)

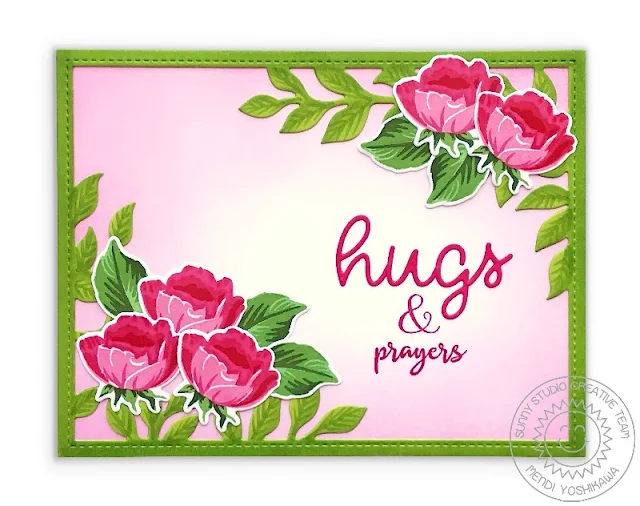
Card No. 7: Up next is an encouragement card using the Potted Rose stamps with our Botanical Backdrop dies.  To help the die-cut frame match the look of my stamped leaves, I drew on some veins with the brush tip of my sketch marker. 

I inked up my card base with some spun sugar distress ink and created a custom sentiment by mixing three separate sets.  I spelled out "hugs" with our Loopy Letter dies, the ampersand is from our Festive Greetings Stamps and the word "prayers" is from our Angelic Sentments Stamps.

Sunny Studio Blog: Hugs & Prayers Pink & Green Rosebud Card (using Potted Rose Stamps & Botanical Backdrop Dies)

Card No. 8:  Do the roses from our Potted Rose stamps look familiar?  They were designed to compliment our popular Everything's Rosy Stamps so of course I had to create a card featuring them together. I was always sad I wasn't able to squeeze a third rose onto that stamp set so this was such a wonderful opportunity to add one and I can't wait to create more cards in the future mixing these two sets!  


For this card I inked up the center of my card base with some twisted citron distress ink and then layered it with a background mixing two of our frilly frames (which are designed to mix and match with each other). I used our new Frilly Frames Herringbone Dies for the inside of my panel and then cut the outside edge using our Frilly Frames Retro Petal dies. Our new herringbone frame cuts the opposite way, creating an opening with the stitching on the other side of the cutline.

I completed my card with a sentiment taking the word "birthday" from our Quilted Hexagon Dies and "wishes" from our Heartfelt Wishes Stamps. I heat embossed the greeting onto a banner from our Banner Basics Stamps, which I colored using a no-line coloring technique.
Sunny Studio Blog: Red & Green Rose Bouquet Birthday Card (using Potted Rose, Everything's Rosy, Banner Basics & Heartfelt Wishes Stamps and Frilly Frames Herringbone Dies)

Card No. 9:  For this card I wanted to utilize the outlined flowerpot image from the Potted Rose set which compliments the images in our Pink Peonies Stamps.  I stamped my peony flowers in VersaFine Clair Charming Pink ink with the leaves in VersaFine Clair Verdant Ink and then heat embossed them with clear embossing powder.  For my color medium I turned to Daniel Smith watercolors.  I then added some dots of yellow liquid enamel by Ranger.

To turn my flower pot into a shaker, I used a small circle punch in the center and then used my scissors to cut a small shadow around the inside of the flower pot.  I then traced that shape that I fussy cut out onto my watercolored panel to repeat the process, cutting my watercolor paper opening just slightly larger so that I wouldn't see it peeking out from behind my flower pot.  I used a glue pen to adhere my pot to my background and then added a piece of acetate to the back of my watercolor paper.  I then added foam tape around that opening and the remaining card panel before adding my Studio Katia Crystal Clear Mini sequins and a piece of rust cardstock to compliment my pot.  


I finished my card with a strip of aqua striped paper from our Silly Stripes Paper pack and a simple hello sentiment from the Potted Rose set which I heat embossed with white embossing powder.

Sunny Studio Blog: Peony & Terracotta Pot Sequin Shaker Card (using Potted Rose & Pink Peonies Stamps, Striped Silly Paper)

Card No. 10: For my last card of the day, I paired the terracotta pot from the Potted Rose set with our Timeless Tulips Stamps for a slimline card.  To create a sort of dreamy cloud background, I purposely inked up my background, leaving some patches lighter and uninked. I added some of the tulips and leaves directly to my card base and then popped up some of them with foam tape to give my arrangement a dimensional look.

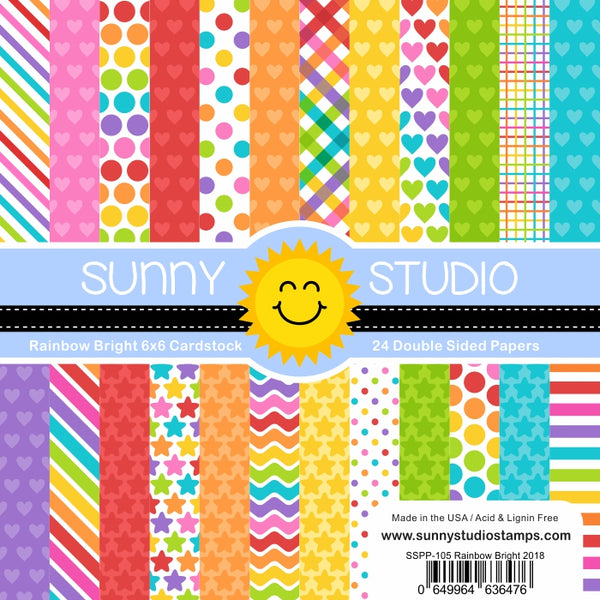
To ground my flower arrangement I added a band of white cardstock which I edged with our Stitched Scallop Dies. I cut a thin strip of striped paper for a pop of color using our Rainbow Bright Paper pack and stamped a greeting from our Cheerful Daisies Stamps.


Sunny Studio Blog: Tulips & Terracotta Pot Spring Smiles Slimline Card (using Potted Rose, Timeless Tulips, & Cheerful Daisies Stamps, Stitched Scallop Dies and Rainbow Bright Paper)

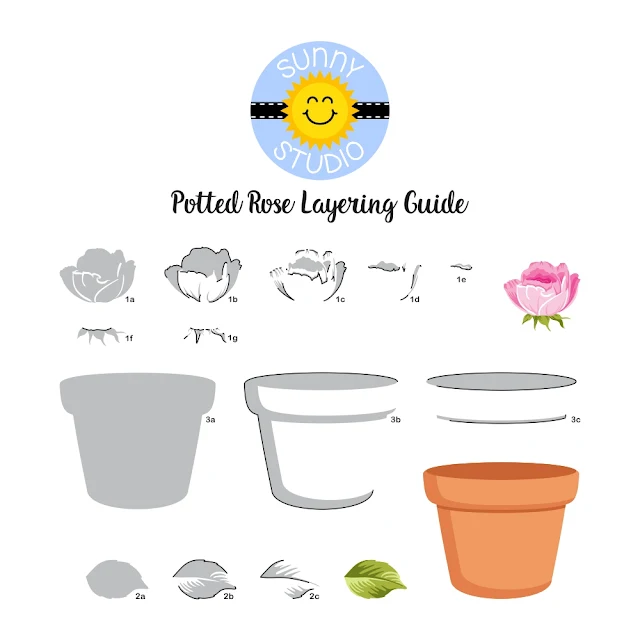
To help you line up our layered stamps like a pro I've created a special layering guide (you can click on the photo below to view it larger).  The guide shows the stamps starting with the lightest ink color, working towards the darkest, but sometimes I find it easier to start backwards. They both work depending on what your preference is.  The black outline indicates where that layer touches the previously stamped layer.  :)
Sunny Studio Blog: Layered Radiant Plumeria Tropical Flower Stamp Color Layering Guide
Sunny Studio Blog: Layered Potted Rose Terracotta Pot & Rosebud Stamp Color Layering Guide

I frequently am asked which ink colors I used for my layered images.  While I think there are so many great options out there, these are the colors I used today for my stamped images:

Pink & Orange Plumeria (stamped samples only)
Colorbox Razzleberry
Pinkfresh Studio Sparkling Rose
Pinkfresh Studio Apricot
Catherine Pooler Tiki Torch
Colorbox Tangerine
Lawn Fawn Pumpkin Spice

Dk. Hot Pink & Yellow Plumeria (Card No. 4)
Colorbox Raspberry Pink
Versafine Charming Pink
Colorbox Lemonade
Versafine Cheerful
Colorbox Banana
Pinkfresh Studio Apricot

Hot Pink & Yellow Plumeria (Card No. 3 & 4)
Versafine Charming PinkColorbox Candy
Colorbox Lemonade
Versafine Cheerful
Colorbox Banana
Pinkfresh Studio Apricot


Pink & Yellow Plumeria (Card No. 3)
Hero Arts Ultra Pink
Gina K Bubblegum Pink
Lawn Fawn Butter
Pinkfresh Studio Lemon Whip
Lawn Fawn Sunflower
Pinkfresh Studio Apricot

Peachy Pink Plumeria (Card No. 1)
Colorbox Cherry
Lawn Fawn Ballet Slippers
Colorbox Capri Pink
Stampin' Up Blushing Bride
Colorbox Cantaloupe
Versafine Tulip Red

White & Yellow Plumeria (Card No. 2)
SSS Barely Beige
Skipped This Layer- No Ink

Colorbox Lemonade
Versafine Cheerful
Colorbox Banana
Pinkfresh Studio Apricot


Yellow Rose (Card No. 5)
Colorbox Lemonade
Versafine Cheerful
Colorbox Banana
Colorbox Dandelion


Yellow Tulips (Card No. 10)Colorbox Lemonade
Versafine Cheerful
Colorbox Banana
Pinkfresh Studio Apricot

Pink Rose & Tulips 
(Card No. 6 & 10)

Gina K Bubblegum Pink
Hero Arts Ultra Pink
Versafine Charming Pink
Gina K Passionate Pink


Pinkish Red Rose (Card  No. 7)
Colorbox Cherry
Versafine Glamorous
Colorbox Fireberry
Colorbox Cranberry

Red Hibiscus, Rose & Tulip (Card No. 2, 8 & 10)
Versafine Tulip Red
Colorbox Strawberry
Colorbox Candy Red
Colorbox Cranberry

Lime Green Leaves (Card No. 2)

Colorbox Limon
VersaMark Verdant
Colorbox Grasshopper

Medium Green Leaves (Card 1, 2, 3, 4, 6 & 7)

Hero Arts Green Hills
MFT Green Room
Colorbox Green Apple


Dark Green Leaves (Card  No. 2, 3, 4, 8 & 10)
Colorbox Grasshopper
Colorbox Green Apple
Colorbox Golf Course

Olive Green Leaves (Card No. 5)
Colorbox Kiwi
Colorbox Luxuriant Green
Colorbox Artichoke

Terracotta Pot (Card No. 6 & 8)
Colorbox Pumpkin Pie (or SSS Orange Peel)
Hero Arts Just Rust
Colorbox Pumpkin


That wraps up today's sneak peeks.  I know that's quite a bit of information and it means so much to have you hang out with me today. I'd love to give a $40 gift code to one lucky winner using the rafflecopter below.  Make sure to keep checking back all this week for more peeks & prizes for up to five chances to win. The contests run through Saturday at Midnight PST with winners announced here on Sunday, April 26th. :)

a Rafflecopter giveaway Here's a closer look at the new Radiant Plumeria stamps & coordinating diesPotted Rose stamps & coordinating dies as well as the new Frilly Frames Herringbone Dies used today (which will be available for purchase on Friday, April 24th).


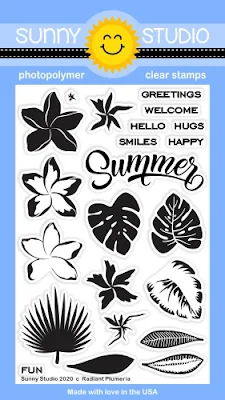
Sunny Studio Blog: Radiant Plumeria Tropical Flowers 4x6 Clear Photopolymer Stamp Set    Sunny Studio Blog: Potted Rose Rosebud with Terracotta Pot 4x6 Clear Photopolymer Stamp Set

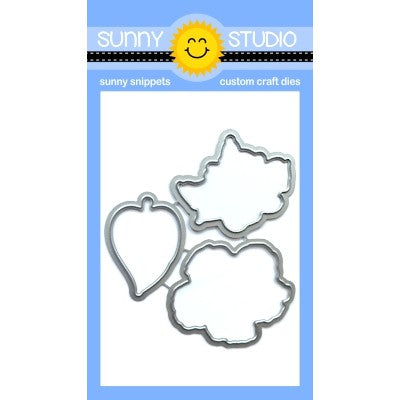
Sunny Studio Blog: Radiant Plumeria Coordinating Metal Cutting Dies    Sunny Studio Blog: Potted Rose Coordinating Metal Cutting Dies

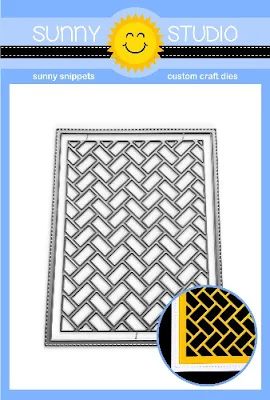
Sunny Studio Stamps: Frilly Frames Herringbone A2 Background Backdrop with Stitched Frame Metal Cutting Dies


 Other Supplies Used:
Angelic Sentiments Stamps
Shop at:
Sunny Studio
Heartfelt Wishes Stamps
Shop at:
Sunny Studio
Stitched Scallop Dies
Shop at:
Sunny Studio
Timeless Tulips Stamps
Shop at:
Sunny Studio

Festive Greetings Stamps
Shop at:
Sunny Studio
Fancy Frames-Square Dies
Shop at:
Sunny Studio
Fancy Frames- Rectangles
Shop at:
Sunny Studio
Background Basics Stamps
Shop at:
Sunny Studio
Classic Gingham 6x6 Paper
Shop at:
Sunny Studio
Striped Silly 6x6 Paper
Shop at:
Sunny Studio
Rainbow Bright 6x6 Paper
Shop at:
Sunny Studio
Sliding Window Dies
Sliding Window Dies
Shop at:
Sunny Studio
Loopy Letters Dies
Loopy Letters Dies
Shop at:
Sunny Studio
Everything's Rosy Stamps
Shop at:
Sunny Studio
Everything's Rosy Dies
Shop at:
Sunny Studio
Botanical Backdrop Die
Shop at:
Sunny Studio
Hawaiian Hibiscus Stamps
Shop at:
Sunny Studio
Hawaiian Hibiscus  Dies
Hawaiian Hibiscus Dies
Shop at:
Sunny Studio
Frilly Frames Retro Petals Dies
Shop at:
Sunny Studio
Banner Basics Stamps
Shop at:
Sunny Studio
Banner Basics Dies
Banner Basics Dies
Shop at:
Sunny Studio
Cheerful Daisies Stamps
Shop at:
Sunny Studio
Phoebe Alphabet Stamps
Shop at:
Sunny Studio
Pink Peonies Stamps
Pink Peonies Stamps
Shop at:
Sunny Studio
Pink Peonies Dies
Pink Peonies Dies
Shop at:
Sunny Studio
Blooming Frame Die
Blooming Frame Die
Shop at:
Sunny Studio
Eyelet Lace Borders
Eyelet Lace Borders
Shop at:
Sunny Studio
Stitched Arch Dies
Stitched Arch Dies
Shop at:
Sunny Studio
Iridescent Pastel Confetti
Shop at:
Sunny Studio
Crystal Clear Mini Sequins
Shop at:
Sunny Studio