Showing posts with label Layered Poinsettia Dies. Show all posts

Monday, December 9, 2019

Layered Poinsettia Cards with Eloise and Leanne

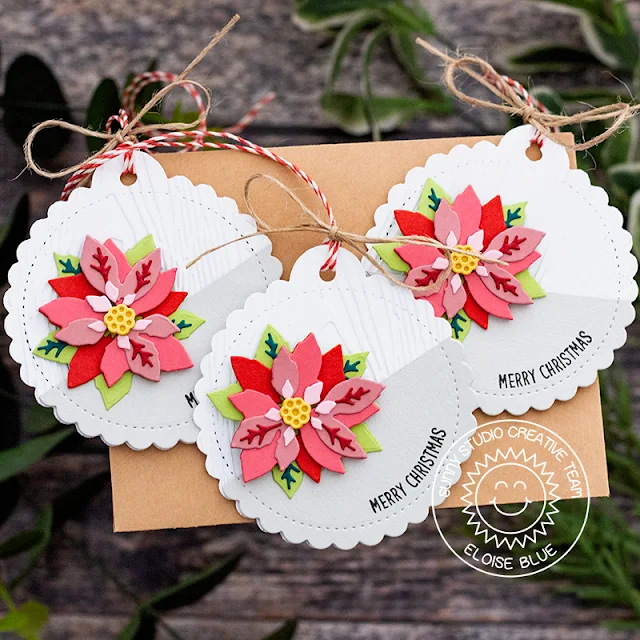
Hi friends, Eloise here and today I’m using the Layered Poinsettia’s Die Set to create some Christmas Tags. I used the Scalloped Tag Circle Dies for the base and also used the Woodgrain Embossing Folder for some added texture and the Merry Mice Stamp Set for the sentiment.

Sunny Studio Stamps: Layered Poinsettia Dies Scalloped Tag Circle Dies Merry Christmas Tags by Eloise Blue

I started off with die cutting out all my layers of the poinsettia die from different shades of cardstock. I then layered them together and adhered them. While I was die cutting, I also cut out three Scalloped Circle Tags from white cardstock and also grey cardstock and then ran the white ones through with the Woodgrain Embossing Folder.

Sunny Studio Stamps: Layered Poinsettia Dies Scalloped Tag Circle Dies Merry Christmas Tags by Eloise Blue

Next I cut down the grey pieces a little to create a diagonal look, added foam tape onto the bottom and adhered them onto my white tags at the bottom. I then adhered the poinsettia’s with foam tape too. For the sentiment I used the Merry Mice Stamp Set, curved the ‘Merry Christmas’ in my MISTI and stamped it with black ink onto the bases of the tags. Lastly, I tied two types of twine through the tops of each of the tags.

Thanks so much for stopping by today, I hope you enjoyed these tags and I’ll see you next week.

--------------------------------------------------

Hi crafty friends, Leanne here! I have another card to share that features the Layered Poinsettia. If you recall, my card from last week combined the poinsettia and buffalo plaid. I really loved that look so I have used that combination again for this week. I've used a very traditional color palette with some glittery accents for a more elegant design.

Sunny Studio Stamps: Layered Poinsettia Dies Christmas Trimmings Merry Christmas Card by Leanne West

I started with an A2 sized card base. I cut a panel of white card stock about a quarter inch smaller than A2 dimensions. I added some black paint splatters then layered it on top of some black glitter card stock with foam tape. I created a red and black plaid strip using a stamp from the Background Basics set. I adhered this strip towards the left side. I stamped out some pine boughs from the Christmas Trimmings set. I created the Layered Poinsettia using dark green card stock for the bottom layer and white for all the petals. I used a light green ink pad with a sponge dubber to add shading to the larger petal edges and completely color the tiny petals. 

Sunny Studio Stamps: Layered Poinsettia Dies Christmas Trimmings Merry Christmas Card by Leanne West

Before adhering the pine boughs and poinsettia, I heat embossed the greeting in silver. The Merry Christmas greeting also comes from the Christmas Trimming set. To finish off the card, I frosted the poinsettia petals with Nuvo White Blizzard Glitter Drops and scattered a few dots of Nuvo Sliver Crystals Glitter Drops. 

Sunny Studio Supplies Used:

Background Basics Stamps
Shop at:
Sunny Studio
Christmas Trimmings Stamps
Shop at:
Sunny Studio
Christmas Trimmings Dies
Shop at:
Sunny Studio
Woodgrain Embossing
Woodgrain Embossing
Shop at:
Sunny Studio
Merry Mice Stamps
Merry Mice Stamps
Shop at:
Sunny Studio
Layered Poinsettia Dies
Shop at:
Sunny Studio
Scalloped Tags-Circle
Shop at:
Sunny Studio

Monday, December 2, 2019

Embossing Folder Focused Cards with Leanne and Eloise

Hello everyone, Leanne here! Have you started decorating for the holidays yet? I just love the Farmhouse style of decorating especially for Christmas. It was this decorating trend that inspired my card today. Most of the Farmhouse Christmas decor ideas I've seen include buffalo plaid, so for my card I created a green and black plaid background using the Buffalo Plaid Embossing Folder

Sunny Studio Stamps: Layered Poinsettia Dies Fancy Frames Dies Christmas Garland Frame Dies Christmas Card by Leanne West

To achieve the green and black plaid, I started with green card stock and then I used Onyx Black VersaFine to ink up the embossing folder before running it through my die cut machine. I added the embossed plaid panel to an A2 sized card base. I die cut one of the Fancy Frames Rectangles to place in the center of the plaid background.

Sunny Studio Stamps: Layered Poinsettia Dies Fancy Frames Dies Christmas Garland Frame Dies Christmas Card by Leanne West

The Farmhouse decorating style is known for it's simplicity so I followed suit and kept this card design fairly clean and simple. I die cut the "Merry Christmas", using the Christmas Garland Frame Dies, from black glitter card stock and adhered to the frame at an angle. I then used the Layered Poinsettia dies to create a single flower to add just below the greeting. For a little bit of embellishment, I added a few clear sequins to finish off the card. 

------------------------------------------------

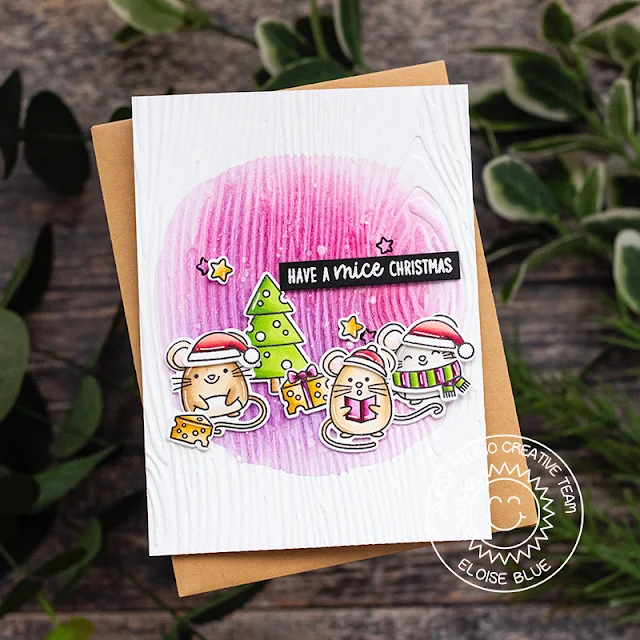
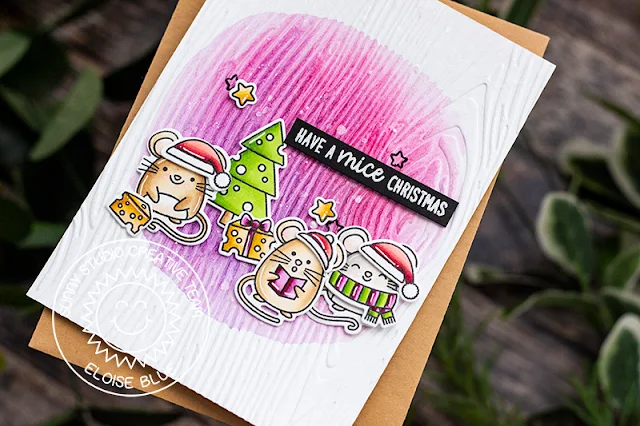
Hi friends, Eloise here and today I’ll be using the Woodgrain Embossing Folder along with Merry Mice to create a Christmas card.

Sunny Studio Stamps: Merry Mice Embossing Folders Christmas Card by Eloise Blue

I started off with stamping out my images and colouring them in with Copic Markers. I cut them out and then added white details using a gel pen.

(Copic Markers Used: B0000, B000 / YG03, YG23, YG25, YG17 / R000, R00 / R32, R35, R37, R39 / YR20, YR21, YR23, YR24 / W00, W0, W1, W3 / E50, E51, E53, E55 / E30, E31, E34, E35 / RV91, RV93, RV95, RV99 / RV63, RV66, RV69, R89 / 0)

Sunny Studio Stamps: Merry Mice Embossing Folders Christmas Card by Eloise Blue

I then took a piece of watercolour cardstock and ran that through my die cutting machine with the Woodgrain Embossing Folder. I then water-coloured a pink/purple circle into the centre.

Lastly, I adhered my images into place and white heat embossed the ‘Have A Mice Christmas’ sentiment onto a thin strip of black cardstock and adhered that on too.

Thanks so much for stopping by today and I’ll see you all next week. 


All retail purchases of any size will have 10% donated to Convoy of Hope to help with children’s feeding initiatives and disaster response.

And as always orders will also come with our mini holiday light bulb die (not pictured).

Sunny Studio Supplies Used:


Fancy Frames- Rectangles
Shop at:
Sunny Studio
Buffalo Plaid Embossing
Shop at:
Sunny Studio
Woodgrain Embossing
Woodgrain Embossing
Shop at:
Sunny Studio
Merry Mice Stamps
Merry Mice Stamps
Shop at:
Sunny Studio
Merry Mice Dies
Merry Mice Dies
Shop at:
Sunny Studio
Layered Poinsettia Dies
Shop at:
Sunny Studio
Christmas Garland Frame
Shop at:
Sunny Studio

Friday, November 15, 2019

Layered Poinsettias Cards with Rachel and Candice

Hello friends! It's Rachel here and I have a card to share with you today that features the new Layered Poinsettia Die Set. To start my card, I first created my poinsettia by cutting the various layers in different shades of red card stock. I also cut one layer of leaves from green card stock. In order to get the illusion of added depth, I blended each piece lightly on the edges with some Distress Ink that was slightly darker than the card stock itself.

Sunny Studio Stamps: Layered Poinsettia Dies Circle Snowflake Frame Dies Layered Snowflake Frame Dies Christmas Themed Card by Rachel Alvarado

Also, I used small pieces of 3D Adhesive Foam Squares when adding each layer to also add some more dimension. If you preferred less dimension, you'd simply need to glue your layers together. Once my flower was assembled, I set it aside and worked on my card background. Since I loved the look of the Woodgrain Embossing Folder on my previous card, I used the same technique on this card. I added some brown ink to the front panel of my embossing folder and ran a piece of 4.25"x4.25" Kraft card stock through my machine. I then layered this woodgrain piece with both a square white and green piece of card stock.

Sunny Studio Stamps: Layered Poinsettia Dies Circle Snowflake Frame Dies Layered Snowflake Frame Dies Christmas Themed Card by Rachel Alvarado

For some added interest, I die cut another piece of green card stock with the Snowflake Circle Frame Die and added this to the center of my card. I then used this set to also cut some white snowflakes as accents. For my sentiment, I used the "Wishes" word die from the Layered Snowflake Frame Die and die cut my sentiment from white card stock. I glued this piece to the front of my card and added the word "Christmas" (from the Merry Mice Stamps Set) by heat embossing it with Fine Detail White Embossing Powder onto a strip of black card stock. Lastly, I added a few small White Pearls to the centers of my snowflakes and poinsettia.

I hope you've enjoyed my card today! Wishing you all a lovely weekend!

-------------------------------------------------------

Welcome back my crafty friends, it's Candice with you again this Friday sharing an elegant Christmas card for you today using the new Layered Poinsettia dies

Sunny Studio Stamps: Layered Poinsettia Dies Circle Snowflake Frame Dies Layered Snowflake Frame Dies Winter Themed Card by Candice Fisher

The fabulous Sunny Studio Stamps products I used are:
I began my card by creating an 8 1/2 x 3 1/2 card base which will fit nicely into the size 9A envelopes.

To create my background, I die cut strips from shimmer paper with the Frilly Frames Stripes die and using the negative for a guide, glued them to a piece of cardstock that I trimmed to fit on the front.

Sunny Studio Stamps: Layered Poinsettia Dies Circle Snowflake Frame Dies Layered Snowflake Frame Dies Winter Themed Card by Candice Fisher

Next, I die cut the poinsettia leaves from the same shimmer paper. I then cut out three sets of the poinsettia petals, inking each layer with chipped sapphire, then faded jeans and topped with stormy sky.  

For my large sentiment, I die cut the winter wishes from silver and multiples from scrap white cardstock and layered. I then heat embossed the sentiment in silver and trimmed to create a banner. For a simple embellishment, I added a few white pearls.

Thank you so much for visiting!

Sunny Studio Supplies Used:

Frilly Frames Stripes Die
Shop at:
Sunny Studio
Woodgrain Embossing
Woodgrain Embossing
Shop at:
Sunny Studio
Santa Claus Lane Stamps
Shop at:
Sunny Studio
Merry Mice Stamps
Merry Mice Stamps
Shop at:
Sunny Studio
Layered Poinsettia Dies
Shop at:
Sunny Studio
Layered Snowflake Frame
Shop at:
Sunny Studio
Snowflake Circle Frame
Shop at:
Sunny Studio

Saturday, November 2, 2019

Sunny Saturday Share: Customer Cards


Hey everyone, how are you all doing this weekend? I'm so excited to be popping in today with a Sunny Saturday Share. There have been so many amazing cards popping up on Instagram that have made my jaw drop so I couldn't wait to share them with all of you! 

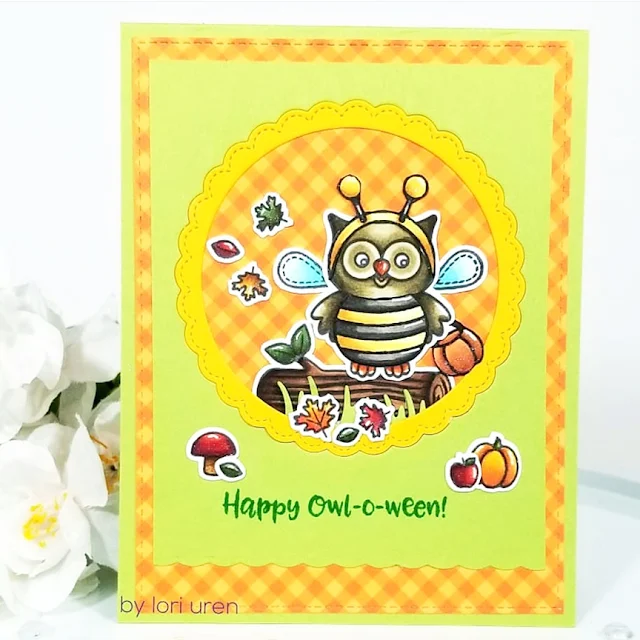
Happy Owl-o-ween and Fancy Frame Circle dies card by Lori Uren

Sunny Saturday Shares: Happy Owl-o-ween Customer Card by Lori Uren

Elegant Leaves card by Toni Maddox

Sunny Saturday Shares: Elegant Leave Customer Card by Toni Maddox

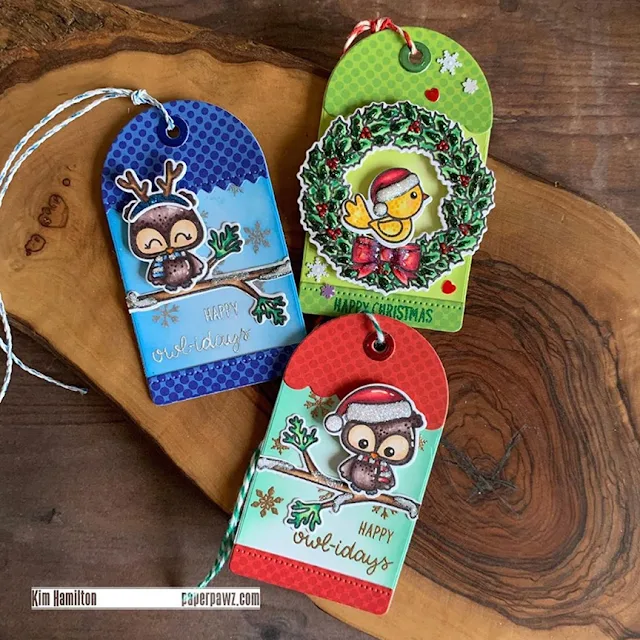
Happy Owlidays and Build-A-Tag #1 dies tags by Kimberley Hamilton

Sunny Saturday Shares: Happy Owlidays Build-A-Tag dies Customer Card by Kimberly Hamilton

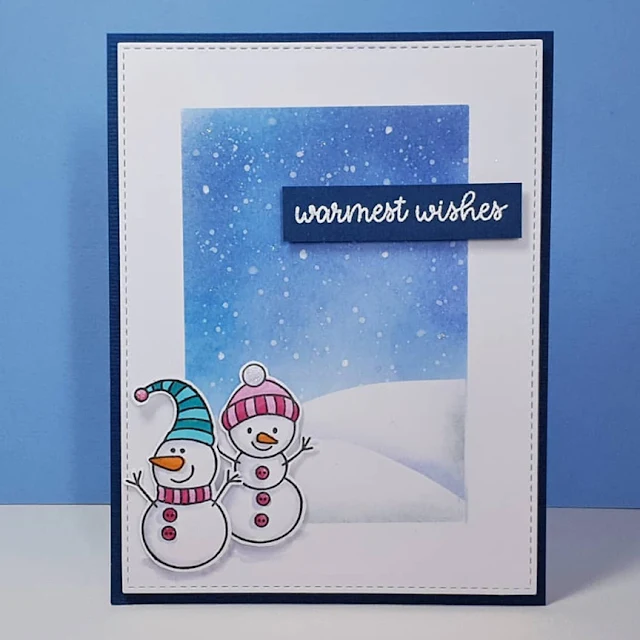
Feeling Frosty and Scalloped Tag dies tags by Amy Tsuruta


Sunny Saturday Shares: Feeling Frosty Scalloped Tag dies Customer Card by Amy Tsuruta

Feeling Frosty card by Christine


Sunny Saturday Shares: Feeling Frosty Customer Card by Christine

Merry Mice and Sliding Window dies card by Anita Madden


Sunny Saturday Shares: Merry Mice Sliding Window Dies Customer Card by Anita Madden

Merry Mice card by Caren Bartholomew


Sunny Saturday Shares: Merry Mice Customer Card by Caren Bartholomew

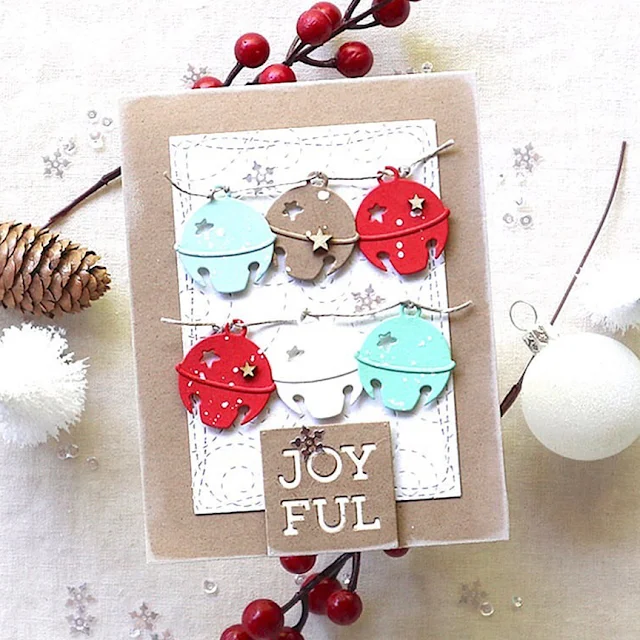
Silver Bells dies card by Yoonsun Hur


Sunny Saturday Shares: Christmas Garland Frame dies Customer Card by Jenn Brown

Christmas Garland Frame dies card by Jenn Brown


Sunny Saturday Shares: Christmas Garland Frame dies Customer Card by Jenn Brown

Season Greetings and Layered Poinsettia dies card by Judy Tuck


Sunny Saturday Shares: Season Greetings Layered Poinsettia dies Customer Card by Judy Tuck

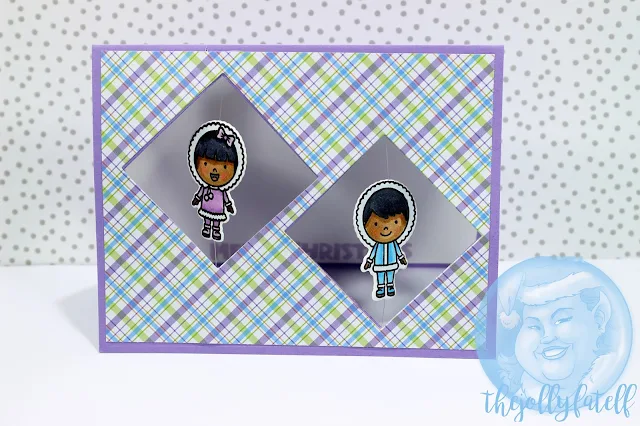
Eskimo Kisses card by Misty


Sunny Saturday Shares: Eskimo Kisses Customer Card by Misty

Thank you for sharing all these fabulous ideas with us! I hope you will continue to share your gorgeous projects with us--It always makes my day to see them. You can tag us on instagram with the hashtag #sunnystudiostamps or share your projects with us in our flickr group or on our facebook page. ☺


Sunny Studio Supplies Used:

Happy Owl-o-ween Dies
Shop at:
Sunny Studio
Happy Owl-o-ween Stamps
Shop at:
Sunny Studio
Silver Bells Die
Silver Bells Die
Shop at:
Sunny Studio
Fancy Frames-Circle Dies
Shop at:
Sunny Studio
Sliding Window Dies
Sliding Window Dies
Shop at:
Sunny Studio
Happy Owlidays Stamps
Shop at:
Sunny Studio
Happy Owlidays Dies
Happy Owlidays Dies
Shop at:
Sunny Studio
Build-A-Tag #1 Dies
Build-A-Tag #1 Dies
Shop at:
Sunny Studio
Elegant Leaves Stamps
Shop at:
Sunny Studio
Elegant Leaves Dies
Elegant Leaves Dies
Shop at:
Sunny Studio
Season's Greetings Stamps
Shop at:
Sunny Studio
Season's Greetings Dies
Shop at:
Sunny Studio
Feeling Frosty Stamps
Shop at:
Sunny Studio
Feeling Frosty Dies
Feeling Frosty Dies
Shop at:
Sunny Studio
Merry Mice Stamps
Merry Mice Stamps
Shop at:
Sunny Studio
Merry Mice Dies
Merry Mice Dies
Shop at:
Sunny Studio
Layered Poinsettia Dies
Shop at:
Sunny Studio
Scalloped Tags-Square
Shop at:
Sunny Studio
Christmas Garland Frame
Shop at:
Sunny Studio