Showing posts with label Fluffy Clouds. Show all posts

Wednesday, March 17, 2021

Lovable Llama Cards and Video Tutorial with Julia and Franci

Hey crafty friends! It’s Julia here with a fun interactive birthday card! I used the adorable Lovable Llama stamp set for this one! 

Sunny Studio Stamps: Lovable Llama Spring Scenes Floating By Sliding Window Dies Birthday Card by Julia Englich

To create my scene I also used the Spring Scenes, Floating By and Inside Greetings Birthday stamp sets as well as the Sliding Window and Fluffy Clouds dies. 

Sunny Studio Stamps: Lovable Llama Spring Scenes Floating By Sliding Window Dies Birthday Card by Julia Englich

I really wanted to add a sentiment that read "Llama tell you" so I used Kinsley Alphabet stamps for my custom greeting!

Sunny Studio Stamps: Lovable Llama Spring Scenes Floating By Sliding Window Dies Birthday Card by Julia Englich

I had so much fun with the sliding window mechanism! It's amazing for adding an additional message or a little hidden scene to your cards! If you would like to see how this card came together, you can watch the video below - or on my YouTube channel, Craft Room Adventures.


Inks used: background: Twisted Citron and Mowed Lawn Distress Ink as well as Tumbled Glass and Salty Ocean Distress Oxide. Copic Markers used: YG11, YG13, YG17, BG99; Y11, Y13, Y15, Y17; R20, R22; R24; R27; R29, R39; RV21, RV23, RV25, RV29; B21, B23, B26, B28; BG11, BG13, BG15, BG18; V000, V01, V04, V05, V09; R21; E30, E31, E33, E35, E37, E39; 0.

Thank you so much for stopping by today! Have an amazing day!

-----------------------------------------------

Hi there! Franci here with you, showcasing the new Lovable Llama set, the cutest ever!! So I had to make another rocking card here because I think they are so much fun and they are so easy to make with the new Stitched Circle Large Dies and the Scalloped Circle ones

Sunny Studio Stamps: Lovable Llama Banner Basics Birthday Card by Franci Vignoli

First of all I die cut all the panels: the largest one out of this colorful patterned paper from the Spring Sunburst 6x6 paper set and the smallest out of white cardstock. I later inked it up in the center with some Spiced Marmalade Distress ink Oxide.

Then I started working on my images, I combined lots of elements from these different sets: Lovable Llama + coordinated diesBalloon Rides coordinated diesBanner Basics coordinated dies. I stamped them onto white cardstock, colored them with Copics and cut them out. I also added my sentiment from the Inside Greetings Birthday set.

Sunny Studio Stamps: Lovable Llama Banner Basics Birthday Card by Franci Vignoli

I glued down all my images to the scalloped circle, then folded in half my stitched one and adhered my decorated panel just to one half of my colorful one. As you can see I also added some elements with acetate strips to give my design more interest and the card fit a standard size envelope perfectly so it's super easy to mail! Finally I added some details with a white gel pen and some clear sequins.

I hope you like it and thank you so much for stopping by today! 

Sunny Studio Supplies Used:


Sliding Window Dies
Sliding Window Dies
Shop at:
Sunny Studio
Spring Sunburst 6x6 Paper
Shop at:
Sunny Studio
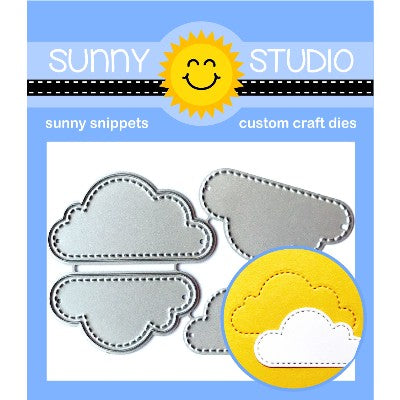
Fluffy Clouds Dies
Fluffy Clouds Dies
Shop at:
Sunny Studio
Banner Basics Stamps
Shop at:
Sunny Studio
Banner Basics Dies
Banner Basics Dies
Shop at:
Sunny Studio
Floating By Stamps
Floating By Stamps
Shop at:
Sunny Studio
Floating By Dies
Floating By Dies
Shop at:
Sunny Studio
Kinsley Alphabet Stamps
Shop at:
Sunny Studio
Spring Scenes Stamps
Shop at:
Sunny Studio
Spring Scenes Dies
Spring Scenes Dies
Shop at:
Sunny Studio
Balloon Rides Stamps
Shop at:
Sunny Studio
Balloon Rides Dies
Balloon Rides Dies
Shop at:
Sunny Studio
Inside Greetings Birthday
Shop at:
Sunny Studio
Lovable Llama Stamps
Shop at:
Sunny Studio
Lovable Llama Dies
Lovable Llama Dies
Shop at:
Sunny Studio
Scalloped Circle Mat 1 Dies
Shop at:
Sunny Studio
Stitched Circle Large Dies
Shop at:
Sunny Studio

Tuesday, March 9, 2021

Country Scenes Cards with Kavya and Isha

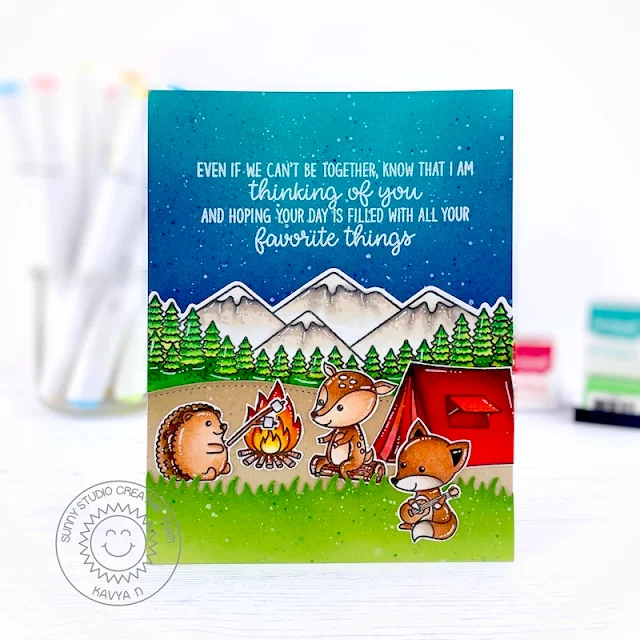
Hi folks, Kavya here. I am back on the blog with a new project. I love creating scenes.. so naturally, I fell in love with Country Scenes from the new release as it makes it super easy to create a scene for your critter cards. Just find a suitable landscape and add a few critters! 

Sunny Studio Stamps: Country Scenes Critter Campout Slimline Dies Card by Kavya

I used this to along with a previously released set to create this gorgeous card for a friend with whom I love to go camping. I haven’t had the chance to go with her this year but it’s definitely on my bucket list after the pandemic. I also found the perfect sentiment for the occasion from the new Inside Greetings Birthday stamps set. Although, this set is intended for birthdays, some of the sentiments can be used all year long! 

I first started off by ink blending the top half of the card using navy blue and teal dye inks. I then added blue and white paint splatters to create a super quick night sky! Later, I stamped the mountain scene from the Country Scenes stamp set and some critters from the Critter Campout stamp set and colored them using alcohol markers and colored pencils. As always, I added some highlights using a white gel pen. 

Sunny Studio Stamps: Country Scenes Critter Campout Slimline Dies Card by Kavya

Then, I used the Slimline Nature Borders set (A MUST HAVE IMO! Almost 90% of my cards use this set in some form and is perfect for both slimline and A2 sized cards) to die cut ‘land’ and some ‘grass’ using cream and green cardstock. I used the matching dye inks to ink blend the edges and added some splatters here as well. Finally, I put together the scene as shown below and added a sentiment from the Inside Greetings Birthday stamps set that is perfect for my friend! 

I hope you liked this card! Be sure to check back for more inspiration tomorrow :) 

-------------------------------------------------

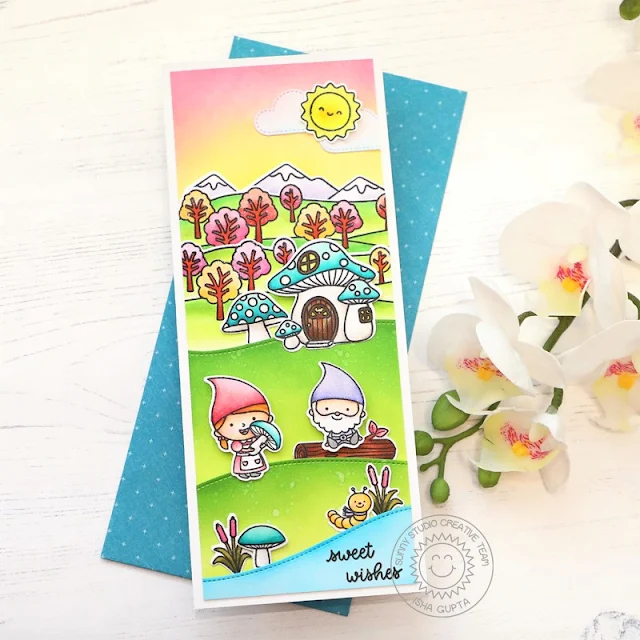
Hello everyone! Isha here with a slimline card featuring the Country Scenes stamp set. I really love this set as it's perfect to create beautiful scenes. 

Sunny Studio Stamps: Country Scenes Slimline Dies Home Sweet Gnome Garden Fairy Card by Isha Gupta

I started by stamping two rows of trees scene images and colored them using Copic markers and die-cut using the coordinating dies. I also stamped the mountain scene image, colored it and die-cut. I only wanted to use the mountains behind my trees. 

Take a white panel and sponge some pinks and yellow distress inks to create the sky. Adhere the mountains and then both the layers of tree scenes. Now, I die-cut 3 slopes using the Slimline Nature Borders from white cardstock. I sponged distress inks in the shades of greens on two of them and adhered to the panel ( apply glue to the bottom edge only so we can insert our images to create the scene later)

Sponge the last slope using salty ocean distress ink to create a small pond. Stamp sentiment from the Garden Fairy stamp set. Adhere to the bottom of the panel. Stamp the mushroom house from the Garden Fairy stamp set, color and die-cut using the coordinating dies

Sunny Studio Stamps: Country Scenes Slimline Dies Home Sweet Gnome Garden Fairy Card by Isha Gupta

Stamp gnomes, mushrooms and the caterpillar from the Home Sweet Gnome stamp set, color and die-cut using the coordinating dies. The sun from the Balloon Rides stamp set and die-cut using the dies. The log is from the Seasonal Trees stamp, color and die-cut using the coordinating dies. Now I die-cut two clouds using the Fluffy Clouds die, sponge some pink and blue ink.

Once the images are ready, adhere them as per the card photo. Apply spectrum noir clear shimmer pen to the sun, trees, and gnome hats. Adhere the panel to a white cardbase.

Thanks for dropping by! Have a nice day.

Sunny Studio Supplies Used:

Critter Campout Stamps
Shop at:
Sunny Studio
Critter Campout Dies
Shop at:
Sunny Studio
Home Sweet Gnome Stamps
Shop at:
Sunny Studio
Home Sweet Gnome Dies
Shop at:
Sunny Studio
Fluffy Clouds Dies
Fluffy Clouds Dies
Shop at:
Sunny Studio
Seasonal Trees Stamps
Shop at:
Sunny Studio
Seaonal Trees Dies
Seaonal Trees Dies
Shop at:
Sunny Studio
Slimline Nature Borders
Shop at:
Sunny Studio
Balloon Rides Stamps
Shop at:
Sunny Studio
Balloon Rides Dies
Balloon Rides Dies
Shop at:
Sunny Studio
Country Scenes Stamps
Shop at:
Sunny Studio
Country Scenes Dies
Country Scenes Dies
Shop at:
Sunny Studio
Garden Fairy Stamps
Garden Fairy Stamps
Shop at:
Sunny Studio
Garden Fairy Dies
Garden Fairy Dies
Shop at:
Sunny Studio
Inside Greetings Birthday
Shop at:
Sunny Studio

Monday, March 8, 2021

Slimline Pennant Die Focused Cards with Mayra and Ashley

Hello everyone. Mayra here with you today. I am so grateful to be here. I have a sweet card to share with you. I used the Slimline Pennant dies along with the Enchanted and Make A Wish stamp sets. 

Sunny Studio Stamps: Slimline Pennant Dies Enchanted Scalloped Circle Mat Dies Card by Mayra Duran-Hernandez

I started by die-cutting the large stitched rectangle using the Frilly Frames Quatrefoil die set from a piece of patterned paper from the Dots & Stripes Pastel paper pack. Next, I die-cut the largest of the pennants from the Slimline Pennant dies set. I die-cut it from a soft pink colored cardstock. I then die-cut the scalloped circle, stitched circle, and the grassy hills using the Scalloped Circle Mat 1, Stitched Circle Small, and the Slimline Nature Borders die sets. 

Sunny Studio Stamps: Slimline Pennant Dies Enchanted Scalloped Circle Mat Dies Card by Mayra Duran-Hernandez

Next, I added color to the stitched circle using Tumbled Glass Distress Oxide ink. For the grassy hills, I used Mowed Lawn and Twisted Citron. I then used Copic markers to color all of the images. I used C5, W5, W3, and C0. For the brown areas, I used E41, E81, E84, E87, E47, and E49. For the soft blue, I used B32, B01, and B000. For the soft pink, R20, R30, R00, and R000.

I hope you enjoy the card I created to share with you today. Thank you so much for taking the time to stop by. I hope you each have a wonderful and blessed day. 

--------------------------------------------------

Hello friends! It's Ashley with a cute mini slimline card featuring the Slimline Pennants dies! The finished card is 3.25" x 6" - big enough to give me a little extra space to work, but small enough to fit in a standard envelope. Perfect!

Sunny Studio Stamps: Slimline Pennant Dies Plane Awesome Fluffy Clouds Card by Ashley Ebben

I started by cutting the medium-sized Slimline Pennant die from white cardstock. I then used the stitching-only clouds from the Fluffy Clouds dies to add some interest to the background before blending a bit of Pinkfresh Studio Ocean Breeze ink to the edges. I grabbed another piece of white cardstock and cut a cloudy border using the Slimline Nature Borders. I trimmed the cloudy border by cutting it with the bottom of my Slimline Pennant die so that it would fit perfectly on the piece. The pennant was too long for a mini slimline, so I trimmed it down to 5.75" across, then used the Slimline Basic Borders to add stitching back to that edge.

Sunny Studio Stamps: Slimline Pennant Dies Plane Awesome Fluffy Clouds Card by Ashley Ebben

To add a bit more background interest, I cut a few solitary clouds from white cardstock with the Fluffy Clouds dies and scattered them around. I stamped images from Plane Awesome onto white cardstock in Lawn Fawn Jet Black ink and colored with Copics. I just love that cute monkey and his goggles! I cut them out with the matching dies and added them to my card with foam tape. 

To finish my sentiment, I stamped the phrase onto black cardstock in VersaMark ink and embossed with white. I added the sentiment strip to the card with foam tape. For the card base, I used the blue ray paper from the Classic Sunburst pack. I finished with a scattering of iridescent crystals.

Thank you so much for stopping by! Have a wonderful day!

Sunny Studio Supplies Used:

Dots & Stripes Pastels 6x6 Paper
Shop at:
Sunny Studio
Make A Wish Stamps
Make A Wish Stamps
Shop at:
Sunny Studio
Make A Wish Dies
Make A Wish Dies
Shop at:
Sunny Studio
Fluffy Clouds Dies
Fluffy Clouds Dies
Shop at:
Sunny Studio
Plane Awesome Stamps
Shop at:
Sunny Studio
Plane Awesome Dies
Plane Awesome Dies
Shop at:
Sunny Studio
Enchanted Stamps
Enchanted Stamps
Shop at:
Sunny Studio
Enchanted Dies
Enchanted Dies
Shop at:
Sunny Studio
Frilly Frames Quatrefoil
Shop at:
Sunny Studio
Slimline Basic Borders
Shop at:
Sunny Studio
Slimline Nature Borders
Shop at:
Sunny Studio
Classic Sunburst Paper
Shop at:
Sunny Studio
Scalloped Circle Mat 1 Dies
Shop at:
Sunny Studio
Slimline Pennant Dies
Shop at:
Sunny Studio
Stitched Circle Small Dies
Shop at:
Sunny Studio