Showing posts with label Chubby Bunny. Show all posts

Wednesday, February 22, 2023

Easter Cards with Marie and Catherine

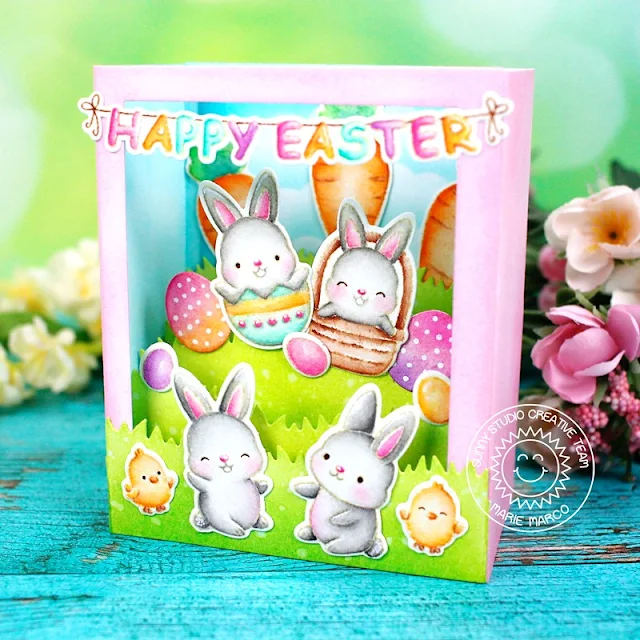
Hey Crafty Friends, Marie here. With Spring fast approaching, I am looking forward to another one of my favorite holidays of the whole entire year and that is Easter Sunday! When I was little, my mom would hide easter eggs all around the house and we would have Sunday mass and have a big family brunch right after. For my family, Easter is just as important as Christmas, and there would always be Easter cards and gifts exchanged! So this year, I will be giving my mom this Easter shadow box card featuring Sunny Studio Stamps' Chubby Bunny Stamps with elements from their Bunnyville Stamps

Sunny Studio Stamps: Chubby Bunny Easter Card by Marie Marco (featuring Bunnyville)

To begin the process of creating this card, I used a shadow box die from Heffy Doodle. I cut out all my shadow box pieces from Bristol Smooth cardstock paper. I then ink blended the outside of my box using Cotton Candy Ink from MFT, and Salvaged Patina Distress Ink for the inside as well as for the cloud stenciled background. For all my grass panels, I used my favorite grass colored ink combination in Twisted Citron and Mowed Lawn Distress Ink. I went over all the grass panels with water droplets for some light texture. After inking my entire box, I put it together using double sided tape adhesive and Bearly Art Precision Craft Glue. 

Sunny Studio Stamps: Chubby Bunny Easter Card by Marie Marco (featuring Bunnyville)

Next, I stamped out all my images from the Chubby Bunny Stamp Set and Bunnyville stamps onto watercolor paper using Antique Linen Distress Ink. I colored all my images using Faber Castell Watercolor pencil. I then cut out all my images using the coordinating Chubby Bunny Dies and I fussy cut the carrot images from Bunnyville. The Bunnyville stamps also come with Bunnyville Dies

Finally, after coloring and die cutting, I played around with placement and adhered all my images inside my shadow box. I really love how this card came together! I love all the bright Spring Colors and how happy, playful,  and festive these adorable bunnies look! I can't wait to hand deliver this one to my mom this year! As always Crafty friends, thanks so much for joining me today on another card inspiration! Until next time, Happy Crafty Cardmaking! 

-------------------------------------------

Hello Crafty Friends! Catherine here, and today I am sharing a fun easter basket card created with Eggs To Dye For Stamps and Layered Basket Stamps.

Sunny Studio Stamps: Eggs To Dye For Easter Card by Catherine Cohen (featuring Fancy Frame Dies, Stitched Rectangle Dies, Layered Basket)

To start, I embossed a piece of white cardstock 3 ¾”W x 5” H with Lots of Dots Embossing folder. I then die cut a lacy frame with white cardstock from Fancy Frames Rectangle Dies. I adhered the frame onto the polka dot embossed background.

I stamped a basket with the Layered Basket Stamps using Pinkfresh Studio Ink Cubes- Urban Raincoat. I used three colors from the set, Misty Coast, Rocky Slope, and Metropolis. I splattered some Metropolis ink mixed with water onto the basket for added texture.

I stamped the eggs with the following Altenew inks and die cut the eggs with the coordinating dies, Eggs To Dye For Dies. For the blue and purple egg, I White Heat embossed the eggs after I stamped them.

Pink – Frosty Pink, Pink Diamond, Pinkalicious
Purple- Soft Lilac, Lavender Fields
Blue- Caribbean Sky

Sunny Studio Stamps: Eggs To Dye For Easter Card by Catherine Cohen (featuring Fancy Frame Dies, Stitched Rectangle Dies, Layered Basket)

Next, I stamped the chick using light brown ink and colored it with Copic Markers listed in my blog link below.

For the sentiments, I White Heat embossed the sentiments onto a banner from Stitched Rectangle Dies and a tag from Stitched Oval 2 Dies. I added white brads to the oval tag on the basket. I adhered the eggs, chick, basket, and sentiment onto the polka dot background. I thought it would be fun to add some pink grass for the basket. I finished the card by adhering it onto a background with paper from Subtle Grey Tones 6x6 Paper.

Thanks so much for stopping by! For more inspiration, please feel free to visit me at Crafti-Cat! Have a great day!

Sunny Studio Supplies Used:

Stitched Rectangle Dies
Shop at:
Sunny Studio
Fancy Frames- Rectangles
Shop at:
Sunny Studio
Chubby Bunny Stamps
Chubby Bunny Stamps
Shop at:
Sunny Studio
Chubby Bunny Dies
Chubby Bunny Dies
Shop at:
Sunny Studio
Lots of Dots Embossing
Shop at:
Sunny Studio
Subtle Grey Tones Paper
Shop at:
Sunny Studio
Eggs To Dye For Stamps
Shop at:
Sunny Studio
Eggs To Dye For Dies
Shop at:
Sunny Studio
Layered Basket Stamps
Shop at:
Sunny Studio
Layered Basket Dies
Layered Basket Dies
Shop at:
Sunny Studio
Stitched Oval 2 Dies
Shop at:
Sunny Studio
Bunnyville Stamps
Bunnyville Stamps
Shop at:
Sunny Studio
Bunnyville Dies
Bunnyville Dies
Shop at:
Sunny Studio

Saturday, April 16, 2022

Sunny Saturday Share: Easter Themed Customer Cards

Hey everyone, how are you all doing this weekend? I'm so excited to be popping in today with a Sunny Saturday Share. There have been so many amazing cards popping up on Instagram that have made my jaw drop so I couldn't wait to share them with all of you! 

BunnyvilleSnail Mail & Harvest Mice card by Silvia Galloni

Sunny Studio Stamps: Bunnyville Easter Customer Card by Silvia Galloni (featuring Snail Mail)

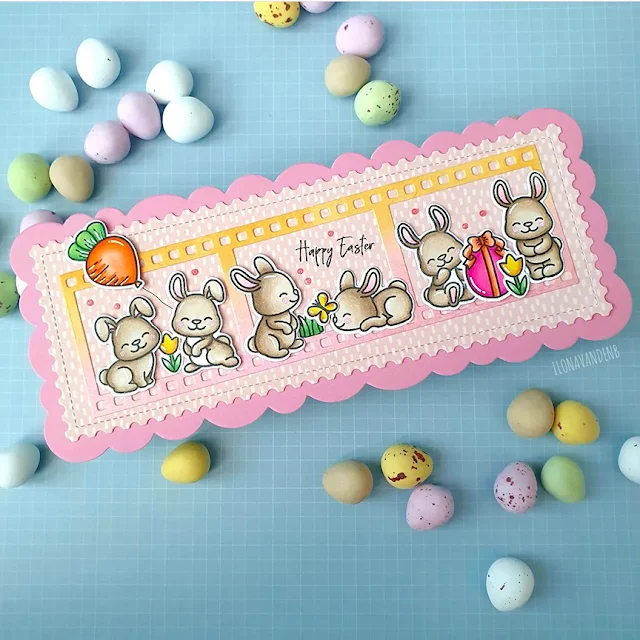
Bunnyville card by Ilona van den B

Sunny Studio Stamps: Bunnyville Easter Customer Card by Ilona van den B

Bunnyville and Chickie Baby card by Sylvie

Sunny Studio Stamps: Bunnyville Easter Customer Card by Sylvie (featuring Chickie Baby)

Bunnyville treat bags by Sweet T

Sunny Studio Stamps: Bunnyville Easter Customer Card by Sweet T

Bunnyville card by Tina

Sunny Studio Stamps: Bunnyville Easter Customer Card by Tina

Bunnyville & Gingham Pastels Paper card by Marinda

Sunny Studio Stamps: Bunnyville Easter Customer Card by Marinda

Bunnyville card by Ginger

Sunny Studio Stamps: Bunnyville Easter Customer Card by Ginger

Bunnyville card by Linda Crea

Sunny Studio Stamps: Bunnyville Easter Customer Card by Linda Crea

Chubby Bunny card by Jenny

Sunny Studio Stamps: Chubby Bunny Easter Customer Card by Jenny

Bunnyville & Stitched Oval card by Mina

Bunnyville card by Mary Swayze

Sunny Studio Stamps: Bunnyville Easter Customer Card by Mary Swayze

Thank you for sharing all these fabulous ideas with us! I hope you will continue to share your gorgeous projects with us--It always makes my day to see them. You can tag us on instagram with the hashtag #sunnystudiostamps or share your projects with us in our flickr group or on our facebook page. ☺


Sunny Studio Supplies Used:

Chubby Bunny Stamps
Chubby Bunny Stamps
Shop at:
Sunny Studio
Chubby Bunny Dies
Chubby Bunny Dies
Shop at:
Sunny Studio
Chickie Baby Stamps
Chickie Baby Stamps
Shop at:
Sunny Studio
Chickie Baby Dies
Chickie Baby Dies
Shop at:
Sunny Studio
Snail Mail Stamps
Snail Mail Stamps
Shop at:
Sunny Studio
Stitched Oval Dies
Stitched Oval Dies
Shop at:
Sunny Studio
Gingham Pastels 6x6 Paper
Shop at:
Sunny Studio
Harvest Mice Stamps
Harvest Mice Stamps
Shop at:
Sunny Studio
Harvest Mice Dies
Harvest Mice Dies
Shop at:
Sunny Studio
Snail Mail Dies
Snail Mail Dies
Shop at:
Sunny Studio
Bunnyville Stamps
Bunnyville Stamps
Shop at:
Sunny Studio
Bunnyville Dies
Bunnyville Dies
Shop at:
Sunny Studio

Tuesday, April 5, 2022

Bunnyville Cards with Isha and Kavya

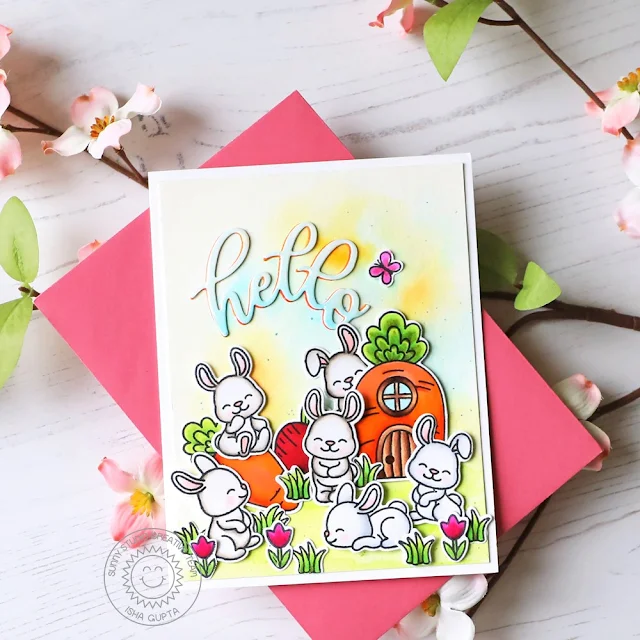
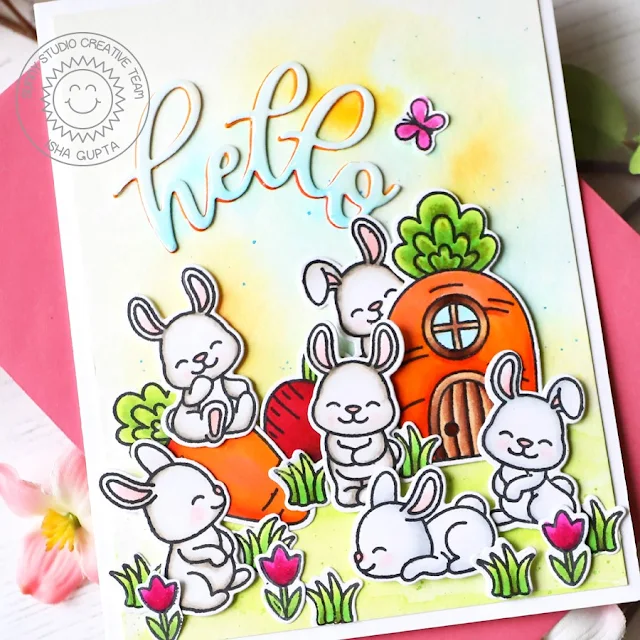
Hello everyone, Isha here today sharing a fun and playful spring theme HELLO card featuring our new Bunnyville stamps and dies. I really like how happy and playful these bunnies are and they give me a huge smile :)

Sunny Studio Stamps: Bunnyville Card by Isha Gupta (featuring Slimline Dies)

To start, I created the background using watercolors. Next, stamp images from the Bunnyville stamp, colour them using copic markers and die-cut using the coordinating dies.

Sunny Studio Stamps: Bunnyville Card by Isha Gupta (featuring Slimline Dies)

Adhere the images to the mat layer to create a fun scene. Next, I die-cut the word HELLO twice from the white card using the Slimline Scalloped Frame die. Colour one with copics in blue ombre and second in orange ombre. Adhere the orange behind the blue in slight off-set. Adhere to the card. To finish, add Nuvo crystal glaze to the word.

Thank you for dropping by. Have a nice day!

------------------------------------------------

Hi folks, Kavya here. I am back on the blog with another fun project. With Easter around the corner, I thought I’d create a card by combining a bunch of older and newer releases.

Sunny Studio Stamps: Bunnyville Card by Kavya (featuring Chubby Bunny, Chickie Baby, Little Birdie)

I first started off by stamping and coloring a bunch of images from BunnyvilleLittle BirdieChubby Bunny and Chicky Baby stamps. Then I created my background by ink blending Speckled Egg and Dusty Concord distress oxide inks and used green cardstock for the grass. 

Sunny Studio Stamps: Bunnyville Card by Kavya (featuring Chubby Bunny, Chickie Baby, Little Birdie)

Finally, I arranged all the elements on the background to finish my card! 

I hope this inspires you to pull out your older sets ;) Happy Crafting!

Sunny Studio Supplies Used: 

Chubby Bunny Stamps
Chubby Bunny Stamps
Shop at:
Sunny Studio
Chubby Bunny Dies
Chubby Bunny Dies
Shop at:
Sunny Studio
Chickie Baby Stamps
Chickie Baby Stamps
Shop at:
Sunny Studio
Chickie Baby Dies
Chickie Baby Dies
Shop at:
Sunny Studio
Slimline Scalloped Frame
Shop at:
Sunny Studio
Bunnyville Stamps
Bunnyville Stamps
Shop at:
Sunny Studio
Bunnyville Dies
Bunnyville Dies
Shop at:
Sunny Studio
Little Birdie Stamps
Shop at:
Sunny Studio
Little Birdie Dies
Little Birdie Dies
Shop at:
Sunny Studio