Showing posts with label Big Bold Greetings. Show all posts

Friday, June 23, 2023

Everything's Rosy Card with Tina

Hello crafty friends, it’s Tina and today we are talking about lots of layering! First up I am creating gorgeous flowers with the layering stamp and die set Everything’s Rosy! The detail in these stamps is just amazing and you end up with such great realistic roses.

Sunny Studio Stamps: Everything's Rosy Thank You Card by Tina Henkens (featuring Frilly Frame Dies, Big Bold Greetings, Spring Greenery Dies, Scalloped Circle Mat Dies)

As always with layering stamps I used a trick I learned from Jennifer McGuire using the dies and a stamping tool. You start by die cutting the basic shapes, in this case the two roses and the clustered leaves. I cut each shape several times. You put the negative pieces of cardstock inside the stamping tool, so you can just pop in the basic shapes.

Next, I removed all the stamps from the plastic sheet they come on. You place the first drawing (the 1a image) onto the cut basic shape for perfect placement. I secure the plastic in place with some low tack tape. Next, I place the coordinating stamp onto the drawing and line it up with the lines of the image. Then you just pick up the stamp with the door of your stamping tool and remove the plastic, you’ll get perfect stamping each time! Repeat the same process for each layer. I always stamp more images than I need, giving myself some room to play with the design.

Sunny Studio Stamps: Everything's Rosy Thank You Card by Tina Henkens (featuring Frilly Frame Dies, Big Bold Greetings, Spring Greenery Dies, Scalloped Circle Mat Dies)

I created a white A2 card base and covered it with a pretty teal paper from the Sweater Weather paper pad. This ties in nicely with the teal inks I used on the leaves. I cut a white panel with the Frilly Frames Stripes Die and layered it on top of the teal one. Next, I added a white circle using the largest of the Scalloped Circle Mats 3.

Now it was time to lay down my roses and leaves, so I could see how much room I had left for a sentiment. I fiddled a bit with the placement and once I was happy, I could adhere the arrangement with liquid glue and dimensional foam tapes. As a little bonus, I added some white and teal leaves cut with the Spring Greenery dies.

I stamped the beautiful scripty ‘Thank You’ from the Big Bold Greetings in Versafine Onyx Black ink and cut it with the matching die. A few Chrystal Clear Jewels were scattered around the sentiment.

I hope you will create beautiful bouquets with these gorgeous, layered roses! Thank you for joining me and happy crafting!

Sunny Studio Supplies Used:

Everything's Rosy Stamps
Shop at:
Sunny Studio
Everything's Rosy Dies
Shop at:
Sunny Studio
Frilly Frames Stripes Die
Shop at:
Sunny Studio
Scalloped Circle Mat 3 Dies
Shop at:
Sunny Studio
Sweater Weather Paper
Shop at:
Sunny Studio
Spring Greenery Dies
Shop at:
Sunny Studio
Big Bold Greetings Stamps
Shop at:
Sunny Studio
Big Bold Greetings Dies
Shop at:
Sunny Studio

Thursday, May 25, 2023

Perfect Gift Boxes Card with Marine

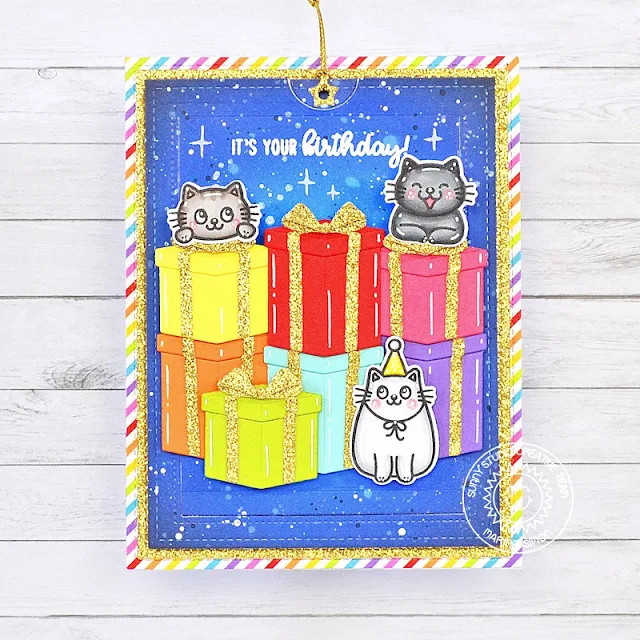
Hello crafty friends, Marine here! I'm back with a super bright and shiny interactive card showcasing the Perfect Gift Boxes die set, as well as three cute kitties from Birthday Cat. Love those little guys so much, I can't wait to feature them on more cards!

Sunny Studio Stamps: Perfect Gift Boxes Dies Focused Birthday Card by Marine Simon (featuring Big Bold Greetings, Birthday Cat, Sliding Window Dies)

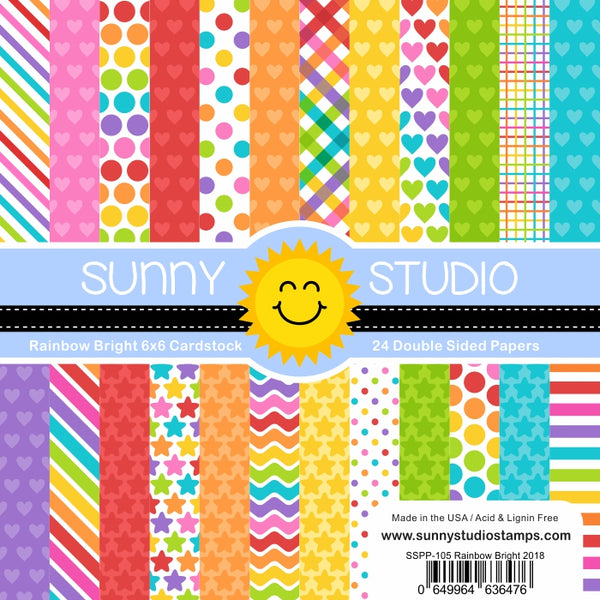
I started off by cutting a few panels: a 5,5 x 4,25 inches Rainbow Bright pattern paper, a slightly smaller gold glitter panel, and two even smaller Strathmore bristol smooth panels. I attached the gold glitter panel on the rainbow panel using double sided tape, and then worked on the two blank bristol panels. I colored them both using blue oxide inks: salty ocean + blueprint sketch + chipped sapphire, and added texture to both panels: chipped sapphire + water splatters, white ink + water splatters, and liquid stardust + water splatters. I set one aside and kept the other to create my interactive panel using the Sliding Window die set.

I white heat embossed my "It's your birthday" greeting from Party Pups on the interactive panel, added foam tape at the back all along the edges except for the top, and then attached it to the second blue panel using foam tape.

Sunny Studio Stamps: Perfect Gift Boxes Dies Focused Birthday Card by Marine Simon (featuring Big Bold Greetings, Birthday Cat, Sliding Window Dies)

Next I cut seven Perfect Gift Boxes out of different colored cardstock, I cut the ribbons and bows out of gold glitter cardstock, assembled everything using liquid glue, and then attached the boxes on my interactive panel using 1mm foam squares. And I was going to stop there, but I felt that my card needed something else, so I stamped three kitties from Birthday Cat on white cardstock using an alcohol marker friendly black ink, cut them using the coordinating dies, colored them using my Graph'It Brush markers, and then stuck them among the boxes using foam squares again.

Sunny Studio Stamps: Perfect Gift Boxes Dies Focused Birthday Card by Marine Simon (featuring Big Bold Greetings, Birthday Cat, Sliding Window Dies)

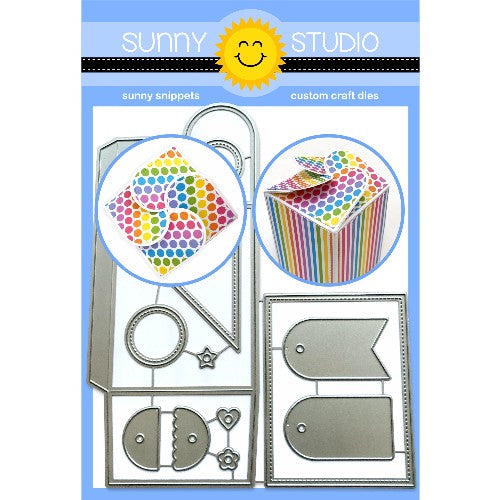
I also wanted to add a second sentiment behind the interactive panel. I gold heat embossed a "Make a Wish" greeting from Big Bold Greetings on white cardstock, cut it using the coordinating die, and stuck it behind the panel using foam squares. And next I added a few extra details: I cut a gold glitter star using a die from Wrap Around Box that I glued at the top of the panel, and added a golden thread handle to be able to pull the panel.

And that's it! I hope you like this new super cute birthday card! Thanks so much for stopping by, and see you next time!

Sunny Studio Supplies Used:

Party Pups Stamps
Party Pups Stamps
Shop at:
Sunny Studio
Rainbow Bright 6x6 Paper
Shop at:
Sunny Studio
Sliding Window Dies
Sliding Window Dies
Shop at:
Sunny Studio
Wrap Around Box Die
Wrap Around Box Die
Shop at:
Sunny Studio
Big Bold Greetings Stamps
Shop at:
Sunny Studio
Big Bold Greetings Dies
Shop at:
Sunny Studio
Birthday Cat Stamps
Birthday Cat Stamps
Shop at:
Sunny Studio
Birthday Cat Dies
Birthday Cat Dies
Shop at:
Sunny Studio
Perfect Gift Boxes Dies
Shop at:
Sunny Studio

Monday, May 15, 2023

A Cut Above Card with Bobbi

Hello friends. It’s Bobbi with one “cutting edge” card for you … literally! I’m using the new Cut Above stamps and diesThis stamp set includes a pencil, push pin, graph and lined papers, and sharp scissors! It’s the scissors that makes this card really “cutting edge!”.

Sunny Studio Stamps: A Cut Above Thank You Card by Bobbi Lemanski (featuring Big Bold Greetings)

I used Neenah 80lb white cardstock for the front panel and the A7 card base. All of the stamping and coloring was done on the front panel and then attached to the card base before I cut it on an angle for a fun opening. To cut this 5″ X 7″ card in almost half, I used the sharp, red scissors (well and my Fiskars cutter). I stamped the grid paper up the left side, matching the lines of the stamp design for a continuous pattern and colored in a number of random squares. I also stamped the lined paper up the middle of the card for a fun notebook look.

Sunny Studio Stamps: A Cut Above Thank You Card by Bobbi Lemanski (featuring Big Bold Greetings)

I stamped the push pin and pencils, stamping in layers to achieve the dimensional look. The sentiment was stamped on the top line and the pencils and push pin were glued to the front. I thought it would be fun to add some colorful dots/confetti to the front to fill in the white spaces, too. I used a hand paper punch to punch these out of coordinating cardstock.

Sunny Studio Stamps: A Cut Above Thank You Card by Bobbi Lemanski (featuring Big Bold Greetings)

Inside the card, I added a teal A7 piece of cardstock. I used a ruler and my white Gelly Roll pen to add the “cut lines” for a coordinated look. The top dotted line follows the actual front panel cut line. I also stamped, die cut and glued the “thank you” greeting using the Big Bold Greetings stamps and coordinating dies to the top left.

Thanks for stopping by today. If you want to see more ideas and inspiration from me, subscribe to my blog, BobbiHartDesign.com. I’ll send you updates on new posts! You can also find me on Instagram as @BobbiHartDesign and on Facebook as BobbiHartDesign.

Sunny Studio Supplies Used:

Big Bold Greetings Stamps
Shop at:
Sunny Studio
Big Bold Greetings Dies
Shop at:
Sunny Studio
A Cut Above Stamps
A Cut Above Stamps
Shop at:
Sunny Studio
A Cut Above Dies
A Cut Above Dies
Shop at:
Sunny Studio

Tuesday, May 2, 2023

Birthday Mouse Card with Isha

Hello everyone, Isha here with you! Today I have a fun and adorable card featuring the Birthday Mouse stamp and coordinating dies. This image is very cute so I went with a monochromatic CAS card to keep this image as my focal element.

Sunny Studio Stamps: Birthday Mouse Birthday Card by Isha Gupta (featuring Mini Mat & Tag Dies, Big Bold Greetings)

I started by sponging salvaged patina, salty ocean and blueprint sketch distress oxide inks to a white panel. Die-cut using the Mini Mat and Tag 4 dies. Flick some white paint. Adhere to a white cardbase.

Stamp the image from the Birthday Mouse stamp set, color and die-cut using the coordinating dies. Adhere to the panel using 3d foam. Add some sparkle to the balloons using the nuvo clear sparkle pen.

Sunny Studio Stamps: Birthday Mouse Birthday Card by Isha Gupta (featuring Mini Mat & Tag Dies, Big Bold Greetings)

Stamp the sentiment from the Big Bold Greetings stamp set. I kept the stamping in ombré color. Die-cut using the coordinating dies. Adhere to the card using 3d foam.

Thank you for dropping by and have a nice day!

Sunny Studio Supplies Used:

Mini Mat & Tag 4 Dies
Shop at:
Sunny Studio
Big Bold Greetings Stamps
Shop at:
Sunny Studio
Big Bold Greetings Dies
Shop at:
Sunny Studio
Birthday Mouse Stamps
Shop at:
Sunny Studio
Birthday Mouse Dies
Birthday Mouse Dies
Shop at:
Sunny Studio

Friday, April 28, 2023

Perfect Gift Boxes Card with Tina

Hello crafty friends, it’s Tina with a colorful birthday card featuring the beautiful Perfect Gift Boxes dies. I love that these packages have their matching ribbons and festive bows!

Sunny Studio Stamps: Perfect Gift Boxes Birthday Card by Tina Henkens (featuring Big Bold Greetings, Panda Party)

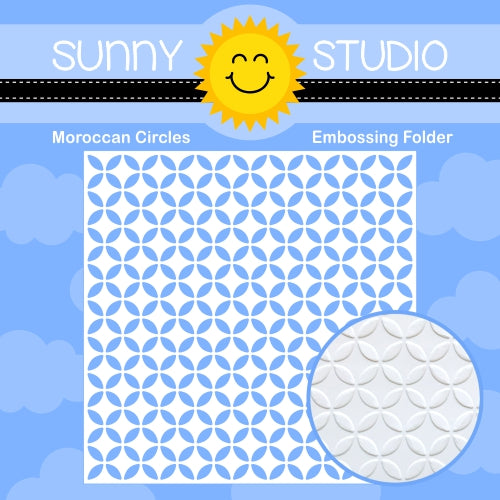
To create the illusion of dimension I started by dry embossing three panels of white Neenah cardstock using the Moroccan Circles, Lots Of Dots and Sunburst embossing folders. The last panel will be my background for this card. I used the other two to die cut 3 large and 3 smaller packages. Next, I also cut the bows from plain white paper.

All my coloring was done by ink blending the boxes and bows with distress oxides Kitsch Flamingo, Spiced Marmalade, Squeezed Lemonade, Twisted Citron, Salty Ocean and Dusty Concord. I used a blending brush to get a smooth coverage and added extra layers to get a two-toned look.

The lids and the ribbons were cut from matching glitter cardstocks from my stash. The sparkle gives these boxes an extra festive look. Being a big fan of cute critters, I stamped a sweet bear from Panda Party and colored him with my copic markers. I added a small white pompom from my stash to his cute party hat! Now, I could place my boxes and panda onto the Sunburst panel to decide my layout.

Sunny Studio Stamps: Perfect Gift Boxes Birthday Card by Tina Henkens (featuring Big Bold Greetings, Panda Party)

There was enough room at the top of the card for a sentiment from the Big Bold Greetings stamp and die set. To give the card an additional festive layer, I cut a rectangle border from a polka dot paper (Spring Fever pad) with two rectangle dies (from this Infinity set). I repeated this step twice from white cardstock for dimension.

I began to assemble the card by gluing the white sunburst panel to a card base, on the bottom of the panel I added a ‘white floor’ piece splattered with Salty Ocean oxide. Next, I adhered the border and arranged all the gift boxes, with the panda playing peek-a-boo! Lastly, I added the sentiment and a few embellishments from the Pastel Mix, Bright Mix and Iridescent Clear jewels.

I hope you will enjoy creating with these fun Perfect Gift Boxes dies! Thank you for joining me and happy crafting!

Sunny Studio Supplies Used:

Sunburst Embossing
Sunburst Embossing
Shop at:
Sunny Studio
Lots of Dots Embossing
Shop at:
Sunny Studio
Moroccan Circles Embossing
Shop at:
Sunny Studio
Big Bold Greetings Stamps
Shop at:
Sunny Studio
Big Bold Greetings Dies
Shop at:
Sunny Studio
Panda Party Stamps
Panda Party Stamps
Shop at:
Sunny Studio
Panda Party Dies
Panda Party Dies
Shop at:
Sunny Studio
Spring Fever Paper
Spring Fever Paper
Shop at:
Sunny Studio
Perfect Gift Boxes Dies
Shop at:
Sunny Studio

Tuesday, April 25, 2023

Notebook Die Focused Card with Isha

Hello everyone! Isha here today with a cute card featuring the new Notebook dies. You must have seen all the gorgeous inspiration by Mendi featuring the new release.

Sunny Studio Stamps: Notebook Die Focused Birthday Card by Isha Gupta (featuring Big Bold Greetings, Purrfect Birthday)

I started by creating the background by inking the gelli plate with distress oxide inks, and took the print onto a white card. Stamp the images from the Purrfect Birthday stamps to create a background. Adhere this panel to the card base.

Die-cut the notebook panel from the Notebook Photo Corners die from pink card and vellum, tear them from bottom. Adhere the vellum to the pink die-cut using 3d foam. Adhere to the card. Stamp the word "Happy Birthday" from the Big Bold Greetings onto black card using versamark ink, sprinkle WOW! opaque white embossing powder and heat set. Die-cut using the coordinating dies

Sunny Studio Stamps: Notebook Die Focused Birthday Card by Isha Gupta (featuring Big Bold Greetings, Purrfect Birthday)

Die-cut the tab using the Notebook Tabs dies. Sponge a bit of color to the edges. Stamp the sentiment from the Critters On The Go stamp set. Adhere to the card.

Thanks for stopping by and have a nice day!

Sunny Studio Supplies Used:

Purrfect Birthday Stamps
Shop at:
Sunny Studio
Purrfect Birthday Dies
Shop at:
Sunny Studio
Critters on the Go Stamps
Shop at:
Sunny Studio
Big Bold Greetings Stamps
Shop at:
Sunny Studio
Big Bold Greetings Dies
Shop at:
Sunny Studio
Notebook Photo Corners Dies
Shop at:
Sunny Studio
Notebook Tabs Dies
Notebook Tabs Dies
Shop at:
Sunny Studio

Friday, April 14, 2023

Spring Fever Paper Focused Cards with Tina and Vanessa

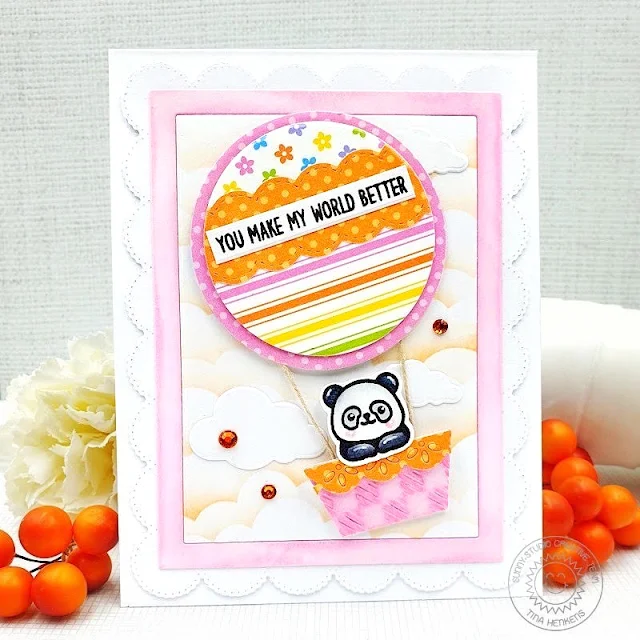
Hello crafty friends, Tina here with a card featuring the beautiful papers from the Spring Fever pack. I have used these papers a lot in my previous cards because I really love the bright and happy colors! Today we are making our own balloon from a selection of these sheets.

Sunny Studio Stamps: Spring Fever Patterned Paper Focused Card by Tina (featuring Panda Party, Words Of Gratitude)

The top layer consists of three pieces cut with the Ribbon & Lace Borders dies. After gluing these to a piece of copy paper, I cut a circle using one of the Nested circles. Next, I created a slightly bigger circle from a pink dotted paper and adhered them together with foam tape.

The Buffalo Plaid embossing folder provided the perfect texture for the basket (I just drew a simple shape and cut it with my scissors), inking it with distress oxide Picked Raspberry. I added an orange embellishment strip to the top of the basket (Ribbon & Lace Borders dies). Of course the balloon needed a sweet passenger, like this cutie from Panda Party!

As a background, I blended a soft orange ink from my stash over a cloud stencil. I also cut a pink frame (Nested rectangle dies) and a white panel with the Frilly Frames Eyelet Lace die.

Sunny Studio Stamps: Spring Fever Patterned Paper Focused Card by Tina (featuring Panda Party, Words Of Gratitude)

The sentiment was selected from the Words Of Gratitude set and stamped onto a small white strip with Versafine Onyx Black ink. Three little white clouds were added as extra dimension to the scene.

After assembling the background panels to a white card base, I connected the balloon and the basket with two pieces of twine. Lastly, I put the little panda in the basket so he could take off on his wonderful journey through the sky! A few orange jewels from the Bright Jewels Mix completed this scene card.

I hope you got inspired to create your own cards with these beautiful papers! Thank you for visiting the blog and happy crafting!

---------------------------------------------------

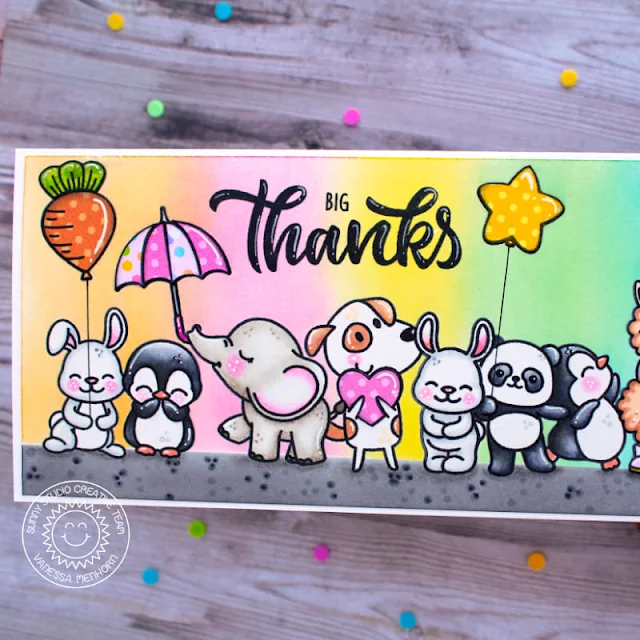
Hello to you! Vanessa here with a slimline card using the Spring Fever paper. Today's card is my last one as a design team member for Sunny Studio Stamps and I wanted to create something special to say thanks for the wonderful time. So I used as many of the cute images as possible. 

Sunny Studio Stamps: Spring Fever Patterned Paper Focused Card by Vanessa Menhorn (featuring Panda Party, Bunnyville, Floating By, Big Bold Greetings)

I started with a panel of white cardstock and stamped the images from Panda PartyPassionate Penguins, Alpaca HolidayBunnyvillePuppy Love, Floating By, and Baby Elephants, always masking the images before stamping the next. Then I masked off the bottom, inked the background with various Distress Oxide inks, inked the bottom with black ink and removed all masks.

Sunny Studio Stamps: Spring Fever Patterned Paper Focused Card by Vanessa Menhorn (featuring Panda Party, Bunnyville, Floating By, Big Bold Greetings)

Now I colored the images with Copics and paper-pieced the balloons, the umbrella, the heart and the accessories of the alpaca with the Spring Fever patterned paper. After I had stamped the "big Thanks", combining Big Bold Greetings and Words of Gratitude, I added highlights with a white gel pen and adhered the panel to the card.

Sunny Studio Stamps: Spring Fever Patterned Paper Focused Card by Vanessa Menhorn (featuring Panda Party, Bunnyville, Floating By, Big Bold Greetings)

I hope you like my good-bye card. Thank you so much for stopping by and have a lovely weekend. It's been an honor!

Sunny Studio Supplies Used:

Words of Gratitude Stamps
Shop at:
Sunny Studio
Alpaca Holiday Stamps
Shop at:
Sunny Studio
Buffalo Plaid Embossing
Shop at:
Sunny Studio
Floating By Stamps
Floating By Stamps
Shop at:
Sunny Studio
Frilly Frames-Eyelet Lace
Shop at:
Sunny Studio
Bunnyville Stamps
Bunnyville Stamps
Shop at:
Sunny Studio
Passionate Penguins Stamps
Shop at:
Sunny Studio
Baby Elephants Stamps
Shop at:
Sunny Studio
Big Bold Greetings Stamps
Shop at:
Sunny Studio
Panda Party Stamps
Panda Party Stamps
Shop at:
Sunny Studio
Panda Party Dies
Panda Party Dies
Shop at:
Sunny Studio
Puppy Love Stamps
Puppy Love Stamps
Shop at:
Sunny Studio
Ribbon & Lace Dies
Ribbon & Lace Dies
Shop at:
Sunny Studio
Spring Fever Paper
Spring Fever Paper
Shop at:
Sunny Studio