Showing posts with label Big Bold Greetings. Show all posts

Thursday, April 13, 2023

Ribbon & Lace Border Die Focused Cards with Waleska and Marine

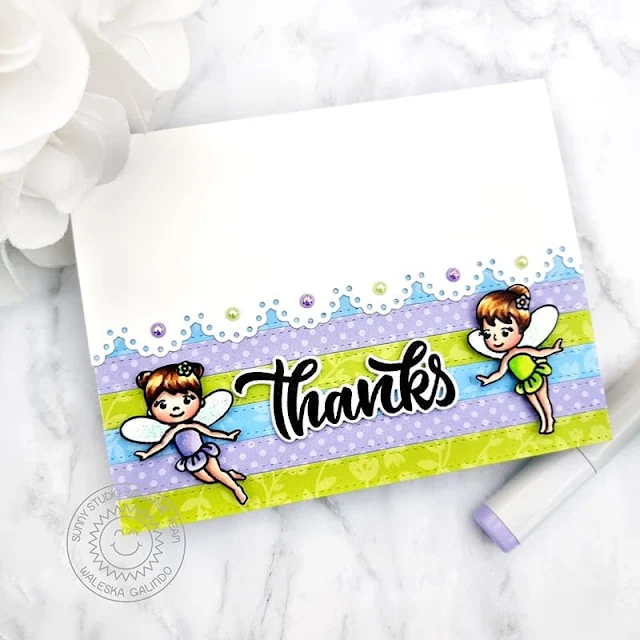
Hello Friends, Waleska here. With this card I wanted to thank each of you that read my blog posts and are very kind to me on social media when I share my Sunny Studio Stamps cards.  My card today features the Ribbon and Lace Border dies and the Garden Fairy Stamps.


Sunny Studio Stamps: Ribbon & Lace Border Die Focused Card by Waleska Galindo (featuring Garden Fairy)

To create this card I started with the color palette I wanted something soft and spring and the Spring Fever paper has some beautiful prints and colors. I then cut some stripes with the Ribbon and Lace Border dies. I cut an A2 size card base and used one of the scalloped borders to create a beautiful border on the front, I then used the different color stripes to create a design on the front of this panel.


Sunny Studio Stamps: Ribbon & Lace Border Die Focused Card by Waleska Galindo (featuring Garden Fairy)

I stamped two of the cute fairies from the Garden Fairy Stamps and colored them with copic markers matching the colors of the paper I already used. I also stamped the word Thanks from the Big Bold Greetings stamps with Versafine Ink. I adhere the fairies and word on the front of the panel and to finish my card I added some gems to the scalloped border. Again thank you so much for stopping by today! Remember to stay safe and crafty!

---------------------------------------

Hello crafty friends, Marine here with you today, back with this Cinderella inspired card. I've had this idea in mind for weeks, so I'm super happy to finally share this card with you. As very often I wanted to feature a bunch of images on my card, so once again I went for a slimline design, but used two Ribbon & Lace Borders to add an extra something else to the very bottom of my card.

Sunny Studio Stamps: Ribbon & Lace Border Die Focused Card by Marine Simon (featuring Enchanted)

So, I started off by cutting an 8,5 x 3,5 inches Strathmore bristol smooth panel, and I used the straight die from Ribbon & Lace Borders to cut an inch out of the bottom of this panel. Next I colored my panel using stencils and oxide inks: mowed lawn + rustic wilderness for the hills, and wilted violet + blueprint sketch + black soot for the night sky.

Sunny Studio Stamps: Ribbon & Lace Border Die Focused Card by Marine Simon (featuring Enchanted)

I stamped my images on Transotype perfect coloring paper using an alcohol marker friendly black ink, cut them all using the coordinating dies, and used my alcohol markers to color everything. Here are the stamps I picked:

the castle, the coach, and a princess from Enchanted
two mice & the pumpkins from Harvest Mice
the tiny hat from Christmas Critters
the flowers from Chubby Bunny + from Chickie Baby
the trees from Spring Scenes
the grass from Garden Critters

Sunny Studio Stamps: Ribbon & Lace Border Die Focused Card by Marine Simon (featuring Enchanted)

Once all the images were colored, I attached them all on my panel using foam squares, and next I worked on the final details. I used another die from Ribbon & Lace borders to cut a scalloped border out of some purple glitter cardstock. I embossed my "Hoping your day is magical" greeting from Garden Fairy in silver on a piece of pink dotted paper from Spring Fever, and I attached those different pieces on a purple card base. And as always I finished my card by adding highlights and details on the images using a white gel pen.

Sunny Studio Stamps: Ribbon & Lace Border Die Focused Card by Marine Simon (featuring Enchanted)

And that's it! I really love how it turned out, with all the pumpkins, the coach, and the mice... I hope you like it too! As always, feel welcome to check the process video for more details! Thank you so much for stopping by, and see you next time!

Sunny Studio Supplies Used:

Christmas Critters Stamps
Shop at:
Sunny Studio
Christmas Critters DIes
Shop at:
Sunny Studio
Chubby Bunny Stamps
Chubby Bunny Stamps
Shop at:
Sunny Studio
Chubby Bunny Dies
Chubby Bunny Dies
Shop at:
Sunny Studio
Chickie Baby Stamps
Chickie Baby Stamps
Shop at:
Sunny Studio
Chickie Baby Dies
Chickie Baby Dies
Shop at:
Sunny Studio
Enchanted Stamps
Enchanted Stamps
Shop at:
Sunny Studio
Enchanted Dies
Enchanted Dies
Shop at:
Sunny Studio
Spring Scenes Stamps
Shop at:
Sunny Studio
Spring Scenes Dies
Spring Scenes Dies
Shop at:
Sunny Studio
Harvest Mice Stamps
Harvest Mice Stamps
Shop at:
Sunny Studio
Harvest Mice Dies
Harvest Mice Dies
Shop at:
Sunny Studio
Garden Fairy Stamps
Garden Fairy Stamps
Shop at:
Sunny Studio
Garden Fairy Dies
Garden Fairy Dies
Shop at:
Sunny Studio
Big Bold Greetings Stamps
Shop at:
Sunny Studio
Garden Critters Stamps
Shop at:
Sunny Studio
Garden Critters Dies
Shop at:
Sunny Studio
Ribbon & Lace Dies
Ribbon & Lace Dies
Shop at:
Sunny Studio
Spring Fever Paper
Spring Fever Paper
Shop at:
Sunny Studio

Wednesday, April 12, 2023

Spring Bouquet Cards with Catherine and Marie

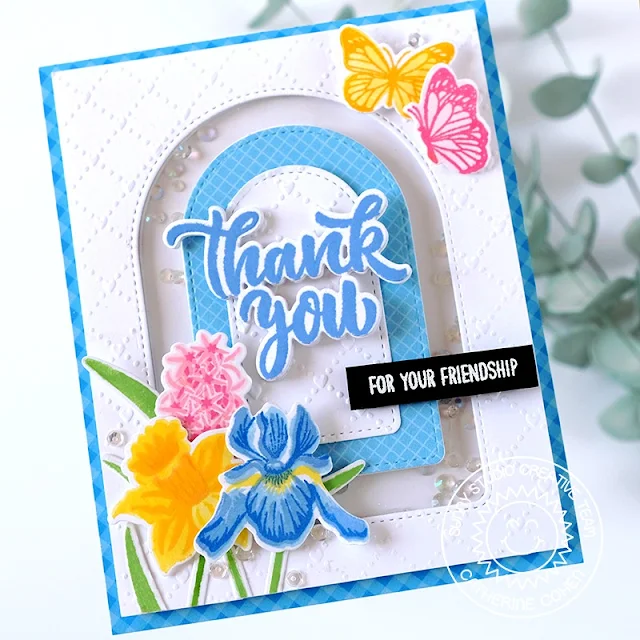
Hello Crafty Friends! Catherine here, and today I am sharing a friendship shaker card created with the pretty Spring Bouquet Stamps and Stitched Arch Dies.

Sunny Studio Stamps: Spring Bouquet Thank You Card by Catherine Cohen (featuring Stitched Arch Dies, Big Bold Greetings)

To start, I embossed A2 white cardstock with Quilted Hearts Embossing Folder. To make the opening, I die cut the embossed panel with the largest arch in Stitched Arch Dies. I then die cut a small arch using the leftover large arch. I then die cut a medium size arch with paper from Gingham Pastels Paper. I adhered the small white arch onto the medium arch and set it aside.

To make the shaker, I flipped my embossed panel over and adhered A2 acetate onto the back. Next, I die cut the large arch using a double-sided foam sheet. I then die cut the medium sized arch with double sided foam sheet. I removed the backing on the foam sheet and adhered the foam arches onto the back of the panel. I nested the medium arch inside the large arch and taped it together with craft tape. I placed the arches onto  A2 white cardstock, and added some Iridescent Clear Jewels inside the space between the two arches. I removed the arches and placed the embossed panel onto the background. I adhered the medium and small arches onto the center.

Sunny Studio Stamps: Spring Bouquet Thank You Card by Catherine Cohen (featuring Stitched Arch Dies, Big Bold Greetings)

Using white cardstock, I die cut the flowers from Spring Bouquet and the butterflies from Watering Can with the coordinating dies. I placed the negative die cut cardstock onto my Misti stamping tool, placed the images back inside the negative space, and inked the images with the following Altenew Inks:

Pinks:  Frosty Pink, Cotton Candy, Coral Berry
Yellows: Citrus Burst, Fresh Lemon, Sunkissed
Blues: Iceberg, Ultramarine, Sapphire
Green: Firefly, Grass Field

I adhered the images onto the card front. I added a “Thank You” sentiment from Big Bold Greetings inked with Altenew Persian Blue Dye Ink. I added a White Heat Embossed sentiment from Words of Gratitude and a few sequins from Majestic Fusion Sequins. I wanted to balance the blue arch in the center of the card so I added a border using Gingham Pastels Paper.

Thank you so much for joining me today! Have a wonderful week!

-----------------------------------------------

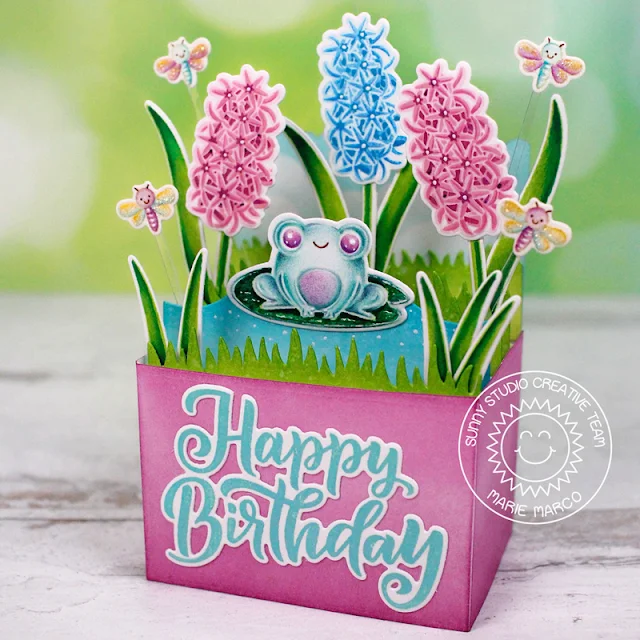
Hello Crafty friends, Marie here! Today I’m back on the blog and excited to share my latest card creation featuring the beautiful hyacinth flower from the lovely layering Spring Bouquet Stamps alongside the adorable Feeling Froggy Stamp. I love hyacinths and I love frogs and the two combined just makes me smile! 

Sunny Studio Stamps: Spring Bouquet Birthday Card by Marie Marco (featuring Feeling Froggy, Big Bold Greetings)

This springtime birthday box card was crafted using Lawn Fawn’s Scalloped Box Card Pop-Up die. I die cut all the box card components from Bristol smooth cardstock paper for the smoothest ink blending experience. I ink blended the outside of the box in Seedless Preserves distress Ink, and used a cloud stencil to ink blend the back panel with Salvaged Patina Distress Oxide ink. For the grass panels, I used a combination of Twisted Citron and Mowed Lawn Distress Ink and for the water panel, I used Salvaged Patina with Mermaid Lagoon Distress Oxide. 

After assembling my box card and cutting off the front and side flaps, I stamped out the hyacinth flowers onto 110 lb. Neenah Solar White Cardstock. When stamping each layer of the flower, I used a sponge dabber to lightly add ink to my stamp instead of directly applying the stamp into the ink pad. I do this technique so that each stamped layer is even and not too saturated. I also give each layer time to dry before stamping the next layer. For my blue hyacinth, I used a combination of Tumbled Glass Distress Oxide, followed by Salty Ocean Distress Oxide, and Mermaid Lagoon Distress Oxide. For the purple hyacinths, I used Spun Sugar Distress ink, Cotton Candy Dye Ink from MftStamps, and finally Seedless Preserves Distress Oxide. I stamped out all the leaves and stems with Twisted Citron Distress ink, and shaded them used Copics In Forest Green (G17), Emerald Green (G05) and Yellow Green (YG03). 

Sunny Studio Stamps: Spring Bouquet Birthday Card by Marie Marco (featuring Feeling Froggy, Big Bold Greetings)

Next, I stamped the adorable frog onto Bristol Smooth Cardstock with InkOn3 Fadeout ink, and colored him with PolyChromos Color Pencils, and copics for the lilly pad ( G17, G05, and BG09). For the tiny dragonfly images, I stamped them onto watercolor paper using Antique Linen Distress Ink and colored them with watercolor pencils. To make their dainty little wings pop, I added some Stickles Glitter Glue in the shade Diamond. I then cut out all my flowers and stems with the corresponding Spring Bouquet Dies. I used the Feeling Froggy Dies to cut all the little dragon flies and froggy. I then adhered all my images to my scene with a combination of double sided tape adhesive and Bearly Art Precision Craft Glue. To make all the little dragonflies look like they're flying, I cut super thin strips of thick acetate and attached them to the tip. 

Sunny Studio Stamps: Spring Bouquet Birthday Card by Marie Marco (featuring Feeling Froggy, Big Bold Greetings)

Finally, I stamped out a Happy Birthday sentiment with my favorite Big Bold Greetings Stamps. I used the color Salvaged Patina Distress Oxide to stamp my sentiment and cut it out using the corresponding Big Bold Greetings Dies. I absolutely love how this box card came together!! It's absolutely perfect for a spring or summer Birthday, and luckily for me, I have many Summer birthdays ahead! Thank you for joining me today, friends !!! Until next time, stay crafty and happy cardmaking!!! 

Sunny Studio Supplies Used:

Words of Gratitude Stamps
Shop at:
Sunny Studio
Gingham Pastels 6x6 Paper
Shop at:
Sunny Studio
Quilted Hearts Embossing
Shop at:
Sunny Studio
Stitched Arch Dies
Stitched Arch Dies
Shop at:
Sunny Studio
Feeling Froggy Stamps
Shop at:
Sunny Studio
Feeling Froggy Dies
Feeling Froggy Dies
Shop at:
Sunny Studio
Watering Can Stamps
Watering Can Stamps
Shop at:
Sunny Studio
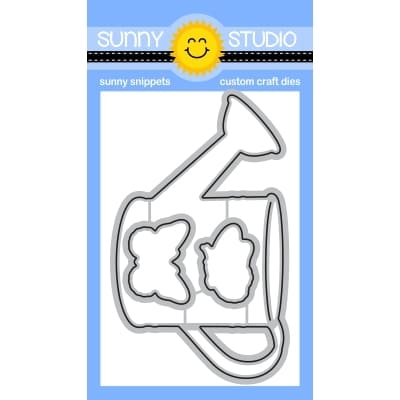
Watering Can Dies
Watering Can Dies
Shop at:
Sunny Studio
Big Bold Greetings Stamps
Shop at:
Sunny Studio
Big Bold Greetings Dies
Shop at:
Sunny Studio
Spring Bouquet Stamps
Shop at:
Sunny Studio
Spring Bouquet Dies
Spring Bouquet Dies
Shop at:
Sunny Studio

Tuesday, April 11, 2023

Build-A-Birdhouse Cards with Lien and Isha

Hi crafty friends! It's Lien here, with a great way to add some forced perspective on a card using different-sized images.

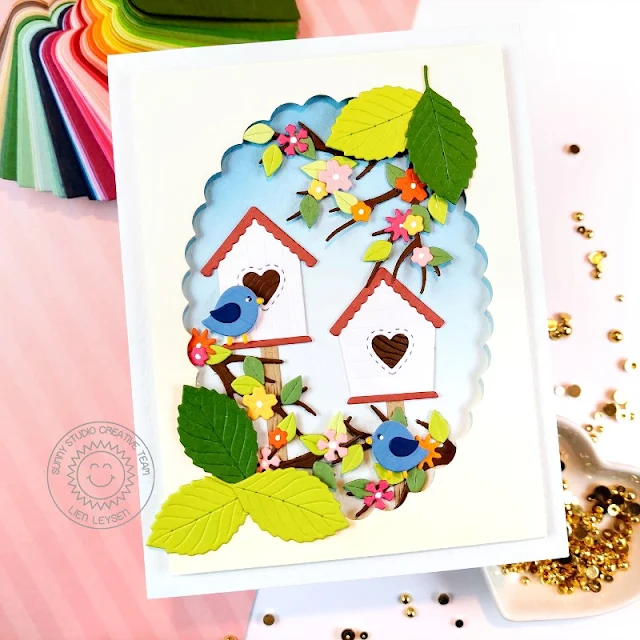
Sunny Studio Stamps Blog: Build-A-Birdhouse Metal Cutting Dies Scalloped Oval Spring Birds & Tree Branch Card by Lien Leysen

To get the most out of this forced perspective effect, I started out by creating a little window or frame for my scene. I die-cut one of the Scalloped Oval Mat 1 Dies from the center of some cream cardstock. This is cut slightly smaller than an A2 card so I'd have a nice margin all around in the end. My background is made from a very pale blue cardstock and I added a little bit of ink blending at the top to darken it up and add some more depth.
 
I propped my frame piece up on foam tape and then assembled two birdhouses from the fun Build-A-Birdhouse dies and also put the two birds together, setting those aside for later. I adhered to the birdhouses in the frame. I also cut the Autumn Tree die from brown cardstock, I'm just going to use the branches and some of the small leaves, tucking the branches underneath the frame. Using a jewel picker it's easy to add all the small leaves and to add more color I also added some tiny flowers on the branches. These flower dies are included in the Wonderful Windows dies

Sunny Studio Stamps Blog: Build-A-Birdhouse Metal Cutting Dies Scalloped Oval Spring Birds & Tree Branch Card by Lien Leysen
 
Because the birdhouses and the branches are quite small, the scene looks to be pretty far away. However, there's no real perspective on a card like this, in the end, these could just be small elements on a card. To force the perspective, to make the things inside the window look small and far away, add something outside of the window that is noticeably larger. A great element to do that with on this card would be some flowers or leaves. I opted for the leaves, using the Autumn Greenery dies to create some larger leaves for the outside of the window.

--------------------------------------------

Hello everyone! Isha here today with an adorable thanks card featuring the Build-A-Birdhouse dies. Past few weeks I have been using pastel colors on my cards and as you know me I love colors, so for this card, I went with some bold colors.

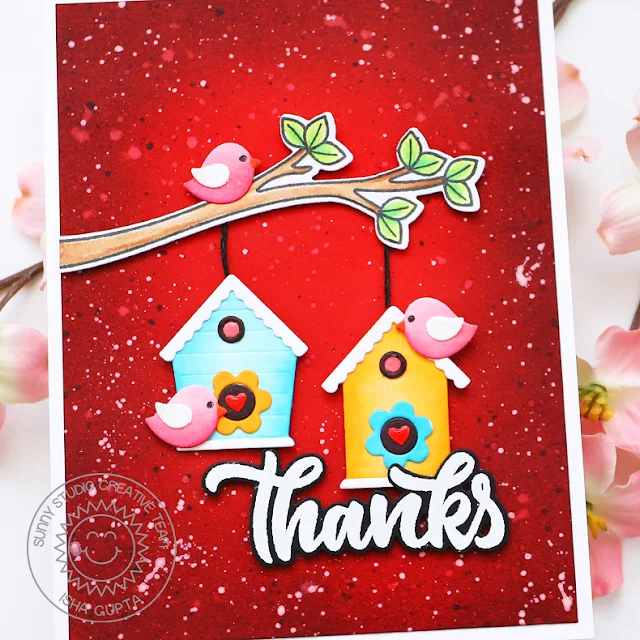
Sunny Studio Stamps: Build-A-Birdhouse Thank You Card by Isha Gupta (featuring Little Birdie, Big Bold Greetings)

I started by creating the background using various colors of Distress inks. Sponged them by keeping the darker colors to the edges. Flick, black and white paint to the panel. Adhere the panel to a white card base. Stamp the tree branch from the Little Birdie stamp set, color, and die-cut using the coordinating dies.

Sunny Studio Stamps: Build-A-Birdhouse Thank You Card by Isha Gupta (featuring Little Birdie, Big Bold Greetings)

Die-cut the images from white cardstock using the Build-A-Birdhouse dies. Color the images using Copic markers. Adhere to various layers to finish the images. Adhere all the images to the card. Stamp the word thanks from the Big Bold Greetings stamp set onto a black card using Versamark ink. Sprinkle WOW! opaque white embossing powder. Heat set. Die-cut using the coordinating dies. Adhere the word to the card. 

Add Nuvo crystal glaze to some of the elements and the card is ready. Thank you for dropping by!

Sunny Studio Supplies Used:

Scalloped Oval Mat 1 Dies
Shop at:
Sunny Studio
Little Birdie Stamps
Shop at:
Sunny Studio
Little Birdie Dies
Little Birdie Dies
Shop at:
Sunny Studio
Autumn Greenery Dies
Shop at:
Sunny Studio
Autumn Tree Die
Autumn Tree Die
Shop at:
Sunny Studio
Big Bold Greetings Stamps
Shop at:
Sunny Studio
Big Bold Greetings Dies
Shop at:
Sunny Studio
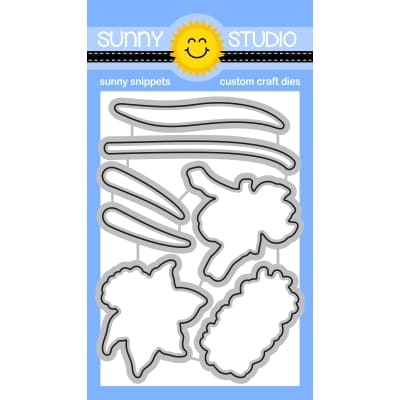
Build-A-Birdhouse Dies
Shop at:
Sunny Studio
Wonderful Windows Dies
Shop at:
Sunny Studio

Monday, April 10, 2023

Big Bold Greetings Cards with Cathy and Bobbi

Hey friends! Cathy here today sharing a sweet little panda in his stylish home who would love some company!

Sunny Studio Stamps: Big Bold Greetings Everyday Card by Cathy Chapdelaine (featuring Panda Party, Wonderful Windows, Cozy Christmas)

I had a lot of fun creating this living room for my panda. I started with the wall and floor of the scene. First, I die-cut of piece of paper from the Subtle Grey Tones Paper using the second largest Stitched Rectangle Die. For the floor, I embossed a piece of light gray cardstock using the Woodgrain Embossing Folder and die-cut the piece twice using the ribbon die from the Ribbon & Lace Border Dies. I cut the ribbon pieces into "planks" and adhered 2 rows to the bottom of the die-cut paper piece. I then trimmed the excess from the right and left edges.

Next, I matted the paper piece on black cardstock and matted it again on green cardstock that I die-cut using the largest Stitched Rectangle Die. I adhered these combined pieces to the center of an A2 card front.

For the window, I die-cut the smaller window from the Wonderful Windows Dies from black cardstock. I traced around the outside of the die-cut window with a pencil on white cardstock, cut it out with scissors and inked a light blue sky with Tumbled Glass Distress ink. I die-cut the Autumn Tree Die from white cardstock, colored the branches with Copics and adhered portions of the branches to the right side of the sky piece. I trimmed off the excess along the right edge. I then die-cut leaves and flowers from the Wonderful Windows Dies from white cardstock, colored the flowers with Copics and inked the leaves with Twisted Citron Distress ink. After adhering them to the branches, I adhered the black window frame to the sky piece and adhered the window 2" from the bottom of the card and 1" from the right side.

Sunny Studio Stamps: Big Bold Greetings Everyday Card by Cathy Chapdelaine (featuring Panda Party, Wonderful Windows, Cozy Christmas)

Next, I stamped the panda from the Panda Party Stamps and the pillows/sofa from the Cozy Christmas Stamps on Neenah Classic Crest 80lb solar white cardstock, colored them with Copics and fussy cut them out. I decided the little panda needed a houseplant so I die-cut a small tag topper from the Stitched Arch Dies from white cardstock and colored it with Copics to resemble a basket planter. For a tall plant, I inked white cardstock with Rustic Wilderness Distress ink and die-cut a small fern leaf from the Spring Greenery Dies.

To finish, I stamped the "Miss You" sentiment from the Big Bold Greetings Stamps in Versamark ink on black cardstock, heat embossed it with white embossing powder and die-cut it using the coordinating dies. To add a little more color, I die-cut the coordinating "Miss You" die from light blue cardstock and layered the sentiment slightly overlapping it.

I hope you enjoyed and thanks for stopping by! For more inspiration, please visit my blog www.inkredibleadventures.com and you can also find me on Instagram as @cathy.chapdelaine.

--------------------------------------------------

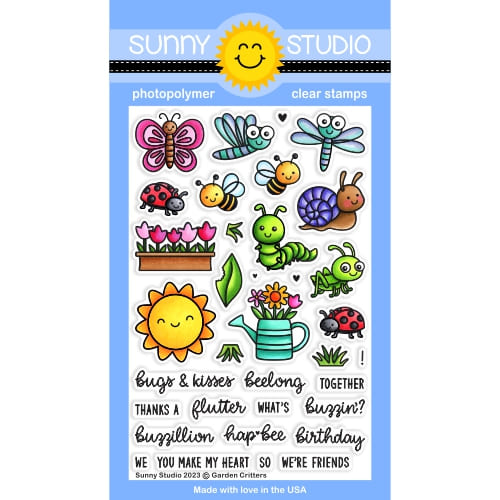
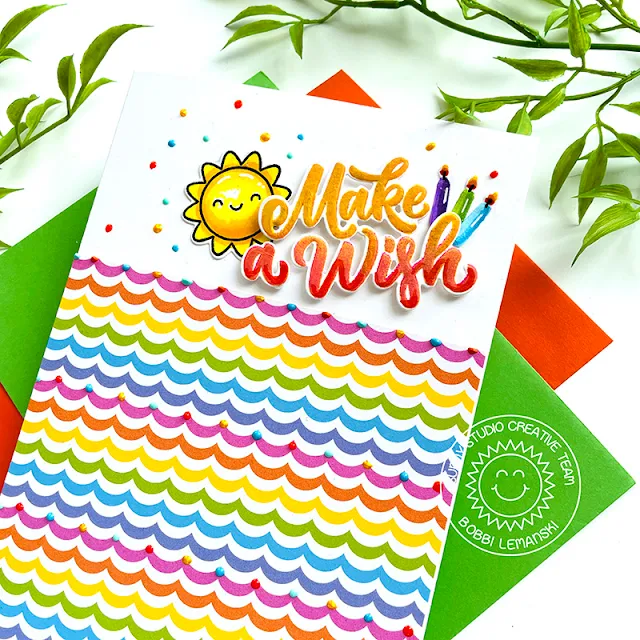
Hi friends! It’s Bobbi here with a BIG and BOLD greeting card! I am using the Big Bold Greeting stamps and coordinating dies for this vibrant birthday card. This is such a quick and easy card to make and is age-appropriate for anyone. I am using a fun paper from the Spring Fever paper pack that just makes the card happy and that cute sun is from the Garden Critters stamp set and coordinating dies.

Sunny Studio Stamps: Big Bold Greetings Everyday Card by Bobbi Lemanski (featuring Spring Fever patterned paper, Garden Critters)

I stamped the “Make a Wish” phrase using three ink colors, stamping one color at a time. I used a Memento ink in yellow, orange and pink. I cut out the phrase using the matching die. I also cut three candles from the same set and colored them using Copic Sketch markers in B05, B02, V09, V04, YG17 and YG03. The flames were done in R17, YR07, and YR19. I drew the wick with a fine-tip black marker. I also stamped the sun from the Garden Critters stamp set and cut it out using its coordinating die. I colored the sun using Copics in Y08, Y15, Y19 and Y38. I added white highlights to the sun and the candles using my Gelly Roll pen.

Sunny Studio Stamps: Big Bold Greetings Everyday Card by Bobbi Lemanski (featuring Spring Fever patterned paper, Garden Critters)

To make the background for this 5″ X 7″ card, I cut a 5″ wide X 4-1/2″ tall piece of patterned paper and attached it to the front of the card base. Next, I added dots of Pearl Pen in coordinating colors to the scallop joints at the top on each of the pink strands. These dots of color give the paper dimension and interest in a quick and easy way. Note: Pearl Pen is similar to Nuvo Drops. Either will work for this application. 

Sunny Studio Stamps: Big Bold Greetings Everyday Card by Bobbi Lemanski (featuring Spring Fever patterned paper, Garden Critters)

I attached the sentiment, the candles and the sun to the white space at the top of the card, offsetting the design to the right. I used foam tabs under the sentiment to make it stand out above everything else for emphasis. I also added accent dots around the collage for more festive fun. You can see from the photo above how much dimension this card has. It’s so cute and so easy to do! This card is ready to send.

Thanks for stopping by today. If you want to see more ideas and inspiration from me, subscribe to my blog, BobbiHartDesign.com. I’ll send you updates on new posts! You can also find me on Instagram as @BobbiHartDesign and on Facebook as BobbiHartDesign.


Sunny Studio Supplies Used:

Stitched Rectangle Dies
Shop at:
Sunny Studio

Subtle Grey Tones Paper
Shop at:
Sunny Studio
Woodgrain Embossing
Woodgrain Embossing
Shop at:
Sunny Studio
Stitched Arch Dies
Stitched Arch Dies
Shop at:
Sunny Studio
Spring Greenery Dies
Shop at:
Sunny Studio
Cozy Christmas Stamps
Shop at:
Sunny Studio
Cozy Christmas Dies
Cozy Christmas Dies
Shop at:
Sunny Studio
Big Bold Greetings Stamps
Shop at:
Sunny Studio
Big Bold Greetings Dies
Shop at:
Sunny Studio
Garden Critters Stamps
Shop at:
Sunny Studio
Garden Critters Dies
Shop at:
Sunny Studio
Panda Party Stamps
Panda Party Stamps
Shop at:
Sunny Studio
Panda Party Dies
Panda Party Dies
Shop at:
Sunny Studio
Ribbon & Lace Dies
Ribbon & Lace Dies
Shop at:
Sunny Studio
Wonderful Windows Dies
Shop at:
Sunny Studio
Spring Fever Paper
Spring Fever Paper
Shop at:
Sunny Studio