Saturday, October 21, 2023

Guest Designer Spotlight: Cards with Ashlee Bellinger

Hey, Sunny Studio friends my name is Ashlee and I'm here with a guest post using a bunch of awesome products from Sunny Studio Stamps to get you inspired. I had so much fun creating these cards, I hope you enjoy them too!

Sunny Studio Stamps: Holiday Hugs Holiday Cards by Ashlee Bellinger (featuring Crepe Paper Streamers Dies, Perfect Gift Boxes Dies, Mini Mat & Tag Dies, Dotted Diamond Dies)

For my first card, I used these products :

Dotted Diamond Portrait die

Holiday Hugs stamps plus coordinating dies

Crepe Paper Streamers die

Perfect Gift Boxes die

Mini Mat & Tag 2 die

To create this card I started with a grey card stock base. I then die cut the dotted diamond portrait die from a lighter grey card stock before adhering it to the base leaving a slight edging. I wanted this card to be perfect for a birthday celebration so I die-cut a bunch of the crepe paper streamers along with the extra little die pieces in blue so they could be multi-coloured streamers! 

Sunny Studio Stamps: Holiday Hugs Holiday Cards by Ashlee Bellinger (featuring Crepe Paper Streamers Dies, Perfect Gift Boxes Dies, Mini Mat & Tag Dies, Dotted Diamond Dies)

Using the mat from the mini mat and tag die 2 I die cut that from white card stock and adhered that to the base using foam tape to start adding dimension to the card. Once that was in place I was able to add my streamers. 

Sunny Studio Stamps: Holiday Hugs Holiday Cards by Ashlee Bellinger (featuring Crepe Paper Streamers Dies, Perfect Gift Boxes Dies, Mini Mat & Tag Dies, Dotted Diamond Dies)

I just adore the Perfect Gift Boxes die so I die-cut lots of pieces and created three presents which I wanted to pop out from behind the images. I stamped, coloured and die-cut the super sweet Holiday Hugs bear along with an extra present. These were all coloured using spectrum noir tri-blend markers with added white gel pen highlights. 

I adhered these all in place using different levels of foam tape which made it all pop! To complete the card I added a stamped sentiment that was mounted on pink card stock and a touch of pretty sequins for that little bit of bling. 

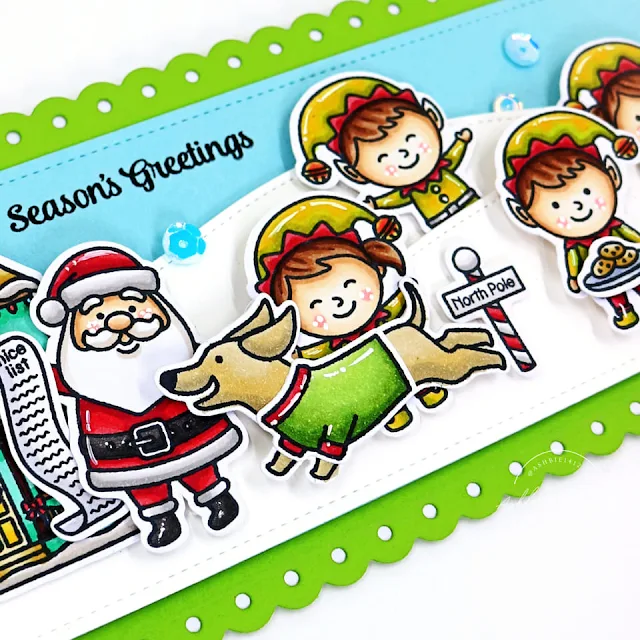
Sunny Studio Stamps: Dashing Dachshund Holiday Cards by Ashlee Bellinger (featuring North Pole, Slimline Dies, Victorian Christmas)

Onto my second card. For this one, I have a slimline card full of lots of Christmas fun.

I used these products for this card :

Dashing Dachshund stamps plus coordinating dies 

North Pole stamps plus coordinating dies

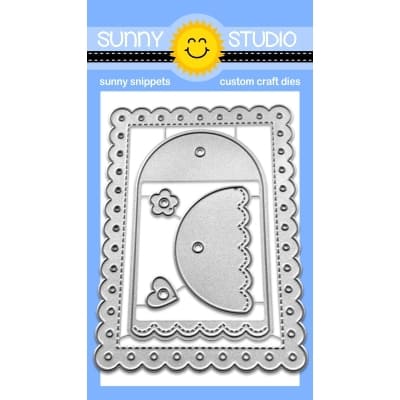
Slimline Scalloped Frame dies

Slimline Nature Borders dies

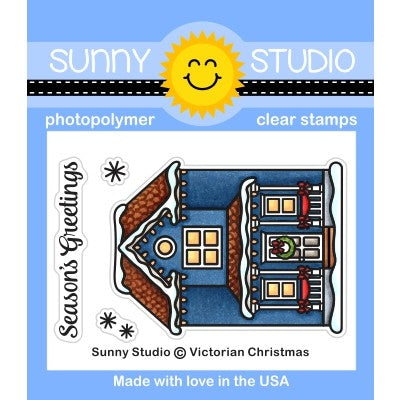
Victorian Christmas stamp

Sunny Studio Stamps: Dashing Dachshund Holiday Cards by Ashlee Bellinger (featuring North Pole, Slimline Dies, Victorian Christmas)

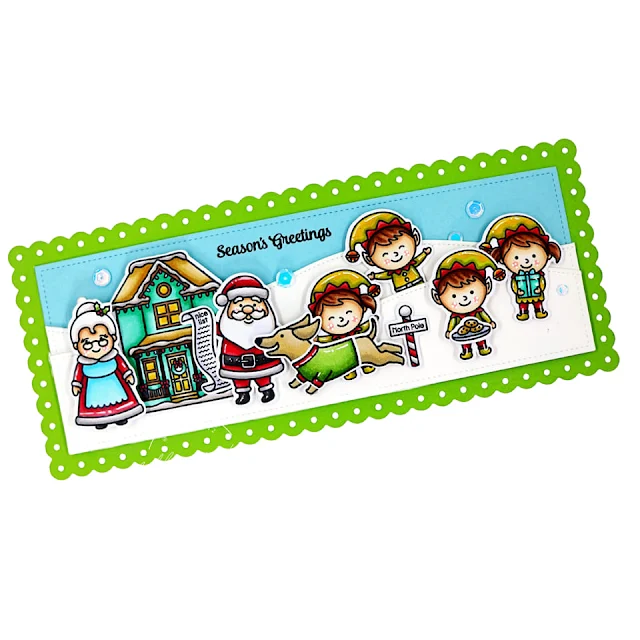
To create this card I started by die-cutting the largest die from the slimline scalloped frame set from green card stock. I then went ahead and die-cut the sky using the stitched rectangle die from the same set. I wanted to create some snow for the North Pole so I die-cut the rectangle again but this time from white card stock before die-cutting it into snowy ground using a die from the nature borders. I made two layers of snow and adhered them together using foam tape so there were different depths of snow. Now it was ready to stamp and colour a bunch of cuties to create my scene.

Sunny Studio Stamps: Dashing Dachshund Holiday Cards by Ashlee Bellinger (featuring North Pole, Slimline Dies, Victorian Christmas)

I stamped coloured and die-cut a whole bunch of images from all these sets including North Pole, Dashing Dachsund and Victorian Christmas. These were all coloured with a mix of Copic and Spectrum noir tri-blend markers. Using a white pen I added some white highlights. Now they were all coloured and die cut it was time to arrange them into a North Pole scene. 

Sunny Studio Stamps: Dashing Dachshund Holiday Cards by Ashlee Bellinger (featuring North Pole, Slimline Dies, Victorian Christmas)

To complete the card I stamped a sentiment directly into the sky on the card using Memento tuxedo black ink "seasons greetings"  along with a touch of sequins. I think it looks like they are having an absolute blast with Santa and Mrs Claus, don't you?!

Thank you so much for checking out my cards today, I really hope you like them as much as I enjoyed creating them. Happy crafting and big crafty hugs! 

Sunny Studio Supplies Used:

Slimline Nature Borders
Shop at:
Sunny Studio
Slimline Scalloped Frame
Shop at:
Sunny Studio
North Pole Stamps
North Pole Stamps
Shop at:
Sunny Studio
North Pole Dies
North Pole Dies
Shop at:
Sunny Studio
Victorian Christmas Stamps
Shop at:
Sunny Studio
Victorian Christmas Dies
Shop at:
Sunny Studio
Mini Mat & Tag 2 Dies
Shop at:
Sunny Studio
Crepe Paper Streamers Dies
Shop at:
Sunny Studio
Perfect Gift Boxes Dies
Shop at:
Sunny Studio
Dotted Diamond Portrait
Shop at:
Sunny Studio
Dashing Dachshund Stamps
Shop at:
Sunny Studio
Dashing Dachshund Dies
Shop at:
Sunny Studio
Holiday Hugs Stamps
Holiday Hugs Stamps
Shop at:
Sunny Studio
Holiday Hugs Dies
Holiday Hugs Dies
Shop at:
Sunny Studio

Friday, October 20, 2023

Dashing Dachshund Card with Tina

Hello crafty friends, Tina here with a sweet Christmas themed card featuring the adorable Dashing Dachshund stamp and die set. This doggie is all excited and ready for the holiday season! As are our two fur babies Mira and Lena! They always love to ‘help’ when we decorate the Christmas tree!

Sunny Studio Stamps: Dashing Dachshund Winter Holiday Card by Tina Henkens (featuring Snowman Kisses, Stitched Arch Dies, Winter Scenes, Frilly Frame Dies)

For this project I selected a bright blue gingham paper from Critter Country. I have been hoarding this pack because it contains so many cute images! I cut a panel using the frame die from Frilly Frames Stripes.

Next, I stamped the sweet dachshund and two snowmen from Snowman Kisses (aren’t these guys super adorable!!). The row of pine trees from Winter Scenes is perfect to create a cold snowy backdrop. I colored all these images with my Copic markers and added white highlights with a gel pen.

As a focal point, I cut an arched frame from glittery cardstock using the two largest Stitched Semi Circles dies. Next, I made two snow banks from white Neenah paper and a backing piece for my frame. This piece was colored with a blending brush and Distress Oxide Kitsch Flamingo. I love to use pink as a Christmas color! The sentiment was selected from the Victorian Christmas set and stamped onto a white Brilliant Banner 1 with Versafine Onyx Black ink.

Sunny Studio Stamps: Dashing Dachshund Winter Holiday Card by Tina Henkens (featuring Snowman Kisses, Stitched Arch Dies, Winter Scenes, Frilly Frame Dies)

To assemble the card, I first adhered the gingham panel to a white card base. Next, I glued the tree border to the pink sky and added the two snowbanks. After gluing the glittery border in place, I mounted the whole piece to the card with foam tape.

Finally, I placed my images and banner onto the focal point. I wanted the dog to ‘jump’ into the scene, so I stamped the sentiment to the left side of the banner.

As embellishment I added three small snowflakes from Snowflake Circle Frame to the pink sky. I hope you will enjoy creating a card with this sweet dachshund set!

Thank you for visiting the blog and happy crafting!

Sunny Studio Supplies Used:

Frilly Frames Stripes Die
Shop at:
Sunny Studio
Snowflake Circle Frame
Shop at:
Sunny Studio
Stitched Semi-Circle Dies
Shop at:
Sunny Studio
Victorian Christmas Stamps
Shop at:
Sunny Studio
Winter Scenes Stamps
Shop at:
Sunny Studio
Winter Scenes Dies
Winter Scenes Dies
Shop at:
Sunny Studio
Snowman Kisses Stamps
Shop at:
Sunny Studio
Snowman Kisses Dies
Snowman Kisses Dies
Shop at:
Sunny Studio
Critter Country Paper
Shop at:
Sunny Studio
Brilliant Banner 1 Dies
Shop at:
Sunny Studio
Dashing Dachshund Stamps
Shop at:
Sunny Studio
Dashing Dachshund Dies
Shop at:
Sunny Studio

Thursday, October 19, 2023

Pretty Poinsettia Tags with Marine

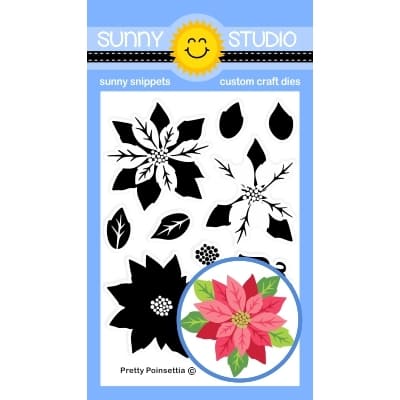
Hey crafty friends, Marine here with you today, I'm back with this set of three Christmas shaker tags showcasing Pretty Poinsettia, a gorgeous and very easy to use layering stamp set. Every year, I like to create tags, you can put them on presents, hang them in the Christmas tree or in the house, etc. I personally send them to my crafty friends abroad along with a holiday card.

Sunny Studio Stamps: Pretty Poinsettia Holiday Tags by Marine Simon (featuring Scalloped Square Tag Dies, Holiday Greetings)

I knew I wanted to have three poinsettias on each tag, so, with the help of the layering guide on the Pretty Poinsettia product page, I started off by stamping nine poinsettias on 80lb Neenah solar white cardstock using the different layering stamps from the set along with Lawn Fawn dye inks: for the first layer (1a) I used peachy keen, for the second layer (1b) I used guava, and for the third layer (1c) I used lobster. Next I used my heat gun to dry the inks and prevent them from mixing into each other, I gold heat embossed the center of each poinsettia, and then cut my nine poinsettias using the matching die.

I gold heat embossed several leaves using the stamps 2a and 3a. And next I used Altenew dye inks to create green leaves. For the first layers (2a and 3a) I used frayed leaf, and for the second layers (2b alternate and 3b alternate) I used forest shades. And I used the matching dies to cut all the leaves.

While I was into the stamping process, I took the advantage of the opportunity to white heat emboss three Holiday Greetings on vellum that I cut using the coordinating dies.

Sunny Studio Stamps: Pretty Poinsettia Holiday Tags by Marine Simon (featuring Scalloped Square Tag Dies, Holiday Greetings)

Next I worked on the shaker tags, and started off by cutting all the different elements in three using the Scalloped Tag Square die set: the front panel out of red cardstock (and I used a smaller square die from my stash to cut an opening inside of each of those panels), acetate panels, vellum panels and All Is Bright panels. And here is how I built each shaker tag:

1. Attach the acetate panel at the back of the red panel using liquid glue along the four edges

2. Still at the back of that red panel, add foam strips on the four edges, use a powder tool along the inside edges of the foam to make it non sticky, clean the acetate using a cloth, and pour some shaker accessories on the acetate (here I used gold sequins from my stash)

3. Attach the vellum panel on top of the pattern paper panel using liquid glue along the four edges (this step is optional, I did this to mute the colors on the pattern papers a little bit)

4. Attach your vellum + pattern paper panel at the back of the red panel, directly on the foam strips to close the shaker tag

Sunny Studio Stamps: Pretty Poinsettia Holiday Tags by Marine Simon (featuring Scalloped Square Tag Dies, Holiday Greetings)

Next I created a handle at the top of each tag using gold thread, and added bows for more cuteness. And then I attached all the elements (poinsettias, leaves and greetings) on the tags using 3mm glue dots mostly to stick really well on the acetate, and also 1mm foam squares. And to add more shine to those tags, I added clear droplets here and there directly on the poinsettias.

And that's it! Those shaker tags were so fun to make, and stamping the poinsettias and seeing them taking shape was quite satisfying. I hope you will find inspiration in today's projects. Thanks so much for stopping by, and see you next week with more poinsettias, but in a different way!

Sunny Studio Supplies Used:

Scalloped Tags-Square
Shop at:
Sunny Studio
All Is Bright Paper
All Is Bright Paper
Shop at:
Sunny Studio
Holiday Greetings Stamps
Shop at:
Sunny Studio
Holiday Greetings Dies
Shop at:
Sunny Studio
Pretty Poinsettia Stamps
Shop at:
Sunny Studio
Pretty Poinsettia Dies
Shop at:
Sunny Studio

Wednesday, October 18, 2023

Feliz Navidad Card with Gladys

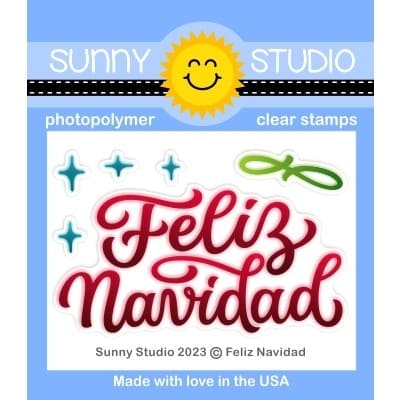
Hello crafty friends, Gladys here! I'm excited to be back on the blog to share a Christmas card featuring the beautiful stamp sentiment called Feliz Navidad.

Sunny Studio Stamps: Feliz Navidad Holiday Card by Gladys Marcelino (featuring Holiday Hugs, Fancy Frame Dies)

First, I stamped the adorable bear and present image from the Holiday Hugs stamp set with alcohol friendly ink. Then I colored them with Copic markers and used the coordinating dies to cut them out.

For my background, I used an A2 rectangle die to cut the red pattern paper from All Is Bright 6x6 paper pad. I knew I wanted to put a frame around my image so I used the Fancy Frames Rectangle dies to cut from white cardstock. I adhered the frames on the pattern paper with double sided foam tape to add dimension.

Sunny Studio Stamps: Feliz Navidad Holiday Card by Gladys Marcelino (featuring Holiday Hugs, Fancy Frame Dies)

Next I popped up the bear with foam tape and mounted it on the bottom center of the background panel. I stamped the Feliz Navidad sentiment and used the coordinating die to cut it out. I love a bold sentiment with matching dies! I used the sentiment die to cut twice from white cardstock and stacked them together. I used this technique often to add dimension if I don't want to use foam tape for intricate images. To complete my card I added diamond stickles on the present for some sparkle.

Thank you for joining me and have a wonderful day!

Sunny Studio Supplies Used:

Fancy Frames- Rectangles
Shop at:
Sunny Studio
All Is Bright Paper
All Is Bright Paper
Shop at:
Sunny Studio
Feliz Navidad Stamps
Shop at:
Sunny Studio
Feliz Navidad Die
Feliz Navidad Die
Shop at:
Sunny Studio
Holiday Hugs Stamps
Holiday Hugs Stamps
Shop at:
Sunny Studio
Holiday Hugs Dies
Holiday Hugs Dies
Shop at:
Sunny Studio

Tuesday, October 17, 2023

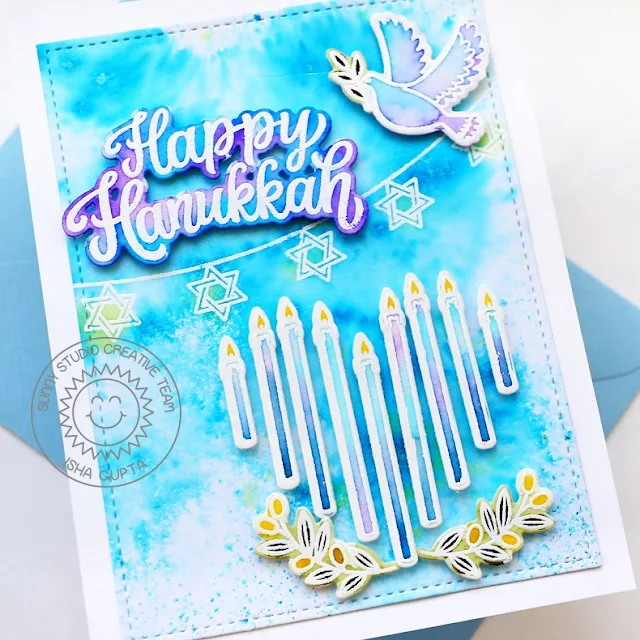
Love & Light Hanukkah Card with Isha

Hello everyone! Isha here today with a watercolor Hanukkah theme card featuring the Love & Light stamp stamps and coordinating dies. I normally don't make Hanukkah theme cards but really enjoyed creating this one.

Sunny Studio Stamps: Love & Light Hanukkah Card by Isha Gupta (featuring Stitched Rectangle Dies)

I started by creating the background using pigment powder, spritz with water to get desired effect. I used magicals by Lindys gang. Stamp the star banner with clear embossing ink, sprinkle WOW! opaque white power and heat set. add some yellow color. Die-cut this panel using Stitched Rectangle dies.

Sunny Studio Stamps: Love & Light Hanukkah Card by Isha Gupta (featuring Stitched Rectangle Dies)

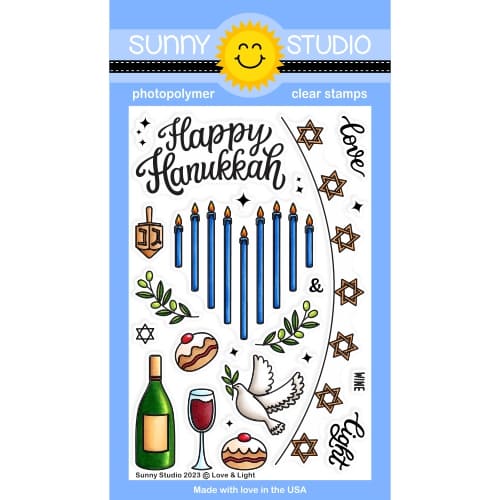
Stamp all the images from the Love & Light stamp set onto watercolor paper using clear embossing ink, use the embossing powder, heat set. Die-cut the images using the coordinating dies, add watercolor. Adhere the panel to a white card and then add images using 3d foam. 

Thank you for dropping by and have a nice day!

Sunny Studio Supplies Used:

Stitched Rectangle Dies
Shop at:
Sunny Studio
Love & Light Stamps
Love & Light Stamps
Shop at:
Sunny Studio
Love & Light Dies
Love & Light Dies
Shop at:
Sunny Studio