Monday, November 25, 2019

Hedgey Holidays Cards with Leanne and Eloise

Hello everyone, Leanne here! I have a fun holiday card to share featuring the cutest little hedgehog from a special mini set called Hedgey Holidays. I used the hedgehog, which is almost perfectly symmetrical, to make this into a spinner card, When the recipient opens the card, the hedgehog spins.  

Sunny Studio Stamps: Hedgey Holidays Circle Snowflake Frame Dies Layered Snowflake Frame Dies Hedgehog Themed Christmas Cards by Leanne West

Spinner cards are very easy to make. You just need to make two of the spinning element to adhere back to back. For this card I started by die cutting a frame for the spinner. I used the Layered Snowflake Frame to cut out the opening in the card front and a separate A2 size panel which has a light sponging of Tumbled Glass Distress Ink around the edges. I Copic colored two hedge hogs and fussy cut them out. I then adhered some clear thread between the two hedgehog images. Using some strong adhesive, I secured the ends of the thread to the card front so the hedgehog is centered within the opening. I then adhered the inked panel over top. I added some snowflakes and holly leaves on both sides of the spinning hedgehog.  

Sunny Studio Stamps: Hedgey Holidays Circle Snowflake Frame Dies Layered Snowflake Frame Dies Hedgehog Themed Christmas Cards by Leanne West

To finish off the front of the card, I added some stamped pines sprigs with berries and a two part greeting. I die cut the large Happy Word from green glitter card stock to layer behind a sentiment strip white heat embossed with hedge holidays. 

I also needed to decorate the inside of the card since a large part of it can be seen through the snowflake frame opening. I made masks by die cutting snowflakes out of Post It Note paper. I placed the snowflake masks in a random arrangement and then gently sponged on some Candied Apple Distress Oxide Ink. I removed the masks and then splattered with thinned red paint. 

------------------------------------------------------------- 

Hi friends, Eloise here and today I’m using the Hedgey Holidays Stamp Set along with Scenic Route to create my Christmas card today.

Sunny Studio Stamps: Hedgey Holidays Scenic Route Hedgehog Themed Christmas Cards by Leanne West

I started off with stamping out my images and colouring them in with Copic Markers. I then cut them all out with the coordinating dies.

(Copic Markers Used: E40, E41, E42, E43, E44, E47, E79 / R00, R30 / R14, R17, R24, R39 / RV11, RV25 / YG03, YG17 / BG11, BG49 / Y13 / B00, B12 / R20, R22)

Sunny Studio Stamps: Hedgey Holidays Scenic Route Hedgehog Themed Christmas Cards by Leanne West

I added foam tape to the backs of the lights and adhered them onto an off-white card base. I then added foam to the back of the hedgehog and adhered that into the centre also. Lastly, I stamped the sentiment ‘Christmas Hedgehugs’ onto the card base.

Thanks so much for stopping by today and I’ll see you all next time. 


All retail purchases of any size will have 10% donated to Convoy of Hope to help with children’s feeding initiatives and disaster response.  

And as always orders will also come with our mini holiday light bulb die (not pictured).


Sunny Studio Supplies Used:

Happy Word Die
Happy Word Die
Shop at:
Sunny Studio
Season's Greetings Stamps
Shop at:
Sunny Studio
Scenic Route Stamps
Scenic Route Stamps
Shop at:
Sunny Studio
Scenic Route Dies
Scenic Route Dies
Shop at:
Sunny Studio
Layered Snowflake Frame
Shop at:
Sunny Studio
Snowflake Circle Frame
Shop at:
Sunny Studio

Saturday, November 23, 2019

Sunny Saturday Share: Customer Cards


Hey everyone, how are you all doing this weekend? I'm so excited to be popping in today with a Sunny Saturday Share. There have been so many amazing cards popping up on Instagram that have caught my eye and I couldn't wait to share them with all of you! 

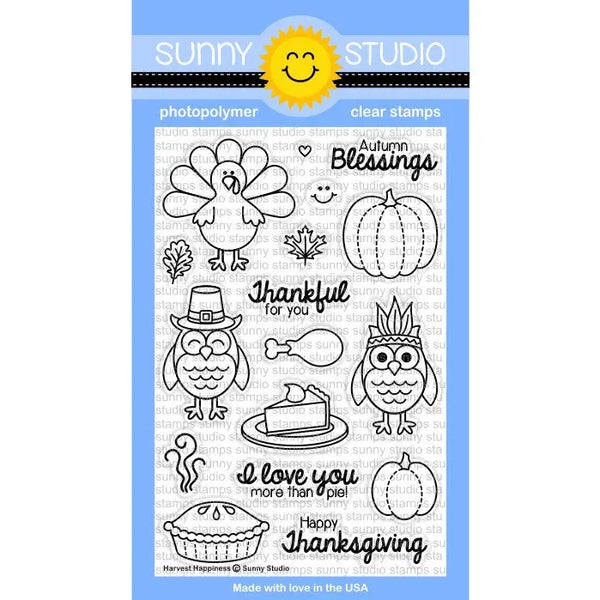
Harvest Happiness card by Crystal Komara

Sunny Studio Stamps: Harvest Happiness Customer Card by Crystal Komara

Woodsy Autumn and Scenic Route card by Toni Maddox


Sunny Studio Stamps: Woodsy Autumn Customer Card by Toni Maddox

Happy Owlidays card by Angela Pahl


Sunny Studio Stamps: Happy Owlidays Customer Card by Angela Pahl

Happy Owlidays card by Amy Tollner


Sunny Studio Stamps: Happy Owlidays Customer Card by Amy Tollner

Feeling Frosty and Scenic Route card by Ashley Ebben


Sunny Studio Stamps: Feeling Frosty Customer Card by Ashley Ebben

Feeling Frosty card by Monique 


Sunny Studio Stamps: Feeling Frosty Customer Card by Monique

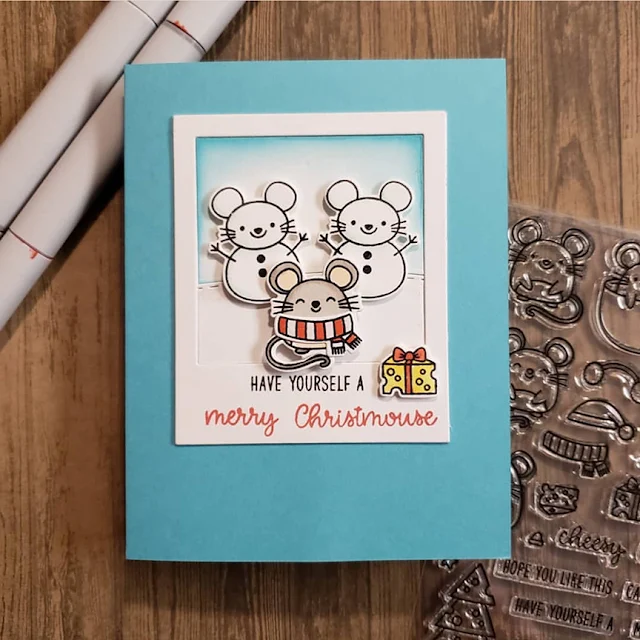
Merry Mice card by Carol Halvorson


Sunny Studio Stamps: Merry Mice Customer Card by Carol Halvorson

Merry Mice card by Kathy Schweinfurth


Sunny Studio Stamps: Merry Mice Customer Card by Kathy Schweinfurth

Merry Mice card by Nicole LeBlanc


Sunny Studio Stamps: Merry Mice Customer Card by Nicole LeBlanc

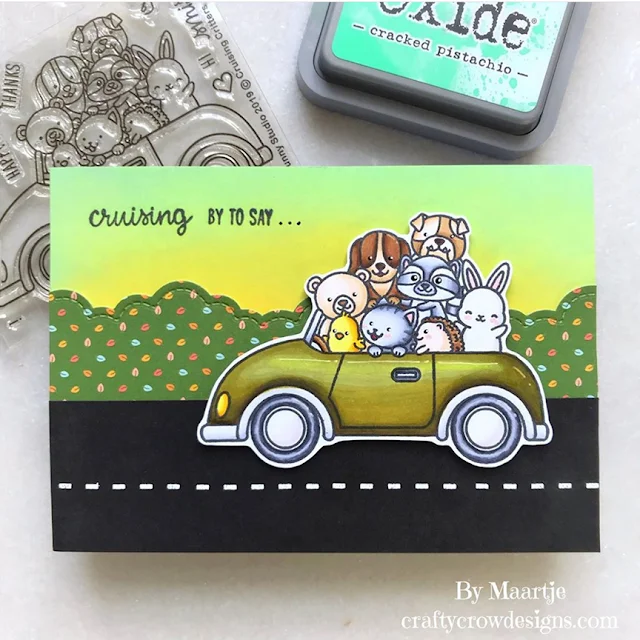
Cruising Critters card by Maartje Kraaijenhagen


Sunny Studio Stamps: Cruising Critters Customer Card by Maartje Kraaijenhagen

Cruising Critters card by Cynthia Cole


Sunny Studio Stamps: Cruising Critters Customer Card by Cynthia Cole

Critter Campout card interactive card by Roslyn Jin


Sunny Studio Stamps: Critter Campout Customer Card by Roslyn Jin

Just Bee-cause card by Chitra


Sunny Studio Stamps: Just Bee-cause Customer Card by Chitra

Super Duper card by Frances Byrne


Sunny Studio Stamps: Super Duper Customer Card by Frances Byrne

Thank you for sharing all these fabulous ideas with us! I hope you will continue to share your gorgeous projects with us--It always makes my day to see them. You can tag us on instagram with the hashtag #sunnystudiostamps or share your projects with us in our flickr group or on our facebook page. ☺


Sunny Studio Supplies Used:

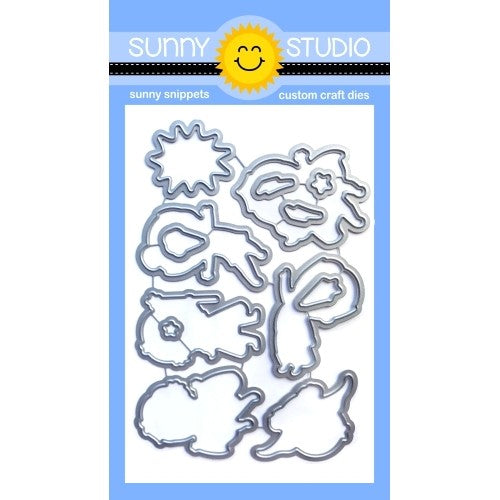
Harvest Happiness Dies
Shop at:
Sunny Studio
Harvest Happiness Stamps
Shop at:
Sunny Studio
Critter Campout Stamps
Shop at:
Sunny Studio
Critter Campout Dies
Shop at:
Sunny Studio
Happy Owlidays Stamps
Shop at:
Sunny Studio
Happy Owlidays Dies
Happy Owlidays Dies
Shop at:
Sunny Studio
Cruising Critters Stamps
Shop at:
Sunny Studio
Cruising Critters Dies
Shop at:
Sunny Studio
Super Duper Stamps
Super Duper Stamps
Shop at:
Sunny Studio
Super Duper Dies
Super Duper Dies
Shop at:
Sunny Studio
Woodsy Autumn Stamps
Shop at:
Sunny Studio
Woodsy Autumn Dies
Woodsy Autumn Dies
Shop at:
Sunny Studio
Just Bee-cause Stamps
Shop at:
Sunny Studio
Just Bee-cause Dies
Just Bee-cause Dies
Shop at:
Sunny Studio
Feeling Frosty Stamps
Shop at:
Sunny Studio
Feeling Frosty Dies
Feeling Frosty Dies
Shop at:
Sunny Studio
Merry Mice Stamps
Merry Mice Stamps
Shop at:
Sunny Studio
Merry Mice Dies
Merry Mice Dies
Shop at:
Sunny Studio
Scenic Route Stamps
Scenic Route Stamps
Shop at:
Sunny Studio
Scenic Route Dies
Scenic Route Dies
Shop at:
Sunny Studio

Friday, November 22, 2019

Scenic Route Cards with Candice and Rachel

It's Candice with you today and I hope you are all getting ready for a fabulous weekend of crafting and I have some inspiration for you using the versatile Scenic Route stamp setHow many of you just had to get the adorable superheroes this summer and just haven't gotten to use them as much as you would like?! I decided to tie them into the holiday season, a perfect card for the comic lover in your family!

Sunny Studio Stamps: Scenic Route Super Duper Woodland Borders Christmas Garland Frame Dies Winter Super Hero Themed Christmas Card by Candice Fisher

The Sunny Studio Stamps products I used are:
I first die cut the frame, using the negative to frame my scene. I filled the scene first with the night sky pattern paper and added the copic colored and glittered hills under the moon.  Next, I colored the houses and used the coordinating dies to cut out and pop dotted along the hillside.

Sunny Studio Stamps: Scenic Route Super Duper Woodland Borders Christmas Garland Frame Dies Winter Super Hero Themed Christmas Card by Candice Fisher

I then die cut the stitched snowhills, layering along the bottom of the card and pop dotted the frame on top of the scene. For the sentiments, I first heat embossed the you're my favorite super hero on two separate navy banners and then die cut multiples of the christmas, the top one out of red glitter. I then die cut the comic bubble out of the same navy and heat embossed the ho, ho, ho in white and pop dotted it next to the Christmas superhero. I added a few green pearls to tie in the green around the sentiment.

I hope you are inspired to use some of your summer sets for Christmas in different ways!

---------------------------------------------------------

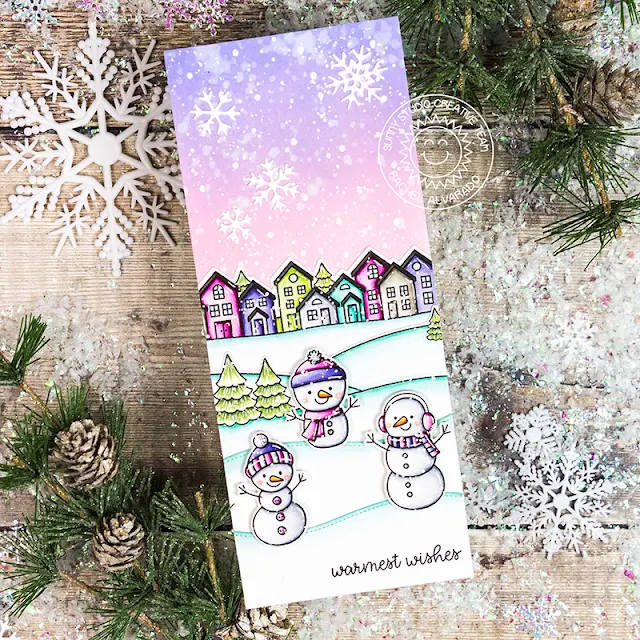
Hello everyone! It's Rachel here and I have a card to share with you today that focuses on the new Scenic Route Stamp Set. I combined this set with some cute snowmen from the Feeling Frosty Set to create a fun winter scene.

Sunny Studio Stamps: Scenic Route Feeling Frosty Circle Woodland Borders Snowflake Frame Dies Winter Themed Card by Rachel Alvarado

To start, I first trimmed a piece of Neenah Solar White 110lb Card Stock to 8.5" x 3.5". I then blended the top portion of it with Spun Sugar and Shaded Lilac Distress Oxide Inks. I splattered this blend with both water and diluted Opaque White Paint to resemble snow. I also added a few white die cut snowflakes using the snowflake dies from the Snowflake Circle Frame Die Set.

I stamped my images with Memento Tuxedo Black Ink onto another sheet of Neenah Solar White 110lb Card Stock and colored them with Copics. I used the coordinating Scenic Route and Feeling Frosty die sets to cut them out once colored.

Copic Colors Used:
  • Pinks: RV000, RV00, RV52, RV55, RV66, RV69
  • Purples: BV000, BV02, BV13, BV17, BV08
  • Whites: 0, C00, C0, C2, C4
  • Greens: G20, G24, YG25, YG63
  • Dark Gray: W5, W8
  • Light Gray: W1, W3, W5
  • Snow Drifts: BG0000, BG11, BG53
Sunny Studio Stamps: Scenic Route Feeling Frosty Circle Woodland Borders Snowflake Frame Dies Winter Themed Card by Rachel Alvarado

Once I had all of my scenery and images cut out, I adhered them carefully onto the front of my card where I wanted them to be aligned. I then used a paper trimmer to trim off any excess. I used the Woodland Border Dies to add a few extra stitched snow drifts. I stamped my sentiment onto the lower right corner of my lowest snow drift and lastly, adhered my snowmen with some 3D Foam Adhesive Squares for added dimension.

I hope you've enjoyed my card today! Thanks so much for dropping by! Wishing you all the most wonderful weekend!

Sunny Studio Supplies Used:

Woodland Borders Dies
Shop at:
Sunny Studio
Super Duper Stamps
Super Duper Stamps
Shop at:
Sunny Studio
Super Duper Dies
Super Duper Dies
Shop at:
Sunny Studio
Comic Strip Speech Bubble Dies
Shop at:
Sunny Studio
Very Merry 6x6 Paper
Shop at:
Sunny Studio
Santa Claus Lane Stamps
Shop at:
Sunny Studio
Feeling Frosty Stamps
Shop at:
Sunny Studio
Feeling Frosty Dies
Feeling Frosty Dies
Shop at:
Sunny Studio
Scenic Route Stamps
Scenic Route Stamps
Shop at:
Sunny Studio
Scenic Route Dies
Scenic Route Dies
Shop at:
Sunny Studio
Snowflake Circle Frame
Shop at:
Sunny Studio
Christmas Garland Frame
Shop at:
Sunny Studio