Hello and welcome to the last day of our Spring Sneak Peek Week! All this week I have been sharing cards showcasing our newest collection which is now available to purchase! Before you head off to shop, I hope you will take a look at our last set of new products and a video down below where I share a better look at each of them "in person".
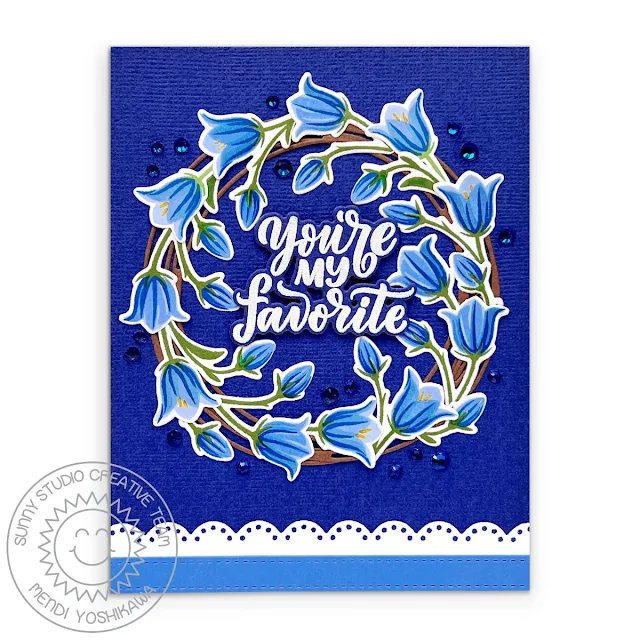
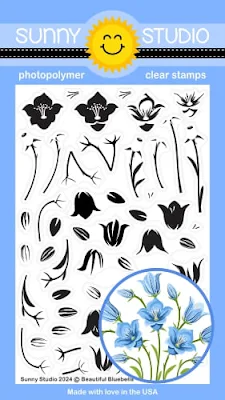
Card No. 1: Today I have a new layering stamp set to share called Beautiful Bluebells and I had so much fun creating cards with these cute flowers! For my first card, I started by cutting two loopy circles from our Snowflake Circle Frames Dies which I slightly offset to form my vine wreath. I then layered the bluebell flower buds over the top and sprinkled some of our Cornflower Blue Jewels around it, adhering them with Ranger's Multi Medium Matte. For my greeting, I used a sentiment from our Lovey Dovey Stamps, heat embossing them with White Detail Embossing Powder onto a piece of cardstock to match my background and cutting them out with the matching Dies. For my last touch, I added the stitched strip cut out with the Ribbon & Lace Border Dies and layered over the scallop trim from our Eyelet Lace Border Dies.
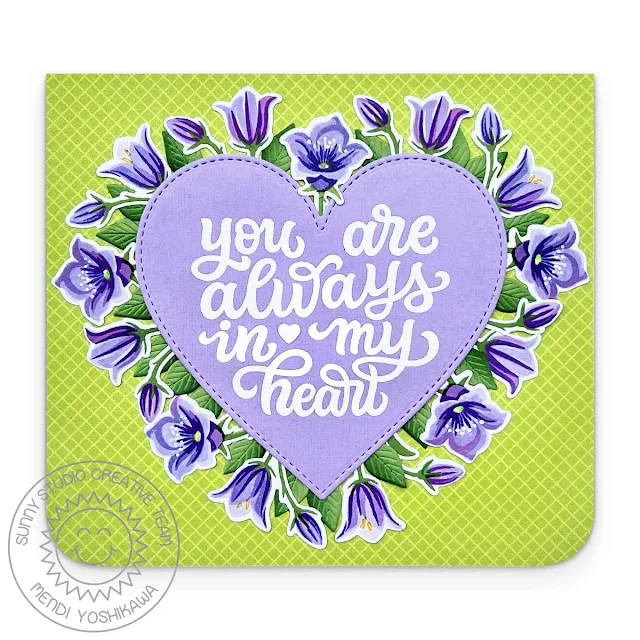
Card No. 2: For my next card featuring the Beautiful Bluebells Stamps, I die-cut our Stitched Heart 2 Dies from lavender cardstock and then heat embossed the nice large greeting from our new My Heart Stamps, adding the little die-cut heart that comes with the My Heart Dies to fill the open space. I then added adhesive to the back of my heart's edge so that I could press in and add all my flowers around the outside. I then filled in any open spaces with some inked-up green leaves from our Out On A Limb Dies. I have always adored these petite little leaves with their cute veining detail. I then mounted my entire heart onto my card panel trimmed down to 5.5" wide x 5" high using our Classic Gingham Paper pack and rounded the bottom corners using my We R Memory Keepers Corner Chomper. I adore this color scheme and how this card turned out!
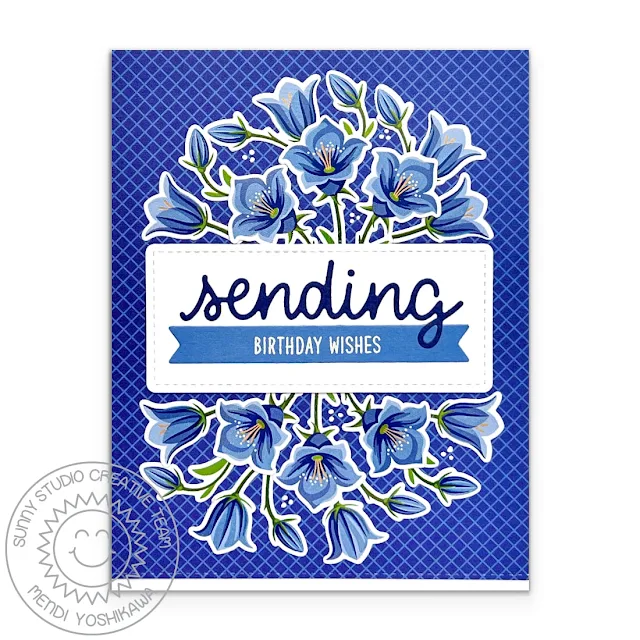
Card No. 3: Up next is another blue and white Beautiful Bluebells card (another favorite Color Scheme of mine) where I started by cutting an A2-sized cardstock panel from our Classic Gingham Paper pack, adding a little stitched edge to the bottom using our Ribbon & Lace Border Dies so that a thin sliver of my card base could show through. I then did my best to create similar floral arrangements on both sides of the stitched rectangle die in the center that was cut using a die from our Treat Bag Topper Dies. I had a couple spots (like in the top left) where I felt the space was a little bare so I added some random triple dots with my white paint pen to balance them out and make them feel like an intentional part of my design. I completed my card by adding a shorted pennant strip from our Notebook Photo Corners Dies which I stamped with the Birthday Wishes greeting and added the die-cut "Sending" word from our Gift Card Envelope Dies.
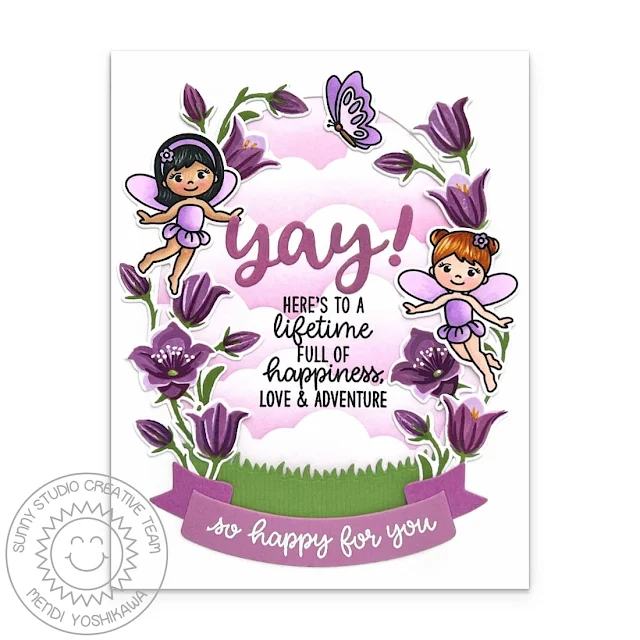
Card No. 4: When I think of bluebell flowers, I think of fairies so I couldn't resist pairing our new Beautiful Bluebells Stamps with our Garden Fairy Stamps. I started by inking up my background with pink clouds using a stencil I created with our Fluffy Clouds Border Dies. I then layered it with our new Mini Grass Border Dies, and a white cardstock window using our Stitched Oval 2 Dies. For my sentiments, I spelled out the word "yay" with our Hayley Uppercase Alphabet Dies and Hayley Lowercase Alphabet Dies. I then stamped the "lifetime of happiness" from our Inside Greetings Congrats Stamps. Lastly, I heat embossed "so happy for you" from that same stamp set onto our Brilliant Banner 2 Dies.
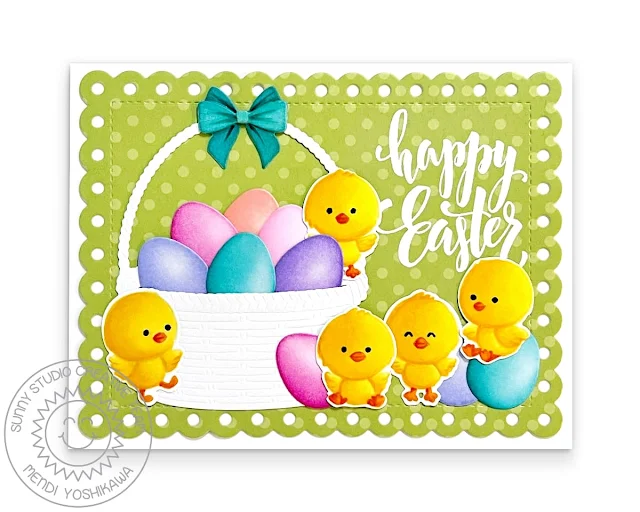
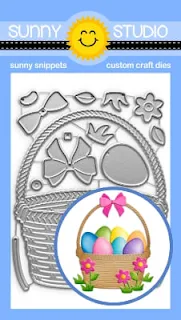
Card No. 5: Moving on to our new Wicker Basket Dies, I have a sunny Easter card! I started by cutting a yellow floral background panel from our Spring Fever Paper pack which I layered with a scalloped mat cut out using our Frilly Frames Eyelet Lace Dies. For my focal point, I used almost every last die from our Wicker Basket Dies with the bow, eggs, flowers, leaves, and tufts of grass. As a last touch I heat embossed my "basket full of love" sentiment using our Eggs To Dye For Stamps and our Brilliant Banner 2 Dies, which were cut from our Classic Gingham & Polka-dot Parade Paper packs.
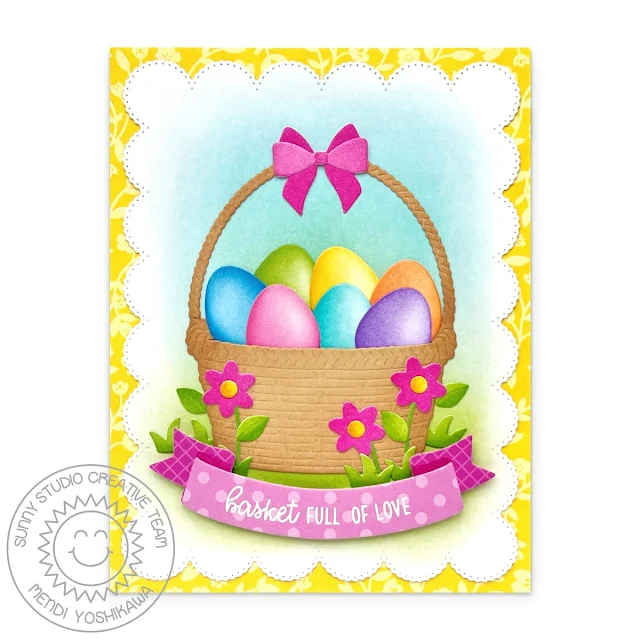
I thought the little chicks from Chickie Baby set would be the perfect compliment to my basket of eggs. To make them match my basket even better, I chose to color them using a "no-line" coloring technique. To do this I stamped them all using Hero Arts Contour Ink which is a light-colored Copic-friendly ink in my stamp positioning tool and kept all the stamps in place while I colored my images. Then before die-cutting them, I put the colored sheet back in my stamping tool and inked up just the little chick's eyes using the corners of my VersaFine Onyx Black ink pad, rubbing off any spots on the stamp image that might have accidentally been inked just so I could stamp the perfectly placed dark eyes to make my little chicks come alive. I also colored my bow with Distress inks and then added the crease details over the top with Copic Markers to make it look more realistic. I love the results of both of these little tricks!
Royal Blue Bluebells
Hero Arts Dusty Blue
Hero Arts Cornflower
Gina K. Powder Blue
Hero Arts Indigo
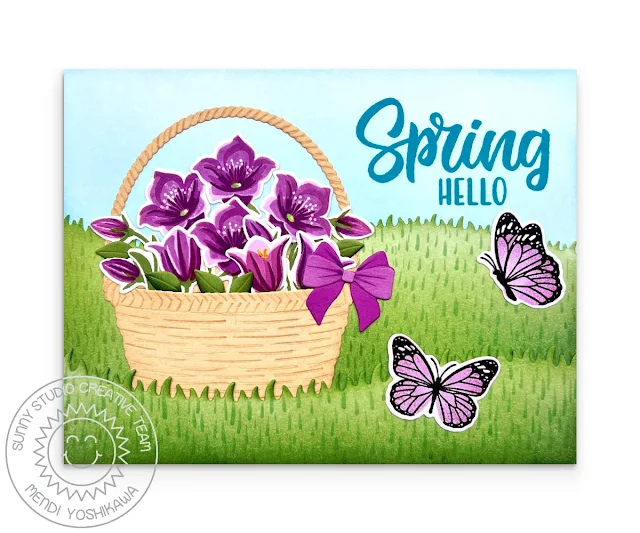
Blue Violet Bluebells
Altenew Wisteria
Hero Arts Passion Flower
Altenew Hydrangea
Altenew Ultraviolet
Purple Bluebells
Pinkfresh Studio Soft Lilac
Pinkfresh Studio Candy Violet
Versafine Clair Purple Delight
Hero Arts Grape Juice
Stems & Leaves
Pinkfresh Studio Key Lime
Pinkfresh Studio Olive
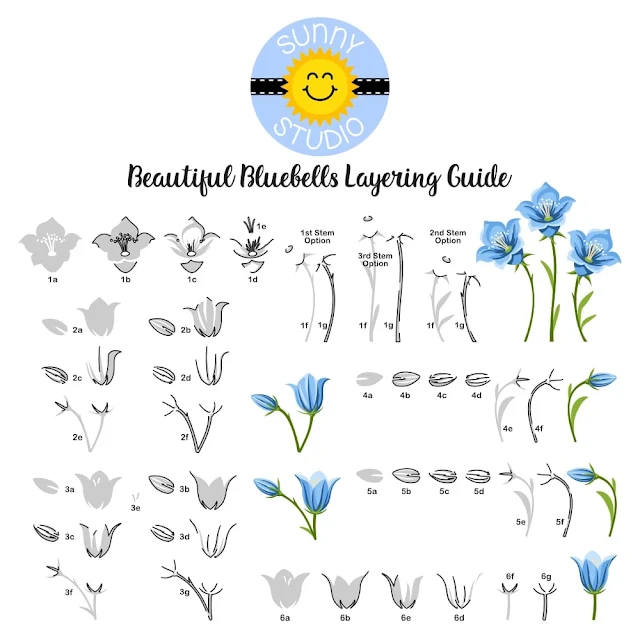
To help you line up our layered stamps like a pro I've created a special layering guide (you can click on the photo below to view it larger). The guide shows the stamps starting with the lightest ink color, working towards the darkest, but sometimes I find it easier to start backward. They both work depending on what your preference is. The black outline indicates where that layer touches the previously stamped layer.
Helpful Tips and Tricks
When designing this set I really wanted to connect more of these flowers into larger groupings to save stamping time, however, I struggled to fit them even within the confines of a 6x8 stamp set with the larger layers which would have made the stamps and dies twice as expensive. In the end, in addition to saving money, I love how flexible they are to work with when they are not connected to each other.
I didn't find this set any more difficult to line up than our other flower layering stamps. However, given the smaller size and some of the intricate details, I wanted to share the tricks I used to achieve the best results.
1. I stamped each layer twice in most cases to reduce blotchiness with some brands of ink, but then I had my heat gun set up next to me and would zap it with the heat gun immediately afterward to dry the ink on the spot so the stamp detail wouldn't disappear with the bleeding as the ink typically smooths and settles into the paper. I actually do this for all our layering stamps, but it was particularly helpful for this one.
2. For the little white dots on the three largest flowers, I went over them after I was done with a white gel pen to regain the brightness and crispness of those dots. This isn't a must, but I liked how it made them really pop. Those same dots really help with lining up the layers for that blossom.
3. I found it much easier to use my Copic marker to add the yellow stamen details than to mess with lining up that tiny stamp. I was able to quickly flick them on all at once with my pen in a fraction of the time rather than trying to line up the tiny stamp image.
4. I did not use the second layering option for my stems. I had already invested quite a bit of time on my giant pile of flowers (see below) and thought they looked awesome without it so that layer is optional.
5. The three flowers in the top right corner of the layering guide (shown above) use the same flower blossom and only have different stems so if you are careful in your planning, you can set up your flower in such a way that all you have to do is add different stems without switching out the flower layers.
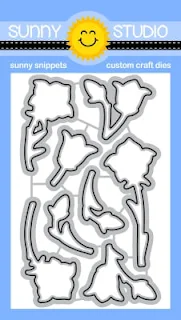
6. I always set up my test layers in my stamp positioning tool using copy-weight scratch paper, stamping a half dozen of them to have on hand to help me set up each layer. When it came to positioning the stems to match my dies, I laid the die over the blossom portion and then traced the stem along the inside of the die onto my scratch paper. I could then line up the stem image to line up with my tracing so it would perfectly line up with the dies for each one. This trick worked beautifully!
I was able to create this happy little pile of flowers over one day while binging a TV series. I only used a fraction of them for my cards shared here today, but I love to keep a Ziploc baggy for each set ready to grab for future cards since I think lining up the layers is the most time-consuming aspect of any layering stamp set.
As is my tradition, I also created a new release video sharing a closer look at each of the projects I shared this week along with new products and maybe a couple extra tidbits I failed to share here on the blog. You can watch it down below or on our YouTube Channel HERE.
It's getting harder and harder to get the word out about new releases and have videos seen with YouTube's new algorithms these days so if you can do me a favor and hit the like button even if you don't have time to watch the entire thing right now I would greatly appreciate it. ❤
Here's a closer look at our new Beautiful Bluebells Stamps & Dies and Wicker Basket Dies used today which are now available to purchase.
 Tsukineko Jumbo Dauber Shop at: Sunny Studio |
 Classic Gingham 6x6 Paper Shop at: Sunny Studio |
 Polka-dot Parade 6x6 Paper Shop at: Sunny Studio |
 Happy Thoughts Stamps Shop at: Sunny Studio |
|
 Snowflake Circle Frame Shop at: Sunny Studio |
 Cheerful Daisies Stamps Shop at: Sunny Studio |
 Eyelet Lace Borders Shop at: Sunny Studio |
 Frilly Frames-Eyelet Lace Shop at: Sunny Studio | |
 Slimline Nature Borders Shop at: Sunny Studio |
 Eggs To Dye For Stamps Shop at: Sunny Studio |
 Garden Fairy Stamps Shop at: Sunny Studio |
 Garden Fairy Dies Shop at: Sunny Studio | |
 Stitched Oval 2 Dies Shop at: Sunny Studio |
 Lovey Dovey Stamps Shop at: Sunny Studio |
 Lovey Dovey Dies Shop at: Sunny Studio |
 Out on A Limb Dies Shop at: Sunny Studio | |
 Stitched Heart 2 Dies Shop at: Sunny Studio |
 Watering Can Stamps Shop at: Sunny Studio |
 Watering Can Dies Shop at: Sunny Studio |
 Inside Greetings Congrats Shop at: Sunny Studio | |
 Hayley Lowercase Alphabet Dies Shop at: Sunny Studio |
 Hayley Uppercase Alphabet Dies Shop at: Sunny Studio |
 Ribbon & Lace Dies Shop at: Sunny Studio |
 Spring Fever Paper Shop at: Sunny Studio | |
 Notebook Photo Corners Dies Shop at: Sunny Studio |
 Brilliant Banner 2 Dies Shop at: Sunny Studio |
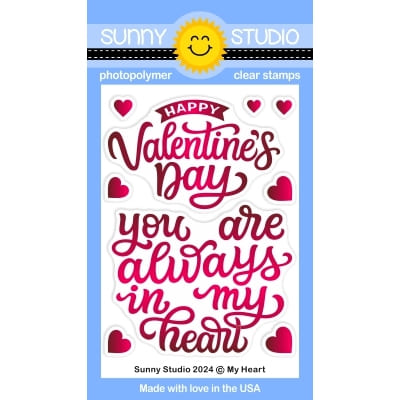 My Heart Stamps Shop at: Sunny Studio |
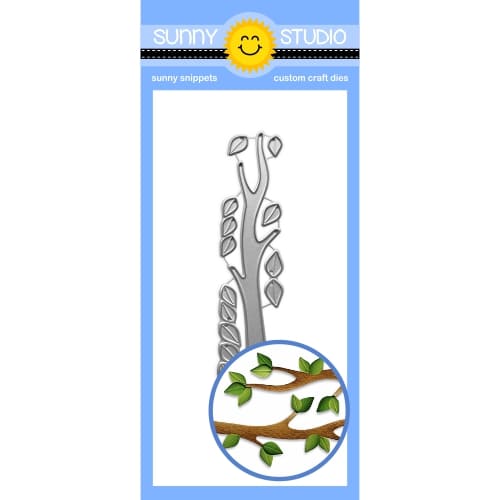 Tree Branch Die Shop at: Sunny Studio | |
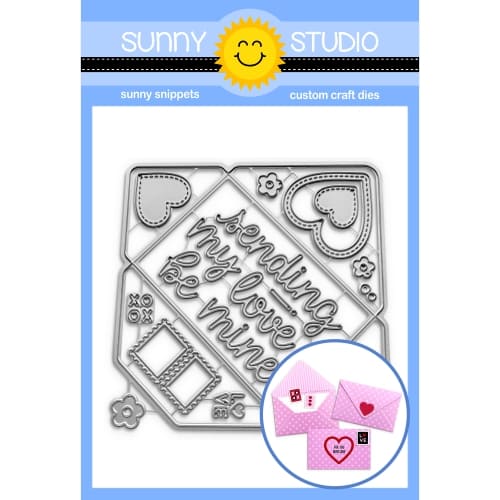 Gift Card Envelope Die Shop at: Sunny Studio |
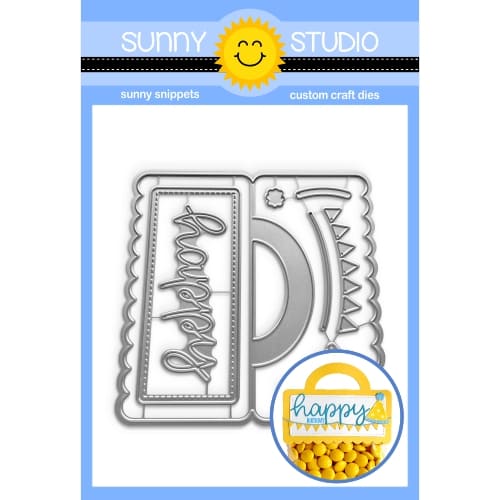 Treat Bag Topper Die Shop at: Sunny Studio |
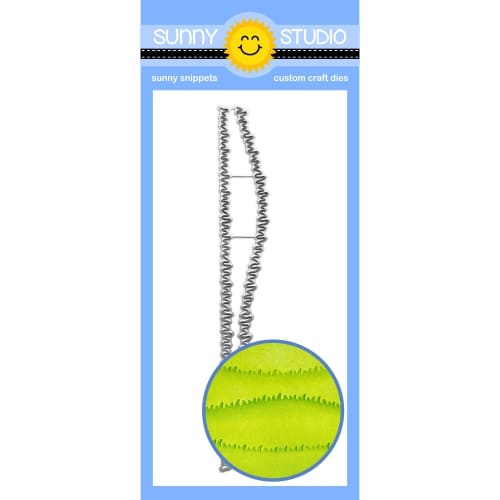 Mini Grass Border Dies Shop at: Sunny Studio |
 Cornflower Blue Jewels Shop at: Sunny Studio | |
 Fluffy Clouds Border Dies Shop at: Sunny Studio |
 Hero Arts White Detail Shop at: Sunny Studio |
 VersaMark Watermark Ink Shop at: Sunny Studio |
 Multi Medium Matte Shop at: Sunny Studio |
|
 Dots & Stripes Pastels 6x6 Paper Shop at: Sunny Studio |
 Frilly Frames Polka-Dot Shop at: Sunny Studio |
 Chickie Baby Stamps Shop at: Sunny Studio |
 Chickie Baby Dies Shop at: Sunny Studio |
|
 Hero Arts Contour Ink Shop at: Sunny Studio |


My favorite is the big bunny. Hope you continue that series.
ReplyDeleteThe pandas and the wicker basket are my top two for sure.
ReplyDeleteOh I love the big bunny!!
ReplyDeleteToday's showcases are delightful, just like the previous days'! My favourite is the Big Bunny; he is just 110% adorable, as is the Big Bear!
ReplyDeleteWonderful release...absolutely wonderful!
~carol
Great release! I love the gift card envelope dies and spring garden dies!
ReplyDeleteWow! ANOTHER great release! I have had so much fun all week! Thank u! Big bunny too!!! I love larger stamps!
ReplyDeleteckeslsr
DeleteLove the Pandas, Puddle Jumpers and Bluebells! 😍😍
ReplyDeleteThe Easter basket is super cute, many possibilities. Thanks
ReplyDeleteWow! Beautiful creations!
ReplyDeleteA great release, Mendi! You are so creative! Everything is so cute but I think the Spring Garden die set speaks to me the most!
ReplyDeleteLove the Big Bunny!
ReplyDeleteI love the bluebells stamp and die set! So gorgeous!
ReplyDeleteI love the basket cards with the chicks and the butterflies!
ReplyDeleteLove the bluebells and the basket! Beautiful samples today!
ReplyDeleteMy favorite has been the big bunny!
another great release..so hard to choose which set I get first...
ReplyDeleteThe Beautiful Bluebells are my FAVORITE. In fact, they are possibly the prettiest flower stamps I have ever seen!
ReplyDeleteooh love all the floral sets and the slimline border dies
ReplyDeleteAnother amazing release!!! My favorites are the bluebells and the big bunny! So sweet and versatile. Thank you.
ReplyDeleteSo much to love! Bighearted Bears, Sprawling Surfaces, and Spring Garden Dies are all on the top of my wishlist! Thanks so much for all of the wonderful new products and inspiration!
ReplyDeleteI love those bluebells but big bunny is my fav
ReplyDeleteI like your new basket die!
ReplyDeleteMost excited about the beautiful bluebells and the spring garden dies.
ReplyDeleteLove the pandas!
ReplyDeleteThe bluebirds are gorgeous! I am looking forward for the pandas!
ReplyDeleteI love those bluebells! The big bunny and those pandas! I might just as well say I like everything!!!
ReplyDeleteYour layering stamps are always gorgeous and so easy to use and line up!
ReplyDeleteIt’s hard to pick a favorite but I really like the panda’s and the ground scene builders.
I love the envelope & treat topper dies as well as the fun Big Bunny!!
ReplyDeleteI especially love the Gift Card Envelope Die and the adorable Panda Bears.
ReplyDeleteThe critters are always a favorite.
ReplyDeleteLove the Spring garden dies and the Sprawling surfaces.
ReplyDeleteI’m most excited for the spring garden dies but it’s not easy to choose, there are so many fun products!
ReplyDeleteAll the products are just gorgeous, but the blue bells and spring garden dies are my favorite!
ReplyDelete