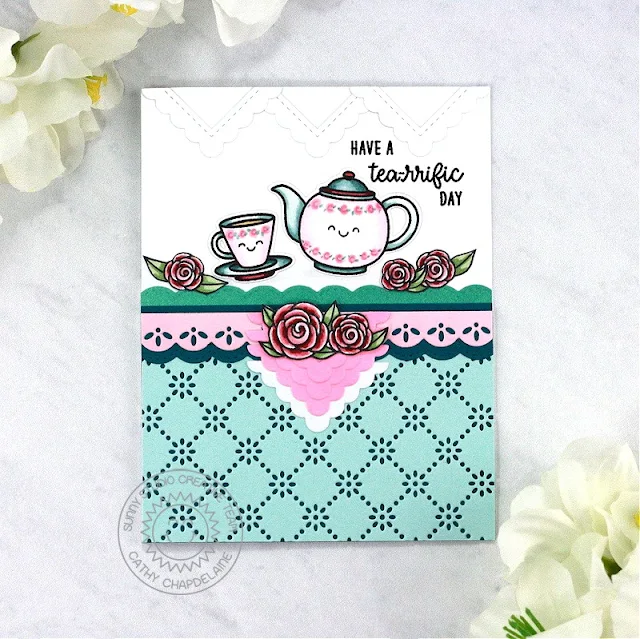
Hey friends! Cathy here today and I've got a happy tea-themed card for you with a fun way of using the new Notebook Photo Corners Dies.
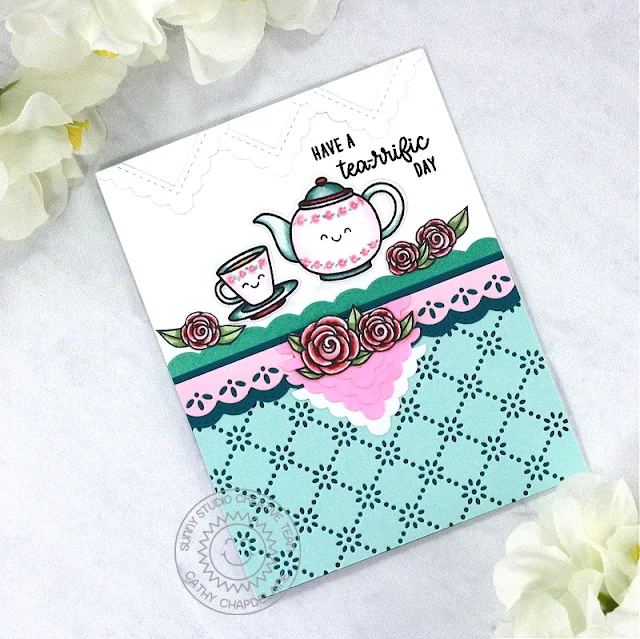
I've got a lot of scalloped and lacy features on this A2 card and I started with the ones on the bottom half of the card front. First, I cut a piece of light blue cardstock 2 3/4" x 4 1/4" and die-cut it using the center portion of the Frilly Frames Eyelet Lace Die. I cut a piece of dark turquoise cardstock 2 7/8" x 4 1/4" and adhered the light blue die-cut piece even with the bottom edge of the turquoise piece. (This leaves 1/8" of turquoise cardstock showing above the light blue piece) Next, I cut a strip of white cardstock 1/2" x 4 1/4" and inked it with Evergreen Bough Distress ink. I then die-cut the edge with a scalloped border die from the Ribbon & Lace Border Dies. I adhered this strip to the back side of the dark turquoise cardstock along the top edge leaving 1/4" of the scalloped edge visible.
Next, I cut a strip of dark turquoise cardstock 5/8" x 4 1/4" and die-cut it using the same scalloped border die. I cut a strip of white cardstock 1/4" x 4 1/4", inked it with Spun Sugar Distress ink and die-cut it using a lace border die from the Ribbon & Lace Border Dies. I adhered the pink strip to the turquoise strip and then adhered this combined piece along the top edge of the light blue cardstock.
Next, I cut a 4 1/4" x 5 1/2" piece of white cardstock and die-cut 3 photo corners from white cardstock using the Notebook Photo Corners Dies. I adhered the photo corners along the top edge of the panel and then stamped the sentiment using stamps from both the Tea-rrific Stamps and the new Birthday Mouse Stamps.
To finish, I adhered the blue/turquoise/pink combined piece to the bottom of the white cardstock panel and then adhered the panel to an A2 card front. I die-cut 4 photo corners from pink cardstock and 1 from white cardstock and layered/adhered them together at the top of the pink lace strip. I stamped roses from the Special Day Stamps, colored them with Copics and fussy cut them out. I stamped the teacup and teapot from the Tea-rrific Stamps on Neenah Classic Crest solar white 80lb cardstock, colored them with Copics and die-cut them using the coordinating dies. I also added cute faces to them using the Looking Sharp Stamps and Summer Sweets Stamps.
I hope you enjoyed and thanks for stopping by! For more inspiration, please visit my blog www.inkredibleadventures.com and you can also find me on Instagram as @cathy.chapdelaine.
Sunny Studio Supplies Used:
 Looking Sharp Stamps Shop at: Sunny Studio |
 Frilly Frames-Eyelet Lace Shop at: Sunny Studio |
 Summer Sweets Stamps Shop at: Sunny Studio |
 Tea-riffic Stamps Shop at: Sunny Studio |
 Tea-riffic Dies Shop at: Sunny Studio |
 Ribbon & Lace Dies Shop at: Sunny Studio |
 Notebook Photo Corners Dies Shop at: Sunny Studio |
 Birthday Mouse Stamps Shop at: Sunny Studio |
 Special Day Stamps Shop at: Sunny Studio | |


This is so sweet! Love the CAS look.
ReplyDeleteLori S in PA
did you hand draw the roses across the teapot and teacup? it looks amazing!
ReplyDelete