Hi folks, Kavya
here. I am back on the blog with another fun holiday card using the new
release!
I decided to revisit an old card as I was out if ideas for this one as this might look very similar to my snowman card from last year. I started off my ink blending the background using Seedless Preserve, Wilted Violet, Dried Marigold and Antique Linen distress oxide inks. Then, I stamped and colored a bunch of images from Snowman Kisses and Christmas Home Stamps.
Adhered the images and I was done! I didn’t add a sentiment as I think the occasion was pretty obvious from the card and I also wanted some of the cool warm background to be shown! Most of it was covered on the left by the house.
That’s it! I hope you
liked this fun project! Happy Crafting!
--------------------------------------------
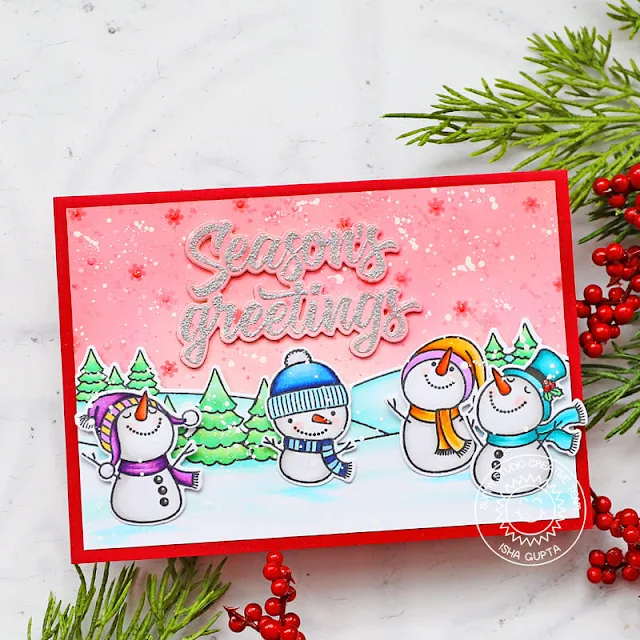
Hello everyone, Isha here with a cute and whimsical winter card. We are featuring the Snowman Kisses stamps and coordinating dies. I love that this stamp set can be combined with lots of various stamps and dies from the previous releases.
I took a red card base. I then took a white card to create the ombre sky using tattered rose, kitsch flamingo and abandoned coral distress oxide inks. There are pretty snowflakes in this set, so I stamped a few onto the panel using the similar inks.
Stamp the Background trees and snow slopes from the Scenic Routes stamps, die-cut using the coordinating dies. Colour using copic markers. Stamp the snowmen from the Snowman Kisses stamp set, colour using copic markers and die-cut using the coordinating dies.
Stamp the sentiment from the Holiday Greetings stamp set using clear ink, emboss this using WOW! silver bells embossing glitter. Die-cut using the coordinating dies. Keep all the negative pieces. Die-cut the sentiment three more times from white cardstock. Adhere the sky piece to the cardbase. Put the sentiment in place and adhere the negative pieces, remove the sentiment die-cut. Stack all the sentiment pieces so we get a chipboard kind of look. Adhere to the card.
Adhere the rest
of the elements using liquid glue and 3d foam for dimension. Flick white paint
for snow texture.
Thank you for
dropping by and have a nice day!
Sunny Studio Supplies Used:
 Christmas Home Stamps Shop at: Sunny Studio |
 Christmas Home Dies Shop at: Sunny Studio |
 Scenic Route Stamps Shop at: Sunny Studio |
 Scenic Route Dies Shop at: Sunny Studio |
 Holiday Greetings Stamps Shop at: Sunny Studio |
 Holiday Greetings Dies Shop at: Sunny Studio |
 Snowman Kisses Stamps Shop at: Sunny Studio |
 Snowman Kisses Dies Shop at: Sunny Studio |


No comments:
Post a Comment