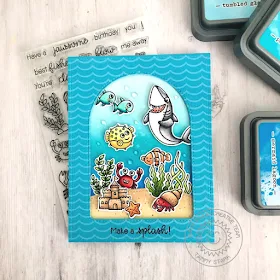
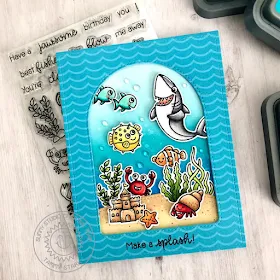
To begin, I cut a
rectangle from the Summer Splash Paper. I
then cut out a window using the largest die from the Stitched Arch Dies.
Next, I created my background by ink blending Blueprint Sketch, Mermaid Lagoon,
Peacock Feathers, and Tumbled Glass Distress Oxide inks. I splattered some
water droplets onto my background and blotted up to create some interest to the
water. I created the sandy border by cutting a piece of Bristol cardstock with
the Woodlands Borders Die, ink
blending with Antique Linen and Vintage Photo Distress Oxide inks, and attached
to my inked background. Next, I adhered my wave patterned paper over my
background, using foam tape for dimension.
I stamped, colored with Copic markers, and cut out the images from the following sets: Best Fishes/ Coordinating Dies, Beach Babies/ Coordinating Dies, Sea You Soon/ Coordinating Dies
I stamped, colored with Copic markers, and cut out the images from the following sets: Best Fishes/ Coordinating Dies, Beach Babies/ Coordinating Dies, Sea You Soon/ Coordinating Dies
I
arranged my under the sea critters onto my card and attached some with foam
tape for dimension and stamped the sentiment from Best Fishes along
the bottom of my card with black ink. To complete my card, I added some Sparkling Clear Crystals to
create some bubbles. Finally, I attached my completed card front to a white A2
card base.
Thanks so much for stopping by...SEA you next time! ;)
---------------------------------------------------------
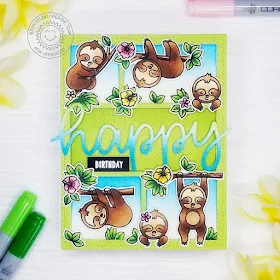
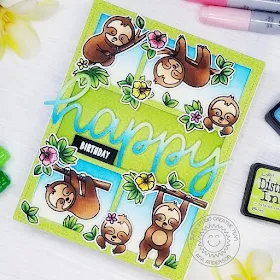
Hello crafty friends! It’s Ana today with a super sweet birthday card featuring Silly Sloths stamps and dies, Comic Strips Everyday dies as well as Happy word die and Flirty Flowers paper pack.
I
started with die cutting green floral paper (from Flirty paper pack) with Comic
Strip Everyday dies, then die cut another frame/background from white
cardstock. I die cut the word happy 4 times out of white cardstock, layered
them, then inked the sentiment and the background with Salty Ocean and Twisted
Citron distress inks. I white heat embossed the word birthday on a piece of
black cardstock, then trimmed the strip.
I stamped the sloths and foliage with Memento Tuxedo black ink, colored them with Copic markers, cut them with coordinating dies then started assembling the card. I popped the frame with thin strips of foam tape, then inserted inked background pieces.
I stamped the sloths and foliage with Memento Tuxedo black ink, colored them with Copic markers, cut them with coordinating dies then started assembling the card. I popped the frame with thin strips of foam tape, then inserted inked background pieces.
I
added the happy word dies cut to the center and adhered the sloths and foliage
with liquid glue and foam tape. To finish the card, I added a few highlights
with white gel pen!
I
hope you have enjoyed today’s post and that this slothy card put a smile on
your face. Have a wonderful day and I’ll see you next week!
Sunny Studio Supplies Used:
Sunny Studio Supplies Used:
 Beach Babies Stamps Shop at: Sunny Studio |
 Beach Babies Dies Shop at: Sunny Studio |
 Comic Strip Everyday Dies Shop at: Sunny Studio |
 Happy Word Die Shop at: Sunny Studio |
 Woodland Borders Dies Shop at: Sunny Studio |
 Flirty Flowers 6x6 Paper Shop at: Sunny Studio |
 Best Fishes Stamps Shop at: Sunny Studio |
 Best Fishes Dies Shop at: Sunny Studio |
 Silly Sloths Stamps Shop at: Sunny Studio | |
 Silly Sloths Dies Shop at: Sunny Studio |
 Summer Splash 6x6 Paper Shop at: Sunny Studio |
 Sea You Soon Stamps Shop at: Sunny Studio |
 Sea You Soon Dies Shop at: Sunny Studio | |
 Stitched Arch Dies Shop at: Sunny Studio |


No comments:
Post a Comment