Thursday, April 6, 2023

Panda Party Cards with Marine and Waleska

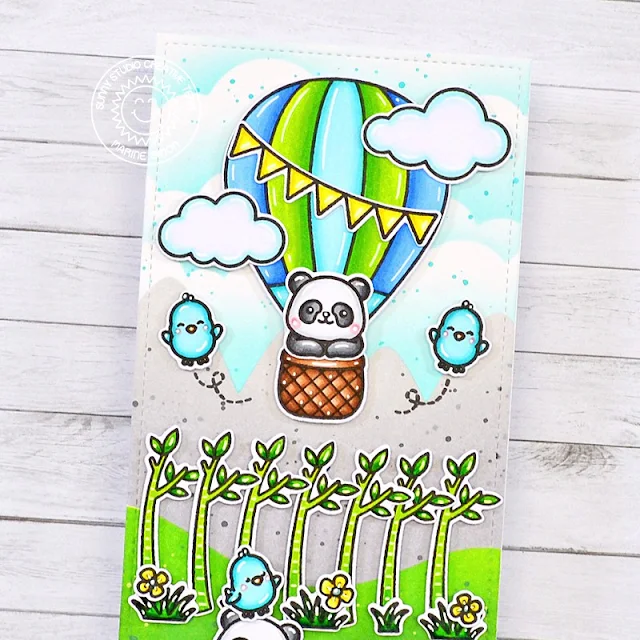
Hey crafty friends, Marine here, so glad to be back on the blog with the loveliest and sweetest pandas from Panda Party. I created a mountain scene for those cute little guys, and to help me complete my scene, I shopped my entire Sunny Studio collection to find the stamps that could fit the theme.

Sunny Studio Stamps: Panda Party Birthday Card by Marine Simon (featuring Balloon Rides)

And just like the Garden Critters card that I shared last week, I first stamped all my images on Transotype perfect coloring paper using an alcohol marker-friendly black ink, and die cut them all using the coordinating dies, in order to place them on an 8,5 x 3,5 inches Strathmore bristol smooth panel and help me visualize the scene I wanted to build. I used a pencil to mark on my panel the different parts I wanted to create in my scene, from the bottom to the top: two hills, mountains, and the sky, and I used stencils from my stash along with oxide inks to color the entire panel.

Sunny Studio Stamps: Panda Party Birthday Card by Marine Simon (featuring Balloon Rides)

Once my mountain landscape was done, I colored all my images using my Spectrum Noir Illustrator markers and Graph'it brush markers. And to create a lovely habitat for my lovely pandas from Panda Party, I picked some extra stamps from different sets:

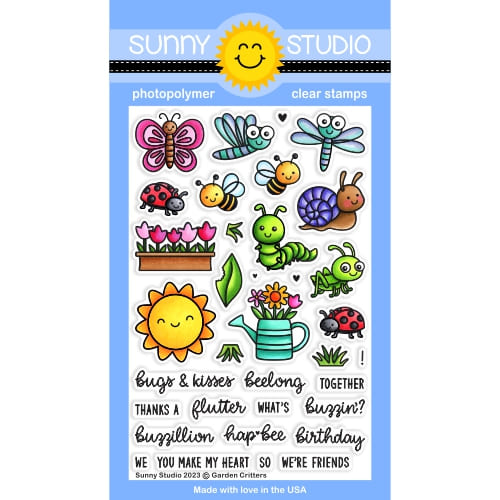
- the grass from Garden Critters
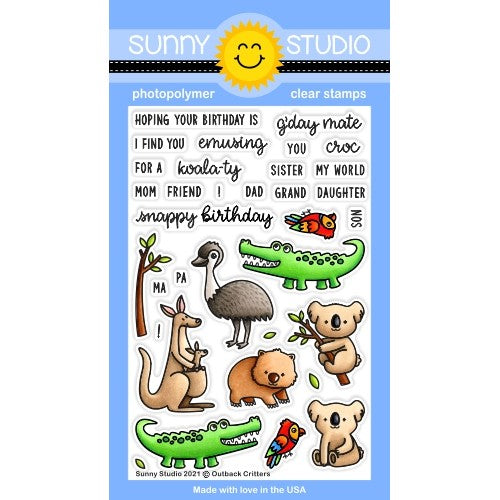
- the branch from Outback Critters
- the hot air balloon & clouds from Balloon Rides
- two leaves from Fabulous Flamingos
- the tree trunk from Seasonal Trees
- the flowers from Chickie Baby + from Chubby Bunny
- the swirling detail from Country Scenes

Sunny Studio Stamps: Panda Party Birthday Card by Marine Simon (featuring Balloon Rides)

I white heat embossed my "Wishing you a pandastic day" from Panda Party at the bottom of the panel, I attached all the images using 1mm foam squares mostly and 3mm glue dots, and as always I finished my card by adding highlights and details to the images using a white gel pen.

Sunny Studio Stamps: Panda Party Birthday Card by Marine Simon (featuring Balloon Rides)

And that's it! Love those cute pandas and how they pop on the green landscape, and the one in the balloon is one more proof that Sunny Studio stamp sets are totally mixable, just perfect if, just like me, you love to create stories on cards. Don't hesitate to watch the process video for more details (click on the image above)! Thank you so much for stopping by, and see you next time!

-------------------------------------------

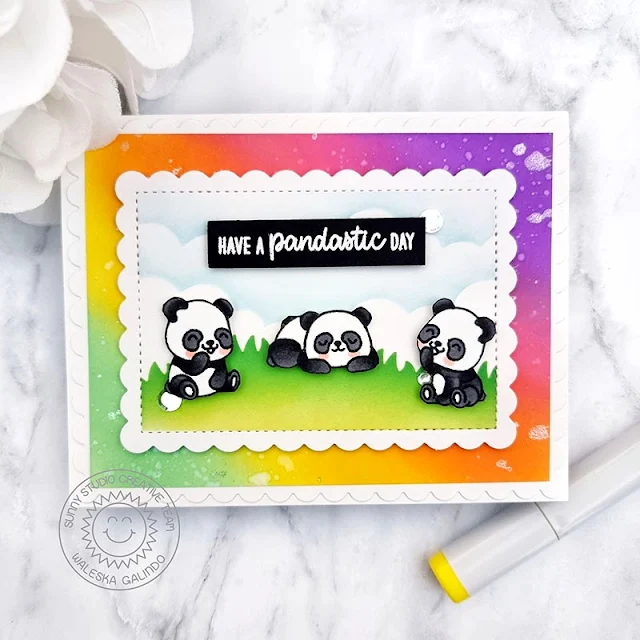
Hello there, Waleska here! I am happy to be back on the blog to share a happy card featuring the Panda Party Stamps. I also used the Frilly Frames Hexagon and the Mini Mat & Tag #1 Dies.

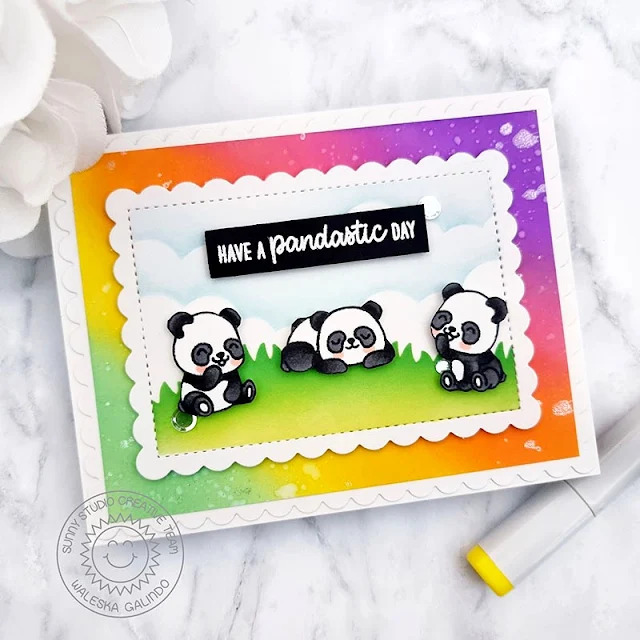
Sunny Studio Stamps: Panda Party Birthday Card by Waleska Galindo (featuring Frilly Frame Dies)

I started by cutting the biggest of the Frilly Frames with white cardstock and inking another piece to adhere on top of this frame with Oxide Inks in colors Wilted Violet, Picked Raspberry, Carved Pumpkin, Mustard Seed and Cracked Pistachio, I did some watercolor splatters for more interest too. I then cut the small scalloped rectangle from the Mini Mat Tag #1 Dies and created a little scene with stencils and oxide inks.

Sunny Studio Stamps: Panda Party Birthday Card by Waleska Galindo (featuring Frilly Frame Dies)

I then stamped and cut the cutest three pandas from the set and adhere them in the scene, I stamped one of the sentiments with white embossing powder on black cardstock, such an adorable card to wish someone you love a pandastic day! Thank you so much for stopping by today have a great rest of your week!

Sunny Studio Supplies Used:
Outback Critters Stamps
Shop at:
Sunny Studio
Outback Critters Dies
Shop at:
Sunny Studio
Chubby Bunny Stamps
Chubby Bunny Stamps
Shop at:
Sunny Studio
Chubby Bunny Dies
Chubby Bunny Dies
Shop at:
Sunny Studio
Fabulous Flamingos Stamps
Shop at:
Sunny Studio
Fabulous Flamingos Dies
Shop at:
Sunny Studio
Seasonal Trees Stamps
Shop at:
Sunny Studio
Seaonal Trees Dies
Seaonal Trees Dies
Shop at:
Sunny Studio
Frilly Frames Hexagon Dies
Shop at:
Sunny Studio
Chickie Baby Stamps
Chickie Baby Stamps
Shop at:
Sunny Studio
Chickie Baby Dies
Chickie Baby Dies
Shop at:
Sunny Studio
Balloon Rides Stamps
Shop at:
Sunny Studio
Balloon Rides Dies
Balloon Rides Dies
Shop at:
Sunny Studio
Country Scenes Stamps
Shop at:
Sunny Studio
Country Scenes Dies
Country Scenes Dies
Shop at:
Sunny Studio
Mini Mat & Tag 1 Dies
Shop at:
Sunny Studio
Garden Critters Stamps
Shop at:
Sunny Studio
Garden Critters Dies
Shop at:
Sunny Studio
Panda Party Stamps
Panda Party Stamps
Shop at:
Sunny Studio
Panda Party Dies
Panda Party Dies
Shop at:
Sunny Studio

Wednesday, April 5, 2023

Tranquil Tulips Cards with Marie and Catherine

Hello Everyone, Marie here! Spring is one of my most favorite times of the year because everything is beautiful and flowers are blooming left and right. If I could think of a flower that is the quintessential Spring flower, tulips definitely come to mind first! That being said, I am excited to share my latest inspiration card that features Sunny Studio Stamps' Tranquil Tulips Stamps. This layering stamp set allows you to quickly create gorgeous tulips during their different stages of bloom. This set is perfect for mass producing cards! 

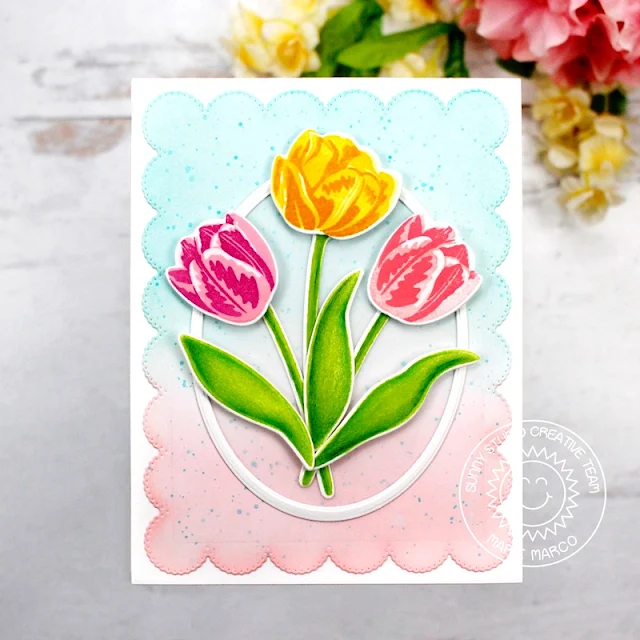
Sunny Studio Stamps: Tranquil Tulips Card by Marie Marco (featuring Loopy Letters Dies, Frilly Frame Dies)

My card today has a very simple design. To start,  I die cut an A2 sized base panel from 110 lb. Neenah Solar White Cardstock. For my background panel I used the Frilly Frames Eyelet Lace Die. I love the scalloped border this die creates! Then taking some Salvaged Patina Distress Oxide Ink, I lightly inked a little more than half the panel, and finished distress inking the rest with Saltwater Taffy Distress Oxide Ink. I also splattered some Salvaged Patina throughout the panel for a little texture. I then  adhered the background panel to the base panel using double sided tape adhesive. 

Next step was to stamp out all my lovely tulips onto Neenah Solar White Cardstock. Each layering flower stamp is individually labeled so it's easy to follow which order they go in. For each tulip bloom, I used three different colors with 3 different ink tones. For the purple tulip, I used a very light Princess Pink Dye Ink for the base, and then a slightly darker Pink in the shade Cotton Candy Dye ink  for the mid tone.These two inks are from MFTstamps. The darkest shade I used is Seedless Preserves Distress Oxide which is a purple that compliments the pink layers very well. For my full bloom yellow tulip, I used Lemon Chiffon Dye Ink, followed by a darker Lemon Drop Dye ink from MftStamps, and the darkest Ink is Fossilized Amber Distress Oxide Ink. 

Sunny Studio Stamps: Tranquil Tulips Card by Marie Marco (featuring Loopy Letters Dies, Frilly Frame Dies)

To make the base of the flower a little darker giving it a more defined gradient, I added a touch of Wild Honey Distress Oxide Ink only to the base. For the pink tulip, I used Spun Sugar Distress Ink, Saltwater Taffy Distress Ink, and finally Worn Lipstick Distress Oxide as the darkest shade. For all the stems and leaves, I used a bright green Twisted Citron Distress Ink, and then Polychromos Color pencils to add some shading. I cut out all the images using the corresponding Tranquil Tulips Dies.

To highlight their beauty, I kept my design very simple by placing all three tulips inside a white oval frame that I created using two oval nesting dies. I gave the flowers dimension by adhering each one with foam tape. I also used foam tape on all the leaves. For the inside of my card, I lightly inked the center of an oval with Salvaged Patina and added a single stemmed tulip, placed off to the side, to create room for my "You're the Best" sentiment. My sentiment was created using the Loopy Letter Dies which I cut from a gold metallic cardstock. 

That concludes this week's card inspiration using the awesome Tranquil Tulips Layering stamps! I had a lot of fun experimenting with various different inks to create the perfect tulip colors! I hope this inspires you to create more Spring projects especially for the upcoming Easter holiday! Thanks so much for joining me today and until next time, Happy Cardmaking! 

-----------------------------------------

Hello Crafty Friends! Catherine here, and today I am sharing some floral gift tags created with Tranquil Tulips Stamps and Vintage Jar Stamps.

Sunny Studio Stamps: Tranquil Tulips Gift Tags by Catherine Cohen (featuring Vintage Jar)

To start, I die-cut the tulips, leaves, and stems, with white cardstock using the coordinating Tranquil Tulips Dies. I placed the die cut images back into the negative spaces. I stamped the images layer by layer with the following Altenew inks:

Yellows: Citrus Burst, Fresh Lemon, Maple Yellow
Pinks: Frosty Pink, Cotton Candy, Coral Berry
Purples: Soft Lilac, Wisteria, Lavendar Fields
Greens: Firefly, Grass Field

I added some highlights onto the tulips and leaves with a white gel pen.

Sunny Studio Stamps: Tranquil Tulips Gift Tags by Catherine Cohen (featuring Vintage Jar)

For the jar, I die cut 6 jars (3 for the front and 3 for the back) out of white cardstock using Vintage Jar Dies. I placed 3 of the jars back into the negative space and stamped the jar using Vintage Jar Stamps with Lawn Fawn Kiddie Pool Ink. I set the 3 jars aside for the back of the tags.  For the front of the jars, I placed the remaining 3 white cardstock jars back into the negative space and stamped the stem images. Next, I stamped the jar on top of the stems using Vintage Jar Stamps and Lawn Fawn Kiddie Pool Ink.

I adhered the tulips, stems, and leaves onto the back of the jar fronts and then glued on the back of the jars. I tied some brown string around the top of the jars. I added tags from Window Quad Square Dies using paper from Gingham Pastels Paper. I added a “thanks” sentiment in the Tranquil Tulips Stamps set using the pennant from Fancy Frames Rectangle Dies.

Thank you so much for joining me today! I would love for you to visit me at Crafti-Cat! Have a lovely day!

Sunny Studio Supplies Used:

Vintage Jar Dies
Vintage Jar Dies
Shop at:
Sunny Studio
Vintage Jar Stamps
Vintage Jar Stamps
Shop at:
Sunny Studio
Fancy Frames- Rectangles
Shop at:
Sunny Studio
Loopy Letters Dies
Loopy Letters Dies
Shop at:
Sunny Studio
Gingham Pastels 6x6 Paper
Shop at:
Sunny Studio
Frilly Frames-Eyelet Lace
Shop at:
Sunny Studio
Window Quad Square Die
Shop at:
Sunny Studio
Tranquil Tulips Stamps
Shop at:
Sunny Studio
Tranquil Tulips Dies
Shop at:
Sunny Studio

Tuesday, April 4, 2023

Hayley Alphabet Die Focused Cards by Isha and Lien

Hello everyone, Isha here with a fun interactive baby card featuring the Hayley Alphabets dies. I used action wobbler to create the interactive element.

Sunny Studio Welcome Sweet Baby Card by Isha Gupta (using Hayley Alphabet Dies, Baby Elephant & Banner Basics Stamps)

To start, I created the clouds in the center of the white panel by sponging pink distress ink through a cloud stencil. I then flicked some pink and white ink splatters.

Stamp the images from the Baby Elephants stamps, color, and die-cut using the coordinating dies. Stamp the banner from the Little Birdie stamp set, stamp the sentiment, color, and die-cut using the coordinating dies. Adhere the center focal image to the card using a mini action wobbler. Adhere to the rest of the images.

Die-cut the word "WELCOME" using the Hayley Uppercase and Hayley Lowercase alphabet. I die-cut it once with white and then with black card. Color the white using pink markers. Adhere the pink alphabet to the black, slightly offset. Adhere to the card.

Adhere the panel to a pink card base. Add some white gel pen details. Add shine to the clouds, crown, and word using a Nuvo shimmer pen. To finish, add some diamond sparkle stars by Studio Katia.

Sunny Studio Welcome Sweet Baby Card by Isha Gupta (using Hayley Alphabet Dies, Baby Elephant & Banner Basics Stamps)

Thanks for dropping by and have a nice day!

---------------------------------------------

Hi crafty friends! It's Lien here, with some tips to align your custom sentiments and a fun way to add stitching to a border die!
 
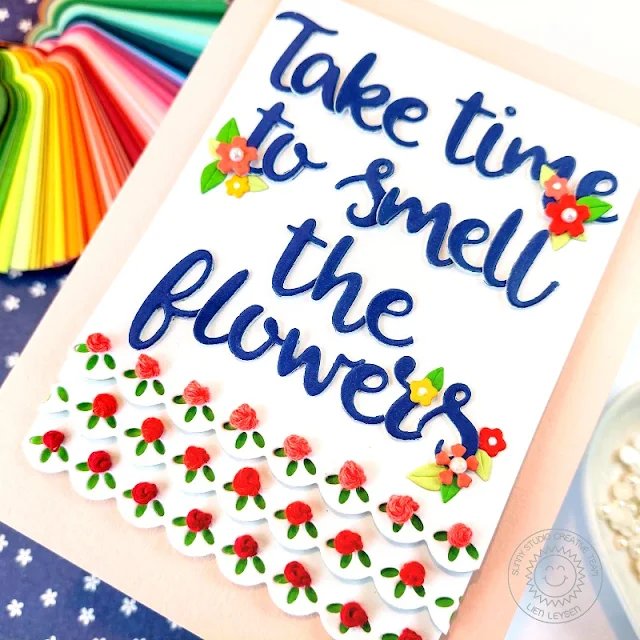
Today I finally got to try an idea I had as soon as I saw these beautiful Ribbon and Lace Border dies. I added stitching to them! First, I die-cut one of the borders from a panel of white cardstock and twice more from scraps. I tried to align the die-cut scraps behind the panel and temporarily adhered them together with washi tape once I liked the spacing. I then trimmed the entire piece down to 4 3/4" x 3 1/2".

Sunny Studio "Take Time To Smell The Flowers" Card by Lien Leysen (using Hayley Alphabet and Slimline Ribbon & Lace Borders Dies)
 
I used three shades of red embroidery thread and stitched french knots in all the circular holes on the border. You can find some great french knot tutorials on youtube, but for stitching on paper, I recommend using all 6 strands of thread and wrapping the thread around your needle at least 5 times for a thicker rose. This takes a little bit of practice, but I promise it's worth it!
 
I traced the borders on some green cardstock with a pencil and quickly trimmed it out with scissors. I can adhere these green scraps behind each white border so it looks like the oval holes in the border die are leaves for each stitched rose. I adhered all these borders together and set the finished piece to the side. 
 
I wanted a longer sentiment on this card and used both the Hayley Uppercase Alphabet Dies and the Hayley Lowercase Alphabet Dies to cut this out. As I did for my last card, before die-cutting these letters, I covered the back of my cardstock (dark blue) in foam tape to create quick puffy alphabet stickers. 
 
Now for my perfect tip to line up a longer sentiment like this created with alphabet dies: I cut a piece of parchment paper (baking paper works too!) to the size of my empty white space above the stitched borders. I adhered this down to my cutting mat so I could see the grid of it through the parchment paper. This way I could use the grid to space my die cuts. Once I was happy with the spacing, I used a piece of Press 'n Seal to pick all the letters up at once and transfer them to my card. 

Sunny Studio "Take Time To Smell The Flowers" Card by Lien Leysen (using Hayley Alphabet and Slimline Ribbon & Lace Borders Dies)

I foam mounted the white panel onto a pink card base and added some small flower and leaf dies from the Wonderful Windows dies and the Autumn Tree dies to embellish the sentiment a little bit. That finishes up this stitched card!

Sunny Studio Supplies Used:

Little Birdie Stamps
Shop at:
Sunny Studio
Little Birdie Dies
Little Birdie Dies
Shop at:
Sunny Studio
Baby Elephants Stamps
Shop at:
Sunny Studio
Baby Elephants Dies
Baby Elephants Dies
Shop at:
Sunny Studio
Autumn Tree Die
Autumn Tree Die
Shop at:
Sunny Studio
Hayley Lowercase Alphabet Dies
Shop at:
Sunny Studio
Hayley Uppercase Alphabet Dies
Shop at:
Sunny Studio
Ribbon & Lace Dies
Ribbon & Lace Dies
Shop at:
Sunny Studio
Wonderful Windows Dies
Shop at:
Sunny Studio

Monday, April 3, 2023

Clucky Chickens Cards with Bobbi and Cathy

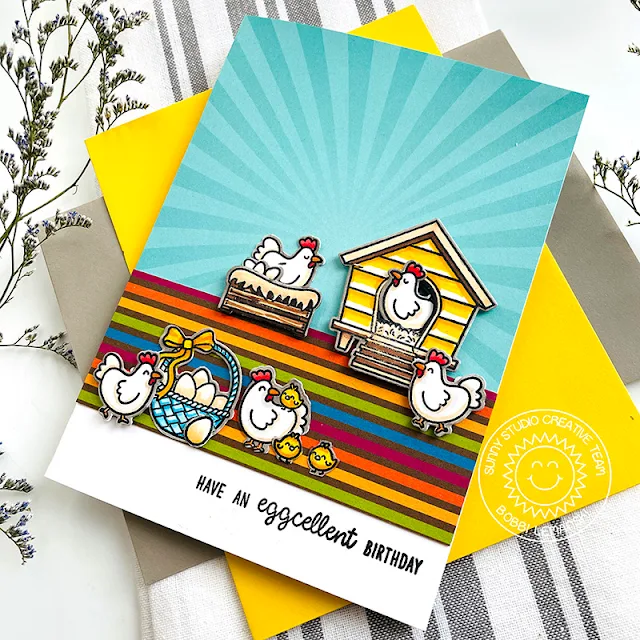
Cluck, cluck…what’s up? Bobbi here with you! It’s the Clucky Chickens stamps and dies! New for spring, these chickens come with all their cute accessories like the hen house, basket, crate with hay, chicks, eggs and more. This stamp set can make all sorts of cards including cards for birthdays. My 5″ X 7″ card features pattern papers from the Classic Sunburst paper pack and the Critter Country paper pack for the background.

Sunny Studio Stamps: Clucky Chickens Birthday Card by Bobbi Lemanski

To make this 5″ X 7″ card, I attached the pattern papers to create a vibrant background and stamped the birthday phrase at the bottom, in the white space. Next, I stamped the cute images from the set and cut them out using the coordinating dies. I colored the images using the following Copic Sketch Marker colors:

Chickens: E53, E50, YR68, R29, R17
Hen house: Y38, Y19, E55, E59, E49, 100, C9, C7, C5
Chicks: Y38, Y18
Crate with hay: E57, E55, E53, E50, E49
Basket: B04, B02, B00, Y19, Y15, Y08, E53, E50
Shadow color: W5

Sunny Studio Stamps: Clucky Chickens Birthday Card by Bobbi Lemanski

I don’t love a white border around my cut images, so I generally color the borders using a shadow color such as W5. It keeps the attention on the image instead of the border when creating a scene like this one.

Sunny Studio Stamps: Clucky Chickens Birthday Card by Bobbi Lemanski

I attached all of the items to the card front. The hen house, crate with hay and three of the chickens were attached with foam tabs, making them stand out a bit. It gives more dimension to the scene. I added one chicken inside the house. There’s a die in the set that cuts out the door opening making this super easy to do! I like that this card has more masculine colors in the background, making the white chickens really pop off the page. It would be a great card for males as well. 

Thanks for stopping by today. If you want to see more ideas and inspiration from me, subscribe to my blog, BobbiHartDesign.com. I’ll send you updates on new posts! You can also find me on Instagram as @BobbiHartDesign and on Facebook as BobbiHartDesign.

---------------------------------------------------

Hey friends! Cathy here today and I’ve got a cute friendship card to share using the Clucky Chickens Stamps. Fast food chicken restaurants inspired my color scheme today but, shhhhh… Don’t tell these chickens!

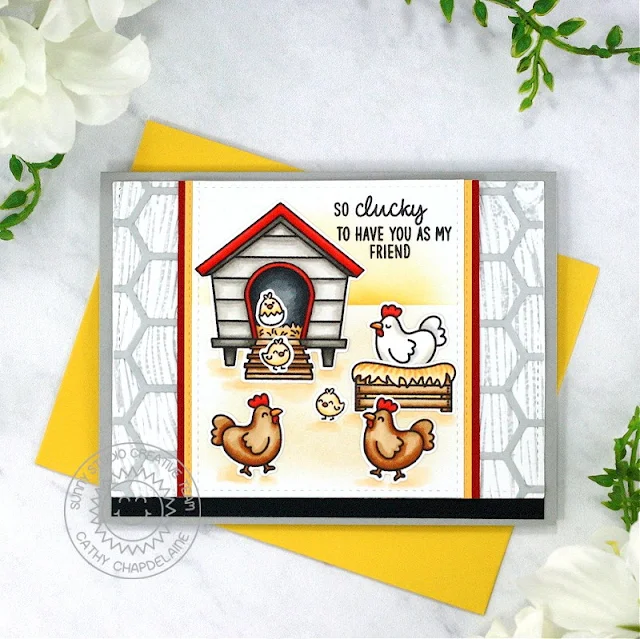
Sunny Studio Stamps: Clucky Chickens Friendship Card by Cathy Chapdelaine (featuring Ribbon & Lace Border Dies, Frilly Frame Dies, Stitched Rectangle Dies)


I started this A2 card by die-cutting a piece of white cardstock with a 
Stitched Rectangle Die. I then inked the inside of the Woodgrain Embossing Folder with Lost Shadow Distress ink and embossed the die-cut rectangle.

Next, I die-cut the center portion of the 
Frilly Frames Hexagon Die from white cardstock and inked it with Lost Shadow Distress ink. I cut the hexagon pattern from the cardstock, adhered it to the left half of the stitched rectangle and trimmed the excess from the outside edges. I then repeated this on the right half of the stitched rectangle. Before I adhered the stitched rectangle to the card front, I die-cut a 5 1/2" long piece of black cardstock using the ribbon die from the Ribbon & Lace Border Dies and adhered the stitched rectangle slightly overlapping the ribbon piece. I trimmed the excess black ribbon piece along the right and left edges of the stitched rectangle and adhered the combined piece centered on the card front.

Sunny Studio Stamps: Clucky Chickens Friendship Card by Cathy Chapdelaine (featuring Ribbon & Lace Border Dies, Frilly Frame Dies, Stitched Rectangle Dies)

For my chicken scene, I die-cut a piece of white cardstock with the largest Stitched Rectangle Die. With the die-cut rectangle placed horizontally, I taped the second largest Stitched Rectangle Die vertically across the piece and die-cut it again. This gave a stitched edge to all sides. I then masked off a horizon line 1 1/2" from the top edge and lightly inked the sky with Fossilized Amber Distress ink. I removed the masking tape and lightly inked the ground with Antique Linen Distress ink. I stamped a sentiment from the 
Clucky Chickens Stamps in the top right corner making sure to leave enough room for the chicken coop.

I brought my red and yellow color scheme together with the help of 2 borders on each side of the center panel that I die-cut using the ribbon die from the Ribbon & Lace Border Dies. I overlapped each piece and adhered them to the back of the center panel trimming the excess from the top and bottom edges. I then adhered the combined piece to the center of the card front.

To finish, I stamped the images from the Clucky Chickens Stamps on Neenah Classic Crest 80lb solar white cardstock, colored them with Copics and die-cut them using the 
coordinating dies. I also deepened the ground around the images with Copic E50 and E51.

I hope you enjoyed and thanks for stopping by! For more inspiration, please visit my blog 
www.inkredibleadventures.com and you can also find me on Instagram as @cathy.chapdelaine.

Sunny Studio Supplies Used:

Stitched Rectangle Dies
Shop at:
Sunny Studio
Frilly Frames Hexagon Dies
Shop at:
Sunny Studio
Woodgrain Embossing
Woodgrain Embossing
Shop at:
Sunny Studio
Classic Sunburst Paper
Shop at:
Sunny Studio
Critter Country Paper
Shop at:
Sunny Studio
Clucky Chickens Stamps
Shop at:
Sunny Studio
Clucky Chickens Dies
Shop at:
Sunny Studio
Ribbon & Lace Dies
Ribbon & Lace Dies
Shop at:
Sunny Studio

Saturday, April 1, 2023

Guest Designer Spotlight: Garden Critters Cards with Kavya

Hi folks, Kavya here. I am back on the Sunny Studio Stamps blog with some fun inspiration using this quarter's release. I absolutely love Spring and Mendi did an awesome job of designing products that pair well with products that were previously released :) 

Sunny Studio Stamps: Garden Critters Everyday Card by Kavya (featuring Squirrel Friends,  Pink Peonies, Fall Friends)

For my first card, I tried creating a garden scene filled with adorable critters. I started off by ink blending my background using blue and yellow dye ink. For the grass, I used some green ink blended green cardstock. 

Sunny Studio Stamps: Garden Critters Everyday Card by Kavya (featuring Squirrel Friends,  Pink Peonies, Fall Friends)

I then stamped and colored a bunch of images from Garden Critters stampPink PeoniesSquirrel FriendsFall Friends and Spring Showers stamp set. 

Sunny Studio Stamps: Garden Critters Everyday Card by Kavya (featuring Kiddie Pool, Wonderful Window Dies)

For my second card, I created a scene depicting a warm autumn afternoon where I am spending my time staring out my bedroom window! I started off by ink bending the brick background using a generic stencil and added some diecut grass at the bottom. 

Sunny Studio Stamps: Garden Critters Everyday Card by Kavya (featuring Kiddie Pool, Wonderful Window Dies)

I then stamped and colored a bunch of images from Garden Critters stampA Bird's Life and Kiddie Pool stamp sets. I created the window using Wonderful Windows Dies and added some extra dimension to the windows using a copic markers. 

That's it and I am done! I loved how both these cards turned out and decided to skip the sentiments so that I can use them for any occasion. 

I hope you liked these projects! Happy crafting!

Sunny Studio Supplies Used:

A Bird's Life Stamps
Shop at:
Sunny Studio
A Bird's Life Dies
A Bird's Life Dies
Shop at:
Sunny Studio
Fall Friends Stamps
Fall Friends Stamps
Shop at:
Sunny Studio
Fall Friends Dies
Fall Friends Dies
Shop at:
Sunny Studio
Pink Peonies Stamps
Pink Peonies Stamps
Shop at:
Sunny Studio
Pink Peonies Dies
Pink Peonies Dies
Shop at:
Sunny Studio
Spring Showers Stamps
Shop at:
Sunny Studio
Spring Showers Dies
Spring Showers Dies
Shop at:
Sunny Studio
Kiddie Pool Stamps
Kiddie Pool Stamps
Shop at:
Sunny Studio
Kiddie Pool Dies
Kiddie Pool Dies
Shop at:
Sunny Studio
Squirrel Friends Stamps
Shop at:
Sunny Studio
Squirrel Friends Dies
Shop at:
Sunny Studio
Garden Critters Stamps
Shop at:
Sunny Studio
Garden Critters Dies
Shop at:
Sunny Studio
Wonderful Windows Dies
Shop at:
Sunny Studio