Friday, March 6, 2020

Prancing Pegasus Cards with Juliana and Candice

Hello Sunny Studio friends! It's Juliana here and today I'm sharing a rainbow themed card featuring the adorable Prancing Pegasus Stamp Set.

Sunny Studio Stamps: Prancing Pegasus Fluffy Cloud Border Dies Stitched Oval Dies Over The Rainbow Everyday Card by Juliana Michaels

To get started I began by creating the background. I took the Fluffy Clouds Border Dies and cut each one from a piece of white cardstock and used them as a mask. While holding the mask in place on a piece of Bristol Paper, I used a foam blending tool to apply Tumbled Glass Distress Oxide Ink. I tapped off the excess ink on my craft mat and then applied it darker closer to the edge of the mask and then went lighter as I moved up from it. I repeated this until the background paper was covered with fluffy clouds. I then took one of the die cut clouds and inked just the top edge. I then trimmed this to fit the bottom of the card panel and I later added the sentiment to this area.

Sunny Studio Stamps: Prancing Pegasus Fluffy Cloud Border Dies Stitched Oval Dies Over The Rainbow Everyday Card by Juliana Michaels

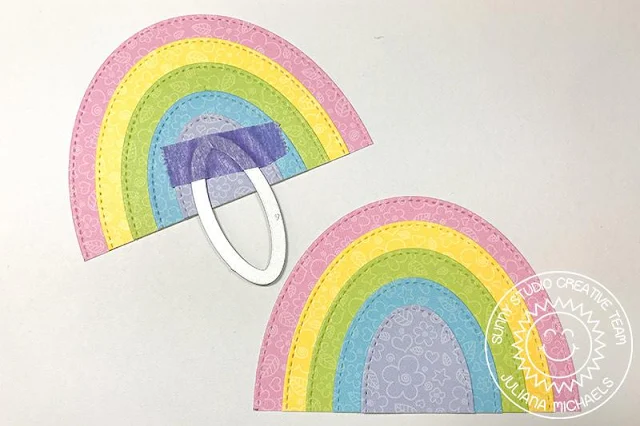
For the rainbow, I used the Stitched Oval Dies and used them to cut ovals from five different colors of patterned paper from the Spring Fling 6x6 Paper Pad. I then stacked the ovals and adhered all of the layers together. Next, I took the smallest oval die, lined it up in the center and cut through all of the layers. I cut this in half and then I had a rainbow!

Sunny Studio Stamps: Prancing Pegasus Fluffy Cloud Border Dies Stitched Oval Dies Over The Rainbow Everyday Card by Juliana Michaels

Next for the adorable pegasus from the Prancing Pegasus Stamp Set. I colored her with Copic Markers and then die cut her using the coordinating Prancing Pegasus Die SetAs I mentioned earlier, I added the sentiment to the bottom cloud section. Here I used the Rainbow Word Die and the Over The Rainbow Stamp Set.

I hope you enjoyed learning how this card came together and how I used the Stitched Oval Dies to create the rainbow on this Prancing Pegasus card. Thanks so much for stopping by today!

-------------------------------------------------------

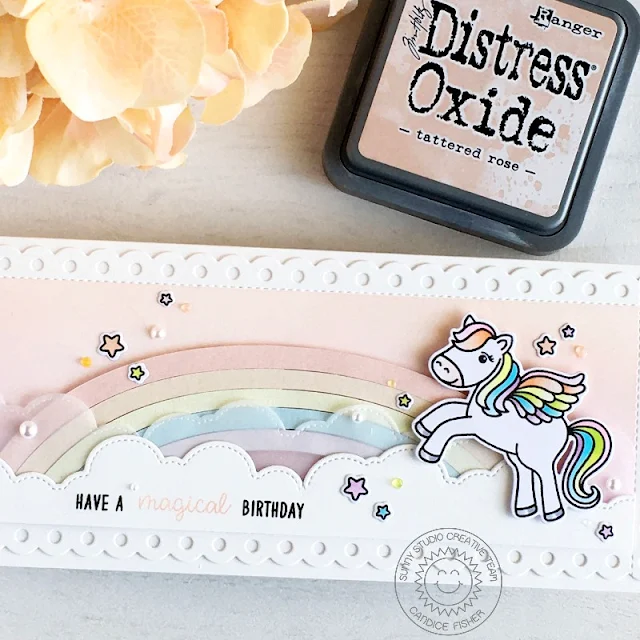
Hello, Candice back with you today! I think it is an unwritten rule that unicorns (and pegasus) have to go with rainbows and of course I had to use them together for my card!

Sunny Studio Stamps: Prancing Pegasus Fluffy Cloud Border Dies Frilly Frame Dies Birthday Card by Candice Fisher

I used a few Sunny Studio Stamps products for my pastel card:

I began my card by making an 8 1/2 x 3 1/2 card base which fits nicely into a standard size envelope. For the background, I first created my slimline frame with the Frilly Frames Polka-Dot die using the partial die cutting method. I then taped off the scalloped edges and inked with Tattered Rose & Milled Lavender Oxides.

Next, I used my Cameo Silhouette to die cut the rainbow from shimmer pastel papers and die cut the clouds, one from vellum and one from thick white cardstock. I then stamped the sentiment with black Versafine and Tattered rose.

Sunny Studio Stamps: Prancing Pegasus Fluffy Cloud Border Dies Frilly Frame Dies Birthday Card by Candice Fisher

I stamped the pegasus and stars, colored with light Copic markers, and die cut using the coordinating dies. To put it all together, I used foam tape to raise the rainbow, clouds and images and added some sparkle with Wink of Stella to the stars and wings. I finished it by adding some Nuvo drops in rainbow and some white pearls.

Thank you for stopping by and have a fabulous day!

Sunny Studio Supplies Used:

Stitched Oval Dies
Stitched Oval Dies
Shop at:
Sunny Studio
Over The Rainbow Stamps
Shop at:
Sunny Studio
Rainbow Word Die
Rainbow Word Die
Shop at:
Sunny Studio
Frilly Frames Stripes Die
Shop at:
Sunny Studio
Fluffy Clouds Border Dies
Shop at:
Sunny Studio
Prancing Pegasus Stamps
Shop at:
Sunny Studio
Prancing Pegasus Dies
Shop at:
Sunny Studio
Spring Fling Paper
Spring Fling Paper
Shop at:
Sunny Studio

Thursday, March 5, 2020

Blooming Frame Dies Focused Cards with Vanessa and Anja

Hello to you! Vanessa here with a new card using the wonderful Blooming Frame Die

Sunny Studio Stamps: Blooming Frame Dies Birthday Card by Vanessa Menhorn

When I made this card, I was preparing for our trip to Paris and saw the gorgeous Art Deco and Art Nouveau elements, so I was inspired to create a card dedicated to this style.

Sunny Studio Stamps: Blooming Frame Dies Birthday Card by Vanessa Menhorn

First, I inked the front of my card base with Crushed Olive, Lucky Clover and Pine Needles Distress Oxide Inks. Then I die-cut the Blooming Frame from dark green cardstock and adhered it. Now I applied Versamark Ink to a piece of yellow cardstock, heat-embossed it with gold embossing powder and die-cut the "happy birthday" from it. After I had adhered the sentiment, I added green pearls from the Rainbow Pearls mix.

I hope you like my take on this wonderful die! Thank you so much for visiting today!

------------------------------------------

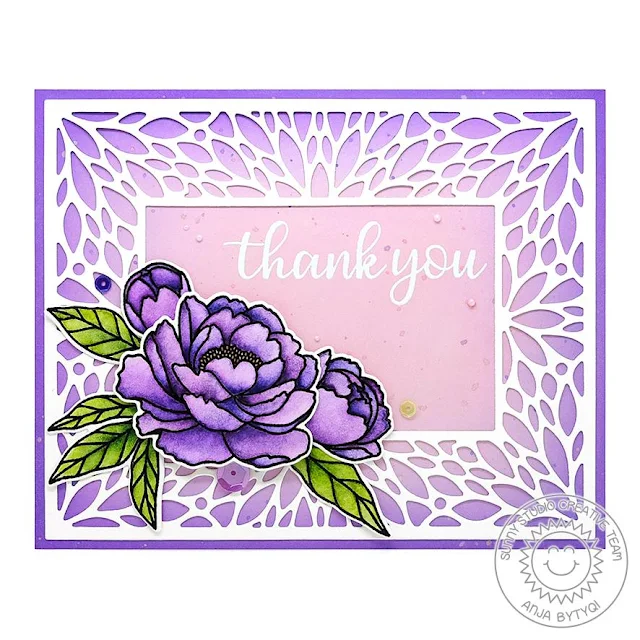
Hello everyone, Anja here and today I'm back with a floral Thank You card using the Blooming Frame Die along with the beautiful Pink Peonies Stamps.

Sunny Studio Stamps: Blooming Frame Dies Pink Peonies Everyday Greetings Thank You Card by Anja Bytyqi

I started with the background by ink blending the Distress Oxides Spun Sugar, Milled Lavender and Wilted Violet onto some Bristol cardstock. I also added a couple of ink splatters with a paint brush.

Next, I die cut the Blooming Frame Die from white heavyweight cardstock using an extra metal shim in my die cutting machine due to the intricate details. I wanted to create a frame design, so I also die cut a rectangle window out of the center. I love how you can see the ink blended background behind the die-cut.

Sunny Studio Stamps: Blooming Frame Dies Pink Peonies Everyday Greetings Thank You Card by Anja Bytyqi

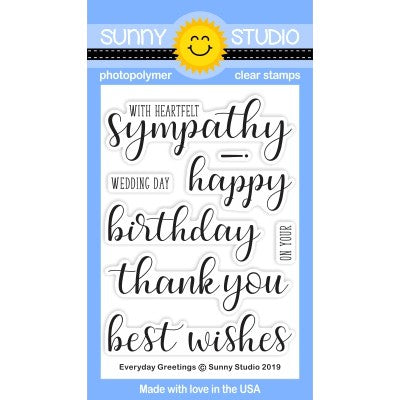
I stamped the sentiment from the Everyday Greetings set in VersaMark Ink and heat embossed it with white embossing powder. For my floral cluster, I stamped the peonies and leaves in VersaFine Onyx Black Ink and heat embossed them with clear embossing powder. This helps staying inside the lines while watercoloring. I used the coordinating dies to cut out the images and arranged them at the bottom left corner of the rectangle window. I used foam tape to pop up the peonies and tucked the leaves behind them. Finally, I adhered some matching sequins and added tiny dots of Nuvo Fairy Wings Dream Drops.

Thank you so much for stopping by! Wishing you a lovely day!

Sunny Studio Supplies Used:

Everyday Greetings Stamps
Shop at:
Sunny Studio
Pink Peonies Stamps
Pink Peonies Stamps
Shop at:
Sunny Studio
Pink Peonies Dies
Pink Peonies Dies
Shop at:
Sunny Studio
Blooming Frame Die
Blooming Frame Die
Shop at:
Sunny Studio

Wednesday, March 4, 2020

Spring Showers Cards with Franci and Ana

Hi everyone and happy Wednesday! Franci here with you today with a cute card showcasing the new Spring Showers set.

Sunny Studio Stamps: Spring Showers Everyday Card by Franci Vignoli

First of all I stamped, colored with Copic and die cut all the images. These little umbrellas are so much fun! I also added some details with a white gel pen to make them extra cute. Then I die cut my scalloped panel out of white cardstock and I inked my cloudy sky background with Distress Ink on to a customized stencil.

Sunny Studio Stamps: Spring Showers Everyday Card by Franci Vignoli

I created a matching card base out of white cardstock and covered the front with this happy yellow patterned paper from the Spring Fling Paper set. Then I placed all my images on to my cloudy panel, glued them down with foam adhesive and stamped my sentiment. I mounted my panel on to my card with more foam adhesive and added some sparkling clear sequins here and there + a little red heart embellishment. 

Hope you like my card and thank you so much for stopping by today! 

----------------------------------------------------------

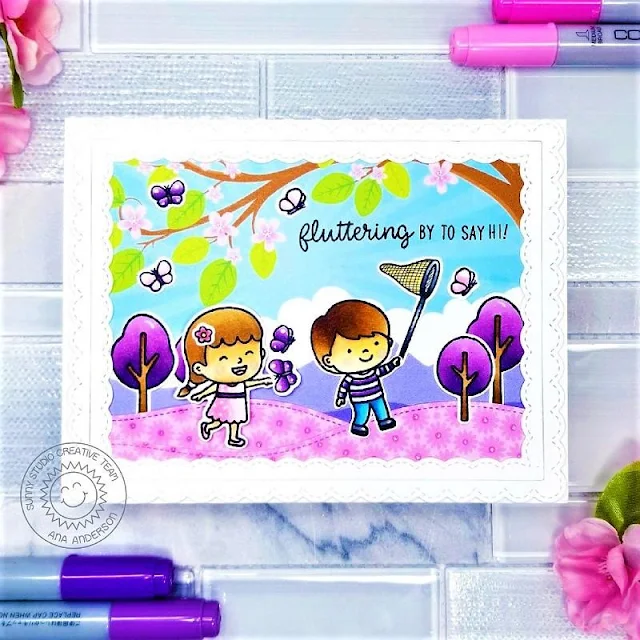
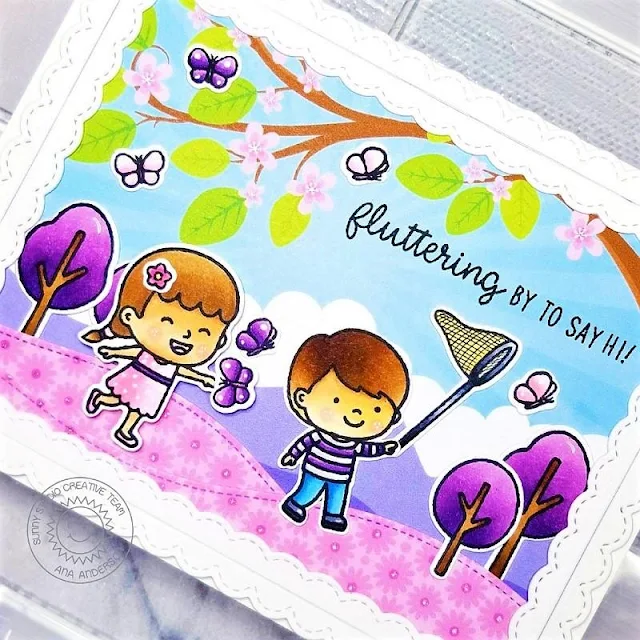
Hi friends! Ana here today with a super cute scene showcasing Spring Showers stamps and coordinating dies as well as Spring Fling patterned paper.

Sunny Studio Stamps: Spring Showers Spring Scenes Woodland Border Dies Fancy Frame Dies Everyday Card by Ana Anderson

To create this sweet scene, I used tree and mountains scene patterned paper for the background. I thought a field full of pink flowers would look adorable for this scene – I used pink floral paper which I die cut with Woodland Borders dies to create the hills.

I framed the scene with white scalloped frame which I die cut with the largest Fancy Frames Rectangle dies. I stamped the adorable kiddos, butterflies and the net from Spring Showers stamp set, as well as the trees (from Spring Scenes stamp set) colored them with alcohol markers and cut them with coordinating dies.

Sunny Studio Stamps: Spring Showers Spring Scenes Woodland Border Dies Fancy Frame Dies Everyday Card by Ana Anderson

I adhered all the images directly to the background using liquid glue, then stamped the sentiment (from Spring Showers set) with VersaFine Onyx black ink.

Isn’t this scene so adorable and sweet!? These little kiddos are just too cute for words! Thank you for visiting with us today and until next time I wish you happy crafting!

Sunny Studio Supplies Used:

Fancy Frames- Rectangles
Shop at:
Sunny Studio
Woodland Borders Dies
Shop at:
Sunny Studio
Spring Scenes Stamps
Shop at:
Sunny Studio
Spring Scenes Dies
Spring Scenes Dies
Shop at:
Sunny Studio
Spring Showers Stamps
Shop at:
Sunny Studio
Spring Showers Dies
Spring Showers Dies
Shop at:
Sunny Studio
Spring Fling Paper
Spring Fling Paper
Shop at:
Sunny Studio

Tuesday, March 3, 2020

Pink Peonies Cards with Angelica and Mindy

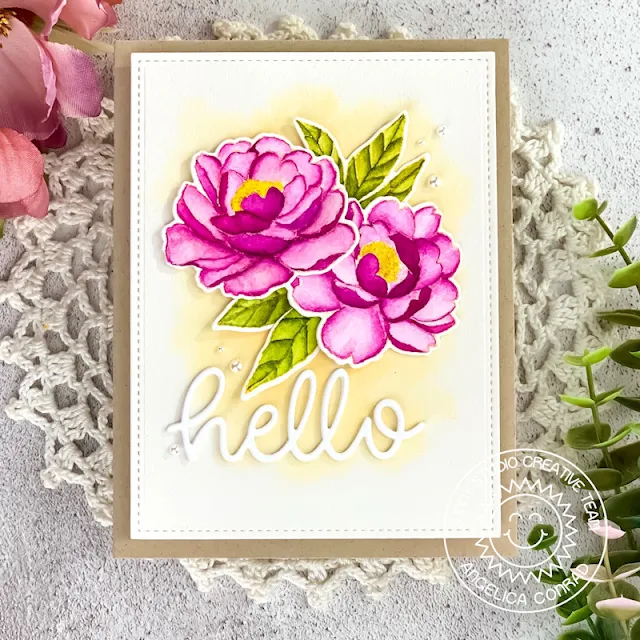
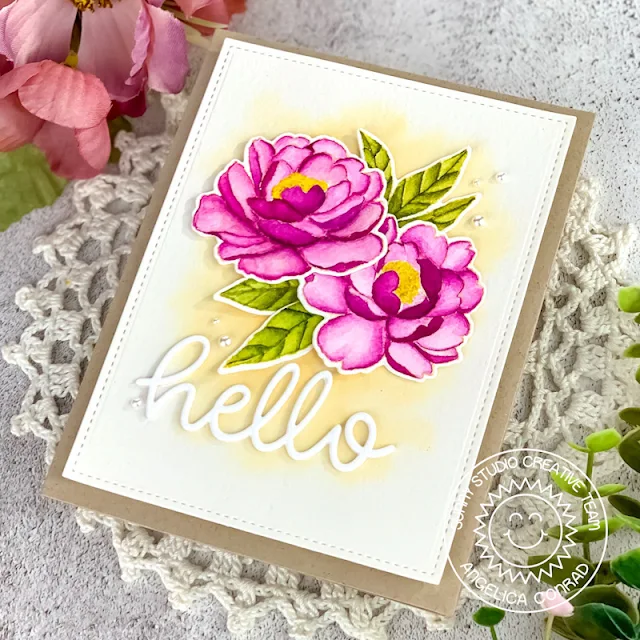
Hi friends! Angelica here, and I have a watercolored card to share today, featuring the Pink Peonies stamp set.

Sunny Studio Stamps: Pink Peonies Hello Word Die Hello Card by Angelica Conrad

I stamped the flowers and petals with Antique Linen Distress Ink onto Arches Coldpress paper, and colored them with Daniel Smith watercolors. Once dry, I used the coordinating dies to die-cut them. 

Sunny Studio Stamps: Pink Peonies Hello Word Die Hello Card by Angelica Conrad

I made a really quick watercolored background, and added the flowers and leaves with thin foam squares. I attached the panel to a card base, and added a die-cut Hello and White Pearls to finish the card.

Thanks so much for joining me today. I hope I helped with inspiration for your next floral project!

--------------------------------------------------------

Hello! It’s Mindy from My Creative Scoop and today, I'm sharing not only a new card, but a video tutorial as well. I’m using the new Pink Peonies Stamp set and I’ve die cut them with the coordinating Pink Peonies Dies

Sunny Studio Stamps: Pink Peonies Frilly Frame Dies Hello Card by Mindy Baxter

I’m also using the new Spring Fling Paper Pad. To soften up the boldness of the purple paper I put the Frilly Frames Striped die over it. This really softens up the card making the flowers bold and jump right off the card.

Sunny Studio Stamps: Pink Peonies Frilly Frame Dies Hello Card by Mindy Baxter

I’ve stamped my images in Memento Black Ink and stamped onto my Copic Xpress it Blending Card – which is my favorite paper to use when coloring with Copic Markers.
In my video tutorial below I’m using the following Copic markers: V17, V15, V12, Y26, Y21.


I had so much fun coloring this gorgeous peony. I hope you have enjoyed my tutorial and found it to be helpful.

Thank you so much stopping by. Have a great day!

Sunny Studio Supplies Used:

Hello Word Die
Hello Word Die
Shop at:
Sunny Studio
Frilly Frames Stripes Die
Shop at:
Sunny Studio
Pink Peonies Stamps
Pink Peonies Stamps
Shop at:
Sunny Studio
Pink Peonies Dies
Pink Peonies Dies
Shop at:
Sunny Studio
Spring Fling Paper
Spring Fling Paper
Shop at:
Sunny Studio

Monday, March 2, 2020

Heartstrings Border Dies Focused Cards with Lynn and Ashley

Hello, there! It’s Lynn here today where I’m sharing a fun card that I created featuring the new Heartstrings Border Dies.

Sunny Studio Stamps: Heartstrings Border Dies Enchanted Frilly Frame Dies Everyday Card by Lynn Put

To create my card, I used the sweet stamp set, Enchanted along with the Enchanted dies. I started out by stamping some of the images from the Enchanted set and coloring them using Copic markers then die cut them out. Next I used the Frilly Frames Retro Petals dies and die cut a piece of the pretty yellow daisy paper from the Spring Fling cardstock pack. After that I cut a strip of the same pattern paper in lavender and used the Heartstrings Border Die and die cut a strip of white cardstock and layered them together. 

Sunny Studio Stamps: Heartstrings Border Dies Enchanted Frilly Frame Dies Everyday Card by Lynn Put

Once that was done, I die cut a rectangle and blended on some Tumbled Glass Distress Oxide ink along the top and used the grass die from the Sunny Sentiments dies. I adhered my images, popping up the knight, princess and rectangle with foam tape and stamped my sentiment from the Enchanted set along the bottom. 

Thanks so much for stopping by!

-----------------------------------------------------

Hello friends! It's Ashley and for my card today, I used one of the Heartstrings Border Dies to create a patterned background! I think the stitched hearts give the perfect amount of texture!

Sunny Studio Stamps: Heartstrings Border Dies Fabulous Flamingos Sending Sunshine Scalloped Tag Circle Dies Everyday Card by Ashley Ebben

I started by die cutting several strips of the stitched hearts from Heartstrings Border Dies from white cardstock. I pieced them together onto another piece of white cardstock then trimmed the whole thing to 4" x 5.25". I added the blue border with an A2 piece of light blue quilted heart paper from Flirty Flowers.

For my scene in the middle, I was inspired by a recent trip to the zoo to grab my Fabulous Flamingos set. It was a nice day, but still too cold for the flamingos to be out. My daughter missed them, so I added them to this card! I stamped the flamingos from Fabulous Flamingos along with the tree from Sending Sunshine in Lawn Fawn Jet Black ink and colored with Copics. I blended Distress Oxides in Tumbled Glass and Antique Linen onto a Scalloped Tag Circle for the backdrop and arranged everything on my card.

Sunny Studio Stamps: Heartstrings Border Dies Fabulous Flamingos Sending Sunshine Scalloped Tag Circle Dies Everyday Card by Ashley Ebben

I added a sentiment from Fabulous Flamingos to the tag in Jet Black ink. I added a twine bow to the top of the tag and a few Studio Katia Iridescent Crystals around the card for sparkle to finish.

Thank you so much for stopping by! Have a fabulous day!

Sunny Studio Supplies Used:

Sunny Sentiments Dies
Shop at:
Sunny Studio
Flirty Flowers 6x6 Paper
Shop at:
Sunny Studio
Fabulous Flamingos Stamps
Shop at:
Sunny Studio
Fabulous Flamingos Dies
Shop at:
Sunny Studio
Sending Sunshine Stamps
Shop at:
Sunny Studio
Sending Sunshine Dies
Shop at:
Sunny Studio
Frilly Frames Retro Petals Dies
Shop at:
Sunny Studio
Scalloped Tags-Circle
Shop at:
Sunny Studio
Enchanted Stamps
Enchanted Stamps
Shop at:
Sunny Studio
Enchanted Dies
Enchanted Dies
Shop at:
Sunny Studio
Heartstrings Border Dies
Shop at:
Sunny Studio
Spring Fling Paper
Spring Fling Paper
Shop at:
Sunny Studio