Tuesday, January 21, 2020

Enchanted Cards with Angelica and Mindy

Hi friends! Angelica here, and I have a sweet birthday card to share today, showcasing the new Enchanted stamp set

Sunny Studio Stamps: Enchanted Comic Strip Everyday Dies Fluffy Clouds Princess Themed Card by Angelica Conrad

I started this card by making a background. I blended Ripe Raspberry and Stargazer dye inks onto white card stock. I splattered watered-down acrylic paint onto the panel, and let the panel dry while I die-cut clouds and grass. I die-cut two Fluffy Clouds, inking them with Cotton Candy dye ink. The grass border is from Comic Strip Everyday dies

Sunny Studio Stamps: Enchanted Comic Strip Everyday Dies Fluffy Clouds Princess Themed Card by Angelica Conrad

I attached everything to the inked panel, popping the bottom cloud up with foam adhesive. I added Copic-colored images with thin foam squares, and attached the panel to a card base to finish the card. To finish the card, I used a Happy Birthday stamp from Tiny Dancers, and Princess from Enchanted. I curved the words, and stamped them in a Banner Basics. I added a bit of shading with Copic Markers to the banner, then die-cut it with the coordinating die. I attached it to the card with thin foam squares.

I hope I have inspired new ideas on using this adorable stamp set. Thanks so much for stopping by!

---------------------------------------------------------

Hello! It’s Mindy from My Creative Scoop Today I’m sharing a card using the new Enchanted Stamp Set

Sunny Studio Stamps: Enchanted Sweet Word Die Princess Themed Card by Mindy Baxter

I’ve stamped all my images onto my Copic Xpress it Blending card. I make sure I stamp some images at different angles and I make sure that I stamp going off my paper, too. This really makes it look like it’s a patterned paper. I used my Copic Markers to color all my little images. 

Copic Markers used:
Princess and hat – E13, E11, E00, R32, R30, R81, R85, V17, V15, V12, E71, E74; Prince – E13, E11, E00, R32, R30, BG13, BG18, BG11, E43, E42, N5, N7, N0; Castle – E40, E42, E43, B00, B12, B14, R81, R85, N3, N1, N0; Crowns – E42, E43; Frog – YG61, YG63, YG67, E42, E43, R32, R30, BG18, BG3, BG11; Stars – Y21, Y26; Carriage – B00, B12, B14, N0, N3, R81, R85, E43, E42

Sunny Studio Stamps: Enchanted Sweet Word Die Princess Themed Card by Mindy Baxter

I wanted to use a bold sentiment and try not to cover up all the images so I used the Princess from the Enchanted Stamp set along with the Sweet Word Die which I cut out in some fun foam. I adore the way this card came out!

Thank you so much stopping by. Have a great day!

Sunny Studio Supplies Used:

Sweet Word Die
Sweet Word Die
Shop at:
Sunny Studio
Tiny Dancers Stamps
Tiny Dancers Stamps
Shop at:
Sunny Studio
Comic Strip Everyday Dies
Shop at:
Sunny Studio
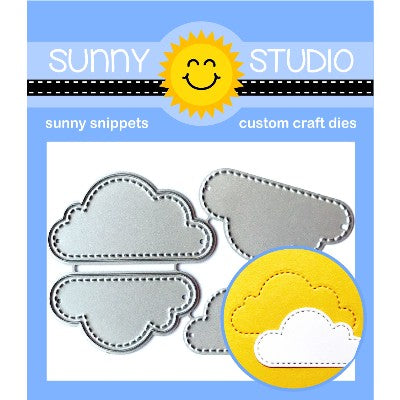
Fluffy Clouds Dies
Fluffy Clouds Dies
Shop at:
Sunny Studio
Banner Basics Stamps
Shop at:
Sunny Studio
Banner Basics Dies
Banner Basics Dies
Shop at:
Sunny Studio
Enchanted Stamps
Enchanted Stamps
Shop at:
Sunny Studio
Enchanted Dies
Enchanted Dies
Shop at:
Sunny Studio

Monday, January 20, 2020

Spring Scenes Cards by Lynn and Ashley

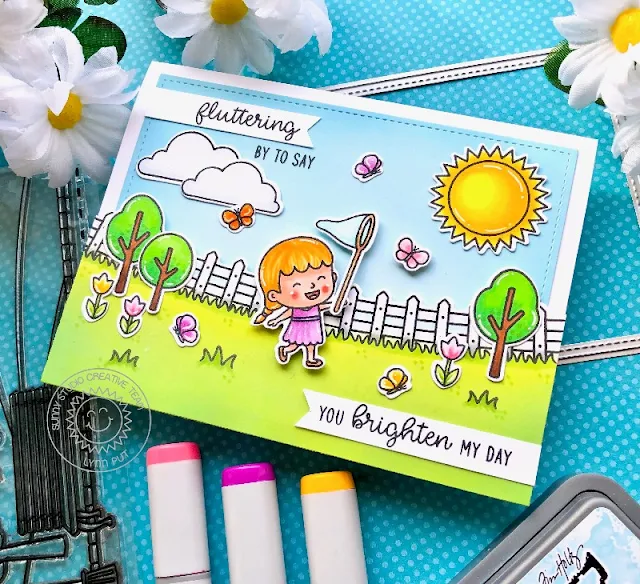
Hello everyone, Lynn here! Today I’m up over on the Sunny Studio Stamps blog where I’m sharing a fun card highlighting the new Spring Scenes stamp set and Spring Scenes dies.

Sunny Studio Stamps: Spring Scenes Spring Showers Frilly Frame Dies Spring Themed Everyday Card by Lynn Put

To create my card, I used the new Spring Scenes stamp set and dies which are of course fantastic for creating scenes which I’ve done here with my card where I’ve used a few of the adorable images from the new stamp set, Spring Showers. I started out my using the Frilly Frames Retro Petals die and using only the outer stitched frame die to cut a piece of white cardstock which I then blended on some Tumbled Glass Distress Oxide ink. Next I stamped my images, I stamped the fence with grass, the trees and butterfly from the Spring Scenes stamp set, the clouds, flowers, butterflies and little girl with butterfly net from the Spring Showers stamp set and dies and the sun from the Sunny Sentiments stamp set and dies

Sunny Studio Stamps: Spring Scenes Spring Showers Frilly Frame Dies Spring Themed Everyday Card by Lynn Put

After stamping and die cutting all of my images, I colored them using Copic markers. For the grass I colored with Copic markers just along the fence line and then blended on some Twisted Citron and Mowed Lawn Distress Oxide inks to fill in the rest of the area then stamped the little grass images from the Spring Scenes set. I created banners for my sentiment, one on the top left corner of my card with part of it stamped directly on my background, and another banner for the second part of my sentiment.

Once all of my pieces where complete, I assembled my card by first adhering my stitched blue background panel to my card front, then I added foam tape to my fence/grass piece, the little girl with the butterfly net and one of the butterflies and adhered all of my images.

--------------------------------------------------

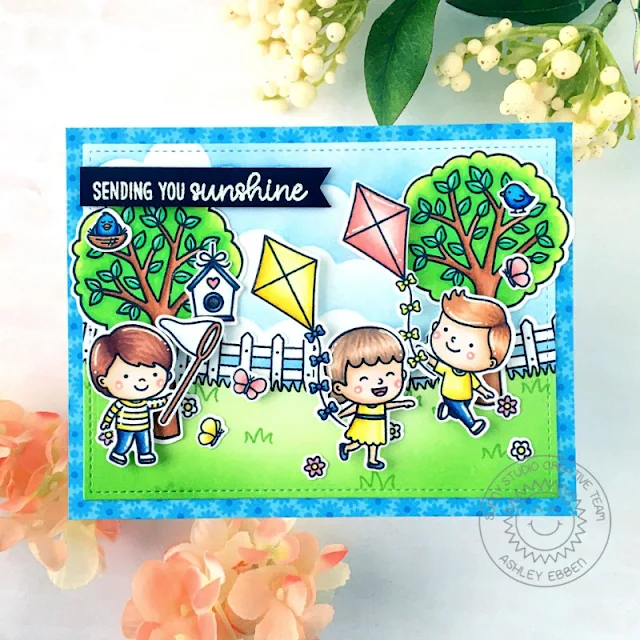
Hello everyone! It's Ashley today with a card featuring the new Spring Scenes stamp and die set! If you loved the Scenic Route stamps from the last release as much as I did, you are going to want to grab this set! It makes it so easy to create cute card scenes, especially when combined with other sets like the Spring Showers cuties.

Sunny Studio Stamps: Spring Scenes Spring Showers Frilly Frame Dies Seasonal Trees Spring Themed Everyday Card by Ashley Ebben

I started by using the My Favorite Things Mini Cloud Edges stencil and Lawn Fawn Forget Me Not ink to make my background sky. I stamped the fence and grass from Spring Scenes in Lawn Fawn Jet Black ink and masked off the area above the grass so I could ink blend. I blended Lawn Fawn Freshly Cut Grass and Jalapeno inks for the grass, then used the individual grass clump sets with the Freshly Cut Grass ink to add detail. I finished by coloring the fence and spaces between with Copics before die cutting with the Spring Scenes dies. To add the stitched details, I die cut both the cloud piece and the grass piece with the frame of Frilly Frames Retro Petals.

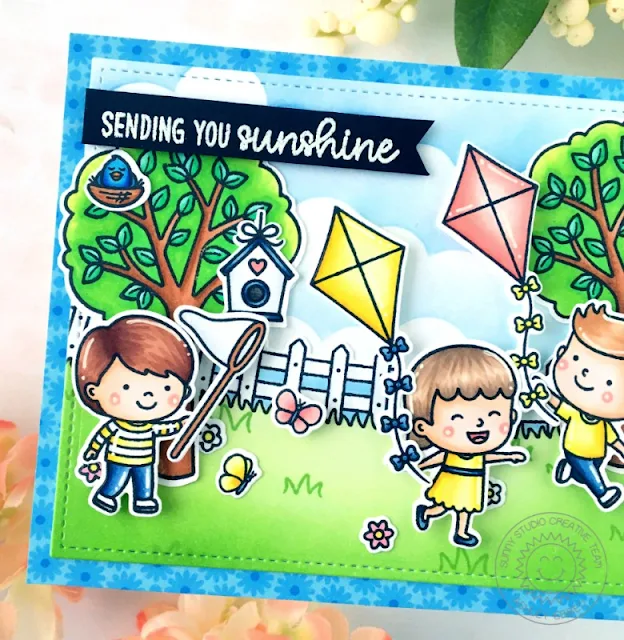
Sunny Studio Stamps: Spring Scenes Spring Showers Frilly Frame Dies Seasonal Trees Spring Themed Everyday Card by Ashley Ebben

I stamped images from Spring ScenesSpring Showers, and Seasonal Trees in Jet Black and colored with Copics. I arranged my images around the card, popping a few up with foam squares, before mounting the whole piece on a piece of light blue flowered paper from the new Spring Fling paper pack. I finished with a sentiment from Sending Sunshine embossed in white on a strip of black cardstock and popped up with foam tape.

I just love how these sets work so well together! They create the cutest scenes, don't you think? Thank you so much for stopping by! Have a wonderful day! 

Sunny Studio Supplies Used:

Sunny Sentiments Dies
Shop at:
Sunny Studio
Sunny Sentiments Stamps
Shop at:
Sunny Studio
Seasonal Trees Stamps
Shop at:
Sunny Studio
Seaonal Trees Dies
Seaonal Trees Dies
Shop at:
Sunny Studio
Sending Sunshine Stamps
Shop at:
Sunny Studio
Frilly Frames Retro Petals Dies
Shop at:
Sunny Studio
Spring Scenes Stamps
Shop at:
Sunny Studio
Spring Scenes Dies
Spring Scenes Dies
Shop at:
Sunny Studio
Spring Showers Stamps
Shop at:
Sunny Studio
Spring Showers Dies
Spring Showers Dies
Shop at:
Sunny Studio
Spring Fling Paper
Spring Fling Paper
Shop at:
Sunny Studio

Saturday, January 18, 2020

Guest Designer Spotlight: Spring Showers Cards with Nicky Meek

Hello everybody, Nicky Meeks here! Today I am so happy to be guest designing for Sunny Studio Stamps. I've created two cards using the super sweet Spring Showers stamp set and coordinating dies. This first card also features the new Spring Scenes stamps and coordinating dies

Sunny Studio Stamps: Spring Scenes Spring Showers Everyday Cards by Nicky Meek

To create this card I ink blended the background and used a stencil from my collection to subtly stencil in the sunshine. I distressed the background by splattering water droplets and blotting them up and then splashing on some paint. I attached this to a 110lb white cardstock base which is lovely and sturdy for supporting such a dimensional card.

On Copic friendly cardstock I stamped the image from Spring Scenes and coloured it with Copic markers. The sentiment was stamped and it was die cut, backed with foam tape and applied to the background.

Sunny Studio Stamps: Spring Scenes Spring Showers Everyday Cards by Nicky Meek

On more Copic friendly cardstock the kids from Spring Showers were stamped with Memento Ink in Rich Cocoa and then also coloured with Copics. They were die cut and applied to the scene with yet more foam tape. Points were highlighted with a white gel pen.

Sunny Studio Stamps: Spring Scenes Spring Showers Everyday Cards by Nicky Meek

To finish up the card I die cut the clouds using the Spring Showers dies (without stamping them first), backed them with foam tape and applied them. I also added in some flowers and butterflies making sure that the eye goes around the card.

Hope you like this card but now for something completely different using other images from Spring Showers.

Sunny Studio Stamps: Spring Scenes Spring Showers Everyday Cards by Nicky Meek

This is basically a background card with some clouds and raindrops popped up on top. To create it I took an A2 panel of white Copic friendly cardstock. I stamped the three umbrella images randomly using Memento Ink in Rich Cocoa. 

Sunny Studio Stamps: Spring Scenes Spring Showers Everyday Cards by Nicky Meek

I used Copic marker to colour them and used a couple of pale blue colours to edge around them. Points were highlighted with a white gel pen and I used a simple stitched edge die from my stash to define the edges a little. The background panel was applied to a 110lb white cardstock base.

Sunny Studio Stamps: Spring Scenes Spring Showers Everyday Cards by Nicky Meek

I die cut the clouds again without stamping them first. I stamped the sentiments on some of them and then popped them up on different amounts of foam tape so that they appear to float. The final touch was to glue the raindrop embellishments in place.

Thank you so much for stopping by to read today.

Sunny Studio Supplies Used:

Spring Scenes Stamps
Shop at:
Sunny Studio
Spring Scenes Dies
Spring Scenes Dies
Shop at:
Sunny Studio
Spring Showers Stamps
Shop at:
Sunny Studio
Spring Showers Dies
Spring Showers Dies
Shop at:
Sunny Studio

Friday, January 17, 2020

Chickie Baby Cards with Rachel and Candice

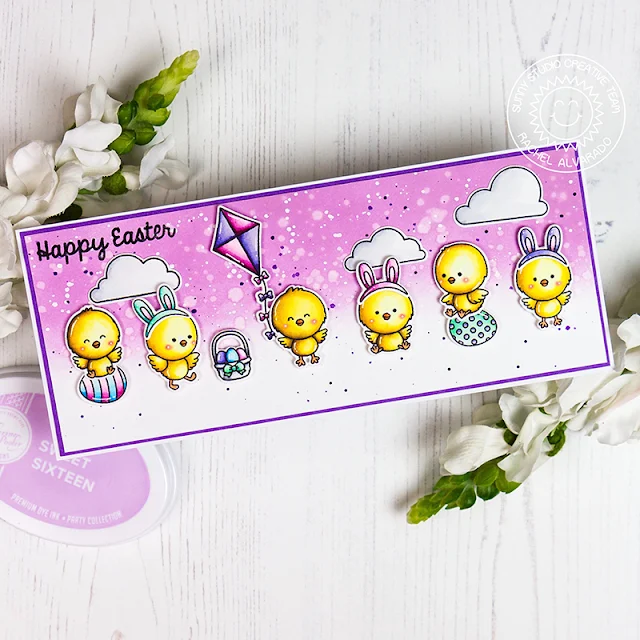
Hello friends! It's Rachel here and I have a Slimline Card to share with you that showcases the new and adorable Chickie Baby Stamp Set. I just love these sweet little peeps and their accessories! To start my card, I first stamped all of my images onto a sheet of Neenah Solar White 110lb Card Stock with Memento Tuxedo Black Ink. I then used Copic Markers to color everything and the coordinating dies to cut them out.

Sunny Studio Stamps: Chickie Baby Spring Showers Chubby Bunny Easter Card by Rachel Alvarado

I also added a few other images from separate stamp sets. I stamped a few clouds and a kite from the new Spring Showers Set and a cute little Easter basket from the Chubby Bunny Stamp Set.

Sunny Studio Stamps: Chickie Baby Spring Showers Chubby Bunny Easter Card by Rachel Alvarado

For my background, I cut a piece of Smooth White Card Stock to 3.25" x 8.25" and blended the top portion with some Sweet Sixteen Catherine Pooler Ink. I then splattered this piece with both water and diluted purple and white inks for some added interest. I then stamped my sentiment from the A Good Egg Stamp Set onto the top left corner and added all of my images with some 3D Foam Adhesive Squares. Lastly, I layered my card with both purple and white card stock for a final card size of 3.5" x 8.5".

Thanks so much for dropping by! Wishing you all a wonderful day!

----------------------------------------------------

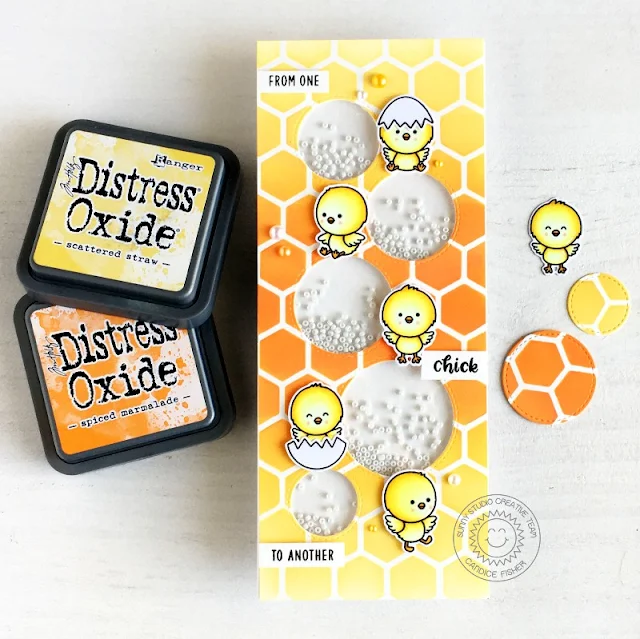
Welcome crafty friends!  It's Candice here today and I am sooo excited to share with you this fabulous new Spring release from Sunny Studio Stamps! Today I am sharing a fun card using the adorable Chickie Baby stamp set!

Sunny Studio Stamps: Chickie Baby Frilly Frame Dies Staggered Circle Dies Girlfriend Card by Candice Fisher

I used these fantastic Sunny Studio Stamps products:
For the background, I created a stencil from the hexagon die and used it to ink over with ripe persimmon, spiced marmalade, fossilized amber & scattered straw to make the chicken wire. Another great way to extend your dies! Next, I stamped the chickies and egg shells, colored with Copic markers and cut out using the coordinating dies.

Sunny Studio Stamps: Chickie Baby Frilly Frame Dies Staggered Circle Dies Girlfriend Card by Candice Fisher

To make the shaker element, I first die cut the stitched circles at once from the one die (love that!) and adhered a strip of acetate behind them. I then used foam tape around each circle to hold in the beads and placed the card front over it. 

To finish the card, I stamped the sentiments in black, trimmed to banners and used foam tape to add dimension. I added a few white & orange pearls for a little shine.

Thank you for visiting today!

Sunny Studio Supplies Used:

A Good Egg Stamps
A Good Egg Stamps
Shop at:
Sunny Studio
Chubby Bunny Stamps
Chubby Bunny Stamps
Shop at:
Sunny Studio
Chubby Bunny Dies
Chubby Bunny Dies
Shop at:
Sunny Studio
Staggered Circles Die
Shop at:
Sunny Studio
Frilly Frames Hexagon Dies
Shop at:
Sunny Studio
Chickie Baby Stamps
Chickie Baby Stamps
Shop at:
Sunny Studio
Chickie Baby Dies
Chickie Baby Dies
Shop at:
Sunny Studio
Spring Showers Stamps
Shop at:
Sunny Studio
Spring Showers Dies
Spring Showers Dies
Shop at:
Sunny Studio

Thursday, January 16, 2020

Prancing Pegasus Cards with Vanessa and Anja

Hello to you! Vanessa here today with a card using the new Prancing Pegasus set. I am so excited about the new release, it's fantastic again! So let's start with my first card using it:

Sunny Studio Stamps: Prancing Pegasus Fluffy Clouds Border Dies Magical Pegasus Birthday Card by Vanessa Menhorn

I first inked the front of my white card base with yellow and violet Distress Oxide inks. Then I die-cut the Fluffy Clouds Border Dies from vellum and white cardstock and adhered them to the card. Now I stamped the pegasus onto white cardstock, colored it with Copics, added highlights with a white gel pen, die-cut it with the matching die and adhered it to the card with foam tape.

Sunny Studio Stamps: Prancing Pegasus Fluffy Clouds Border Dies Magical Pegasus Birthday Card by Vanessa Menhorn

I stamped the sentiment onto a strip of violet cardstock, heat-embossed it with white embossing powder, trimmed the strip and adhered it to the card with foam tape. Finally, I added sequins from the Iridescent Pastel Confetti.

This little pegasus is the cutest creature, don't you agree? Can't wait to play with all the other sets of the new release! See you next week, thanks for visiting!

----------------------------------------------------------

Hi everyone, Anja here and I'm excited to share my first card using some of the brand new Spring Release products. Today I'm featuring the adorable Prancing Pegasus Stamps.

Sunny Studio Stamps: Prancing Pegasus Floating By Fluffy Clouds Border Dies Magical Pegasus Birthday Card by Anja Bytyqi

I started off with a white card base and picked the gorgeous rainbow colors/white heart pattern from the Spring Fling Paper pack. At the bottom, I adhered three layers of white Fluffy Clouds Border die-cuts.

Next, I stamped the pegasus and also the pile of balloons from the Floating By set in Memento Tuxedo Black Ink and colored them with Copic Markers. Is used the coordinating dies to cut out the images. I thought it would be fun to let the pegasus fly over the clouds with the help of the colorful balloons. I had to stamp the balloon strings again (because the die only cuts out the balloons), but this time onto the patterned paper.

Sunny Studio Stamps: Prancing Pegasus Floating By Fluffy Clouds Border Dies Magical Pegasus Birthday Card by Anja Bytyqi

Finally, I stamped the sentiment in VersaMark Ink onto a purple cardstock banner and white heat embossed it. I popped it up with foam tape and added some Iridescent Pastel Confetti and Diamond Stickles dots.

Thank you so much for stopping by! Wishing you a magical day!

Sunny Studio Supplies Used:

Fluffy Clouds Border Dies
Shop at:
Sunny Studio
Floating By Stamps
Floating By Stamps
Shop at:
Sunny Studio
Floating By Dies
Floating By Dies
Shop at:
Sunny Studio
Prancing Pegasus Stamps
Shop at:
Sunny Studio
Prancing Pegasus Dies
Shop at:
Sunny Studio
Spring Fling Paper
Spring Fling Paper
Shop at:
Sunny Studio