Page Tabs

Thursday, April 30, 2020

Cruisin' Cuisine Cards with Vanessa and Anja

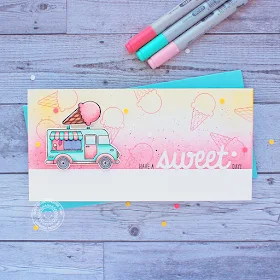
Hello to you! Vanessa here with a sweet card using the new Summer 2020 Release set Cruisin' Cuisine. This set is so cute and fun:

Sunny Studio Stamps: Cruisin' Cuisine Sweet Word Die Everyday Card by Vanessa Menhorn

For this slimline card, I masked a stripe on the front and stamped the ice cone from the set repeatedly with coral ink. Then I inked the area with coral and yellow ink and applied ink droplets. After removing the mask, I stamped the sentiment, die-cut the Sweet Word Die from white cardstock and adhered it.

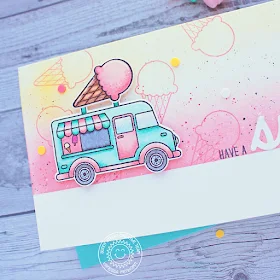
Sunny Studio Stamps: Cruisin' Cuisine Sweet Word Die Everyday Card by Vanessa Menhorn

I stamped the van and the ice cone onto white cardstock, added a "board" with a black marker, colored the images with Copics, die-cut the elements with the matching dies and adhered everything to the card with foam tape. Finally, I added Birthday Cake Dot Sprinkles.

I love everything from the new release!! How about you? Thanks for visiting!

--------------------------------------------------------

Hi everyone, Anja here and I'm thrilled to share my first card using new products from the freshly released Summer ReleaseToday I'm kicking it off with the fun Cruisin' Cuisine Stamps. From the moment I saw this set, I knew I wanted to create an ice cream truck!


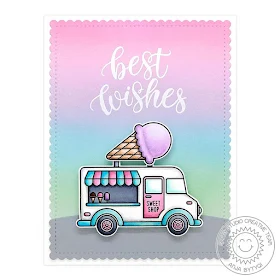
Sunny Studio Stamps: Cruisin' Cuisine Frilly Frame Dies Everyday Card by Anja Bytyqi
The stamp set comes with various food accessories and sentiments. I stamped the images in Memento Tuxedo Black Ink and colored them with Copic Markers. For the ink blended background, I used yummy pastel Distress Oxide Ink colors (Picked Raspberry, Spun Sugar, Milled Lavender, Tumbled Glass and Cracked Pistachio) which remind me of ice cream.

Sunny Studio Stamps: Cruisin' Cuisine Frilly Frame Dies Everyday Card by Anja Bytyqi

I stamped the scripty sentiment from the Pink Peonies set in VersaMark Ink and heat embossed it with white embossing powder. Next, I cut a small road hill from grey cardstock. I used the stitched scalloped die from the Frilly Frames Stripes set to add a decorative border to the background panel and the hill. I adhered them to a white A2 card base and popped up the ice cream cone and truck with foam squares.

Thank you so much for stopping by! Have an amazing day!

Sunny Studio Supplies Used:

Sweet Word Die
Sweet Word Die
Shop at:
Sunny Studio
Frilly Frames Stripes Die
Shop at:
Sunny Studio
Pink Peonies Stamps
Pink Peonies Stamps
Shop at:
Sunny Studio
Cruisin' Cuisine Stamps
Shop at:
Sunny Studio
Cruisin' Cuisine Dies
Shop at:
Sunny Studio

Wednesday, April 29, 2020

Tool Time Cards with Ana and Tammy

Hello friends! It’s Ana here today with a masculine card showcasing adorable new Tool Time stamp set and it’s coordinating dies – from the new summer release! We have a lot of boys/men in our family and I am always finding myself needing masculine cards! I was so excited to see this set! It is perfect for birthdays, achievements and upcoming Father’s Day!

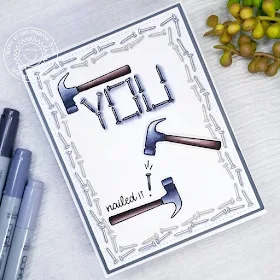
Sunny Studio Stamps: Tool Time Father's Day Card by Ana Anderson

For my card today I used only two images from the set –a hammer and a nail. I thought stamping the nail around the edges of the panel would create a really cool visual frame. I stamped the nails in two rows, using darker gray ink for the outside and medium gray for the inside line.

Next, I created the word YOU using the same nail stamp, then added coloring/shading with Copic C markers to all the nail images.

Sunny Studio Stamps: Tool Time Father's Day Card by Ana Anderson

I stamped, colored and die cut the hammer 3 times and adhered it to the background, then added the sentiment and finished it off with and additional nail that serves as an exclamation point.

I love how this card turned out! Tool Time set is so versatile – images in the set can be transformed from masculine to super cute by using the smiley face included in the set!

Thank you so much for joining us today and until next time I hope you have a wonderful day!

-------------------------------------------------------------


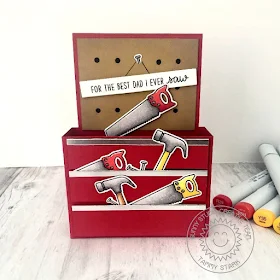
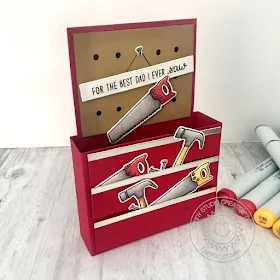
Hi crafty friends! Tammy here and I am so excited to be sharing my first post as a Design Team Member for Sunny Studio Stamps! Today, I have a fun tool box card to share with you that showcases the new Tool Time Stamp Set

Sunny Studio Stamps: Tool Time Father's Day Box Card by Tammy Stark

My card measures approximately 3 1/2" wide X 5" tall, and fits perfectly into an A2 envelope when folded flat. I stamped my images with Memento Tuxedo Black Ink onto Bristol smooth cardstock and colored with Copic Markers. I then used the coordinating Tool Time Dies to cut out my images.

Copic Colors used: Yellow: Y35, Y15, Y11; Red: R24, R29, R39; Gray: N0, N2, N4

Sunny Studio Stamps: Tool Time Father's Day Box Card by Tammy Stark

To create the peg board, I cut a piece of kraft cardstock and inked it with Brushed Corduroy Distress Oxide. I used a spring loaded hole punch to create the holes for the pegboard, layered on top of black cardstock, then attached to the red backing. The drawers were created by cutting strips of red cardstock, approximately 4 3/4" wide X 1" tall. I then cut a  thin strip of silver foil cardstock, attached to the top of each drawer, and attached to the front of the box using foam tape for dimension.

Thanks so much for stopping by! For more crafty inspiration, check out my Instagram feed!

Sunny Studio Supplies Used:

Tool Time Stamps
Tool Time Stamps
Shop at:
Sunny Studio
Tool Time Dies
Tool Time Dies
Shop at:
Sunny Studio

Tuesday, April 28, 2020

Tea-riffic Cards with Leanne and Ana

Hello crafters, Leanne here! I'm excited to start sharing what I've been working on using the newest release. For today's project, I've made a Mother's Day card featuring the sweet images from Tea-riffic

Sunny Studio Stamps: Tea-riffic Background Basics Frilly Frame Dies Stitched Oval Dies Mother's Day Card by Leanne West

I started by stamping out and Copic coloring the tea cup and tea pot from Tea-riffic. I also stamped out several tiny flowers and leaves which can be found in the Backyard Bugs stamp set.  

Copic colors used for the tea cup and pot are BV01, BV02, BV04. Colors used for the flowers and leaves are RV52, RV55, YG11, YG17.

Next I applied some Spun Sugar Distress Oxide ink with a blending brush to the center of an A2 sized card. I stamped a strip of white card stock with the gingham stamp from Background Basics using some bright green ink. This gingham piece will serve as a table cloth. I positioned the gingham strip towards the bottom half of the card front. I arranged the colored images as if they were sitting on the table. Once I had my images in place, I could stamp the greeting right above them. The word stamps to build this greeting come from the Tea-riffic set.  

Sunny Studio Stamps: Tea-riffic Background Basics Frilly Frame Dies Stitched Oval Dies Mother's Day Card by Leanne West

To complete the card I created a custom frame. I covered a panel of white card stock with Spun Sugar Distress Oxide ink. I spattered the inked panel with water and thinned pink paint. To give the panel a scalloped edge, I used a die from the Frilly Frames Hexagon set. To make the opening, I used the second largest die from the Stitched Oval set. Lastly, I adhered the frame onto the card front with adhesive foam tape. 

-----------------------------------------------------

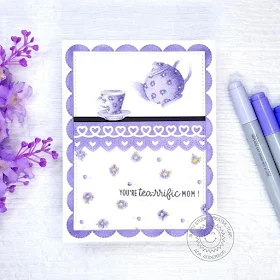
Hi crafty friends! Ana here today with a sweet Mother’s Day card showcasing brand new Tea-riffic stamps and dies. As soon as I saw this beautiful stamp set, it made me think of England and I wanted nothing more than to create a beautiful card that has a feel of English afternoon tea time, with fine china and delicate lace.

Sunny Studio Stamps: Tea-riffic Background Basics Frilly Frame Dies Heartstring Border Dies Mother's Day Card by Ana Anderson

I stamped the images from Tea-riffic set with very light blue ink for no line Copic coloring. I used BV04, BV13, BV02, BV31 markers to color both images, then free-handed a floral pattern on both teapot and cup and die cut with coordinating dies.

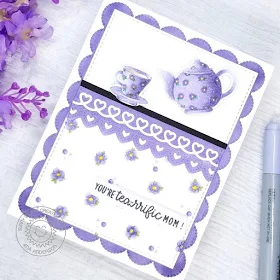
I created the floral pattern for the bottom part of my card by stamping a little flower (from Chickie Baby stamp set) in same light blue ink and coloring each flower with BV markers. I added dots in three different sizes to fill in the space between the flowers.
I used Heartstring Border dies to die cut heart borders, colored the pierced one with markers, then layered white border and hearts on top.

Sunny Studio Stamps: Tea-riffic Background Basics Frilly Frame Dies Heartstring Border Dies Mother's Day Card by Ana Anderson

For my background scalloped mat, I used Frilly Frames Eyelet Lace die and colored it with the same BV markers. I stamped the sentiment (from Tea-riffic set) with dark gray ink, trimmed it into a strip and assembled my card popping the teapot, cut and the sentiment with foam tape.

I just love how this card turned out and I really hope you like it too and that you got inspired. Thank you so much for spending some time with us today – I hope you have a wonderful rest of your week!

Sunny Studio Supplies Used:

Backyard Bugs Dies
Backyard Bugs Dies
Shop at:
Sunny Studio
Backyard Bugs Stamps
Shop at:
Sunny Studio
Background Basics Stamps
Shop at:
Sunny Studio
Stitched Oval Dies
Stitched Oval Dies
Shop at:
Sunny Studio
Frilly Frames Hexagon Dies
Shop at:
Sunny Studio
Chickie Baby Stamps
Chickie Baby Stamps
Shop at:
Sunny Studio
Frilly Frames-Eyelet Lace
Shop at:
Sunny Studio
Heartstrings Border Dies
Shop at:
Sunny Studio
Tea-riffic Stamps
Tea-riffic Stamps
Shop at:
Sunny Studio
Tea-riffic Dies
Tea-riffic Dies
Shop at:
Sunny Studio

Monday, April 27, 2020

Grad Cat Cards with Lynn and Ashley

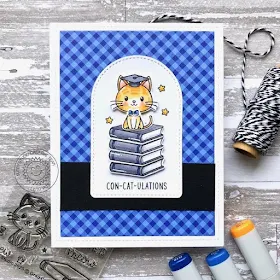
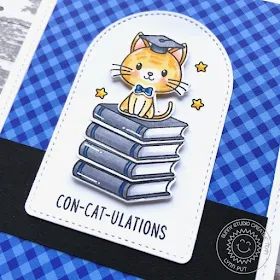
Hello there! It’s Lynn and today I'm sharing a fun graduation card I created featuring the new Grad Cat stamp set and coordinating dies.

Sunny Studio Stamps: Grad Cat Frilly Frame Dies Stitched Arch Dies Cat Themed Congratulations Card by Lynn Put

To create my graduation card, I started out by stamping the adorable cat image along with four of the book images from the Grad Cat set and colored them using Copic markers then die cutting them out using the coordinating dies.

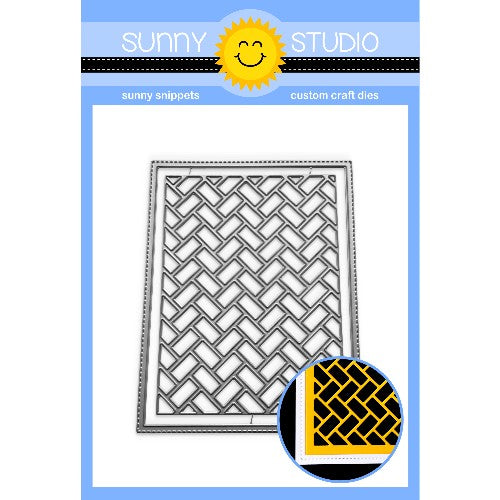
Next I used the Frilly Frames Herringbone dies and used just the stitched outside portion of the die to die cut a piece of brilliant blue Classic Gingham paper and also a piece of white card stock for my background. I also added a strip of black card stock along the bottom of my background. 

Sunny Studio Stamps: Grad Cat Frilly Frame Dies Stitched Arch Dies Cat Themed Congratulations Card by Lynn Put

After that I die cut a piece of white card stock using the Stitched Arch dies and stamped my sentiment along the bottom. I adhered my images popping up the cat and books with foam tape. I stamped three little stars from the set around the cat and colored them with Copic markers then I adhered my white arch piece to my card front to complete my card.

-----------------------------------------------------------

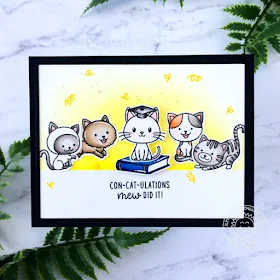
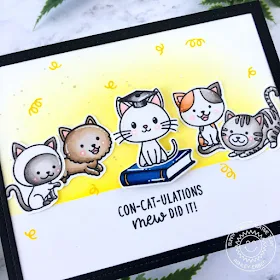
Hello friends! It's Ashley! Are you all super excited for the new release? It's amazing! Today I combined one of the new sets, Grad Cat, with an older set, Purrfect Birthday, to create a cute graduation card!

Sunny Studio Stamps: Grad Cat Frilly Frame Dies Purrfect Birthday Cat Themed Congratulations Card by Ashley Ebben

I started by stamping the images from Grad Cat and Purrfect Birthday in Lawn Fawn Jet Black ink. I colored with my Copics and cut everything out with the matching dies.

I masked off the bottom of a piece of white cardstock and blended Lawn Fawn Lemonade ink on the upper half, then splattered it with Liquid Pixie Dust from InkOn3 for glittery confetti. I removed the mask and stamped my sentiment from Grad Cat below the line in Jet Black. I arranged the kitty family on the card, popping the graduating kitty sitting on the book up with foam tape.

Sunny Studio Stamps: Grad Cat Frilly Frame Dies Purrfect Birthday Cat Themed Congratulations Card by Ashley Ebben

For finishing touches, I added some confetti from Purrfect Birthday with Hero Arts Butter Bar ink and a small stamp block. I then die cut a black frame with the new Frilly Frames Herringbone die. It almost looks like a framed family photo!

Thank you so much for stopping by! I hope you all have fun playing with the new release!

Sunny Studio Supplies Used:

Purrfect Birthday Stamps
Shop at:
Sunny Studio
Purrfect Birthday Dies
Shop at:
Sunny Studio
Classic Gingham 6x6 Paper
Shop at:
Sunny Studio
Grad Cat Stamps
Grad Cat Stamps
Shop at:
Sunny Studio
Grad Cat Dies
Grad Cat Dies
Shop at:
Sunny Studio
Frilly Frames Herringbone
Shop at:
Sunny Studio
Stitched Arch Dies
Stitched Arch Dies
Shop at:
Sunny Studio

Sunday, April 26, 2020

Summer 2020 Sneak Peek Week Winners

Hope you are having a lovely Sunday!  Thank you for helping me countdown to our Summer release this past week.  Your outpouring of love and sweet comments always mean so much, but even more so during this time l when I'm starved for a little extra human interaction.  :)

Rafflecopter has selected 5 random winners for the $40 gift codes to our store and they are as follows:


Monday
Sherry Bear

Tuesday
Luci

Wednesday
Joan Kinnischtzke

Thursday
Nikki

Friday
Larissa Heskett

Congratulations!  Please look for an email in your inbox coming later this evening with your shopping code.   

Hope you all have a wonderful week with some extra time to enjoy being crafty.  :)

Big hugs!


Friday, April 24, 2020

Sneak Peek: Introducing Grad Cat, Tea-riffic & Tool Time Mini Stamps

Hello and welcome to 5th and final day of our Summer Sneak Peek Week!  All this week I have been showcasing cards using our newest collection which is now shipping!!!

I've created a video showcasing not only today's sneak peeks, but all the new products from our Summer 2020 release and a closer look at the 48 cards I made with them (which you can view below or at our YouTube channel HERE).


Today's final peeks include three new 2x3 mini stamp sets and their coordinating dies celebrating Graduation, Mother's Day, Father's Day and so much more. 

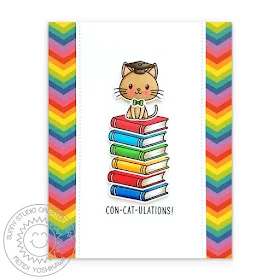
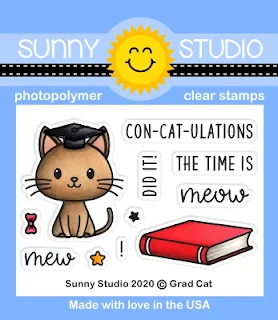
Card No.1:  Up first is our new Grad Cat Stamps that comes with a little kitty wearing a graduation cap, a small bow tie, a book and three punny sentiments. When adding the book to the set I immediately knew I wanted to create a rainbow stack of books for the cat (or any critter really) to sit on.  And can I just say I adore the puns in this set!  To carry out my rainbow theme, I used a rainbow chevron pattern from our Surprise Party Paper pack.  Often my graduation cards follow a red, black & white theme for our local high school colors so it was really fun to break free of that and embrace the rainbow!
Sunny Studio Blog: Con-cat-ulations! Graduation Cat Rainbow Card by Mendi Yoshikawa (using Grad Cat 2x3 Stamp Set)


Card No. 2:  For my next card I couldn't resist the opportunity to stamp a whole litter of kitties in different colors. I inked behind them with some salty ocean distress ink and added a tiny red heart using our Basic Mini Shape Dies II to separate my two phrases. For their diplomas I used the smallest sized diploma from our Woo Hoo Stamps and completed my card with a small strip of red cardstock to tie with all the other red accents.
Sunny Studio Blog: Con-cat-ulations! Mew Did it! Punny Graduation Kitty Card by Mendi Yoshikawa (using Grad Cat & Woo Hoo Stamp Sets)

Card No. 3:  My last card with the new Grad Cat Stamps pairs the kitty with the notebook paper from our School Time Stamps and the diploma from our Woo Hoo Stamps. The lines of the notebook paper were just the right size to stamp my two punny sentiments on either side and I added a little extra realism by using a 1/8" circle punch to punch out the holes for each paper.  For my card background, I used a gradient from our Heroic Halftones Paper pack and stamped a couple stars from the Grad Cat stamps, together with some mini star die-cuts with our Basic Mini Shape Dies II.
Sunny Studio Blog: The Time is Meow! Mew Did it! Punny Graduation Kitty Card by Mendi Yoshikawa (using Grad Cat, School Time & Woo Hoo Stamp Sets)

Card No. 4:  Our second new mini set of the day is our new Tea-riffic Stamps. The set comes with a teapot, teacup and a punny sentiment that can be personalized for a friend, mother or sister like I did here. To decorate my teapot & teacup I added some flowers from our Chubby Bunny & Chickie Baby Stamps. I fussy cut mine, but you could also use the coordinating dies or mask them off and stamp them directly onto the tea images themselves.

I added the pair onto a Stitched Arch using our new dies, stamping the punny sentiment from the set. For my background I alternated yellow prints & patterned scraps from our Classic Gingham, Striped Silly and Polka-dot Parade Paper packs. A grosgrain ribbon tied with a bow completed my card, which was inspired by THIS card by Heather Pulvirenti.

Sunny Studio Blog: Tea-riffic Teapot & Teacup Yellow & Blue Floral Sister Card, using Stitched Arch Dies

Card No. 5:  Up next is a polka-dot take on the teapot & teacup. The Tea-riffic Stamps come with a full dot and a half dot making it possible to stamp a polka-dot pattern like the one shown here before you color your images. Everything is just cuter with polka-dots, right?  

I mounted my images onto one of our new Stitched Semi Circle dies and then offset a red and white layer of our Eyelet Lace Border Dies to add along the bottom. To tie in my pink heart print paper from our Flirty Flowers Paper pack, I inked on some worn lipstick distress ink behind my images. A few scattered White Pearls completed my card.
Sunny Studio Blog: You're A Tea-riffic Mom Red Polka-dot Teapot & Teacup Mother's Day Card (using Tea-riffic Stamps, Eyelet Lace Border Dies, Stitched Semi-Circle Dies & Flirty Flowers Paper)

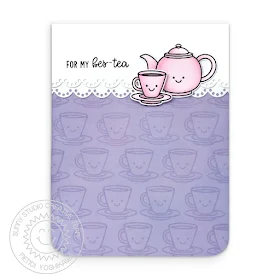
Card No. 6:  For my last card using the Tea-riffic Stamps, I used the little happy face from the set to add personalities to  my Teapot & Teacup (which always make me think of Beauty & The Beast). To create my custom patterned paper, I started by inking up a piece of white cardstock with shaded lilac distress ink and then used a ruler to draw faint pencil lines to help me keep my stamped teacups straight. I then went back through and quickly stamped all the little faces and erased my pencil lines.

I finished my card with a couple scalloped layers using our Eyelet Lace Border Dies and another punny sentiment that works perfectly with this set from our new Summer Sweets Stamps.
Sunny Studio Blog: For My Bes-tea Punny Teapot & Teacup Handmade Card (using Tea-riffic Stamps & Eyelet Lace Border Dies)

Card No. 7: Our last new little stamp set of the day is called Tool Time which features a hammer, nail & hand saw with two different punny sentiments.  I once again decided to create my own patterned paper, this time drawing my light pencil lines on the diagonal.  A clear grid style ruler is perfect for this sort of technique because it makes it super easy to draw evenly spaced lines without a ton of measuring and honestly after I drew my lines I just eyeballed the rest, trying my best to keep each row somewhat evenly spaced and centering the nails with the row above and below.

When I was done with my pattern, I cut part of a circle out of the side using our new Stitched Semi Circle dies. I then cut another circle in the same size from white cardstock inked up with mustard seed and a little spiced marmalade distress ink along the bottom. I inlaid the circle into my opening and taped the two pieces together with some tape along the back. Lastly I die-cut a mat from both pieces using our Frilly Frames Retro Petals dies.

I then mounted them onto a blue A2 sized cardstock panel and tucked in a tape measure border from our School Time Stamps and a sentiment which was stamped onto a little banner piece from our Fancy Frames Rectangle Dies.
Sunny Studio Blog: Tool Time Congrats!  You Nailed It!  Punny Congratulations Card (using Tool Time & School Time Stamps, Stitched Semi-Circle Die, Fancy Frames Rectangle Dies & Frilly Frames Retro Petals Dies)

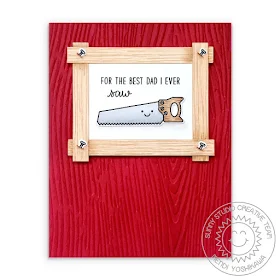
Card No. 8:  For my very last card of the week I used the little hand saw image to create a cute punny Father's Day card. I created my own faux wood frame by coloring some white strips of cardstock with my copic markers, adding some faint little squiggly lines to mimic the look of woodgrain.  I then created a little slice in each corner with my craft knife to insert the nails into, before adding foam tape to the back of my entire frame.  A piece of red cardstock which I embossed with our Woodgrain Embossing Folder seemed like the perfect way to complete this simple card.

I ended up using faces on both my Tool Time cards because I just love the personality it gives the hammer & saw, but I know it's not for everyone so I just wanted to make sure to point out that the happy face is a separate stamp that you can chose to use or omit. :)
Sunny Studio Blog: For the Best Dad I Ever Saw Punny Father's Day Card (using Tool Time Stamps & Woodgrain Embossing Folder)

That wraps up our Summer sneak peeks. I know I've unloaded a ton of information, but it means so much to have you hang out with me today. I'd love to give a $40 gift code to one lucky winner using the rafflecopter below.  If you missed our previous giveaways it's not too late to enter.  You can still go back through the past week and enter each contest. The contests run through Saturday at Midnight PST with winners announced here on Sunday, April 26th. :)

a Rafflecopter giveaway We know what a struggle it is to be confined to our homes as we continue to fight the Coronavirus. As many of us turn to paper crafts to help keep ourselves entertained, we'd like to help you save a little extra cash with these two shipping offers through May 31st.

Sunny Studio Stamps: Free Shipping Offer on Orders of $25+ through May 31, 2020

Also receive our newest free mini splash die that automatically comes with every order (while supplies last).

Sunny Studio Stamps: Summer 2020 Free Mini Splash Die with Every Order!

Here's a closer look at the new Grad Cat stamps & coordinating dies
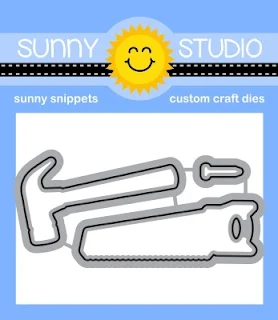
Tea-riffic stamps & coordinating dies and Tool Time stamps & coordinating dies used today (available for purchase on Friday, April 24th).

Sunny Studio Blog: Grad Cat Graduation Kitty 2x3 Clear Photopolymer Stamp Set     Sunny Studio Blog: Grad Cat Coordinating Metal Cutting Dies Set

Sunny Studio Blog: Tea-riffic Mother's Day 2x3 Clear Photopolymer Stamp Set     Sunny Studio Blog: Tea-riffic Coordinating Metal Cutting Dies Set

Sunny Studio Blog: Tool Time Nail, Hammer & Saw Father's Day 2x3 Clear Photopolymer Stamp Set     Sunny Studio Blog: Tool Time Coordinating Metal Cutting Dies Set

Other Supplies Used:
School Time Dies
School Time Dies
Shop at:
Sunny Studio
School Time Stamps
School Time Stamps
Shop at:
Sunny Studio
Woo Hoo Dies
Woo Hoo Dies
Shop at:
Sunny Studio
Woo Hoo Stamps
Woo Hoo Stamps
Shop at:
Sunny Studio

Classic Gingham 6x6 Paper
Shop at:
Sunny Studio
Striped Silly 6x6 Paper
Shop at:
Sunny Studio
Polka-dot Parade 6x6 Paper
Shop at:
Sunny Studio
Flirty Flowers 6x6 Paper
Shop at:
Sunny Studio
Surprise Party 6x6 Paper
Shop at:
Sunny Studio
Heroic Halftones 6x6 Paper
Shop at:
Sunny Studio
Woodgrain Embossing
Woodgrain Embossing
Shop at:
Sunny Studio
Eyelet Lace Borders
Eyelet Lace Borders
Shop at:
Sunny Studio
Fancy Frames- Rectangles
Shop at:
Sunny Studio
Stitched Arch Dies
Stitched Arch Dies
Shop at:
Sunny Studio
Stitched Semi-Circle Dies
Shop at:
Sunny Studio