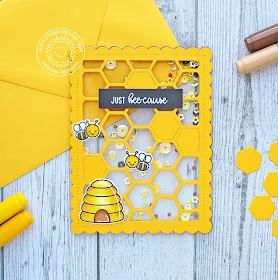
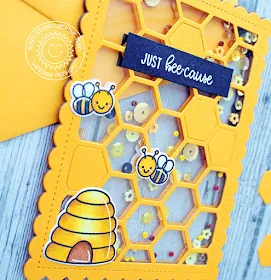
Now I stamped the images twice onto white cardstock, colored them with Copics, die-cut the elements with the matching dies and adhered them to the front and back of the card.
I stamped and
heat-embossed the sentiment twice onto a strip of black cardstock, trimmed it
and adhered the pieces to the front and back. Finally, I adhered some of the
cut-out hexagons.
I love the Frilly Frames series, they offer so many possibilities! Thank you for stopping by today, see you next week!
I love the Frilly Frames series, they offer so many possibilities! Thank you for stopping by today, see you next week!
---------------------------------------------------------
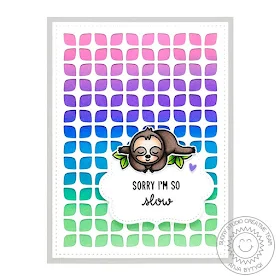
Hi everyone, Anja here and I'm back again with a new inspiration card featuring the Frilly Frames Retro Petals Dies.
My grey card
base is a bit smaller than the regular A2 size. First, I ran the 2-piece die
set together through my die cutting machine to create the white retro petal
background with a stitched border. Next, I adhered a colorful Distress Oxide ink
blended panel behind it.
I stamped this
little cutie and some leaves from the Silly Sloths set
in Memento Tuxedo Black Ink and
colored them with Copic Markers. I used the coordinating dies to cut out the images.
I die cut the stitched label (Sliding Window Dies)
from white cardstock and stamped the sentiment in VersaFine Onyx Black Ink.
To finish off my card, I adhered a small purple clay heart (Pink & Purple Heart Confetti).
Thank you so much for stopping by! Have a slothsome day!
Thank you so much for stopping by! Have a slothsome day!
Sunny Studio Supplies Used:
 Sliding Window Dies Shop at: Sunny Studio |
 Silly Sloths Stamps Shop at: Sunny Studio |
 Silly Sloths Dies Shop at: Sunny Studio |
 Just Bee-cause Stamps Shop at: Sunny Studio |
 Just Bee-cause Dies Shop at: Sunny Studio |
 Frilly Frames Hexagon Dies Shop at: Sunny Studio |
 Frilly Frames Retro Petals Dies Shop at: Sunny Studio |


Both of these ideas for using the new dies are SO sweet! Glad I didn't resist the urge to add both to my purchase. Keep up the great inspirations for card making!
ReplyDeleteYour cards are gorgeous. With the first shaker card, how exactly did you do the "middle" part of where the sequins sits? I understand the double cut of the yellow outside on boht sides, but what is holding the sequins and what clear "window' sheet do you use to make this all happen? Thank you for helping a novice. :)
ReplyDeleteThank you. You adhere a clear acetate sheet (Grafix makes the ones I use, but I think they are a few companies available) and then you add a thin row of foam tape to the outside edge (I love the rolls by Scotch 3M that you can cut down to size).
DeleteHere's a quick and simple video showing how to make a basic shaker card, although there are a couple different ways to achieve the same thing:
https://youtu.be/fh_SWEzKqso?t=99
Hope this helps. :)
Absolutely it helps!! Thank you so much! I love that you gave me products that you use. I find that the specific products work well when trying to make the exact card. Also, thank you for the video, that always helps with a basic idea. Have a wonderful Day and I appreciate you taking the time to answer my question in detail.
ReplyDelete