Page Tabs

Thursday, May 31, 2018

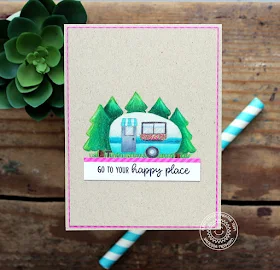
Happy Camper Pencil Colored Happy Place Card with Vanessa

Happy Thursday! Vanessa here with a kraft card using Happy Camper. I first played around with paper-piecing, but then decided to use colored pencils.


Sunny Studio Stamps: Happy Camper Pencil Colored Happy Place Card by Vanessa Menhorn


To start, I stamped the images onto my Kraft panel, using light brown ink (the trees are from Gleeful Reindeer). Then I colored everything with Prismacolors, matted the panel with pink striped patterned paper from the Striped Silly 6x6 Paper pad and adhered the panel to the card base.


Sunny Studio Stamps: Happy Camper Pencil Colored Happy Place Card by Vanessa Menhorn

Now I stamped the sentiment onto a strip of white cardstock, layered it with a strip of pink patterned paper and adhered it.

I'd love to stay in a camper like this, don't you? How cozy it must be inside! Thank you for stopping by today! See you next week!

Sunny Studio Supplies Used:

Gleeful Reindeer Stamps
Shop at:
Sunny Studio
Happy Camper Stamps
Happy Camper Stamps
Shop at:
Sunny Studio
Striped Silly 6x6 Paper
Shop at:
Sunny Studio

Wednesday, May 30, 2018

Critter Campout Happy Campfire Scene Card Set with Franci

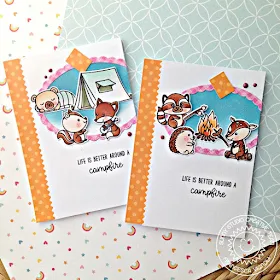
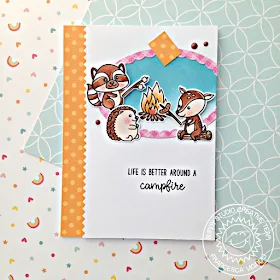
Hello there and happy Wednesday! Franci here with you today with two happy cards featuring the Critter Campout set.

Sunny Studio Stamps: Critter Campout Fancy Frames Happy Campfire Scene Card Set with Franci

First, I stamped all of the images with Memento black ink. I colored them with Copics and die cut them with their coordinating diesThen I created two card bases out of some white cardstock and cut out two coordinated rectangles in white as well.

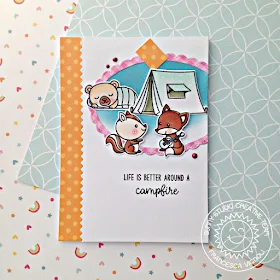
Sunny Studio Stamps: Critter Campout Fancy Frames Happy Campfire Scene Card Set with Franci

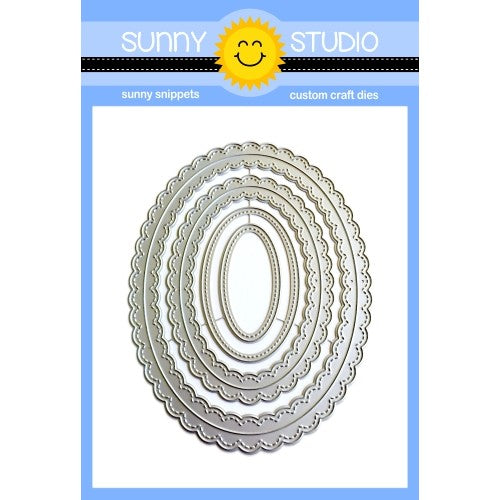
I die cut one side of the rectangle with one of the borders from the Ric Rac die set and I also cut a strip of patterned paper - love this bright orange one from the Polka-Dot Parade paper set! I also die cut a scalloped oval using the Fancy Frames Oval dies out of the pink sheet from the Classic Gingham paper pack. And of course, I did everything twice to create my two cards.

Sunny Studio Stamps: Critter Campout Fancy Frames Happy Campfire Scene Card Set with Franci

I masked part of the white rectangle to create a background inside the oval frames and I sponged some Distress Oxide ink in Broken China for my sky. I glued the pattern paper stripes onto my cards, and then glued down the frames and all of the critters with foam adhesive.

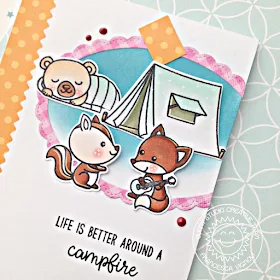
Sunny Studio Stamps: Critter Campout Fancy Frames Happy Campfire Scene Card Set with Franci

The little leftovers from the orange strips are the perfect "washi tape" for my frames to be glued down (love this effect!). I also added some details to the images with a white gel pen and some embellishments with the Nuvo Crystal Drops in Autumn Red.

Sunny Studio Stamps: Critter Campout Fancy Frames Happy Campfire Scene Card Set with Franci

Finally, I adhered my rectangles onto the cards with foam adhesive. Thank you so much for stopping by and have a happy creative day! 

Sunny Studio Supplies Used:

Critter Campout Stamps
Shop at:
Sunny Studio
Critter Campout Dies
Shop at:
Sunny Studio
Fancy Frames- Ovals
Fancy Frames- Ovals
Shop at:
Sunny Studio
Classic Gingham 6x6 Paper
Shop at:
Sunny Studio
Polka-dot Parade 6x6 Paper
Shop at:
Sunny Studio

Tuesday, May 29, 2018

Cascading Stars Night Sky Framed Background Card with Juliana

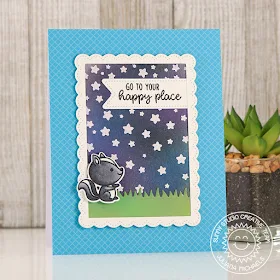
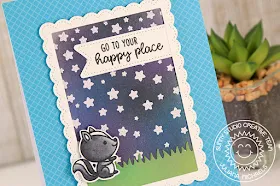
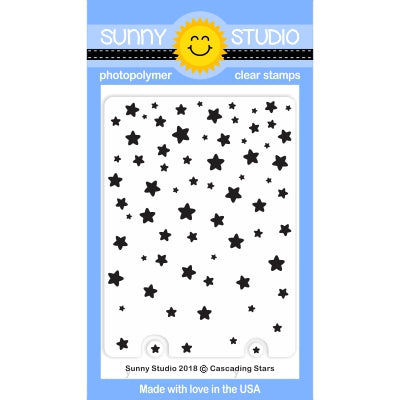
Hello friends it's Juliana Michaels and today, I'm sharing a happy little card using some of the new stamps and dies from Sunny Studio Stamps including the Cascading Stars stamp set. I choose to use this stamp set in a rather traditional way and create a night time sky by combining it with an image from the Critter Campout stamp set.

Sunny Studio Stamps: Cascading Stars Critter Campout Night Sky Framed Background Card by Juliana Michaels

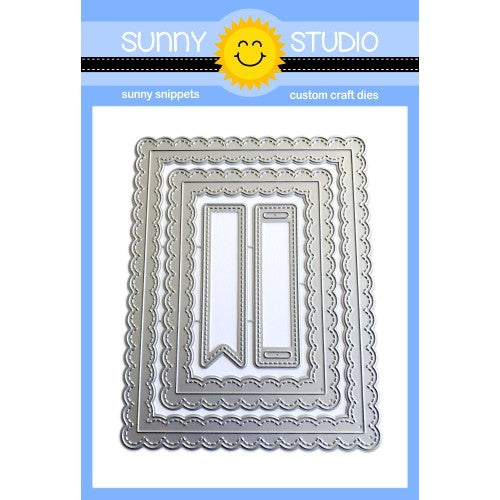
To begin, cut a piece of the teal patterned paper from the Classic Gingham 6x6 paper pad to 4.25 x 5.5 inches. Adhere it to an A2 sized card base. Next, use the middle sized die from the Fancy Frames Rectangle dies to cut a frame from white cardstock. Use one of the banner dies from that same die set, and cut out a banner from white cardstock. Stamp your sentiment using the Happy Camper stamp set.

Now to create the scene inside the frame. Stamp the Cascading Stars stamp onto white cardstock using an embossing ink such as Versamark. Sprinkle it with white embossing powder and heat set it using a heat gun. Use a foam blending tool to apply Distress Oxide Inks in Black Soot, Wilted Violet and Salty Ocean to the cardstock. These colors are great for creating a night time sky!

Sunny Studio Stamps: Cascading Stars Critter Campout Night Sky Framed Background Card by Juliana Michaels

For the grass along the bottom, die cut a piece of white cardstock using the grass die from the Sunny Sentiments die set. Apply Distress Oxide Inks in Peeled Paint and Twisted Citron to give it a nice green grass color. Cut the sky piece to fit behind the die cut frame. Adhere the grass piece to the bottom of the sky and trim off any excess.


Take the banner with the sentiment and adhere it to the sky piece. Again, trim off any excess. Now you are ready to adhere the frame using your favorite adhesive.

For the final touch, stamp and color the adorable little skunk from the Critter Campout stamp set. Then die cut him using the coordinating die set. Use a piece of double sided foam adhesive to adhere it to the card front and to give it a bit of dimension. Your night time sky scene is now complete!

I hope you enjoyed this bit of inspiration using the Cascading Star stamp set along with some other great products from Sunny Studio Stamps. Thanks so much for stopping by today!

Sunny Studio Supplies Used:

Sunny Sentiments Dies
Shop at:
Sunny Studio
Cascading Stars Stamps
Shop at:
Sunny Studio
Critter Campout Stamps
Shop at:
Sunny Studio
Critter Campout Dies
Shop at:
Sunny Studio
Fancy Frames- Rectangles
Shop at:
Sunny Studio
Happy Camper Stamps
Happy Camper Stamps
Shop at:
Sunny Studio
Classic Gingham 6x6 Paper
Shop at:
Sunny Studio

Monday, May 28, 2018

Beach Babies Beach Scene Card with Eloise

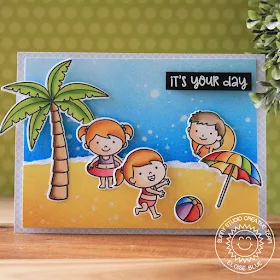
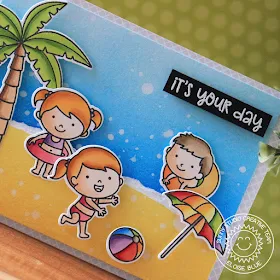
Hi everyone, Eloise here and today I'll be using the Beach Babies stamp set along with Island Getaway to make a beach scene card using some Copic Markers and Distress Inks.

Sunny Studio Stamps: Beach Babies Island Getaway Beach Scene Card by Eloise Blue

To begin my card, I started off with my background. I used some Distress Inks along with watercolour cardstock for my layers. I first used some Squeezed Lemonade and Fossilized Amber Inks for my sand, once I ink blended those on I ripped the cardstock to give that white exposed edge to appear like waves crashing. I then used another piece of cardstock and ink blended some Salty Ocean and Blueprint Sketch on the bottom and then Tumbled Glass on the top for the sky/sea. Once they were both ink blended, I flicked on some water for that added detail, dried it with a heat tool and then I adhered them together with foam tape. Next, I stamped the images from Beach Babies and Island Getaway that I wanted to use and used my Copic Markers to colour them in.

(Copic Markers Used: RV13 RV25, RV09 / Y21, YR12, YR14 / Y11, Y15, Y35 / YG03, YG13, YG17 / B21, B24, B26 / V12, V15, V17 / E53, E55, E57 / E42, E43, E44 / YR21, YR24, YR27 / E000, E00, E21)

Sunny Studio Stamps: Beach Babies Island Getaway Beach Scene Card by Eloise Blue

Once all my images were coloured, I used the coordinating dies to cut them all out. I then added foam tape to the backs and arranged them onto my scene. For my sentiment, I white heat embossed the 'It's Your Day' sentiment onto a thin strip of black cardstock and popped that up onto the top right hand side of my card. For a last finishing touch I popped up my panel onto some grey gingham paper from the Classic Gingham Paper Pad.

Thanks so much for stopping by today, I hope you enjoyed and got inspired and I'll catch you all next time.

Sunny Studio Products Used:

Island Getaway Dies
Island Getaway Dies
Shop at:
Sunny Studio
Island Getaway Stamps
Shop at:
Sunny Studio
Beach Babies Stamps
Beach Babies Stamps
Shop at:
Sunny Studio
Beach Babies Dies
Beach Babies Dies
Shop at:
Sunny Studio
Classic Gingham 6x6 Paper
Shop at:
Sunny Studio

Saturday, May 26, 2018

Guest Designer Spotlight: Cards with Kay Miller

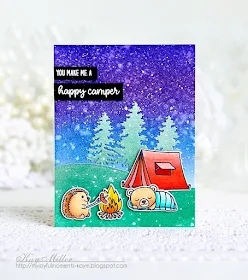
Hi there, it's Kay Miller here! I'm excited to be guesting with Sunny Studio Stamps this month! I have two cards to share with you today featuring the adorable Critter Campout stamp set and coordinating dies.

Sunny Studio Stamps: Critter Campout Friendship Cards by Kay Miller

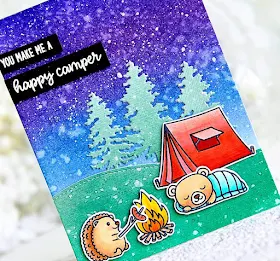
For my first card, I created the background by blending Blueprint Sketch and Wilted Violet Distress inks, then spritzed with water to give the look of a starry night sky. The ground and trees I did the same way using Evergreen Bough Distress ink. 

Sunny Studio Stamps: Critter Campout Friendship Cards by Kay Miller

All of the cute images I colored with Copic markers, cut out with the coordinating dies, and adhered with foam tape. The sentiment was heat embossed with white embossing powder on black card stock, then cut out and adhered with foam tape as well.

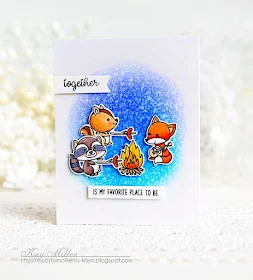
Sunny Studio Stamps: Critter Campout Friendship Cards by Kay Miller

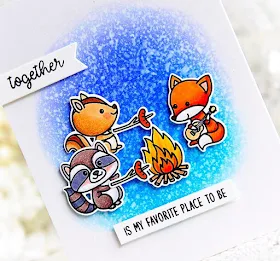
For my next card, I blended some Peacock Feathers, and Blueprint Sketch Distress inks onto my white background then spritzed with water again to give the look of a starry night. 

Sunny Studio Stamps: Critter Campout Friendship Cards by Kay Miller

All of the adorable stamp images were colored with Copic markers, cut out with the coordinating dies, and adhered with foam tape. The sentiments were stamped with black ink on white card stock and cut out with banner dies.

I hope you have enjoyed my cards today with these adorable products from Sunny Studio Stamps! Have a great weekend!

Sunny Studio Supplies Used:

Critter Campout Stamps
Shop at:
Sunny Studio
Critter Campout Dies
Shop at:
Sunny Studio

Friday, May 25, 2018

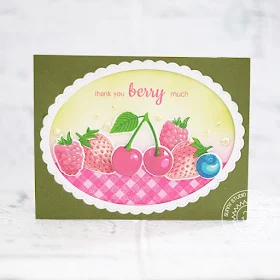
Berry Bliss Scalloped Framed Thank You Card with Lexa

Hello everyone! Lexa here today with a berry fresh thank you card using Sunny Studio Berry Bliss Stamps and use the match sentiment from Fresh & Fruity. Let's get started.

Sunny Studio Stamps: Berry Bliss Fancy Frames Background Basics Thank You Card by Lexa Levana

First, I stamped the berries and cherry with more muted colors with several dye inks. Layering this stamps is so easy, you don't even need a stamping tool. After finished with the stamping, I use the coordinating dies to cut all the images. I still can't believe how real they look like. Yum!

Sunny Studio Stamps: Berry Bliss Fancy Frames Background Basics Thank You Card by Lexa Levana

I blend Spun Sugar Distress Ink on the bottom part and stamp the gingham border from Background Basics with pink dye ink to create a table cloth. As for the top part, I blend Twisted Citron Distress Ink. Fancy Frame Oval Dies is a perfect one to frame this little scene. Last but not least, I add some yellowish gems to decorate my card. Aren't they beautiful?

Thank you so so much for stopping by today and I hope you all have an amazing day!

Sunny Studio Supplies Used:

Fresh & Fruity Stamps
Shop at:
Sunny Studio
Fancy Frames- Ovals
Fancy Frames- Ovals
Shop at:
Sunny Studio
Berry Bliss Stamps
Berry Bliss Stamps
Shop at:
Sunny Studio
Berry Bliss Dies
Berry Bliss Dies
Shop at:
Sunny Studio
Background Basics Stamps
Shop at:
Sunny Studio

Thursday, May 24, 2018

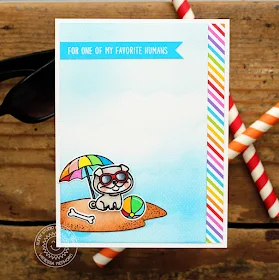
Devoted Doggies Favorite Human Summer Themed Card with Vanessa

Hi everyone! Vanessa here with a card to hopefully put a smile on your face :) What do you need on a lonely island? A doggie to keep you company? Ok!


Sunny Studio Stamps: Devoted Doggies Favorite Human Summer Themed Card by Vanessa Menhorn

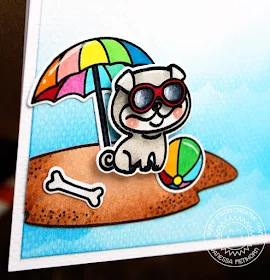
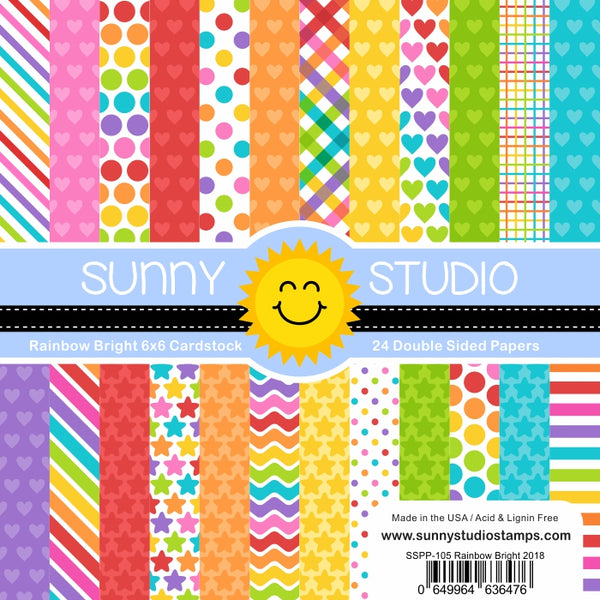
I first trimmed a strip from the striped paper from the Rainbow Bright 6x6 Paper pad and adhered it to the card base. Now I inked a panel of white cardstock with blue ink to create the sea and a sky and adhered it. I stamped the images from Devoted DoggiesBeach Babies and Island Getaway, colored everything with Copics, die-cut or fussy-cut the elements and adhered them to the card.


Sunny Studio Stamps: Devoted Doggies Favorite Human Summer Themed Card by Vanessa Menhorn


After I had stamped and heat-embossed the sentiment onto a strip of blue cardstock, I notched one end and adhered the strip.

Wishing you a sunny day! Thanks for stopping by!

Sunny Studio Supplies Used:

Island Getaway Dies
Island Getaway Dies
Shop at:
Sunny Studio
Island Getaway Stamps
Shop at:
Sunny Studio
Beach Babies Stamps
Beach Babies Stamps
Shop at:
Sunny Studio
Beach Babies Dies
Beach Babies Dies
Shop at:
Sunny Studio
Devoted Doggies Stamps
Shop at:
Sunny Studio
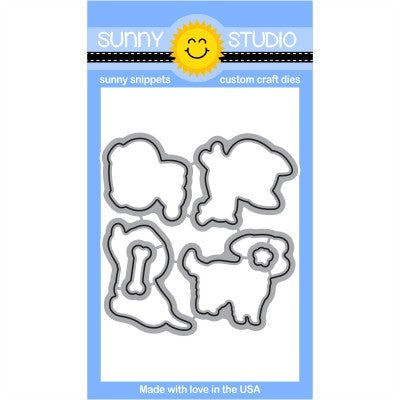
Devoted Doggies Dies
Shop at:
Sunny Studio
Rainbow Bright 6x6 Paper
Shop at:
Sunny Studio