Page Tabs

Thursday, December 31, 2015

Inspiration Week: Introducing Sending My Love & Stitched Heart Dies

Hello there!  Do you have any special plans for New Years?  We usually stay in.  My family is going skiing for the day and I think I might spend the evening taking down my tree while watching some holiday movies I never got around to watching like Sleepless in Seattle, The Family Stone & When Harry Met Sally.  ;)

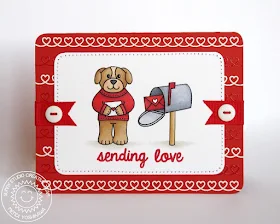
Today I'm super excited to be sharing one of my favorite sets from the release called Sending My Love!  For my first card I created my background using the heart border die from the Sunny Borders stamp set (being featured tomorrow). I then stamped my little scene with the images from the set.  

These little critters are pretty easy to line up with the interchangeable heads and hands for single layer cards, but you can also stamp them separately, cut them out with the coordinating dies and pop up the pieces for some added dimension.  I think adding a wobbler to the head could be really fun!

Sunny Studio Stamps Sending My Love Valentine's Day Puppy Card

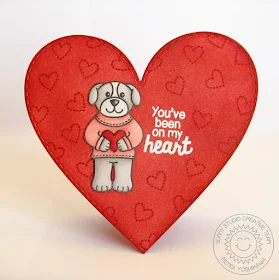
My next card uses the largest heart from the Stitched Heart dies to create a shaped card base.  This heart measures 4.5" wide by 4.25" high making it a perfect fit for an A2 sized envelope.  You can also use the negative space for a fun window on a larger sized card or home decor project.  :)

To create this card base I inked up my white die-cut heart with Fired Brick Distress ink and then stamped my background with a small heart from the stamp set with the same Fired Brick ink.  I made sure to zap it with my heat gun to make sure it was really dry and then embossed my sentiment with some white embossing powder.  

Stumped on how to get your shaped cards to sit upright?  I snipped off the tip of the heart in back to give it a flat surface to rest on.  ;)


Sunny Studio Stamps Sending My Love Valentine's Day Heart Shaped Card

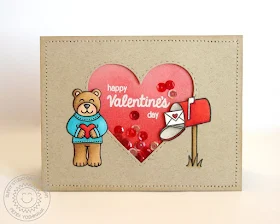
My next card uses the middle-sized negative heart from the Stitched Heart Dies for my shaker window.  I inked up a piece of white cardstock for the inside with Barn Door Distress ink and then once again heat embossed my sentiment in white.  I adhered a couple sequins to the inked background so they wouldn't all look like they have fallen to the bottom and then adhered it to the back of my card front panel with a piece of craft foam which I had diecut with that same heart.  To make it so that none of the foam could be seen from the front of my card, I used the stitch line on the foam to trim down my heart with my scissors a tiny bit before sandwiching the layers together.

My images were stamped on white cardstock, colored with Copic Markers and fussy cut out.  For my mailbox, I trimmed off the grass and stamped the image again onto my card front so I could layer them together so the grass would look seamless.  ;)


Sunny Studio Stamps Sending My Love Valentine's Day Teddy Bear Card

I wanted to create a card to show how this set isn't limited to just Valentine's Day.  In fact I have created for quite a few other occasions as well (some I won't be able to share until next week).  For this card I used the puppy and kitty images paired with the cupcake and gift to make a Birthday card.  I think they would be super cute colored for Christmas paired with the thank you sentiment to make holiday thank you cards too!  :)


Sunny Studio Stamps Sending My Love Birthday Wishes Cat & Dog Card

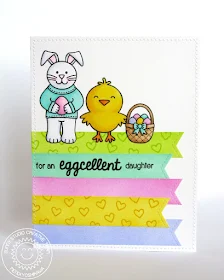
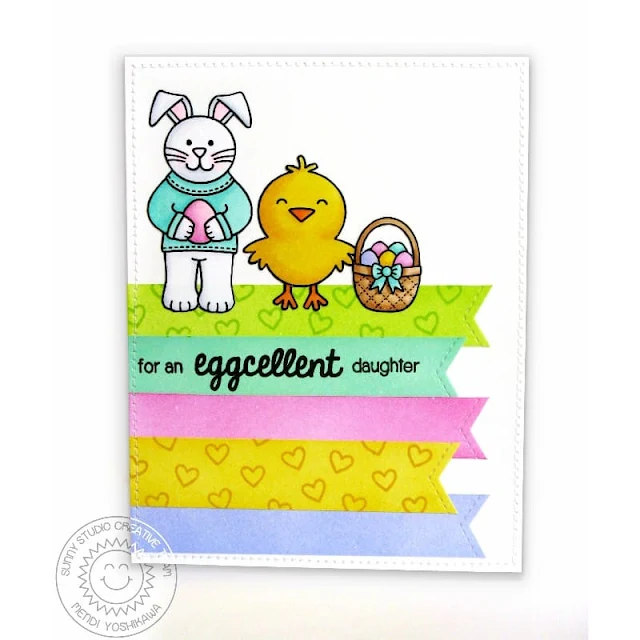
My last card was shared yesterday, but I just wanted to include it again with this post to show how the bunny works great for Easter too!  :)

Sunny Studio Stamps Sending My Love Easter Bunny Card

Here's a full look at the Sending My Love stamp set, Sending My Love dies and Stitched Heart Dies:


Well, that's all I have for today.  Just a reminder that the new release will be available for purchase tomorrow morning by 8:00 EST.  I'll also be back tomorrow morning at that same time with one last post featuring our Sunny Borders and Sweet Script stamps.  Hope you have a safe & happy New Year's Eve!  :)

Wednesday, December 30, 2015

Inspiration Week: Introducing A Good Egg Easter Set

Hello and welcome to day three of our inspiration week using our new Spring release.  Today I am sharing ideas using our A Good Egg stamp set (mixed in with a few of our other new sets).  

My first card is a shaped card I created on my Silhouette by welding a bunch of circles together to form a 4-1/2 x 4-1/2" card base.  I made sure to reserve an extra set of circles before welding them together, so that I could cut them from white cardstock and ink them up from different colors of distress ink (spun sugar, shaded lilac, twisted citron, broken china & mustard seed with a bit of spiced marmalade).  I then stamped them with the mini heart from Rain or Shine in the same color of ink.  My sweet chick and the Easter egg carton were colored in with Copic markers to match.  :)

Sunny Studio Stamps A Good Egg Easter Chick Card

For my next card I colored many of my eggs the same color and found that some paper from Doodlebug's Easter Parade was a wonderful match.   I also used the grass border die from the Sunny Sentiments die set and the banner from the Sunny Borders stamp set.  :)

Sunny Studio Stamps Easter Card (using A Good Egg, Sunny Sentiments dies & Sunny Border Stamps)

For my third card I used more of the grass border die as well as the grass stamp from Sunny Sentiments to create my own patterned paper.  I used the little circles to ground my images so they didn't feel like they were floating.  I finished off my card with a sentiment from the set.  This set if full of mix and match options which I can see being nice mixed with sentiments from other sets as well.  :)

Sunny Studio Stamps Easter Card (using A Good Egg & Sunny Sentiments Stamps & Dies)

The "A Good Egg" set comes with Easter baskets in two sizes.  One for using as a standalone image and a second one shrunken down to fit the size of more of our little animals.  I also used the fishtail banner dies and added a bunny from our Sending My Love stamp set which I will be sharing tomorrow.  ;)
Sunny Studio Stamps Easter Card (using A Good Egg, Sending My Love & Fishtail Banner Dies)

Here's a closer look at the full stamp set and coordinating dies available for purchase on Friday.  :)


I hope you've enjoyed these ideas from our A Good Egg stamp set.  I will be back tomorrow with a look at our Sending My Love set and our Stitched Hearts dies.  ;)

Tuesday, December 29, 2015

Inspiration Week: Introducing Backyard Bugs Set + Free Cutting File

Hello there!  For today's share I have cards using the Backyard Bugs stamp set.  This set started as a back burner idea that in the end turned out to be one of my favorites.  I just love all the opportunities for scene building that this set offers!

Up first is a card using the toadstool house as the focal point for my little scene.

Sunny Studio Stamps Backyard Bugs Thanks A Buzzillion Card

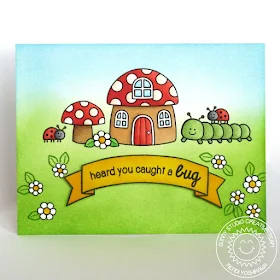
I loved it so much I had to create a second one with a slightly different focus.  This time I incorporated the ladybugs, the caterpillar, some daisies and the banner from the Sunny Borders set (which I will be share later in the week). 
Sunny Studio Stamps Backyard Bugs Heard You Caught A Bug Ladybug Card

Backyard Bugs started with a little snail that my daughter drew that I thought showed real personality and I asked if I could use him as the jumping off point for this stamp set.  He & the "snail mail" sentiment work really great with the Sending My Love" stamp set to come later this week too.  ;)

For my pennants I used the fishtail banner dies along with some of the smaller companion images from the Backyard Bugs stamp set to create my own patterned paper.

Sunny Studio Stamps Backyard Bugs & Fishtail Banners What's Buzzin? Card

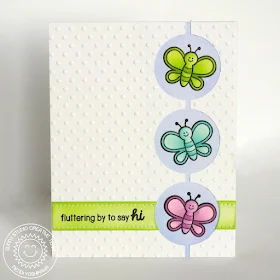
For my last project I created a simple card using the butterfly image as a focal point.  For my card front I have created a cutting file that I am providing as a free download HERE.

Sunny Studio Stamps Backyard Bugs Fluttering By To Say Hi Butterfly Card


Here's a full look at the Backyard Bugs stamp set and the coordinating dies.


I hope you like what you've seen so far and will join me again tomorrow for another look at some of the new sets (available for purchase on January 1st).  :)

Monday, December 28, 2015

Inspiration Week: Introducing Rain or Shine & Sunny Sentiments

Hello there!  I'm so excited to be kicking off the week for the first two companion sets from our Spring release called Rain or Shine and Sunny Sentiments!

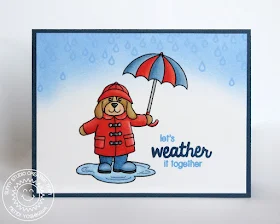
My first card uses several of the main focal point images from the sent including the umbrella, puppy dog in the raincoat and a puddle.  I used Stormy Sky distress ink with a foam applicator to ink the top of my card panel and then stamped a repeat raindrop pattern with several of the extra raindrops in the set.


Sunny Studio Stamps Rain or Shine Let's Weather It Together Spring Card

My next card uses the rainbows and clouds from Rain or Shine and the sun, stars, sentiment and extra die from Sunny Sentiments.  I inked on some soft Tumbled Glass ink around the edges and colored in my images with Copic markers.  

Sunny Studio Stamps Rain or Shine & Sunny Sentiments Rainbow Card

I wanted to create another card with the puppy dog this time focusing on a happy rainbow color scheme.  I designed the dog with both arms outstretched to increase the flexiblity in your scene building and making it possible to hold the umbrella in either paw.  

I love having this umbrella and all the design possibilities it offers.  Later in the week I will be sharing some cards that use it one it's own for both baby and wedding shower cards.  ;)
Sunny Studio Stamps Rain or Shine Umbrella Spring Card

For my last card I used the second sunshine from the Sunny Sentiments and mixed the large and small clouds from the two sets along with a happy sentiment. 
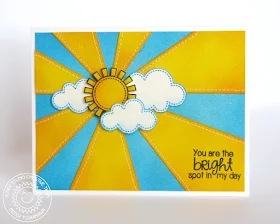
Sunny Studio Stamps Rain or Shine & Sunny Sentiments Sunburst Card

Well that's all I have for you today, but I honestly couldn't stop playing with these sets so you will be seeing more cards incorporating these images and sentiments in my future cards.  

Here's a full look at the stamp sets and their coordinating dies.  For the Sunny Sentiment dies, most of the dies were designed to cut out a shadow around the stamped images, but the grass is actually the same as the grass stamp so you can either use it to stamp or cut out your border.  I have found myself using both versions quite a bit with the other sets so you will see that pop up quite a bit later in the week as well. :)


Sunny Studio Rain or Shine Stamp SetSunny Studio Stamps Rain or Shine Die Set

                   Sunny Studio Sunny Sentiments Stamp SetSunny Studio Sunny Sentiments Die Set

Sunny Studio Sunshine Word Die


Thanks so much for stopping by.  I hope I've inspired you and that you will come back for another look at tomorrow's stamp set.  :)

Saturday, December 26, 2015

Sunny Saturday Share + A Look At Our Spring Release!

 
Good Morning!  I hope your holiday was extra happy!  I know it's probably a bit late to share a couple of these, but they were just too darling not to share anyway. With a simple change in sentiments or colors, I think you could turn them into ideas perfect for winter Birthdays.  ;)  

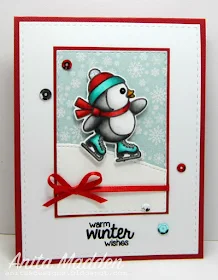
Up first is a super cute card by Anita Madden using our Snow Kissed stamps & dies.

Sunny Studio Stamps Snow Kissed Penguin Winter Wishes by Anita Madden.

Next is a super cute card by Angel Johns using our Bundled Up stamps.
 
Sunny Studio Stamps Bundled Up Penguin Christmas Card by Angel Johns.

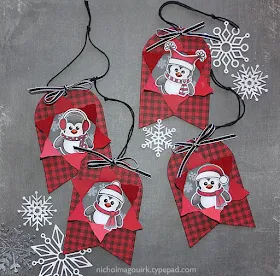
And for our last project share we have some adorable tags by Nichol Magouirk using more of the Bundled Up stamps & dies.

Sunny Studio Stamps Bundled Up Penguin Gift Tags by Nichol Magouirk.

Nichol has also created a wonderful tutorial on how she created these fun tags on her YouTube channel .
 

I thought it would also be fun to share a look at all of our stamp sets and a couple of our new standalone dies.  There are also dies to match each of the new stamps.  Stay tuned for the coming week when I will be sharing lots of fun ideas using everything to help inspire you!  I can't wait to share all the fun I've been having with them!  :) 


And for those who might have missed it, I just wanted to add a reminder that our Spring release date had to be pushed back by a week and will now be available for purchase on Friday, January 1st. My sincere apologies...


Friday, December 25, 2015

Wishing You a Cool Christmas Tag with Marion


Merry Christmas! It's Marion here popping in to wish you all a most wonderful Christmas Day. I hope that you are all enjoying a day filled with love and good times. Today I have a sweet little Christmas tag to share with you using the adorable penguin from the Bundled Up set and its coordinating dies.


Sunny Studio Stamps Bundled Up Cool Christmas Penguin Holiday Gift Tag by Marion Vagg.

This tag was pretty simple to make. I stamped and die cut the penguin and its Santa hat from white cardstock. Then all the images were coloured with Copic Markers, even the sun ray in the background. The sentiment is white heat embossed onto black cardstock and I love how it adds some contrast to the tag.


Sunny Studio Stamps Bundled Up Cool Christmas Penguin Holiday Gift Tag by Marion Vagg.
I finished off the tag with a scattering of sequins and popped the penguin up on some foam squares.

Sunny Studio products used: 
I wonder if any of you received some lovely crafty supplies for Christmas? We'd love to hear about it. 

Thanks for stopping by and Merry Christmas,
Marion

Thursday, December 24, 2015

Sending Birthday Wishes Balloon Card with Elise

Hello! It's Elise here to share a quick and simple birthday card with you that features the Birthday Smiles stamp set! This is one of my favorite sets, so I wanted to use it to make a colorful birthday card!

Sunny Studio Stamps Birthday Smiles Balloon Card by Elise Constable.

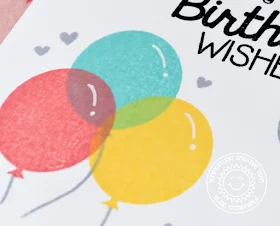
I stamped the balloons in pink, yellow, and blue inks, and the balloon string wing a grey ink. The sentiment is actually two different sentiments from this stamp set together because I wanted to include the "sending" in this sentiment. I added some grey hearts stamped around the balloons, and I finished the card by adding some twine along the top! 

Here's a close up on the balloons:


Sunny Studio Stamps Birthday Smiles Balloon Card by Elise Constable.

They look so neat with the overlapping colors! I also used a white gel pen to add some details to the balloons after I stamped them!

Thanks for stopping by to see this card featuring the Birthday Smiles stamp set!  

Have a Merry Christmas Eve!

Wednesday, December 23, 2015

Introducing A New Team Member & A Sad Goodbye...

I knew this day was coming, but I'm so sad it is finally here.  Audrey Tokach has decided to step down from the team to give herself a little breathing room.  When she signed on I knew she could probably only squeeze us into her busy schedule for a few months, but I am so grateful for the time she gave us and for taking a chance on our new little company.  She's the best and will be welcome back anytime.  :)
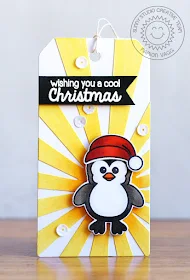

To fill her spot, we have the talented Francine Vuillème joining us.  I have been a huge fan of hers for a long time and have been dying to have her join us since she played along with us for grand opening blog hop last September.  I just know you are going to fall in love with her too (if you're not already head over heals).   ;)


Thanks Ladies!  Your talents are so appreciated!  :)


Sending a Smile Birthday Card with Audrey

Hi there!  Audrey here!  I am so sad that this will be my last post as part of the Sunny Studio design team.  I have thoroughly enjoyed my time on the team and have had so much fun!


Today I am sharing a card using the Bundled Up stamp set and Birthday Smiles stamp set.  I stamped the balloons from the Birthday Smiles stamp set on the top of my white card base, followed by the balloon strings.  I stamped, colored and fussy cut two penguins from the Bundled Up stamp set and grounded them on a piece of black cardstock.  

To add a fun pop of color, I added a strip of cardstock that was inked with distress inks in a rainbow of colors, and then along the left edge, a piece of polka dot paper.  I added a black and white twine bow along the bottom, and stamped a sentiment from Birthday Smiles in the top right corner.  It didn't pop enough for my liking, so I outlined it with a white gel pen, a trick I learned from a fellow stamper, Kelly.  Finally, I added a scattering of clear sequins in various sizes.


That's all for me today, but before I go we have one final sneak peek for the Spring release with another look at the Sunny Borders stamps (with coordinating dies).  This set not only features some fun borders, but all a very versatile banner die and extra sentiment to fit inside.  :)


Be sure to stop by tomorrow for more inspiration from the design team!! :)


Tuesday, December 22, 2015

Cool Christmas Watercolored Card with Heidi

Hello everyone, Heidi Here!  Today I have a card that I created by combining a couple of adorable winter stamp sets, the "Bundle Up" and "Snow Kissed" I think these two stamps complement each other nicely.


For this card, I stamped and heat embossed the winter accessories from the "Bundle Up" stamp set to created a background pattern, then I water colored all the little images and I applied a very subtle blue color on the whole background. I stamped the adorable penguin from the "Snow Kissed" stamp set and I colored using water color brush markers as well, and I die cut it using its coordinated die. Finally, I stamped the sentiment on a piece of black card stock and I heat embossed it using white embossing powder.


I hope you've enjoyed this card, the "Snow kissed" and the "Bundle Up" stamp set are available at the Sunny Studio shop.

For today's sneak peek we have one last look at the Rain or Shine stamp set which includes a rainbow and two clouds.  The beauty of these images is that they come separate so you can use the clouds with the rainbow or on their own (or mixed with the larger cloud from the Sunny Sentiments set).  ;)


I wish you a very Merry Christmas to all of you who celebrate, and a Happy New Year! 
Have a lovely day!