Thursday, March 16, 2017

Easter Wishes Spring Birthday Card with Vanessa

Hi everyone! Vanessa here with a spring birthday card using Easter Wishes. This set is so adorable and versatile, I am sure I'll be using it all year long!

Sunny Studio Stamps: Easter Wishes Spring Birthday Card by Vanessa Menhorn

I first created a sky on the front of my card base, using the cloud from the Little Angels Dies and an ink blending tool. Now I trimmed a green panel to fit the card and die-cut a circle from the top left corner. After I had adhered the panel, I stamped the sentiment (a mix of Froggy Friends and Sweet Shoppe). 

Sunny Studio Stamps: Easter Wishes Spring Birthday Card by Vanessa Menhorn

Now I stamped all the images onto white cardstock, colored them with Copics and die-cut them with the matching dies. Finally, I adhered the images to the card, using foam tape to pop some up for more dimension.

Happy Spring everybody! And thanks for stopping by today!

Sunny Studio Supplies Used:
        

Wednesday, March 15, 2017

Sun Ray Dies Stencil Cards with Amy

Hello there! Amy here showcasing the Color Me Happy Stamps and Sun Ray Dies. Hopefully you've seen how wonderful and versatile the sun ray dies are from the previous post; today I'm going to show you how I made my own stencils with them and used it on the cards.

Sunny Studio Stamps: Sun Ray Dies Stencil Card by Amy Yang

Sunny Studio Stamps: Sun Ray Dies Stencil Card by Amy Yang

For the first card, I trimmed acetate to 6X6 and used just the rays from the Sun Ray Dies. I ran it through the die cut machine many times in the shape of the sun's rays (see picture above).

Sunny Studio Stamps: Sun Ray Dies Stencil Card by Amy Yang

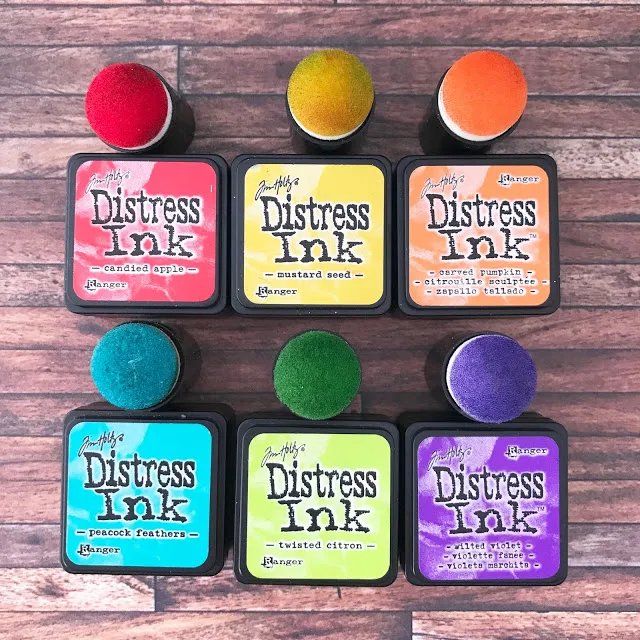
Using the stencil I made, I colored in the open areas with rainbow colored Distress Inks using the finger dauber. 

Sunny Studio Stamps: Sun Ray Dies Stencil Card by Amy Yang

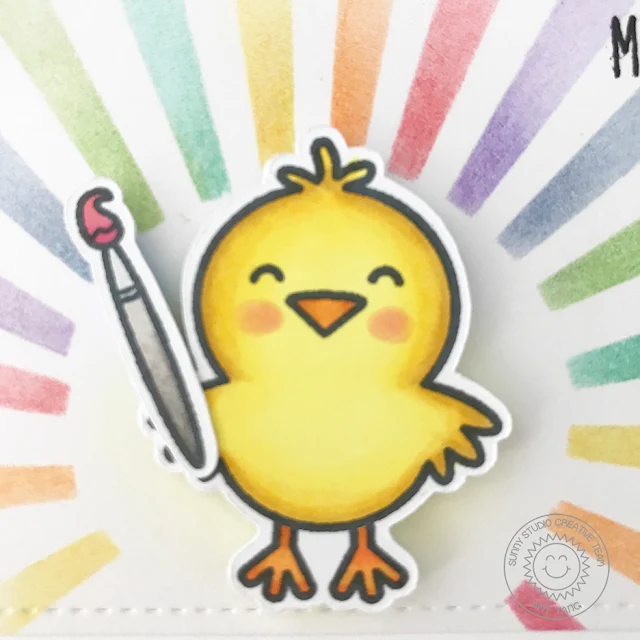
I added the sentiment using Versafine Onyx Black Ink Pad. Then, I stamped and colored the adorable chick and paint brush from the A Good Egg stamp set and colored it with copics. I added foam adhesive behind the images and adhered it to the front panel.

Sunny Studio Stamps: Sun Ray Dies Stencil Card by Amy Yang

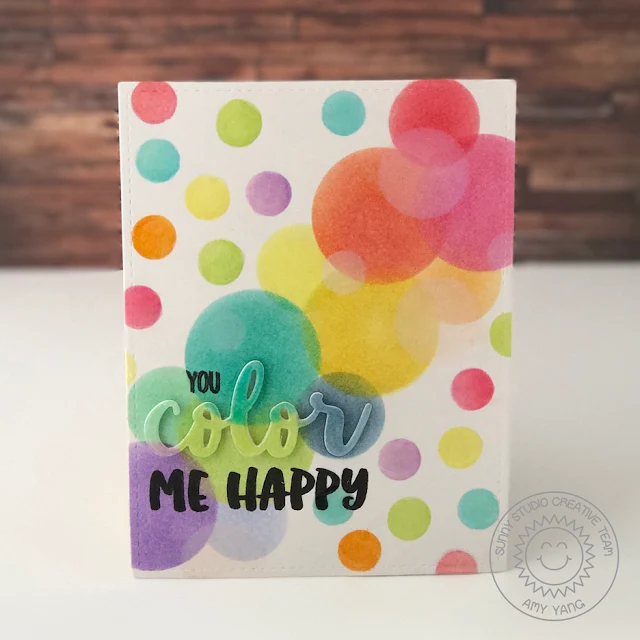
For the second card, I made a stencil again- this time using the circles in the Sun Ray Dies

Sunny Studio Stamps: Sun Ray Dies Stencil Card by Amy Yang

I used the stencil to add rainbow colored Distress Inks (adding more colors than my previous card) again using the finger daubers. 

Sunny Studio Stamps: Sun Ray Dies Stencil Card by Amy Yang

Once I was done adding all the colors, I used the Color Word Die and ran the paper through the die cut machine.  I also die cut white card stock using the same die four more times to add dimension to the card. To achieve this, I adhered them together one on top of the other. Before gluing down the down the word "color," I stamped the rest of the sentiment with a Versafine Onyx Black Ink Pad. Lastly, I added glossy accents to the die cut word "color" and the small circles on the sides.  

Sunny Studio Stamps: Sun Ray Dies Stencil Card by Amy Yang

Here are the two cards together. Thank you for visiting with us today. I hope I have inspired you in someway.  Have a colorful Wednesday!

Sunny Studio Supplies Used:
        

Tuesday, March 14, 2017

That Sucks Easter Bunny Card with Emily

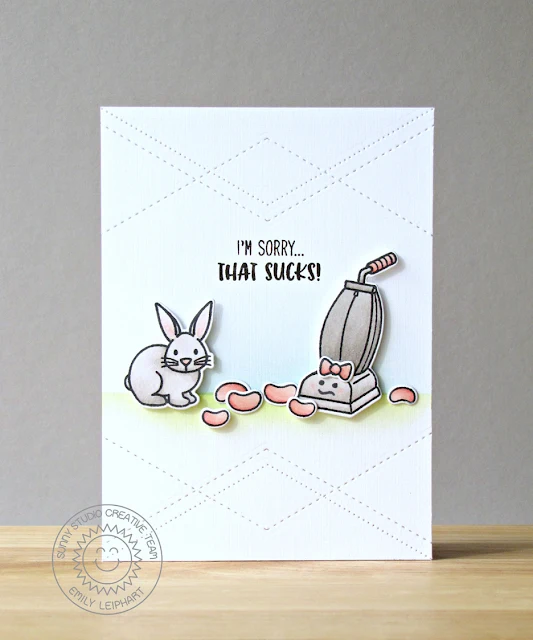
Hey everyone, it's Emily here. After sharing THIS card set featuring the That Sucks mini stamp set, I wanted to come up with something totally different and I think I've achieved that with this hilarious scene, featuring a bunny from Easter Wishes who made a mess. What that mess may be is totally up to your imagination. LOL!

Sunny Studio Stamps: That Sucks Easter Bunny Card by Emily Leiphart

This card would be perfect for anyone who's going through a hard time, especially around this time of year, or even for someone with a sick pet. 

Sunny Studio Stamps: That Sucks Easter Bunny Card by Emily Leiphart

The pattern on the base panel was created using the Fishtail Banner II dies. The bow on the vacuum cleaner and the two sizes of jelly beans are from A Good Egg.

Sunny Studio Stamps: That Sucks Easter Bunny Card by Emily Leiphart

Please visit my blog for a full supply list. Thanks so much for stopping by!

Sunny Studio Supplies Used:


Monday, March 13, 2017

Froggy Friends Sunrise Scene Card with Eloise

Hello everyone, Eloise here and today I have a card featuring the Froggy Friends stamp set. This one is one of my favourites from the release, it's super adorable and I love water themed scenes so this stamp set is just right up my alley.

Sunny Studio Stamps: Froggy Friends Sunrise Scene Card by Eloise Blue

To begin my card today I stamped out my frogs onto some watercolour cardstock and used my Zig Clean Color Real Brush Markers to colour all my images in. I then used the coordinating Froggy Friends dies to cut them all out. 

Once my images were coloured I worked on my background. I took another piece of watercolour cardstock and then used a mask that I cut myself from masking paper and masked off the sky of my piece of paper. I then used Tumbled Glass, Salty Ocean and Blueprint Sketch Distress Inks and ink blended the water in an ombre way. I repeated the same step with the sky part. I used the other side of the mask I created before, taped it down over my water and then used Squeezed Lemonade, Mustard Seed and Fossilised Amber Distress Ink to colour the sky. I wanted it to look like a sunrise effect. For a finishing touch I splattered some water on top to give that water splotch look, then dried it with my heat tool. 

Sunny Studio Stamps: Froggy Friends Sunrise Scene Card by Eloise Blue

Once my background was done, I adhered my white frame around my scene with some foam tape. I just used Stitched Rectangle dies to create my frame, but you could do this with a trimmer or knife. I then adhered the rest of my scene together with foam tape also. I stamped the 'Congrats on your new pad' sentiment on the top of my panel with some black ink.

To finish up my card I added some pink cardstock to my card base and adhered my panel over top.

That finished up my card for today, I hope you enjoyed and stick around the blog for the rest of the week for more inspiration!

Sunny Studio Supplies Used:
  

Sunday, March 12, 2017

30-day Coloring Challenge Blog Hop Winner!

Happy Sunday!  Just popping in announce the winner for the 30-day Coloring Challenge Blog Hop. 

Congrats to Barbara Macaskill


You've won our Timeless Tulips and Daffodil Dreams stamp sets.  Please email me your address at info@sunnystudiostamps.com so I can get your sets out to you.  

Thank you to everyone who stopped by and left such sweet comments.  They were all truly appreciated.  Don't forget to check out Kathy's blog with the full list of winners coming soon to see if you were a winner at one of the other many blogs.  :)

Saturday, March 11, 2017

Guest Designer Spotlight: Cards with Isha Gupta

I'm so excited to welcome Isha Gupta to the blog today as our special guest. She has some gorgeous cards that you are going to just love! 

Hello everyone! I'm Isha Gupta and I am so excited to be here as a guest today. For today's cards I used Froggy Friends and Timeless Tulips stamp sets.

Sunny Studio Stamps: Froggy Friends and Timeless Tulips Cards by Isha Gupta

This first card is perfect for this time of the year as it's start of Spring here and Tulips and Daffodils have just started to grow :) I really love the tulips from the Timeless Tulips stamp set. I decided to have a colorful background instead of simply coloring the flowers. 

Sunny Studio Stamps: Froggy Friends and Timeless Tulips Cards by Isha Gupta

The layering stamps are just GORGEOUS, which I only used in the leaves. The flowers is only the outline stamp.

Sunny Studio Stamps: Froggy Friends and Timeless Tulips Cards by Isha Gupta

For my second card, I used Froggy Friends stamp set. Love all the playful froggies and the small elements to create a scene. I simply watercolored the water area and stamped it using the water ripple stamp for extra dimension. 

Sunny Studio Stamps: Froggy Friends and Timeless Tulips Cards by Isha Gupta

I then stamped, colored and cut rest of the images using my Zig clean color real brush markers. I then used some foam adhesive and created my scene. This sweet frog looks really adorable :) I love it's expressions!

I hope you like my creations as much as I enjoyed creating them! Thank you Mendi for having me as a guest on the blog. It was so much fun using your awesome products.

Sunny Studio Supplies Used:
    

Friday, March 10, 2017

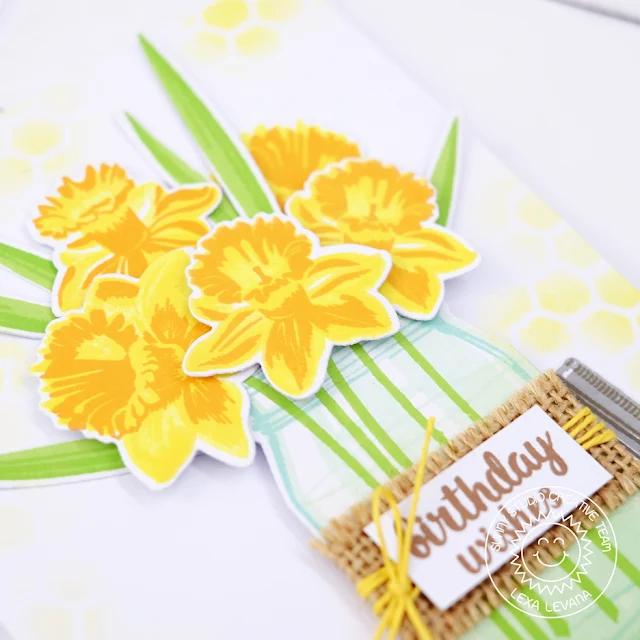
Daffodil Dreams Birthday Bouquet Card with Lexa

Hello everyone! Lexa here with a flowery card starring Daffodil Dreams stamp and coordinating dies. Layering stamp is so much fun, effortless and create a super beautiful result in the end. Sunny Studio's layered stamps are probably one of the easiest to work on with.

Sunny Studio Stamps: Daffodil Dreams Birthday Bouquet Card by Lexa Levana

I stamped my daffodils with yellow and orange dye inks, also two shades of green for the leaves and die cut all of them with the coordinating dies. The Vintage Jar looks so real and pretty, I use mint ink for the base color and aqua as the outline. I also use some real burlap and some yellow twines tied around the jar. With the lid on the side, I try to tell a story as if someone just opened the jar and put a bouquet of fresh daffodils in. To create a ground for my main star, I blended Frayed Burlap Distress Ink with a simple line masking. The same yellow dye ink for the daffodils also used for the background, I blended it with a bee hive masking. I try to keep it light so I just blend it only on the edges.

Sunny Studio Stamps: Daffodil Dreams Birthday Bouquet Card by Lexa Levana

I'm not really good at arranging flowers, but I must say that this daffodils are pretty easy to work with. I just need some foam tapes to add some dimensions and here it is. So effortless. If I can do this, everyone can. Here's a closer look of my card.

Thank you so much for stopping by today. I really hope you like this and give it a try to do some stamp layering. Have a wonderful day!

Sunny Studio Supplies Used: