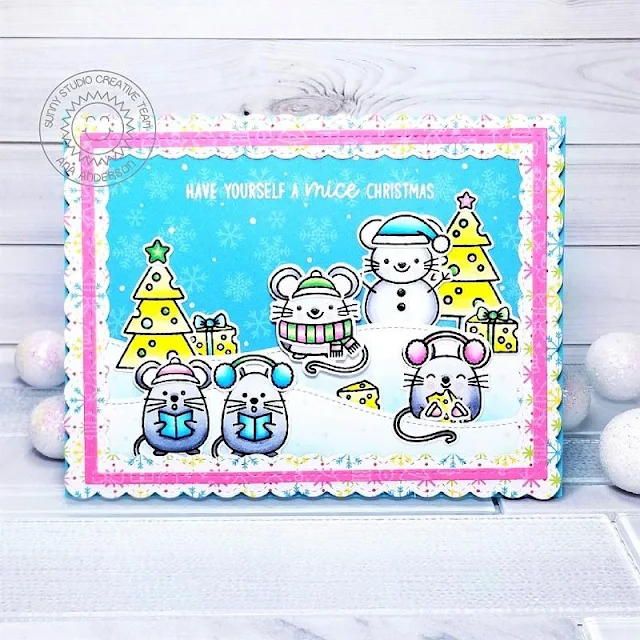
I started with stamping adorable images with Memento Tuxedo black ink, coloring them with Copic
markers and cutting them with coordinating dies. The colors I used to
color the images were inspired by the multicolored snowflakes pattern paper
from Very Merry paper pack, which I used to create
the frame for my scene.
I cut the frame with Fancy Frames rectangle dies, added a thin pink frame on top (from the same Very Merry paper pack) then started working on my background. I stamped the sentiment with VersaMark Watermark ink on a piece of blue snowflake patterned paper (from Holiday Cheer paper pack) and white heat embossed it.
I cut the frame with Fancy Frames rectangle dies, added a thin pink frame on top (from the same Very Merry paper pack) then started working on my background. I stamped the sentiment with VersaMark Watermark ink on a piece of blue snowflake patterned paper (from Holiday Cheer paper pack) and white heat embossed it.
To create snowy hills, I die cut two pieces of white cardstock
using Woodland Borders die, then inked each die cut
with ColorBox Dyestress ink in Capri.
Finally, I assembled my card and added a few highlights and falling snow with
white gel pen.
I had so much fun creating this card – these mice are soo adorable, I am still giggling when I look at their sweet faces! Thank you so much for stopping by today – I will see you next week, and until then I wish you Happy Crafting!
---------------------------------------------
I had so much fun creating this card – these mice are soo adorable, I am still giggling when I look at their sweet faces! Thank you so much for stopping by today – I will see you next week, and until then I wish you Happy Crafting!
---------------------------------------------
Hi there and happy
Wednesday! Franci here with you today with a mice festive
little gift tag. Awww
it's finally time to show you a project made with my favorite set from the new
release, the Merry Mice stamp set! I love all these little mice you can dressed up for Winter/Christmas, they're
adorable!!
First
of all I die cut the largest Scalloped Circle Tag twice out of white
cardstock and I die cut one of them with the Woodland Border, to create a little
stitched snowy hill. I colored the other one with Distress inks, let it dry and
added some watercolor + white little splatters.
I die cut a little tag using one of the dies included in the Fancy Frames rectangle dies set and stamped part of my sentiment on. Then I stamped, colored and die cut all my little mice and all their Christmas accessorizes. Look at those earmuffs, come on, how can you resist that much cuteness?!?!?
I die cut a little tag using one of the dies included in the Fancy Frames rectangle dies set and stamped part of my sentiment on. Then I stamped, colored and die cut all my little mice and all their Christmas accessorizes. Look at those earmuffs, come on, how can you resist that much cuteness?!?!?
I
stamped my "Christmouse" on to the snowy hill and glue it down to the
tag with liquid glue, then I added all the images with foam tape. I assembled all the other elements and
added some embellishments like the new Blue Snowflake Confetti +
some White Nuvo Drops.
Hope I inspired you to create some sweet festive projects today and thank you so much for stopping by!
Hope I inspired you to create some sweet festive projects today and thank you so much for stopping by!
Sunny Studio Supplies Used:
 Fancy Frames- Rectangles Shop at: Sunny Studio |
 Woodland Borders Dies Shop at: Sunny Studio |
 Holiday Cheer 6x6 Paper Shop at: Sunny Studio |
 Very Merry 6x6 Paper Shop at: Sunny Studio |
 Merry Mice Stamps Shop at: Sunny Studio |
 Merry Mice Dies Shop at: Sunny Studio |
 Scalloped Tags-Circle Shop at: Sunny Studio |


Great choice of colors for your card. It's so cheerful and pretty!
ReplyDelete